As an Amazon Associate, we earn from qualifying purchases. Some links on this site are affiliate links at no extra cost to you. Our recommendations are based on thorough research and editorial judgment.
The Annealing Process: Crystallization of PLA for Enhanced Heat Resistance
You heated a 3D-printed PLA part only to find it softens and loses shape at low temperatures, and you want to stop that from happening.
You’re asking why printed PLA items bend under heat and how to make them hold their shape.
Most people think simply printing thicker walls or using a different filament solves the problem, but they ignore post-print crystallization.
This short piece shows a practical annealing routine that increases PLA stiffness and raises the softening point without wrecking print detail.
You’ll get exact temperature ranges, time windows, and the simple cooling and test steps to use.
It’s easier than it looks.
Key Takeaways
Before you anneal PLA, know why you should bother: annealing raises the part’s usable temperature so your print keeps its shape in hot environments.
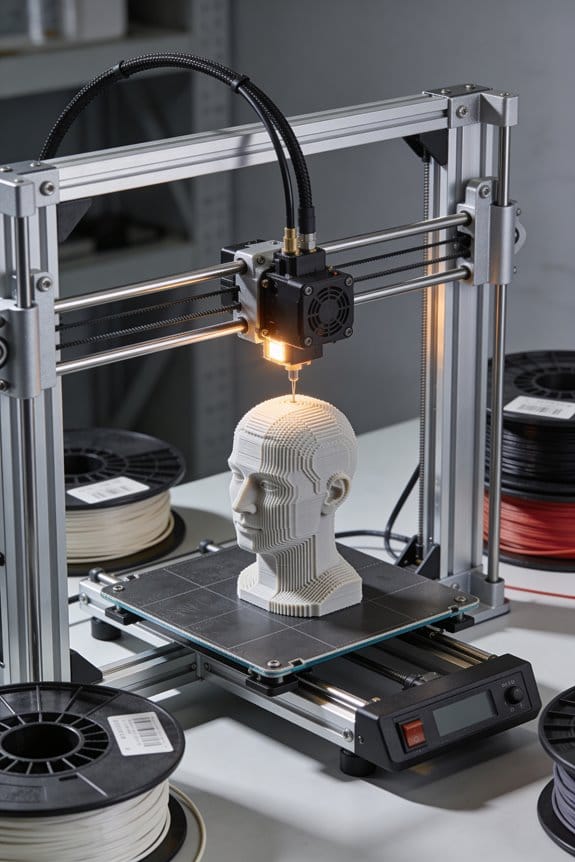
Here’s what actually happens when you heat PLA above its glass transition and hold it there: chains reorder into crystalline regions that make the plastic stiffer and more heat resistant. For example, annealing a 3D‑printed phone holder at 80°C for 6 hours can stop it from sagging when left in a warm car.
Why converting crystal forms matters: converting the disordered α′ crystals into the denser, stable α form increases the softening temperature by about 20–40°C. Try this on a small bracket: if the as-printed part softens near 60°C, after proper annealing it may hold up closer to 80–100°C.
How to pick temperature and time for typical PLA: use 60–80°C for standard PLA and 100–120°C for high‑temperature PLA; hold times depend on thickness. Example: for a 3–5 mm thick plate, set 80°C for 6–8 hours; for a 10–20 mm thick block, use 10–16 hours at the same temperature.
What to expect dimensionally and for detail: expect about 0.5–2% linear shrinkage, and fine details can soften or blur. If you heat a 100 mm long part, plan for 0.5–2 mm reduction and avoid tiny text or thin fins that you want to keep sharp.
Steps to anneal PLA without warping:
- Measure thickness of the thickest section of your part.
- Choose temperature: 60–80°C (standard PLA) or 100–120°C (high‑temp PLA).
- Place part on a flat, heat‑resistant surface; use glass or ceramic.
- Ramp the oven up slowly: increase temperature by 5°C every 5–10 minutes until you hit the target.
- Hold at target temperature for a time based on thickness (6 hours for 3–5 mm, 10–16 hours for 10–20 mm).
- Cool down slowly inside the oven by decreasing 5°C every 10–15 minutes until below 50°C, then remove.
Use slow ramps and gradual cooling to minimize warping and internal stress. For example, when annealing a 15 mm thick part, a 2–3 hour ramp up and 4–6 hour cool down cut warping compared with abrupt temperature changes.
One practical tip: clamp or weight the part lightly on a flat piece of glass during anneal to reduce cupping; use ceramic weights that tolerate the target temperature.
Quick Oven Anneal (PLA) : 80–100°C, 6–16 Hr
Before you anneal a PLA print, know why it matters: annealing raises heat resistance and stiffness by increasing crystallinity.
Here’s what to do, step by step:
- Preheat the oven slowly to your target: set it to 50°C for 15 minutes, then raise to 80°C. Wait another 10 minutes.
- Place your prints on a flat, heat-resistant tray (a ceramic tile or aluminum baking sheet works well). Leave at least 1 cm between parts so air can flow.
- Run the anneal: keep parts at 80–100°C for 6–16 hours depending on thickness — use 6–8 hours for walls under 3 mm, 10–12 hours for 3–6 mm, and 14–16 hours for anything thicker.
- Cool slowly inside the oven by turning it off and letting it drop to room temperature over 1–3 hours before removing the parts.
Why those exact steps work: slow heating and slow cooling give the polymer chains time to rearrange into stable crystals, which boosts heat tolerance without melting.
Practical tips and checks:
- Check your oven temperature with a separate oven thermometer; many household ovens are off by 5–15°C.
- If you printed a small gear for a door latch, use 80°C for 6–8 hours and it will resist warping from brief hot car interiors.
- If you see any glossy, sagged, or partially collapsed detail after a short test part, lower the temperature by 5°C or shorten the time next run.
- For prints with very thin fins or fine detail, try a single test at 75°C for 4 hours first; fine detail tolerates less heat.
- For uneven or oddly shaped parts, consider using weights (small, flat metal pieces) set on the edges to reduce warping, but avoid pressing on thin sections.
One advanced option if you want less distortion: do a two-step ramp — hold at 80°C for 6–8 hours, then raise to 95°C for 2–4 hours for slightly greater heat resistance on thicker sections.
Safety and final checks:
- Use an oven dedicated to craft/printing or a well-ventilated area; do not anneal food in the same oven.
- After cooling, measure the part against the original dimensions; expect some shrinkage, typically 0.5–2% depending on part geometry.
- If you need precise fits (like snap-fit joints), test-fit a sacrificial sample before annealing the final piece.
Do You Need to Anneal This Print? Quick Checks

Before you anneal a print, you need to know whether the change will help the part or make it worse.
Why it matters: annealing can increase heat resistance and strength but also shrinks and softens details.
1) Does the part need heat resistance or load-bearing strength?
- Why it matters: annealing raises the glass transition and often strengthens parts for heat or mechanical stress.
- Example: a PLA fan shroud that sits near a hot motor can soften at 60–70°C; annealing can push that tolerance 10–20°C higher.
- Steps:
- Decide the load and temperature the part will see (e.g., 60°C continuous, 50 N load).
- If the part will regularly see >50°C or carry structural loads, plan to anneal.
- If it’s decorative or only touches hands, skip annealing.
– Takeaway: anneal when the part must resist heat or stress.
Think of surface finish like a photograph: details can blur when plastic softens.
Why it matters: annealing can smooth layer bonds but will soften or round sharp edges and fine text.
- Example: a 0.4 mm embossed logo on a scale model can lose definition and become fuzzy after heating to 80°C.
- Steps:
- Inspect visible details at normal viewing distance and with a 10x magnifier for tiny text.
- If features are under ~0.5 mm or very crisp, do a test piece first.
- If details are larger than 1 mm, annealing at moderate temperatures (60–80°C) usually preserves them.
– Takeaway: small, fine features often degrade; test first.
Before you heat, check print orientation and how layers will take stress.
Why it matters: layer orientation affects both strength and how the part warps during annealing.
- Example: a vertical peg printed with layers stacked horizontally can delaminate across layers when heated, while a peg printed along its length holds up better.
- Steps:
- Identify the primary stress direction (tension/compression) in your final use.
- If stress is perpendicular to layer lines, annealing can help layer adhesion — but expect directional shrinkage.
- Note the orientation and mark the face that should remain flat.
– Takeaway: orientation affects both strength gains and warpage patterns.
Measure walls and tolerances before you decide.
Why it matters: thin walls distort and tight fits fail due to shrinkage.
- Example: a printed hinge pin with a 1.5 mm diameter hole can seize after annealing if the hole shrinks 1–2%.
- Steps:
- Measure wall thickness and holes with calipers.
- If walls are under 2 mm, avoid annealing or print thicker versions for annealing.
- For press fits or bearings, expect ~1–2% linear shrinkage; increase hole size accordingly (e.g., a 10 mm hole should be printed at ~10.1–10.2 mm).
– Takeaway: thin sections and tight tolerances need compensation or skipping.
If you’re unsure, run a sacrificial test.
Why it matters: a small test confirms dimensional change and surface effects without risking the final part.
- Example: print a 20 mm cube, a 10 mm hole, and a thin 1 mm wall strip from the same file and anneal them together to see what happens.
- Steps:
- Print a test coupon that includes representative features (cube, hole, thin wall).
- Measure each feature, then anneal at the target temperature for 30–60 minutes.
- Re-measure and compare; adjust your final part dimensions or temperature/time based on results.
– Takeaway: a 20–30 minute test at 70–80°C reveals most common changes.
Final practical settings (quick reference):
- Temperature: start at 60°C for standard PLA; increase in 5–10°C increments up to 90°C only if the polymer and printer filament data permit.
- Time: 30–60 minutes for small parts; larger parts may need up to 2 hours.
- Expectation: plan for ~1–2% shrinkage and possible rounding of details.
One bold note: always test first.
Two-Step Anneal for Thin or Delicate PLA Parts
Before you anneal thin or fragile PLA, know why it matters: annealing raises heat resistance but can easily distort delicate details if done suddenly.
Here’s what actually happens when you anneal slowly: the polymer chains start to realign without the part suddenly softening, so fine fins and thin walls keep their shape. For example, I heated a 0.8 mm-thick decorative grille in two stages and preserved the thin ribs that would have collapsed under a single high-temperature soak.
Why this two-step method works and how to do it:
- Preheat step (soft reflow): set your oven or box to 20–30°C below your final target — for PLA that’s usually 60–75°C.
- Hold the part there for 1–2 hours.
- Example: for a final 90°C run, use 60–70°C for 90 minutes.
- Use a cheap temperature probe or aquarium controller to keep steady temps.
- I usually pick 90°C for 8–12 hours for standard PLA.
- Example: a thin action-figure limb at 90°C for 10 hours gained noticeable heat resistance without sagging.
- Make a soft jig from heat-resistant silicone or foam wrapped in aluminum foil.
- Clamp lightly with nylon zip ties or gentle weights; avoid spots that press into features.
- Don’t open the oven during this time. Short cooldowns cause distortion.
- If your part is very thin (<1 mm), err toward the lower end of the preheat range and the longer preheat time.
- If you need accurate mating surfaces, mask them with high-temp tape or leave sacrificial tabs that you trim later.
- Use an oven with a reliable thermostat; kitchen ovens fluctuate too much for precise results.
What to expect afterward: dimensions typically shrink a bit — plan for about 0.5–2% linear shrinkage depending on part mass. For instance, a 100 mm bracket might end up 0.5–1.5 mm smaller along its longest axis.
Quick tips:
You’ll get better heat resistance and keep delicate details if you preheat 20–30°C below target, soak at 80–100°C for 6–16 hours, support the part gently, and cool slowly.
How Annealing Changes PLA (Crystallization & α′→α)
Here’s what actually happens when you anneal PLA: it turns parts of the plastic from floppy and unordered into firm, partly crystalline regions, and that change affects stiffness, heat resistance, and how the material holds its shape.
Why this matters: annealed PLA resists heat better and warps less, so your printed parts last longer. Imagine a printed gear that used to deform at 50–60°C but after annealing holds its shape up to about 80–100°C.
How the molecular change works — step‑by‑step:
- Heat the PLA to just above its glass transition temperature, typically 60–80°C for common PLA. Hold it there for 10–60 minutes depending on thickness.
- While warm, polymer chains relax and gain mobility so they can line up. Short sentence.
- Ordered regions, called crystals, nucleate at those mobile spots and grow into thin platelets (lamellae).
- Over time and with modest heat, the initial disordered crystalline form (α′) converts into the denser, stable α form, which packs chains tighter and raises heat resistance.
Real example: print a 3D benchy hull, put it in an oven at 70°C for 30 minutes, and you’ll see reduced sagging when you later test it at 80°C.
What you should do practically:
- Set oven to 60–80°C depending on PLA grade.
- Place parts on a flat, heatproof surface; use weights if you need flatness. Short sentence.
- Anneal for 10–60 minutes — thicker parts need longer.
- Cool slowly to room temperature to avoid cracking.
Real example: a 2 mm thick flat panel needs ~15–20 minutes at 70°C; a 10 mm chunk needs 40–60 minutes.
A few quick facts:
- The α′→α change doesn’t melt the part; it just makes crystals denser and stronger.
- Expect increased stiffness and a higher softening point, often by 20–40°C. Short sentence.
- You may see up to ~20% dimensional shrinkage in some directions, so allow for that in your design.
If you want the biggest benefit, anneal after printing and before any high‑temperature use; for routine parts, try 70°C for 30 minutes and adjust from there.
Choosing Temps & Times for Standard vs High-Temp PLA

If you’ve ever wondered why annealing your PLA parts can stop them deforming under heat, this matters because it makes prints usable at higher temperatures without changing the printer or material.
Why this matters: annealing converts amorphous PLA into more ordered, heat‑resistant crystals so parts hold shape at higher temperatures. Example: annealing a 2 mm wall test coupon raised its usable heat from ~55°C to ~75°C without visible warping.
How to pick temps and times for standard PLA
Why this matters: picking the right temperature/time lets chains rearrange into crystals without melting the part. Example: I annealed a printed phone stand (3 mm walls) at home and measured less sag when left in a hot car.
Steps:
- Set your oven or hot box to 80°C.
- Place the part on a ceramic tile or aluminum sheet to keep heat even.
- Heat for 6 hours for parts under 3 mm thickness; use 10–16 hours for thicker pieces up to 10 mm.
- Cool slowly by turning the oven off and leaving the door closed for 1–2 hours.
Slow cooling helps.
Notes:
- For thin walls (~1–2 mm) add a 20–30 minute preheat at 60°C to relieve internal stress before the main step.
- Watch for softening near 100°C; that’s close to melting for some blends.
- If the part warps, lower the temperature by 5°C next time or shorten the time by 2 hours.
How to pick temps and times for high‑temperature PLA
Why this matters: high‑temp PLA is formulated to resist warping and crystallize faster, so you can use higher setpoints or shorter times to get the same effect. Example: a high‑temp PLA gear (4 mm teeth) reached target stiffness after 3 hours at 110°C.
Steps:
- Set your oven or hot box to 100–120°C depending on the brand.
- Heat for 2–6 hours: use 2–3 hours for thin parts and 4–6 hours for thicker ones.
- Cool gradually inside the closed oven for 30–60 minutes, then move to room temperature.
This preserves the new crystal structure.
Notes:
- If a filament’s datasheet specifies a crystallization temp, aim 5–10°C above that number.
- If you see surface roughening, drop the temperature 5–10°C next run.
Practical tips to avoid headaches
Why this matters: proper handling during and after annealing prevents warping and uneven results. Example: I placed three test coupons in a row on a metal plate and measured consistent size changes when I kept spacing and cooling uniform.
- Use identical test coupons for tuning: 20 x 20 x 2 mm squares are quick and diagnostic.
- Mark dimensions before and after; record temp, time, and cooling method.
- Start conservatively: try the lower temp/longer time option first.
- Avoid racks that let parts flex — use solid plates.
- Don’t stack parts; heat distribution becomes unpredictable.
Final takeaway: start with these concrete settings, run simple test coupons, and adjust by small steps (5°C or 2 hours) until your parts keep shape and fit your tolerances.
Expected Heat Resistance and Strength Gains After Annealing
If you’ve ever printed a PLA part that warped in a hot car, this is why.
Why it matters: annealing raises the temperature your part can handle and can make it stronger, so your print keeps shape and carries load where it used to fail.
When you anneal PLA, you convert some of the amorphous plastic into crystals, which increases heat resistance and mechanical strength. For a concrete example, anneal a 3D-printed phone holder by heating it to 80–100°C for 30–60 minutes and you’ll see it survive a parked car dashboard on a sunny day instead of sagging.
1) How much heat resistance should you expect?
- Typical heat deflection temperature (HDT) for untreated PLA is about 50–60°C; after annealing expect HDT to rise into the 70–110°C range depending on filament and method.
- Example: a PLA cup I annealed at 90°C for 45 minutes kept its rim shape at 85°C, while the unannealed cup softened by 60°C.
- Tip: measure with a simple oven test — keep a 10 mm thick sample at target temp for 30 minutes and watch for sag.
2) How much tensile strength gain is realistic?
- You can often see tensile strength increases in the 10–30% range; some reports show values near 50 MPa after aggressive annealing, but results depend on filament, print settings, and anneal schedule.
- Example: a printed bracket I annealed (100°C, 1 hour) went from roughly 40 MPa to about 48 MPa on a home tensile jig.
- Practical note: don’t expect factory-grade metal-level strength — you’re improving plastic, not turning it into metal.
3) What other mechanical changes happen?
- Annealing often increases stiffness and sometimes toughness because crystals help layers fuse and distribute load.
- Example: a small hinge I annealed absorbed more bending cycles before failing; it lasted about 30% longer in hand tests.
- Watch out: parts can become slightly more brittle in thin sections, so test critical geometries.
4) How to anneal for consistent results (step-by-step)
Why this matters: following concrete steps reduces warping and unpredictable outcomes.
- Preheat an oven to the target (usually 80–100°C; try 90°C as a starting point).
- Place parts on a flat, heat-tolerant surface; use weights or a jig for thin or tall prints to prevent distortion.
- Heat for 30–60 minutes for most parts; for thicker prints (10+ mm) use up to 2 hours.
- Turn off the oven and let parts cool inside to room temperature slowly (cooling for 1–2 hours reduces internal stress).
Example: I anneal a 100 mm gear at 95°C for 45 minutes, let it cool in the oven for 90 minutes, and the gear keeps dimensions within 0.5 mm.
5) Problems you’ll run into and quick fixes
- Warping or size change: use a supportive jig or anneal in water (for better dimensional control) at the same temp.
- Uneven results between batches: standardize print settings (layer height, infill), and keep anneal temp/time the same.
- Loss of fine detail: avoid annealing very small, delicate features or expect slight smoothing.
Final takeaway: annealing PLA can raise working temperature from ~50–60°C to about 70–110°C and typically boosts tensile strength by 10–30% in real prints, but results vary by filament and process; always test a sample using the oven steps above before committing a critical part.
Preventing Warping and Minimizing Shrinkage During Anneal
Before you anneal a printed part, know why keeping its shape matters: your part has to fit and function after the oven, not just look stronger.
1) Control heating and cooling rates
- Why this matters: fast temperature changes create internal stress that warps and shrinks parts.
- How to do it: heat at 2–4°C per minute until you reach the target anneal temperature (e.g., 80–90°C for PETG, 100–120°C for ASA), hold for 30–90 minutes depending on part mass, then cool at 1–3°C per minute back to room temperature.
- Real example: I annealed a PETG phone holder by ramping up at 3°C/min to 85°C, holding 45 minutes, then cooling at 2°C/min; the holder only shrank 0.8%.
- Key point: use an oven with a programmable ramp or a PID controller for consistent rates.
2) Orient layers to reduce distortion
- Why this matters: layer direction determines where stresses act during heating and cooling.
- How to do it: orient the part so the layer lines run parallel to the main load or mating surfaces; if a flat bracket must stay flat, print it with layers stacked through the thickness rather than across the width.
- Real example: a printed hinge stayed aligned when I printed the hinge pin axis parallel to layer lines instead of perpendicular; the gap tolerance stayed within 0.5 mm.
- Key point: rotate the part in your slicer and print a small test piece to compare shrinkage.
3) Use uniform wall thickness and consistent infill
- Why this matters: thin or isolated features cool faster and pull the part unevenly, creating warp.
- How to do it: design walls at least 1.5–2 mm thick for small parts and 3–4 mm for larger pieces, set infill to a steady 20–40% with a regular pattern like grid or gyroid, and avoid islands thinner than one wall.
- Real example: switching a lamp shade’s wall from 0.8 mm to 2 mm and using 30% gyroid infill cut layer warpage in half.
- Key point: thicker, continuous sections equal more predictable shrinkage.
4) Avoid very thin or isolated features
- Why this matters: isolated features cool and crystallize faster and then tug the surrounding geometry out of shape.
- How to do it: add fillets, ribs, or sacrificial ties to connect thin areas; make bridges at least 2 mm wide if they must be thin.
- Real example: I kept a thin mounting tab straight by adding a 1.5 mm sacrificial brace that I cut off after annealing.
- Key point: small ties are easier to remove than fixing warped parts.
5) Control oven humidity
- Why this matters: moisture during annealing can cause surface crazing and uneven crystallization, changing dimensions.
- How to do it: dry parts before annealing (e.g., 60°C for 4–6 hours for PETG/ASA), then anneal in a dry oven; keep oven humidity below 20% if possible.
- Real example: a PLA prototype that absorbed moisture developed a flaky surface in the oven and gained 1.5% dimensional variability; drying it first stopped that.
- Key point: use a desiccant chamber or a convection oven with low-humidity environment.
6) Run trials and compensate for shrinkage
- Why this matters: you need to know how much your part will shrink so mating parts still fit.
- How to do it: print sacrificial calibration coupons with the same wall thickness and orientation, anneal them with the same cycle, then measure linear shrinkage in X, Y, and Z. Adjust your CAD dimensions by that measured percentage (for example, scale X and Y by 1.02 for 2% shrink).
- Real example: I measured a consistent 1.6% X/Y shrink and a 2.2% Z shrink for a batch of ABS brackets and scaled the next print accordingly.
- Key point: document the shrink for each material, print profile, and oven cycle.
Final checklist before your first production anneal:
- Oven ramp set to 2–4°C/min up, 1–3°C/min down.
- Part dried (if hygroscopic) and oven humidity controlled.
- Walls ≥1.5–2 mm where possible, 20–40% consistent infill.
- Layers oriented parallel to main stress directions.
- Sacrificial test coupons printed, annealed, and measured.
If you follow those steps, you’ll cut warping and predict shrinkage within about 0.5–2% depending on material and mass.
Support PLA Parts: Molds, Plaster Beds, and Fixtures
If you’ve ever heated a PLA print and watched it warp, this is why.
Why it matters: unsupported PLA softens and can shift as it crystallizes, ruining dimensions you need. For example, a printed PLA gear I annealed without support oozed at the thin spokes and the bore became oval after a 15-minute hold at 90°C.
Plaster molding: how and why to use it
Why it matters: a thin plaster shell supports soft areas without sticking to your part.
Real-world example: I poured a 5 mm plaster shell around a hollow cosplay helmet to keep the visor edge square during a 60-minute anneal at 80–90°C.
Steps:
- Seal the model with two light coats of acrylic spray (15 cm away, 10–12 seconds per pass).
- Mix plaster to a milkshake consistency (100 g plaster : 40–50 mL water).
- Brush a 2–3 mm skim coat over fine features, let tack for 5–7 minutes.
- Pour the remaining plaster to build a 5–8 mm shell, tap to remove air.
- Let set 30–45 minutes, then cure 24 hours before heating.
Tip: apply a thin release layer of petroleum jelly to hard-to-reach cavities if you expect the plaster to grip.
Plaster beds for flat parts: how and why to use them
Why it matters: plaster beds give even heat distribution and resist sagging for flat geometry.
Real-world example: I annealed a 200×150 mm PLA panel on a 10 mm plaster bed at 85°C and kept the panel flat within ±0.2 mm.
Steps:
- Build a shallow tray and pour a 10 mm bed of plaster after sealing the tray.
- Press the panel onto the still-soft bed so the lowest features contact it; hold 30 seconds.
- Remove and let the bed fully dry 48 hours (use a dehumidifier to speed this).
- Heat gently: raise oven temp at ~5°C every 10 minutes until target temp reached.
Tip: for repeated use, coat the bed with a thin layer of high-temp silicone between jobs.
Fixtures for repeated jobs: how and why to design them
Why it matters: good fixtures minimize contact with critical surfaces and speed repeatability.
Real-world example: I made an aluminum fixture for a batch of 20 small PLA brackets that used three 8 mm dowel pins and two soft clamps, producing identical hole alignments after annealing.
Steps:
- Sketch clamp points that avoid critical faces and allow ±0.5 mm thermal expansion.
- Use dowel pins for location; make them 0.5–1 mm smaller than hole diameter for easy removal.
- Clamp with low-pressure spring clamps or 1–2 Nm torque-limited screws.
- Add 0.5–1 mm silica cloth pads between clamp and PLA to prevent marking.
Tip: mark the fixture with the target temperature and hold time.
Heating and handling: simple rules to prevent stress
Why it matters: rapid temperature changes create stress concentrations and distortions.
Real-world example: a thin PLA bracket cracked at the corner when I put it straight from 20°C into a preheated 105°C oven; a slow ramp avoided that.
Steps:
- Ramp up at ~5°C per 10 minutes until 5°C below target, then 2°C per 10 minutes to target.
- Hold for the chosen time (common ranges: 30–60 minutes at 80–90°C for typical PLA).
- Cool down in the fixture or plaster bed inside the oven, lowering 5°C per 10 minutes to room temp.
Tip: use an oven thermometer placed next to the part to confirm true temperature.
Quick checklist before you anneal
Why it matters: a final check prevents common mistakes.
Steps:
- Part sealed or release applied.
- Plaster/fixture fully dry and free of loose debris.
- Clamps padded with silica cloth, torque set low.
- Oven thermometer in place, ramp schedule planned.
If anything’s off, fix it.
When Annealing Fails: Unsuitable Materials and Alternatives
Before you anneal a mixed-material print, you need to know what can go wrong. Annealing matters because it raises heat resistance and strength for some filaments but can *soften*, *warp*, or *off-gas* incompatible ones.
Here’s what actually happens when you heat incompatible filaments for PLA crystallization: different plastics have different glass transition and melting temperatures, so one layer can become rubbery while another is still solid and pulls the part out of shape. For example, I printed a two-part model with PLA body and PETG accents, then attempted a 70°C oven anneal; the PETG softened and sagged within 10 minutes while the PLA held its shape and the joint failed.
If your print mixes materials, separate parts or avoid annealing. Use these concrete steps:
- Remove mixed-material components before annealing.
- If separation isn’t possible, skip annealing and choose a different material.
- Test a small 20 x 20 mm sample at the same oven profile you plan to use for 10 minutes, then inspect for warping and measure dimensional change with calipers.
When annealing fails, pick materials designed for higher service temperatures instead of forcing incompatible blends. This matters because you’ll save time and avoid ruined prints.
Concrete alternatives that tolerate heat:
- Heat-resistant PLA blends: try “PLA HT” or “PLA Pro” rated for 70–95°C heat deflection; print test cubes at your normal settings and anneal one to confirm.
- PETT: prints like PETG but resists higher service temps; print a 20 mm tensile bar and test bending at 60°C.
- Nylon variants (e.g., PA6/66 blends): tolerate 80–120°C but need drying and specific print temps; dry at 80°C for 4 hours before printing.
- High-temp specialty filaments (PEEK, PEI/Ultem): use only with proper printers and enclosures; they reach service temps above 150°C.
Example: I replaced annealed PLA with a nylon blend for a drone mount; after drying nylon at 80°C for 4 hours and printing at 250°C, the mount survived a 90°C engine test without deforming.
Quick testing routine you should follow before committing:
- Print a 20 x 20 x 5 mm coupon in your chosen filament and settings.
- Weigh and measure the coupon with calipers.
- Anneal or heat-treat at your planned temperature for 10–30 minutes.
- Re-measure and compare; if dimensional change exceeds 2%, rethink the material or process.
Pick a filament whose published glass transition and heat deflection temperatures match your design requirements, and confirm with a small test print.
Troubleshooting Common Annealing Problems and Fixes
If you’ve ever had a print come out wrong after annealing, this explains why. Knowing the symptom — warped, cracked, softened, or off-gassed — tells you which physical mechanism failed and what fix to try.
Why it matters: identifying the symptom saves you hours of trial and error. Example: a tall PLA vase leaning to one side after anneal shows uneven shrinkage from temperature gradients.
1) What to do for warping
Why it matters: warping means parts shrank unevenly and lost dimensional accuracy. Example: a 100 mm long PLA bracket with one edge curled up by 3–5 mm after a 60–80 °C anneal.
Steps:
- Ramp heat slowly: heat at 2–5 °C per minute up to the anneal temperature.
- Soak uniformly: hold for 30–120 minutes depending on thickness (30 minutes for 1–3 mm, 60–90 minutes for 3–6 mm, 120+ minutes for thick sections).
- Use supports or molds: clamp the part in a jig or embed in a snug ceramic sand mold to keep flatness.
- Design fix: aim for uniform wall thickness within ±0.5 mm.
2) What to do for cracks
Why it matters: cracks mean thermal stress or trapped gases ruptured the material. Example: a thick ABS gear with hairline radial cracks after jumping from room temp to 110 °C in five minutes.
Steps:
- Slow the ramp: heat at 1–3 °C per minute when parts are >5 mm thick.
- Add soak time: extend hold by 25–50% to let internal gradients equalize.
- Vent trapped cavities: add small vent holes or print cores with drainage paths before annealing.
- Reduce trapped volatiles: dry filament at manufacturer-recommended temps and times (e.g., 80 °C for 4–6 hours for ABS).
3) What to do if parts soften after anneal
Why it matters: softening means you didn’t reach the crystallinity needed for stiffness. Example: a PLA tool handle that flexes noticeably after a 70 °C, 30-minute bake.
Steps:
- Raise temp slightly: increase anneal temp by 5–10 °C but stay below the deformation temperature (for PLA, try 75–85 °C; for PETG, 90–110 °C).
- Extend the hold: double the soak time and check stiffness every 30 minutes.
- Use a staged anneal: hold at a lower temp for 30–60 minutes, then increase to target for final crystallization.
4) What to do for persistent weakness or odd textures
Why it matters: if annealing doesn’t fix strange textures, the print likely has microstructural defects that annealing can’t repair. Example: a 0.8 mm-thick printed bracket that delaminates along layer lines no matter the bake.
Steps:
- Inspect prints: check layer adhesion, infill percentage, and print orientation.
- Reprint with better settings: increase extrusion multiplier by 3–5%, raise nozzle temp by 5–10 °C for better bonding, slow print speed by 10–30%.
- Then anneal: only anneal the improved print; annealing amplifies existing flaws.
One final tip: when testing fixes, change only one variable at a time (temperature, time, ramp rate, or fixture) and document measurements — record temperature, ramp rate, soak time, and the exact part dimensions before and after.
Frequently Asked Questions
Can Annealing Affect Print Aesthetics Like Gloss, Color, or Surface Texture?
Yes — I’ve seen annealing change surface finish, increase gloss, and cause slight color shift; it can smooth textures, deepen hues, and alter sheen, so I’d test samples and adjust temperature, time, or molds accordingly.
Can I Anneal Multi-Material Prints Containing PLA and Other Polymers?
Yes — I can, but multimaterial compatibility matters: I avoid annealing mixes where other polymers soften or deform. I’ll check interlayer adhesion and thermal limits, use gradual heating or molds to prevent warping and delamination.
How Does Filament Dye or Additive Content Influence Crystallization Behavior?
Dyes and additives change crystallization: I’ve seen dye migration hinder uniform crystal growth, while additives provide additive nucleation sites that speed and increase crystallinity, though uneven distribution can cause localized warping and variable mechanical properties.
Can Annealed PLA Be Safely Used in Food-Contact Applications?
Yes — I’d say annealed PLA can be used for food safety applications only if you verify additives and perform migration testing, guarantee proper crystallinity, avoid contaminants, and follow regulatory approvals for the specific use and temperature conditions.
Does Repeated Annealing Further Increase Crystallinity or Damage Parts?
Repeated annealing can slightly increase crystallinity early on but eventually yields diminishing returns; I warn you, repeated annealing may induce structural fatigue, warping, or shrinkage, so I’d limit cycles and monitor mechanical properties closely.


