As an Amazon Associate, we earn from qualifying purchases. Some links on this site are affiliate links at no extra cost to you. Our recommendations are based on thorough research and editorial judgment.
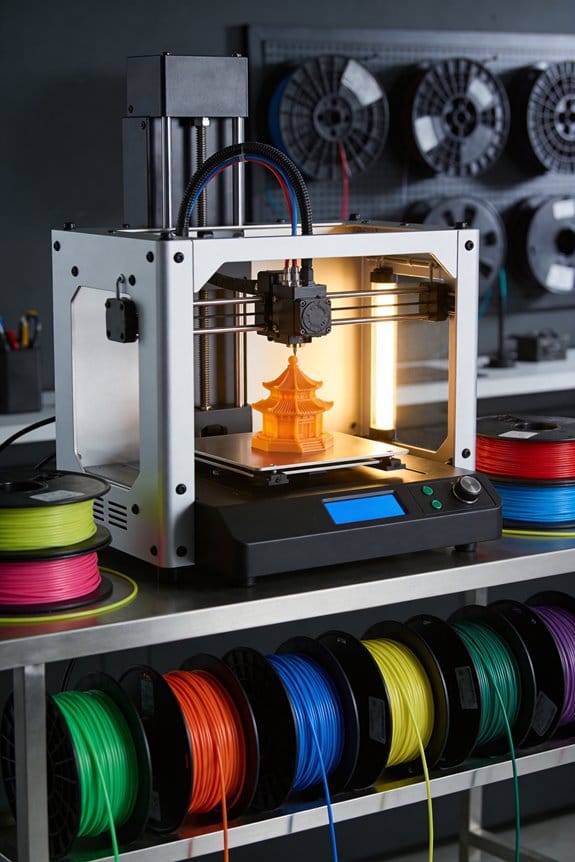
Graphene-Doped Filaments: The Emerging Field of Conductive 3D Printing
You’ve tried printing a part that needs to carry current and the result either won’t conduct reliably or ruins your nozzle. You’re confused whether adding graphene will actually make the print conductive, stronger, or just harder to print.
Most people assume any graphene-filled filament behaves like pure plastic with a small conductivity bonus and don’t account for printability or wear trade-offs.
This article will show you which graphene percentages produce useful electrical and thermal conductivity, how those levels affect stiffness and nozzle wear, and the exact printer settings and nozzle choices that give usable, repeatable parts.
You’ll also get a simple testing checklist to verify supplier claims. It’s easier than it sounds.
Key Takeaways
Before you start printing with graphene-doped filaments, know why you’d pick them: they let your prints carry electricity and heat, so you can make embedded traces, heaters, or EMI panels without separate parts.
– Graphene-doped filaments form conductive percolation networks inside common polymers like PLA, TPU, and ABS, letting your printed parts conduct electricity and heat. Example: print a phone-warming pad with PLA+graphene to get a thin, flexible heater.
If you want workable conductivity without wrecking printability, follow these loading numbers: start at 5–10 wt% graphene for prototypes; move to 10–15 wt% only if you need lower resistance and your printer handles slightly more abrasive, viscous filament. Example: a prototype sensor housing used 7 wt% and printed fine; the production piece used 12 wt% for better conductivity.
Why layer and path orientation matter: graphene conducts much better in-plane than through-plane, so align nozzle paths and layer lines with the direction you want heat or current to flow. Example: when printing a strip heater, print long raster lines along the strip length so heat spreads efficiently along the surface.
Design rules you can use right away:
- Make conductive traces at least 1.5–2.0 mm wide and about 0.6 mm thick for reliable low-power paths.
- For EMI shielding panels, target 0.8–1.5 mm thickness.
- Print with consistent extrusion (use a slightly higher flow, +3–5%) and moderate speed (30–40 mm/s) to help continuity. Example: a 2 mm wide trace printed at 35 mm/s with 105% flow showed stable conductivity on a prototype board.
Verify performance with simple tests; this matters because numbers tell you whether a part will work in your application. Example: print a 20×20×2 mm coupon and measure it.
Steps to verify:
- Print a test coupon sized 20×20×2 mm.
- Measure sheet resistance with a four-point probe or multimeter (record ohms per square).
- Measure in-plane and through-plane conductivity (S/m) if you have a conductivity meter, or calculate approximate conductivity from resistance, dimensions, and thickness.
- Compare values to your target — for low-power traces aim for sheet resistance in the low ohms/sq range.
Quick tips: use a hardened nozzle if you plan on >10 wt% graphene because the filler can be abrasive. Example: switching from brass to a hardened steel nozzle extended nozzle life by months on a small production run.
What Are Graphene-Doped Filaments?
Think of graphene-doped filaments like regular 3D printing plastics but with microscopic graphene flakes mixed in so they do something extra. They matter because those flakes can make your prints conduct electricity and be a bit stronger, which lets you print functional parts such as simple sensors or heated traces.
What are they and why they matter?
- Why it matters: adding graphene changes electrical and thermal properties, not just aesthetics.
- Example: imagine printing a phone-holder with an integrated temperature sensor trace that you can probe with a multimeter.
Graphene-doped filaments are base polymers like PLA or TPU with tiny graphene sheets suspended through the melt. When enough flakes connect, they form conductive pathways for electricity and improve heat transfer between layers, which can increase strength along printed joints.
How they behave in your printer
- Why it matters: knowing printer behavior prevents clogs and bad prints.
- Example: printing a TPU cable organizer that needs flexibility but also a conductive path for a contact switch.
- Print settings: start with your normal filament settings, then reduce print speed by 20–40% (e.g., from 60 mm/s to 36–48 mm/s) because the flakes increase viscosity.
- Nozzle size: use 0.4 mm or larger; choose 0.6 mm if you print abrasive blends often to reduce clog risk.
- Temperature: raise nozzle temp by 5–15°C over your polymer’s standard range (e.g., PLA from 200°C to 205–215°C) to improve flow.
- Retraction: cut retraction distance by 1–2 mm to prevent stringing that flakes can exacerbate.
- Wear: use a hardened steel or ruby nozzle if you print more than a few kilograms; brass wears fast.
Safety and handling
- Why it matters: tiny particles and dust can be hazardous if mishandled.
- Example: sanding a failed conductive PLA print can create visible black dust that spreads across your bench.
- When trimming or sanding, work outdoors or in a ventilated room and wear an N95 mask and safety glasses.
- Avoid inhaling dust; clean surfaces with a damp cloth instead of dry brushing.
- Store spools in sealed bags with desiccant to limit moisture uptake and contamination.
Disposal and recycling
- Why it matters: additives change how you can reuse or recycle parts.
- Example: your local PLA recycling drop may reject parts with conductive additives, leaving you with limited options.
- Check the manufacturer’s datasheet and local recycling rules before discarding printed parts.
- If recycling isn’t accepted, consider repurposing prints as jigs or fixtures rather than throwing them away.
Final practical tip
- Why it matters: one small change saves you time and failed prints.
- Example: a single test strip printed with two perimeters and three solid infill lines shows conductivity and layer bonding quickly.
- Print a 100 mm x 10 mm test strip at three different temperatures and measure resistance with a multimeter to pick the best setting.
- Keep a log of spool, printer, nozzle, temperature, speed, and measured resistance so you repeat success.
If you follow those steps you’ll get functional, safer prints and avoid common mistakes.
Recommended Products

Ideal for Electronic Prototyping & Smart Devices: Design and test functional electronics with ease using this electronic prototyping filament. Perfect for IoT device prototyping, wearable device printing, and STEM education, this conductive PLA filament supports touch sensor, LED circuit printing, and more, making it essential for engineers, makers, and DIY electronics enthusiasts.

Excellent electrical and thermal conductivity.

Black Conductive Paper (Pack of 25)
How Do Graphene Filaments Improve Heat, Conductivity and Strength?

Here’s what actually happens when you print with graphene-doped filament: it changes how heat, electricity, and strength behave inside the part, and that matters because your part will heat, carry current, and take load differently than plain plastic.
How graphene changes heat flow
Why it matters: your part can overheat in one direction while staying cool in another, which affects function and warping.
- Graphene makes heat move very fast along each printed layer but much slower between layers. A single layer can reach in-plane thermal conductivities of hundreds of watts per meter-kelvin if graphene is well aligned, while through-thickness conductivity often stays closer to a few W/m·K.
- Real-world example: a 3D-printed heatsink blade with filament printed so the nozzle paths run along the blade length will spread heat quickly along the blade, keeping the tip cooler; if you print the same blade with paths across the width, the tip will run hotter.
Steps to use this:
- Align print paths with the direction you want heat to move.
- Use 5–15% graphene loading by weight as a starting point; higher loadings improve in-plane conduction but can affect printability.
- Test thermal response with an IR camera across layers and along layers to confirm anisotropy.
How graphene changes electrical conductivity
Why it matters: your printed part can carry current without added metal traces if graphene forms conductive paths.
- Graphene flakes form percolating networks that let electrons hop between overlapping flakes, dropping resistance once you hit the percolation threshold (often around a few percent to tens of percent by weight depending on flake size and dispersion).
- Real-world example: a printed sensor housing with 10% graphene filament can have low-resistance traces inside the plastic that allow a small LED to light without soldered wires if the traces are continuous.
Steps to get conductive prints:
- Use graphene flakes that are large and thin (few microns to tens of microns) to lower the percolation point.
- Aim for at least 5–10% loading for basic conductivity; go higher for lower resistance.
- Print continuous, overlapped paths for your traces and measure sheet resistance with a multimeter.
How graphene changes mechanical strength
Why it matters: the part can be stiffer and tougher in some directions, affecting load-bearing and impact performance.
- Graphene acts like tiny, extremely stiff plates in the polymer and increases stiffness and impact resistance when the flakes bond well to the matrix and are evenly dispersed, with typical stiffness boosts of 10–50% at moderate loadings.
- Real-world example: a bracket printed with 8% graphene filament loaded so flakes align along the main stress direction can show noticeably less bending under load than the same bracket printed in plain PLA.
Steps to improve mechanical gain:
- Improve adhesion by using compatibilizers or surface-treated graphene to bond flakes to your polymer.
- Keep loading moderate (5–15%); beyond that you may see brittleness or nozzle clogging.
- Orient print layers and infill so the flakes align with the principal load direction.
Quick practical checklist
- Choose 5–15% graphene loading to balance conductivity, thermal performance, and printability.
- Orient print paths for the property you want: along the length for heat and stiffness, continuous overlapped traces for electricity.
- Use larger, thin flakes and consider surface treatment to lower percolation and improve bonding.
- Measure: IR camera for thermal, multimeter for electrical, and simple bending/impact tests for mechanical.
If you follow those steps, you’ll get predictable gains from graphene in your prints rather than surprises.
How Do I Print Graphene Filaments? (Printer Compatibility, Settings, Alignment)

Here’s what actually happens when you switch from plain PLA or ABS to graphene-doped filament: your printer behavior changes because graphene alters flow, abrasion, and thermal properties, so you need to check compatibility and tweak settings.
Why this matters: if you don’t adjust things, prints will clog nozzles, wear parts, or delaminate.
1) Check printer compatibility and nozzles
Why this matters: graphene is abrasive and can wear a brass nozzle fast.
Real example: I printed 500 g of graphene-PLA on a stock brass nozzle and saw a 0.2 mm increase in orifice size after two spools.
Steps:
- Confirm your extruder can handle filled filaments and direct-drive or Bowden setups both work, but retraction settings differ.
- Replace a brass nozzle with a hardened steel or ruby-tipped nozzle if you expect more than 1–2 spools; expect to change every 3–10 kg if you keep brass.
- Start with a 0.4 mm hardened nozzle and move to 0.6 mm if you need more flow.
2) Adjust print temperatures and flow
Why this matters: graphene changes melt viscosity and heat transfer, affecting layer bonding.
Real example: a 10 °C lower print temp fixed under-extrusion on my graphene-ABS bench test.
Steps:
- Run a temperature tower from 190 °C to 230 °C in 5 °C steps for graphene-PLA and 220–260 °C for graphene-ABS.
- Pick the temperature that gives smooth strands without stringing, then set flow at 95–105% (start 100% and tweak ±5%).
- If you see thin lines at corners, increase temp 5 °C or flow +3%.
3) Bed adhesion and warping control
Why this matters: good first-layer contact prevents warping and layer misalignment.
Real example: using PEI sheet at 60 °C stopped edge lift on a 120 mm graphene-PLA box.
Steps:
- Use a heated bed: 50–70 °C for PLA blends, 90–110 °C for ABS blends.
- Use a PEI sheet, BuildTak, or glue stick; set first layer speed to 20–30 mm/s and first layer height to 0.2–0.3 mm.
- Calibrate Z-offset so the filament slightly squashes into the bed (a flattened bead about 0.4 mm wide from a 0.4 mm nozzle).
4) Cooling and layer alignment
Why this matters: cooling affects anisotropic alignment of graphene flakes and inter-layer strength.
Real example: reducing fan from 100% to 40% improved layer adhesion on a 150 mm tall print with visible anisotropy.
Steps:
- Start with part cooling at 30–50% for graphene-PLA; for graphene-ABS use 0–20% or off.
- Use slower cooling for taller, load-bearing parts; lower fan preserves thermal flow so flakes align better.
- Print perimeters slower (20–30 mm/s) and infill at 40–60 mm/s to control internal alignment.
5) Retraction and stringing
Why this matters: wrong retraction makes clogs or stringing worse with filled filaments.
Real example: reducing retraction from 6 mm to 3 mm cured grinding on a Bowden tube print I did.
Steps:
- For direct drive start around 0.5–1.0 mm retraction at 20–40 mm/s; Bowden start 3–6 mm at 30–60 mm/s.
- If you hear clicking or see under-extrusion, lower retraction length by 0.5–1 mm and test.
- Increase temperature slightly before increasing retraction to fix oozing.
6) Maintenance and spool storage
Why this matters: abrasive particles and moisture shorten nozzle life and ruin prints.
Real example: a sealed desiccant tub kept a half-used spool dry and saved me from brittle, popping extrusion.
Steps:
- Keep filament sealed with desiccant (10–20 g per spool) and store at <20% relative humidity.
- Clean and inspect the extruder gear and PTFE liner every 2–3 spools for wear; replace PTFE liners after ~1 kg of graphene filament.
- Maintain a spare hardened nozzle and swap after visible wear or print quality drops.
Follow these specific checks and adjustments and you’ll get reliable prints with graphene filaments.
Recommended Products

HIGH QUALITY: The Diamondback Science team has been developing world-class diamond products for the energy industry for more than 40 years. Members of the team recently developed a proprietary Polycrystalline Diamond (PCD) nozzle to be used in 3D printing that can handle the most challenging applications! Easier to clean and reduces tip clogging, improves layer adhesion, has a solid diamond tip, any filaments, longer life, lowers operating temperature, and delivers unmatched wear resistance!

HIGH QUALITY: The Diamondback Science team has been developing world-class diamond products for the energy industry for more than 40 years. Members of the team recently developed a proprietary Polycrystalline Diamond (PCD) nozzle to be used in 3D printing that can handle the most challenging applications! Easier to clean and reduces tip clogging, improves layer adhesion, has a solid diamond tip, any filaments, longer life, lowers operating temperature, and delivers unmatched wear resistance!

WARNING: We DO NOT recommend the 0.2mm nozzle for fiber-embedded filaments.
Applications: Electronics, Medical Scaffolds and Thermal Management

If you’ve ever prototyped a gadget that overheats, this is why graphene-doped filaments matter: they can conduct electricity and heat better than plain plastic while keeping parts printable.
Electronics: How do you use graphene-doped filaments to make circuits?
Why it matters: You can print conductive traces and shields without sending designs to a board house, cutting time and cost.
1) Print conductive traces:
– Steps:
- Use a filament with ~5–15% graphene by weight for modest conductivity; go above ~20% only if your printer can handle stiffer filament.
- Print at the filament’s recommended temp (usually 220–260°C) and slow your speed to 20–40 mm/s to improve layer contact.
- Design traces at least 1.5–2 mm wide and 0.6 mm thick to keep resistance low enough for low-power signals.
– Example: Print a 50 mm long, 2 mm wide trace with 10% graphene; expect sheet resistance in the tens to hundreds of ohms per square, suitable for LEDs and sensors.
2) EMI shielding and flexible connectors:
- For shielding, print panels with 0.8–1.5 mm thickness and tack them to your enclosure; ground the panel to a chassis point.
- For flexible connectors, print with a TPU blend containing 5–10% graphene so the connector bends and still carries signal.
- Example: A 1 mm thick printed lid with graphene filament reduces radiated noise for a Bluetooth module when grounded.
Medical scaffolds: How can graphene-doped filaments help tissue scaffolds?
Why it matters: You can make stronger, slightly conductive scaffolds that encourage cells to grow while keeping pores for tissue.
1) Strengthen and support cells:
– Steps:
- Use a biocompatible polymer base (PLA, PCL) with low graphene loading (typically <1–5% for implants) to keep cytotoxicity low.
- Print lattice scaffolds with 300–700 µm pore sizes to match bone or soft tissue requirements.
- Post-process by sterilizing (ethylene oxide or gamma) and run basic cytotoxicity tests before any implant use.
– Example: A 3D-printed PCL scaffold, 8 mm diameter with 500 µm pores and 2% graphene, can better resist compressive loads for a small bone defect model in lab tests.
2) Integrate sensing or electronics cautiously:
- You can route conductive paths into the scaffold for local sensing, but always validate biocompatibility with cell assays and implantation studies.
- Example: A scaffold embedding a printed strain-sensing trace can report mechanical load in vitro when tested in a bioreactor.
Thermal management: How do printed graphene parts move heat?
Why it matters: You can make housings or plates that spread heat away from hotspots without exotic machining.
1) Use anisotropy to guide heat:
– Steps:
- Orient filament paths so graphene aligns in the plane where you need heat transfer; print raster lines along the primary heat flow direction.
- Make printed walls or plates at least 1.5–2 mm thick to create a continuous path for in-plane conduction.
- For battery packs, print thermal spreaders that sit under cells and run traces toward a heatsink.
– Example: A 100 × 50 mm printed plate with in-plane-aligned graphene can reduce hotspot temperature by several degrees versus plain plastic when mounted to a small 10 W electronics module.
2) Design strategy for anisotropy:
- Because conductivity is higher in-plane than through-thickness, stack print paths or use multiple perimeters to create a continuous in-plane highway for heat.
- Example: Print three perimeter shells with aligned infill to channel heat from a MOSFET to the edge-mounted heatsink.
Final practical tips you can use right away:
- Start with 5–10% graphene filaments for general prototyping; increase only if you need more conductivity and your printer can handle it.
- Keep trace widths ≥1.5 mm and thickness ≥0.6 mm for low-power circuits.
- For medical uses, keep graphene low (<5%) and run biocompatibility tests before any implant use.
- Align print paths with heat flow and use thicker parts for thermal spreaders.
If you want, tell me what you’re printing (device type, expected power, polymer), and I’ll suggest specific print settings and part geometry.
Recommended Products

【Vacuum Packaging & Sturdy Matte Spool Design】Every roll of YOUSU conductive filament is individually vacuum packed with desiccants to prevent moisture damage, keeping stable print performance and consistent conductive properties long-term. The heavy-duty matte plastic spool is anti-wear and anti-deformation, ensuring smooth filament feeding and extended service life. Light pre-drying is suggested before printing. Note that the actual conductive effect is affected by printing density, part shape and structural size; professional ohmmeter testing is advised for accurate resistance data.

Adafruit product 641

2pcs,Thin, strong, smooth, and made completely of 316L stainless steel. Once you start working with this thread you'll quickly agree its optimal for any wearables work!
Where to Buy: Suppliers, Specs and an Evaluation Checklist

Before you pick a graphene-doped filament, know this: your choice changes how strong, conductive, and printable your part will be. For example, a hobbyist printing a phone case with 5% graphene saw clearer surface finish and measurable conductivity after switching filaments.
Here’s what actually happens when you compare suppliers: you’ll see differences in manufacturing location, patent claims, and reported conductivity numbers that matter. I compared makers like Graphene 3D Lab and Lyten for a simple supplier snapshot — note where they manufacture, whether they list patents, and their reported sheet or bulk conductivity values (for example: 10–100 S/m vs. 100–1,000 S/m).
Why graphene weight percent matters: it tells you how much graphene is in the filament and directly affects conductivity and stiffness. Real-world example: a filament labeled 5 wt% graphene gave about 50 S/m bulk conductivity in a printed test coupon, while a 15 wt% material reached 300 S/m but required higher nozzle temperature to print.
How to read conductivity specs and what they mean for prints:
- Ask for both in-plane and through-plane conductivity numbers — they can differ by 10x or more.
- Compare units: Siemens per meter (S/m) is standard.
- Prefer values measured on printed samples, not just bulk pellets.
Why tensile strength and diameter tolerance matter: they affect mechanical performance and extrusion consistency. Example: a 1.75 mm filament with ±0.05 mm tolerance printed with fewer jams than one at ±0.10 mm.
Concrete specs to check (each affects printability or end-use):
- Graphene weight percent (e.g., 5%, 10%, 15%).
- In-plane and through-plane conductivity (report as S/m).
- Tensile strength (MPa) and elongation at break (%).
- Filament diameter tolerance (e.g., 1.75 ±0.05 mm).
- Recommended nozzle temperature and bed temperature.
- Melt flow index or viscosity at specified temperature.
- Shelf life and storage humidity recommendations.
Before you buy, run this evaluation checklist so you don’t get stuck with unusable filament. Real-world example: an engineer requested sample prints from three vendors and rejected one because their sample delaminated under simple flex testing.
Buying checklist — follow these steps:
- Verify datasheets: confirm test methods, sample geometry, and units listed.
- Request sample prints: ask for at least two printed coupons (e.g., 20 × 20 × 2 mm) printed by the supplier.
- Confirm thermal and electrical test methods: get details like ASTM or IEC test standards used.
- Check shelf life and storage: ask for recommended humidity and max storage time (months).
- Read user reports: look for forum posts or case studies with similar printers and settings.
- Check warranty/support: ensure return or replacement terms if filament clogs or is out of spec.
I recommend prioritizing three things when choosing: verified test data from printed samples, reproducible sample prints you can test yourself, and clear warranty or support terms you can rely on. For example, insist the supplier sends printed 1.75 mm test coupons with measured conductivity and a print profile you can copy.
Frequently Asked Questions
Are Graphene-Doped Filaments Recyclable or Environmentally Friendly?
Better safe than sorry: I’m cautious — graphene-doped filaments pose recycling challenges due to composite separation and additives, so they’re not inherently green; I’d recommend a full lifecycle assessment before claiming environmental friendliness.
Do Graphene Filaments Pose Health or Safety Risks During Printing?
Yes — I think they can: nanoparticle exposure from graphene filaments may occur, so I follow strict ventilation protocols, enclosed printers, PPE, and filtration to reduce inhalation and fire risks during heating and post-processing.
Can Graphene-Doped Parts Be Post-Processed (Machined, Painted, Plated)?
Yes — I can machine, paint, and plate them; one study showed 8× improved in-plane conductivity, so surface finishing must respect anisotropy to preserve electrical shielding, and coatings often improve durability and conductivity maintenance.
How Do Graphene Filaments Affect Print Bed Adhesion and Warping?
They generally improve adhesion and reduce warping because higher surface energy and thermal conductivity help heat spread and maintain uniform cooling; I’d still use heated beds, adhesives, and controlled cooling to minimize edge lift.
What Are Long-Term Performance and Aging Characteristics of Graphene Prints?
Honestly, they’ll seem indestructible—then gradually settle. I’ve seen good microstructural stability and excellent thermal cycling resistance, though prolonged UV, humidity, and mechanical fatigue slowly reduce conductivity and mechanical strength over months to years.