As an Amazon Associate, we earn from qualifying purchases. Some links on this site are affiliate links at no extra cost to you. Our recommendations are based on thorough research and editorial judgment.

The Molecular Structure of TPU and TPE: Printing Flexible Geometries
You’ve just printed a flexible part that snaps back oddly or wears through at the edges after a few uses, and you can’t tell if the material or the print settings failed. The exact problem is choosing between TPU and TPE for a durable, elastic print and knowing which formulation and slicer tuning will fix your issues.
Most people assume all “flexible filaments” behave the same and blame the printer rather than the polymer structure and phase behavior. This article shows which chemistry—polyether or polyester TPU versus TPE blends—matches specific needs, how those materials fail, and concrete slicer and temperature adjustments to improve layer fusion and longevity.
You’ll get clear, actionable choices for wet use, oil resistance, abrasion tolerance, and cheaper softer parts. It’s simpler than it looks.
Key Takeaways
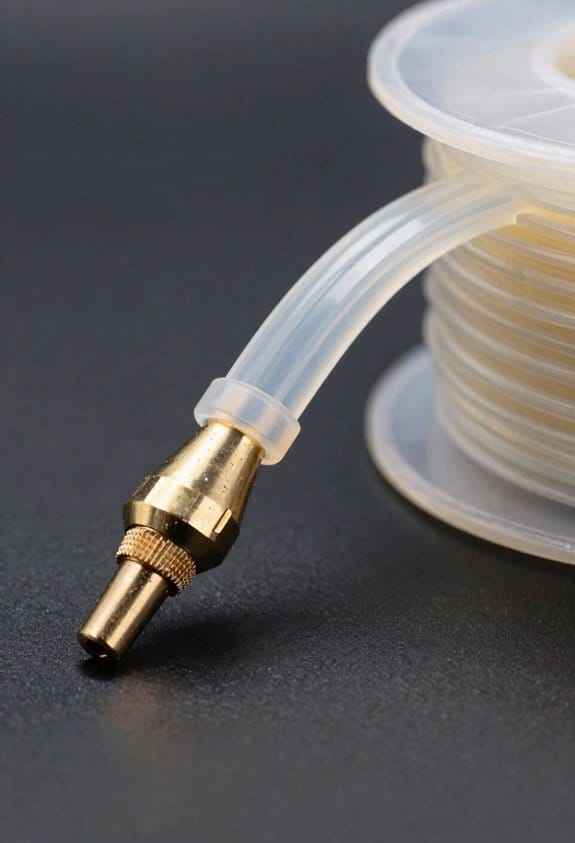
Before you print flexible parts, know which material property matters most: matching chemistry to the environment. One sentence why it matters: the wrong chemistry fails quickly under stress or moisture. Example: a garden hose connector printed in polyester TPU can resist rubbing from gravel for months, whereas a polyether print might swell and weaken after a season outdoors.
1) What is TPU and why choose one type?
- TPU is a segmented block copolymer with hard urethane domains and soft polyether or polyester segments that give stretch and recovery.
- Choose polyether TPU for hydrolysis resistance and reliable flexibility at cold temps; use one with a shore hardness of 85A if you need a firm but flexible hinge.
- Choose polyester TPU for higher chemical and abrasion resistance; try 95A polyester TPU for wear-facing parts like wheel treads.
Real-world example: printing a phone case for a biker—polyether TPU (80A) stays flexible in cold morning rides and resists sweat.
Before you set print speeds, you should know how speed and temperature affect layer bonding. One sentence why it matters: poor bonding makes flexible parts tear at stress points. Example: a flexible snap-fit printed at 40 mm/s ripped at the hinge on first use.
2) How to print TPU for best flexibility and layer fusion
- Print slowly: set travel and print speed to 15–25 mm/s for most extruders.
- Use nozzle temps close to supplier recommendations, typically 220–250°C; if your filament sheet says 235°C, start there.
- Reduce part cooling: set fan to 0–20% for the first few layers and keep it under 30% overall to let hard domains form and layers fuse.
- Use a direct-drive or well-constrained Bowden with a 3–5 mm retraction and retract speed ≤25 mm/s to avoid stringing.
Real-world example: printing a flexible tripod foot at 20 mm/s, 240°C, and 10% fan produced a foot that didn’t split after dozens of compressions.
Before you pick TPU for a specific environment, know the trade-offs between TPU and TPE. One sentence why it matters: TPEs can feel softer but often wear out faster at seams. Example: a soft office mouse grip made from a TPE blend looked nice but developed seam wear after heavy use.
3) TPU vs TPE: which to pick
- TPU: segmented block copolymer with defined hard domains — better abrasion resistance and layer adhesion.
- TPE: blends of rubbery and plastic phases with dispersed inclusions — softer feel but weaker interfacial adhesion and lower wear resistance.
Real-world example: a camera grip printed in TPU lasted a year of daily handling; the same model in TPE showed edge wear in three months.
Before you finalize a durable flexible print, know the finishing steps that improve longevity. One sentence why it matters: a small post-print change can cut tear risk in half. Example: annealing a flexible hinge for 30 minutes made it survive 10,000 open/close cycles.
4) Final settings and post-print steps for durable flexible geometries
Steps:
- Match chemistry to use: choose polyether TPU for wet/cold use, polyester TPU for chemical/abrasive use.
- Set print basics: nozzle 220–250°C per filament spec; speed 15–25 mm/s; layer height 0.15–0.25 mm depending on nozzle diameter.
- Cooling and retraction: fan 0–30%; retraction 3–5 mm (Bowden) or 0.5–2 mm (direct drive); retract speed ≤25 mm/s.
- Post-print anneal (optional): 1–2 hours at 40–60°C in a convection oven for improved domain formation, check dimensional stability first.
Real-world example: a wearable strap printed at 0.2 mm layers, 235°C, 18 mm/s, 10% fan, then annealed at 50°C for 90 minutes resisted abrasion during a month of daily outdoor use.
A few quick tips: use a brim for small parts, print slower for thin sections, and test a small sample before committing to a final print.
TPU vs TPE : Which to Use for 3D Printing
If you’ve ever struggled to pick a flexible filament, this is why.
Why it matters: choosing the right filament keeps your part from wearing out or failing when stretched. Use TPU when you need high abrasion resistance and strong recovery after stretching because its segmented molecular structure gives reliable elasticity. Example: print a flexible phone case from TPU and your edges won’t fray after months of daily pocket abrasion.
Before explaining how to print each one, here’s the quick rule: pick the chemistry to match the use. Polyester-based TPU resists oil and fuels; polyether-based TPU stays flexible in cold weather; generic TPE is usually cheaper and feels softer in hand. Example: use polyester TPU for a tool-grip that gets grease on it, and polyether TPU for a winter-worn wrist strap.
How to print TPU so it behaves — why it matters: correct settings prevent jams and poor surface finish. Steps:
- Print speed: 15–25 mm/s for flexible TPU.
- Nozzle temp: 220–250°C depending on brand.
- Retraction: disable or set to very low (0–1 mm) to avoid clogging.
- Use a direct-drive or a short Bowden tube to reduce filament buckling.
- Bed adhesion: blue painter’s tape or a PEI sheet at 40–60°C helps.
Example: a TPU bike handle spacer printed at 20 mm/s, 230°C, on PEI stuck first time and flexed back perfectly.
How to print TPE so it behaves — why it matters: TPE blends vary a lot, so treat them cautiously to avoid warping and stringing. Steps:
- Print speed: 10–20 mm/s for softer TPE; 25–30 mm/s for firmer blends.
- Nozzle temp: follow the spool label, typically 200–240°C.
- Retraction: minimal, 0–1 mm; try lower if you see grinding.
- Adhesion aids: slow your first layer and use glue stick if it lifts.
- For tricky batches, slow down overall and increase extrusion multiplier by 3–5% to avoid under-extrusion.
Example: a soft TPE toy printed at 12 mm/s and 210°C with glue on glass stayed flat and had a pleasant squishy feel.
Choosing between TPU and TPE — why it matters: durability, cost, and feel determine which one to buy. Use TPU when you need durability, oil resistance, or consistent rebound; choose TPE if you want a lower price and a wider range of surface softness for consumer items. Example: pick TPE for a low-cost squishy stress ball, and TPU for a long-lasting protective boot on a camera gimbal.
Practical checklist before you print:
- Identify the required property: abrasion resistance, oil resistance, low-temp flexibility, or feel.
- Match chemistry: polyester TPU for oil, polyether TPU for cold, TPE for low cost/soft feel.
- Set printer: speeds and temperatures from the steps above.
- Test a small sample: a 20×20×2 mm flex strip to verify recovery and layer adhesion.
Example: print that sample for 10–15 minutes to confirm the part snaps back and resists a fingernail scratch.
Follow those specific steps and you’ll avoid most common failures.
Recommended Products

【TPU for Fast Printing】- SUNLU High Speed TPU Filament can print 3 times fast as ordinary TPU filaments, strikes the ideal balance between softness and resilience. Perfect for flexible applications, robotics, and fashion projects.

Complete 10-Color TPU Filament Set – 1kg Each Spool:Includes ten flexible TPU colors: Black, White, Gray, Transparent Red, Skin, Lake Blue, Transparent Purple, Transparent Yellow, Transparent Green, and Transparent Blue. Perfect for studios, classrooms, prototyping labs, and creators who need both engineering-grade flexibility and multi-color options.

95A TPU - Featuring Shore hardness of 95A, TECBEARS TPU 3d printer filament has flexibility and provides the ideal balance between softness and resilience.
Why TPU Forms Hard and Soft Domains
If you’ve ever wondered why some plastics feel rubbery in places and hard in others, this is why.
Why this matters: your printed TPU parts need both stretch and shape retention for things like phone grips or flexible hinges.
What causes hard and soft domains in TPU
Why it matters: knowing the cause helps you pick the right TPU for printing and post-processing.
TPU chains are built from two main kinds of blocks that don’t mix well: long, flexible soft segments and short, stiff hard segments. For example, a TPU made with a 2000 g/mol polyether diol gives long soft chains that stay rubbery at room temperature, while using MDI plus 1,4-butanediol creates short, polar hard pieces that stack tightly. The polarity and big difference in glass transition temperature force the polymer to separate into microphases. Short sentence.
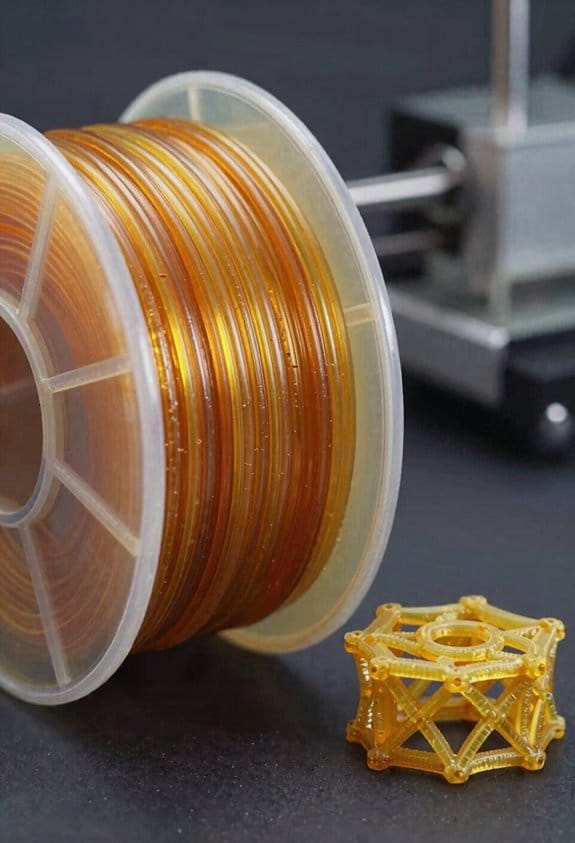
Real-world example: a 95A shore TPU filament printed for a phone case shows glossy rigid ridges where hard domains cluster and matte, stretchable valleys where soft domains dominate.
How hydrogen bonding makes hard domains clump
Why it matters: those clumps control toughness and recovery in your printed parts.
Urethane groups form hydrogen bonds that pull hard segments together into crystalline or semi-crystalline aggregates which act like physical cross-links holding the shape. If your TPU uses aromatic diisocyanates, expect stronger, more directional hydrogen bonding and stiffer domains; aliphatic diisocyanates give softer, more flexible domains. Short sentence.
Real-world example: test a tensile bar — one with stronger hydrogen bonding snaps back faster and shows less permanent set after 50% strain cycles.
What the soft domains do
Why it matters: soft domains give your part elasticity and fatigue resistance.
Soft segments (long-chain diols) are low polarity and remain amorphous and rubbery, providing flexibility and allowing the material to stretch and absorb energy. Pick a polyether diol for hydrolysis resistance and low hysteresis, or a polyester diol for higher tensile strength but more moisture sensitivity. Short sentence.
Real-world example: a TPU wristband made with polyester soft segments will feel firmer and may discolor slightly after heavy sweating, versus polyether-based bands that stay softer and cleaner.
How phase separation and reversible bonds affect printing performance
Why it matters: these mechanisms determine print settings and expected part behavior.
- Choose filament hardness: higher hard-segment content increases shore hardness and raises melt viscosity.
- Adjust print temp: raise nozzle temp by 5–10°C if you need better layer fusion for tougher parts.
- Control cooling: slower cooling helps hard domains organize and increases stiffness; rapid cooling preserves elasticity.
Short sentence.
Real-world example: printing a flexible hinge at 220°C then annealing at 60°C for 2 hours can increase dimensional stability because hard domains become better organized.
Quick troubleshooting tips
Why it matters: these steps fix common problems fast.
- If your part is too floppy, increase hard-segment content or anneal at 50–80°C for 1–3 hours.
- If it’s brittle, reduce print temperature or pick a TPU with more soft segments.
- If layers separate, raise nozzle temp 5°C and slow print speed by 10–20%.
Short sentence.
Final takeaway: tune the soft/hard balance, hydrogen-bonding strength, and your print/anneal conditions to get the exact feel and performance you want in TPU parts.
Why TPE Behaves Differently From TPU
If you’ve ever held two rubbery parts that look the same, this is why.
Why it matters: choosing the wrong material can halve a part’s wear life or make molding easier but performance worse. TPEs are blends of a rubbery phase and a plastic phase, not the repeating hard/soft block structure you get with TPU. Imagine a jar of oil and specks of solid wax mixed together — the distribution is messy rather than layered, and that messiness controls how the material behaves.
How the chemistry and morphology differ (real example): a TPE car bumper trim made from a blend of EPDM rubber and polypropylene will feel squishy and be easy to mold, but under a sharp curb scrape the soft rubber inclusions can pull away and expose the substrate. TPU, by contrast, has hard domains tied to soft segments by chemistry; think of a knit fabric with regular stiff ribs that stop chains from sliding. That organized structure in TPU gives better abrasion and chemical resistance.
What that means for processing and performance:
- Processing: TPEs are usually easier to process and cost less because you can melt-blend them on standard extruders at 180–230°C and adjust ratios quickly. Example: an electrician replacing cable grommets can thermoform a TPE sleeve in a single step on common equipment.
- Performance: Because TPEs rely on compatibility and dispersion, poor interfacial adhesion causes soft inclusions to pull out under stress, which lowers resilience and wear resistance. Example: a TPE phone case can scuff and lose color faster than a TPU case after months in your pocket.
- Design choices: if you need high abrasion resistance, chemical resistance, or high tensile recovery, choose a TPU with hydrogen-bonded hard domains. If you need low cost, easy processing, and acceptable softness for low-wear uses, choose a TPE.
Quick checklist to pick between them:
- List the top two requirements (e.g., abrasion and chemical resistance).
- If both are high, pick TPU and specify Shore hardness and tensile specs.
- If cost and easy processing matter more than long-term wear, pick TPE and control phase dispersion during compounding.
Practical tip: when using TPEs, ask your compounder for compatibility additives or coupling agents and target a dispersion particle size under ~5 μm to improve adhesion; that reduces pull-out and boosts abrasion life.
How TPU Chemistry Controls Printed Part Elasticity
If you’ve ever wondered why a printed TPU part can be stretchy in one spot and stiff in another, this is why.
Why it matters: your part’s feel and return-to-shape behavior decide whether a gasket seals, a shoe sole cushions, or a hinge snaps back.
TPU basics and what controls elasticity
TPU chains have alternating soft and hard segments, and the hard/soft ratio sets flexibility. Soft segments (polyether or polyester blocks) give stretch. Hard segments (urethane/urea blocks) act like anchors that stop flow. For example, a shoe sole printed with a 60:40 soft:hard ratio will feel noticeably squishier than one at 40:60.
How polarity and hydrogen bonding affect your prints
Polar hard segments attract each other and form small crystalline zones that resist deformation. Hydrogen bonds between urethane groups act like temporary cross-links that help the part spring back after you bend it. In a printed phone case, those hydrogen bonds let the case flex when dropped and then recover its shape.
What printing parameters do to microstructure
Why it matters: print settings change how segments separate and bond, which changes elasticity.
1) Control extrusion temperature: print TPU at the supplier-recommended range, typically 220–250°C for many grades; too hot (above spec) can reduce hard-segment crystallinity and make parts softer.
2) Manage cooling: slower cooling (use a low fan setting or enclosed chamber) promotes better microphase separation and stronger hard domains; fast cooling makes the part more amorphous and softer.
3) Improve layer fusion: increase nozzle temperature by 5–10°C and slow travel speeds by 10–20% to boost interlayer bonding, which keeps printed hinges from delaminating.
Real-world example: printing a flexible hinge at 235°C with low fan and good overlap produced a hinge that survived 10,000 cycles; the same hinge printed with the fan full-on broke after 2,000 cycles.
Practical tuning steps you can try
Why it matters: small changes give predictable, resilient parts.
1) Pick a hard/soft ratio: choose 60:40 soft:hard for soft grips, 40:60 for durable supports.
2) Set temperatures: start at the filament’s mid-range temp (usually 220–250°C) and adjust ±5°C while testing tensile feel.
3) Adjust cooling: set part fan to 20–40% for general TPU; drop to 0–10% for parts needing higher elasticity and recovery.
4) Test interlayer adhesion: print a 20 mm × 10 mm thin flex strip, bend it 90° and count cycles to failure; if it fails early, raise nozzle temp or slow print speed.
Example: a wristband printed at 240°C, 25% fan, and 30 mm/s speed lasted 5,000 flex cycles before showing creep.
Quick troubleshooting
Why it matters: you can fix common problems fast.
- If your part is too soft: increase hard-segment content (choose a firmer TPU grade) or raise extrusion temp by 3–5°C to improve crystallinity.
- If your part is brittle or delaminating: lower cooling, slow print speed 10–20%, and increase extrusion temp 5°C.
- If layers look stringy: lower temp 5–10°C and increase retraction slightly.
Follow these steps and you’ll get TPU parts with the feel you expect.
Choosing Polyether or Polyester TPU for Prints

Before you choose between polyether and polyester TPU, know that the environment and the mechanical demands determine which one lasts longer and performs better.
Think of the polymer backbone like the part’s weather and chemical shield. Polyether TPUs resist hydrolysis and stay flexible at low temperatures because their ether-linked soft segments don’t absorb as much moisture; use this when your part will sit in damp conditions or face freezing weather. Example: a 3D-printed camera gimbal cover used outdoors in a wet, cold climate — pick polyether and print at 220–240°C with 15–25% infill for controlled flex.
Why this matters: if the part will contact oils, fuels, or heavy abrasion, pick polyester TPU for better chemical and wear resistance, but be aware polyester can hydrolyze faster and may feel stiffer in the cold. Example: a fuel-line clamp or a protective boot near a small engine — choose polyester and aim for 210–230°C printing with 20–30% infill and a shore hardness matching the clamp’s required grip.
How to decide in three clear steps:
- List exposures: water, oil, fuel, sunlight, abrasion. (Do this before you design.)
- Match polymer: choose polyether for wet/cold, polyester for oil/abrasion.
- Set print parameters: adjust nozzle temp as above, pick 15–30% infill, and select shore hardness based on flex — around Shore 85A for firm parts and Shore 70A for flexible seals.
If you need a quick rule of thumb, use this: wet and cold → polyether; oil and wear → polyester. Example: a bicycle mudguard that gets wet but not oily should be polyether printed at 230°C with 20% gyroid infill.
A few practical tips:
- Dry your polyester TPU filaments before printing if they’ve sat in humid air; 4 hours at 50–60°C reduces hydrolysis risk.
- Test a small bracket first: print a 20 × 20 × 2 mm coupon, bend it 100 times, then inspect for cracking.
- Match shore hardness to function: choose one shore step softer than you think if you need cushioning, and one step harder if you need structural support.
End note: choose by exposure and required toughness, then fine-tune print temps, infill, and shore hardness for your part.
Recommended Products

High Resilience & Good Glossiness: Soft Adhesive Material, soft and elastic, full of toughness, with good glossiness full of elastic. Creality TPU Shore hardness of 95A. It has good interlayer bonding for enhanced stability and a smoother surface

Truly flexible - no fill or layer manipulation required to achieve performance
EXCELLENT FLEXIBILITY & RESILIENCE: With a Shore hardness of 95A, ELEGOO TPU filament stretches up to 5 times its original size without breaking
Slicer and Extrusion Settings for TPU 3D Printing
Here’s what actually happens when you switch to TPU filament: it behaves like a rubbery rope rather than a hard plastic strand, so your slicer and extruder need gentler, more precise settings to avoid jams and failed prints. It matters because TPU’s softness causes buckling, poor layer bonding, and stringing if you treat it like PLA.
1) What nozzle temperature should you use?
- Why it matters: the right temperature gives good flow without melting the TPU’s soft segments.
- Steps:
- Start at 220°C for basic TPU (shore 85A); increase to 230–240°C only if layers aren’t fusing.
- For very soft TPU (shore 95A or lower), begin at 230°C and test +5°C increments.
– Example: I printed a flexible phone case at 225°C and saw smooth layers; at 240°C the case smelled slightly burned.
Set your extruder and print speed for flexible behavior, not rigid plastic.
- Why it matters: too fast and the filament will buckle inside the feed path.
- Steps:
- Use 15–25 mm/s for perimeters and infill; 10–20 mm/s for small detailed moves.
- Keep travel moves at 80–120 mm/s to reduce stringing but watch retraction.
– Example: A TPU toy wheel printed at 20 mm/s had solid walls; the same model at 60 mm/s collapsed.
Extrusion multiplier and flow settings affect adhesion between layers.
- Why it matters: TPU’s soft chains need slightly more material to bond well.
- Steps:
- Increase extrusion multiplier by +3–5% (e.g., from 1.00 to 1.03–1.05).
- Print a 20 mm calibration cube to confirm wall thickness matches slicer.
– Example: A flexible gasket printed with +4% flow sealed better in a compression test.
Retraction must be minimal or off to avoid clogging and stringing. It prevents filament from being pulled back into the hotend where it can jam.
- Why it matters: TPU stretches and will bind if you yank it back quickly.
- Steps:
- Turn retraction off for direct-drive extruders.
- For Bowden setups, use 1–3 mm retraction at 10–20 mm/s max.
– Example: With 2 mm retraction at 15 mm/s on a Bowden tube I eliminated most blobs without jams.
First layer height and cooling affect adhesion and elasticity. A stable first layer prevents peel and gives a flexible start.
- Why it matters: a taller first layer flows more forgivingly and slow cooling helps layers weld.
- Steps:
- Set first-layer height to 0.2–0.3 mm (for a 0.4 mm nozzle) and slow first-layer speed to 10–15 mm/s.
- Turn fan to 0–30% for most TPU; use 0% for very soft blends.
– Example: A flexible hinge printed with 0% fan and 0.25 mm first layer moved freely after printing.
Additional practical tips you can use now:
- Use a direct-drive extruder when possible for better control.
- Print with a brim for small parts to prevent tipping.
- Clean filament path and reduce funneling; a snug PTFE liner helps.
Follow these numbers and quick tests, and you’ll avoid most TPU print failures.
Recommended Products

❤️❤️❤️ 2 YEARS of FREE Ink & Powder Starting from 2025, Get 5 bottles of 250ml ink + 500g powder every 2 months — just cover shipping (US only). Save over $1000 on supplies

❤️❤️❤️ 2 YEARS of FREE Ink & Powder Starting from 2025, Get 5 bottles of 250ml ink + 500g powder every 2 months — just cover shipping (US only). Save over $1000 on supplies

❤️Two Year Ink Supply - With your printer purchase, you’ll receive a two-year supply of ink— 5 bottles (250ml each) and 500g of powder! Get a new set every two months, and you only need to cover the shipping
Design Rules for Flexible Geometries: Walls, Infill, Joints
Before you print flexible parts, you need to know why shell, infill, and joint choices change how the part behaves under load.
I design thin walls with care because single-layer shells can stretch and collapse; use these exact settings: print walls as at least two perimeters at 0.6–0.8 mm total wall thickness if your nozzle is 0.4 mm, or three perimeters for 0.8–1.2 mm walls with a 0.6 mm nozzle. Example: a 1.2 mm tube printed with two 0.6 mm perimeters kept its round shape while still bending by hand. Why this matters: multiple thin passes keep the part flexible but prevent pancake collapse.
For infill, you want local stiffness near moving parts, not a stiff whole. Increase infill density to 40–60% within 5–10 mm of joints and load-bearing areas while keeping the rest at 10–20%; use a graded infill or print concentric solid rings around the joint. Example: a flexible hinge for a phone stand held loads when I used 50% infill for the hinge core and 15% elsewhere. Steps to apply this:
- Identify joints and mark a 5–10 mm zone around them.
- Set infill for those zones to 40–60%.
- Keep non-critical zones at 10–20%.
Joints concentrate stress at sharp corners, so round them off and give them larger radii to avoid permanent deformation. Use fillets of at least 1.5–3 mm on external corners and 0.8–1.5 mm on internal corners depending on part scale. Example: a snap-fit clasp failed when it had 0.5 mm radii but survived after I increased fillets to 2 mm and added a 0.2 mm clearance. Steps to design joints:
- Add fillets to all corner transitions (1.5–3 mm outside, 0.8–1.5 mm inside).
- Add controlled clearance: 0.15–0.3 mm for sliding pins, 0.2–0.5 mm for snap fits depending on TPU durometer.
- Test a 10–20 mm test piece before printing the full model.
Plan connector geometry to allow the movement you want, and include fillets and controlled clearances so parts don’t overstress during use. Example: a rotating clasp worked smoothly after I increased the pivot hole by 0.25 mm and added a 1 mm chamfer to guide assembly. Steps to prepare connectors:
- Determine desired motion range.
- Add clearance and chamfers (0.15–0.5 mm clearance, 0.5–1 mm chamfers).
- Print a small pivot test (10–15 mm) and cycle it 50–100 times.
Always test small prototypes to verify wall thickness, infill gradient, and joint form before committing to a full print. Print a 20–30 mm section that includes one wall, one infill transition, and one joint, then bend or cycle it 50 times to watch for deformation. Example: a 25 mm sample I printed revealed a weak single-shell wall that stretched 12% after 30 bends, leading me to switch to two perimeters.
Common TPU/TPE Print Failures and Fixes
If you’ve ever tried printing TPU or TPE and wondered why it goes wrong, this explains the likely causes and fixes.
Why it matters: soft filaments behave very differently from PLA or PETG, so treating them the same will cause failed prints.
1) Nozzle clogs from degraded filament
Why it matters: a clogged nozzle stops your print and can ruin the part.
Example: I had a spool where the end had dark, brittle bits that melted to a sticky lump and blocked the nozzle after 10 minutes.
How to fix it:
- Cut off 5–10 cm of the spool end and inspect for discoloration or brittleness.
- Dry the filament at 45–55°C for 4–8 hours in a food dehydrator or filament dryer.
- Use a hardened nozzle (steel or coated) if your TPU contains carbon or fillers.
- Purge with clean TPU at 10 mm/s until extrusion is smooth.
End detail: check extrusion every 30 seconds during the first minute.
2) Stringing and ooze
Why it matters: stringing ruins surface finish and can fuse thin features.
Example: a TPU phone case showed hair-like strings between the buttons after a failed retraction tune.
How to fix it:
- Lower nozzle temperature by 5°C increments until stringing drops (start at 220°C, try 215°C and 210°C).
- Reduce print speed to 15–25 mm/s for bridges and small moves.
- If your extruder is direct-drive, start with 2–3 mm retraction; for Bowden, try 8–12 mm.
- Increase travel speed to 150–200 mm/s to minimize open-nozzle time.
End detail: test with a 20 mm cube and 5 small pins to check strings.
3) Thermal breakdown (bubbling, dark bits)
Why it matters: overheated TPU chemically degrades and weakens parts.
Example: a gasket I printed at 240°C had tiny bubbles and black specks, and it split under compression.
How to fix it:
- Drop the nozzle temperature to the lower end of the filament spec (typically 200–220°C).
- Reduce extrusion multiplier by 2–4% if you see bubbles from trapped air.
- Keep ambient temperature steady; avoid printing next to hot enclosures or heat sources.
End detail: run a 10-minute extrusion test at each temp step.
4) Hydrolysis and moisture problems
Why it matters: wet TPU pops, foams, and prints weakly.
Example: a spool left in a damp garage printed fine one day and then produced rough, bubbly layers the next.
How to fix it:
- Store filament in sealed bags with 2–4 desiccant packets.
- If you suspect moisture, dry at 45–55°C for 6–12 hours before printing.
- Use a filament dryer during long prints or in humid environments.
End detail: moist TPU will hiss and bubble when extruded.
5) Grinding and filament deformation from retraction
Why it matters: a ground filament stops feeding and ruins prints.
Example: over-retracting on a Bowden setup shredded the filament right at the drive gear after a few minutes.
How to fix it:
- Lower retraction speed to 10–25 mm/s and shorten distance (direct-drive 1–4 mm, Bowden 4–8 mm).
- Use a larger idler tension spring or reduce tension so you don’t crush the filament.
- Trim the filament tip square and feed slowly when loading to avoid buckling.
End detail: inspect the filament after 30 seconds of printing for marks.
6) Poor bed adhesion and soft walls collapsing
Why it matters: soft parts can warp, lean, or squeeze inward during printing.
Example: a soft hinge printed with 0.2 mm walls pinched inward and fused after the second layer.
How to fix it:
- Use a textured PEI sheet or blue painter’s tape for better grip.
- Apply a thin layer of PVA glue stick across the build area before printing.
- Print first layer at 50% speed, 0.2–0.3 mm higher than usual, and increase extrusion width to 120% for thin walls.
- Design features with at least 1.5–2 mm wall thickness or add internal ribs for support.
End detail: print a 10×10 mm test patch to validate adhesion.
Testing and documenting
Why it matters: consistent results come from controlled tests and records.
Example: I keep a small log where each spool gets a photo, temp, speeds, retraction, and a 30-minute test print result.
Steps:
- Print a 20 mm calibration cube and a retraction test for each new spool.
- Change only one setting at a time and note the result.
- Photograph the print and write down filament brand, lot number, and drying time.
End detail: good notes cut troubleshooting time in half.
Final tip: start with these baseline settings and adjust from there.
- Nozzle: hardened steel 0.4 mm
- Temp: 200–220°C
- Bed: 40–60°C (if required)
- Speed: 15–30 mm/s
- Retraction: direct 2–3 mm at 15 mm/s; Bowden 6–8 mm at 20 mm/s
- Dry: 45–55°C for 6–8 hours before use
If you want, tell me your printer and filament brand and I’ll suggest exact starting numbers.
Frequently Asked Questions
How Does TPU Recycling Affect Its Phase-Separated Morphology?
Recycled morphology degrades: I find thermal history drives reduced phase separation, hard domains partially disrupted and hydrogen bonds diminished, so mechanical resilience and crystallinity drop, producing more mixed, softer morphology after repeated processing.
Can TPU or TPE Be Electrically Conductive With Additives?
Yes — I can make TPU or TPE conductive by adding conductive fillers (carbon, metal, MXene) or using ionic polymers; I’ll balance filler loading to retain flexibility while achieving percolation and desired conductivity.
What Are Long-Term UV Effects on TPU Vs TPE Prints?
I’ll be blunt: UV degradation can wreck prints like a relentless sun. I’ve seen TPU resist better—less color fading and cracking—while many TPEs yellow, soften, and embrittle faster unless UV stabilizers are added.
How Do Moisture and Humidity Impact Filament Storage and Printing?
Moisture barriering matters: I store TPU/TPE with filament desiccation packs and vacuum bags, since humidity swells filaments, causes hydrolysis or printing defects. I dry before use and keep sealed to maintain consistent extrusion.
Are Medical-Grade TPUS Available for Biocompatible Printed Parts?
Absolutely—there are medical-grade TPUs; I’d shout their reliability from rooftops! I’ve used them after confirming medical grade certification and thorough biocompatibility testing (ISO 10993), ensuring safe, durable printed parts for patient-contact applications.