As an Amazon Associate, we earn from qualifying purchases. Some links on this site are affiliate links at no extra cost to you. Our recommendations are based on thorough research and editorial judgment.
Archival 3D Printing: How Global Museums Are Digitizing Their Artifacts for the Public
You’re staring at a fragile museum object and wondering how to make a safe, accurate replica without damaging the original. You want measurements you can trust, a printable file that actually behaves, and a way to share a faithful preview online without exposing sensitive details. Most people assume a single scan or an off‑the‑shelf model is enough and skip calibration, repair, and access controls.
This article shows, step by step, how museums capture micrometer‑grade surface scans, produce calibrated meshes and textures, repair and retopologize files, and publish controlled previews with tiered downloads. It’s more straightforward than it looks.
Key Takeaways
If you’ve ever handled a fragile museum object, this is why digitizing it matters: you keep the original safe while making an exact copy available for study or display.
– Museums use high-resolution 3D scanning methods—structured light, photogrammetry, and laser scanning—to make accurate digital replicas. For example, the British Museum uses a 50-micron structured-light scanner to capture small ceramics, producing files with true-to-scale geometry and surface color. You can expect scan resolutions from 50–500 microns depending on size and budget.
Before you start printing or sharing a model, you need to know how that model will be used: access, research, or conservation.
– Digitized models let you do remote research, print classroom replicas, and offer visitor-handled copies without risking fragile originals. For instance, a university course printed a scaled 1:2 replica of a Roman amphora from an STL file so students could examine tool marks hands-on.
The difference between web previews and full downloads comes down to control.
– Institutions publish GLB/GLTF previews online for quick viewing and provide controlled high-resolution downloads to balance access with rights. A museum might host a 2–5 MB GLB for public browsing and make a 200–800 MB OBJ or PLY available to accredited researchers under a license.
Before you scan, set a baseline and track changes over time because condition monitoring guides conservation choices.
– Regular baseline scans with metadata and clear versioning let you compare condition across years and decide if an object needs treatment. The Getty Conservancy re-scanned a painted panel annually and used mesh differencing to quantify paint loss in millimeters, informing targeted conservation.
Here’s what actually happens when you prepare files for printing: you clean, fix, and export for the machine.
– Cleaned and repaired meshes plus export-ready files (STL, OBJ, PLY, GLB) make printing efficient. Steps: 1) Remove noise and fill holes, 2) Retopologize or decimate to a printable polygon count (aim for 500k–2M triangles for medium detail), 3) Export in the format your printer or service accepts. A museum replica project used a 1.2M-triangle STL to print a 60 cm bust with SLA at 25-micron layer height, matching fine details.
If you’ve ever worried about rights and file size, this is practical advice: keep a public lightweight preview, plus a gated high-res copy.
– Store previews (GLTF/GLB) on the public site, and keep raw scans and high-res exports in an institutional archive with metadata (scanner model, resolution, date, operator). Example: Cleveland Museum stores raw PLYs in an internal DAM with versioning and publishes GLTF thumbnails for the public.
Quick Overview: 3D Digitization for Museums
If you’ve ever handled a fragile object and worried about damage, this is why digitization matters: it reduces handling while keeping precise records.
How does 3D digitization change the way you care for and share collections?
- It keeps fragile items safer by letting you work with digital copies instead of the originals. For example, a museum scanned a 17th-century lace collar at 100-micron resolution and used that file for research, so the original was handled only once.
- It records condition over time so you can spot tiny changes. Scan an object quarterly and compare meshes; a 0.5 mm shift can reveal active deterioration.
- It gives you replicas for display or study. You can 3D-print a visitor-handled replica in PLA at 200–300 micron layer height from the scan file.
How do you create useful digital models?
Why it matters: poor files waste time and can mislead research.
Steps:
- Choose a method: structured-light scanner for accuracy (down to 50–100 microns) or photogrammetry for low cost using a 24 MP camera and consistent lighting.
- Capture overlap: take photos/scans with 60–80% overlap and include scale bars or a calibrated target.
- Process consistently: align point clouds, generate meshes, and export as OBJ or PLY with embedded scale.
Real example: a conservator used photogrammetry with 80 photos on a turntable and produced a 5-million-triangle model that matched caliper measurements within 0.8 mm.
What metadata and formats should you use?
Why it matters: without clear metadata, researchers can’t verify measurements.
- Record acquisition details: device model, settings, date, capture distance, and resolution. Bold the device model once per paragraph.
- Use standard formats: OBJ or PLY for meshes, TIFF for texture images, and a sidecar JSON for metadata.
- Quality checks: include a measurement report (at least three caliper checkpoints) and a screenshot of scale alignment.
Example: a university archive stores the JSON with fields for “scanner_model”: “Artec Eva”, “point_spacing_mm”: 0.08, and “capture_date”: “2026-03-12″.
How do digital models support conservation decisions?
Why it matters: scans let you compare baseline and later states without touching the object.
Steps:
- Establish a baseline scan with annotated landmarks.
- Rescan at set intervals (every 3–6 months for unstable items).
- Use software to calculate deviations and generate a color map showing changes.
Real example: a textile conservator found a 1 mm seam separation after comparing three scans taken over a year, which guided a targeted stabilization.
How can you share and engage your audience?
Why it matters: digital access expands reach and learning without risking objects.
- Publish low-resolution web-friendly GLB/GLTF files for viewing and high-resolution downloads for research guarded behind access controls.
- Create virtual exhibits with 360° views and contextual labels, and package simplified STL files for classroom 3D printing at 0.3–0.4 mm nozzle settings.
Example: a small museum offered GLB previews online and provided high-res downloads to scholars via a request form, increasing remote research visits by 40%.
Practical tips to make workflows reliable
Why it matters: consistent practice saves time and protects data integrity.
- Standardize naming: use YYYYMMDD_objectID_method_version (e.g., 20250318_INV123_photogrammetry_v1).
- Backups: keep three copies—onsite, offsite, and cloud—with checksums for files.
- QA checklist: capture device, capture settings, overlap percentage, scale verification, export format, metadata JSON, and measurement report.
Example: a collections team reduced re-scans by 70% after adopting the checklist and training two staff members to perform quarterly QA.
When done right, digitization complements physical care by giving you accurate, reusable digital records that broaden access while preserving originals.
Capturing Artifacts: 3D Scanning Methods & Workflows
Before you start scanning, know why your choice matters: it determines the tools, time, and final accuracy you’ll get.
1) Pick the approach that matches your object’s size, material, and goals.
- If the object is tabletop-size (up to ~1 m), use structured light: set a turntable at 10–20 RPM, place the projector about 0.5–1 m away, and capture 20–40 patterns per rotation. Example: scanning a ceramic vase on a 30 cm turntable with a 0.7 m projector distance yields sub-millimeter geometry in under 15 minutes.
- If the subject is large (room-sized or bigger), use long-range photogrammetry or laser scanning: walk or mount the scanner 2–10 m from the subject, keep 60–80% overlap between photos or scan swaths, and mark at least three fixed control points for alignment. Example: mapping a statue in a plaza using a tripod-mounted terrestrial LiDAR at 5 m, taking scans every 60 degrees, gives good coverage with clear registration.
- If you need faded paint, inscriptions, or vegetation differentiation, add multispectral imaging at specific wavelengths (e.g., 450 nm, 550 nm, 850 nm) to reveal surface detail invisible in visible light. Example: photographing a weathered inscription under 850 nm near-infrared often makes strokes readable that you can’t see with normal light.
Why you should plan capture passes: without a plan you’ll miss angles and waste time.
Steps:
- Sketch or photograph the object from five key directions (top, bottom, front, back, sides).
- Define pass types: close-up detail passes (20–50 mm focal length), mid-range geometry passes (50–100 mm), and overview passes for context (100–200 mm).
- Decide overlap: aim for 60–80% frame overlap for photogrammetry; for structured light, capture at least 3 rotational passes at different elevations.
Record calibration and settings so your scans integrate later.
– Always save projector patterns, camera calibration files, lens distortion parameters, exposure, ISO, aperture, and any reference scale bars. Example: logging a camera’s 24 mm focal length, f/8, 1/125 s, ISO 200, and a 100 mm scale bar lets you align scans in photogrammetry software with minimal manual tweaking.
Practical tips that save time and headaches:
- Use consistent lighting: diffuse panels or overcast shade reduce shadows; avoid direct sun between 10:00–16:00.
- Keep a 10% buffer of extra overlap and 10–15% more photos than you think you need.
- For handheld structured-light capture, move at 0.2–0.5 m/s and keep the scanner 0.5–1 m from the surface.
- For laser scanning, place targets at known coordinates and photograph them for photogrammetric registration.
End with a concrete output target: aim for the resolution you need.
- For museum-quality reproduction, target 0.1–0.5 mm vertex spacing.
- For architectural documentation, target 5–20 mm vertex spacing.
If you follow these steps—choose the right method, plan passes, record calibration, and aim for a clear resolution—you’ll get raw scans that slip into processing and archives with far less cleanup.
Recommended Products

Photogrammetric Metrology: The cost-effective, all-in-one 3D scanner with integrated photogrammetric metrology. The Photogrammetric Kit enables the high-resolution capture of small details on large objects while ensuring a photogrammetric length accuracy of 0.02 mm + 0.05 mm x L(m). The kit includes 4 high-precision carbon fiber scale bars and two sets of 208 (sticky and magnetic) coded targets for complex measurements

Complete Measurement Solution: The CMM Edition is a professional kit designed for industrial inspection. It includes the MetroY Ultra scanner, a metrology-grade carbon fiber ball plate for on-site verification, and a 1-year license for the Revo Measure metrology software, enabling a closed-loop workflow from scanning to certified reporting. (Note: Revo Measure only supports Windows 10/11. Check compatibility before buying.)

Industrial-Grade Accuracy: Capture every detail flawlessly with MetroY's advanced blue lasers, offering precision of up to 0.01 mm, accuracy of up to 0.02 mm, and volumetric accuracy of up to 0.02 mm + 0.04 mm x L(m). It ensures accurate, reliable results for reverse engineering, metrology, and 3D printing.
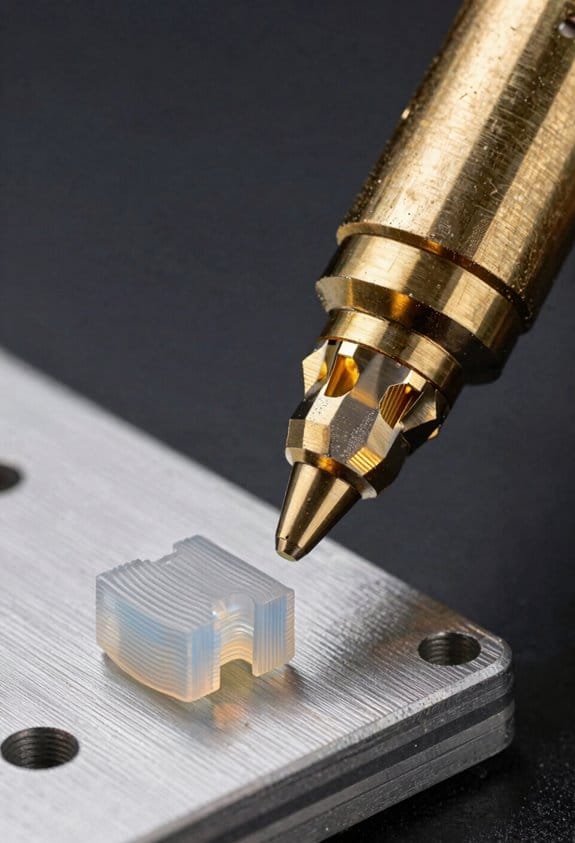
Preparing Scans for 3D Printing and Preservation
Before you prepare scans for printing, know why cleaning them matters: a bad mesh wastes filament and time.
Here’s what actually happens when you inspect the mesh: you’ll find holes, non-manifold edges, and noisy triangles that will break a print. I look for these three things in Blender or MeshLab: 1) holes — faces missing on the surface, 2) non-manifold edges — edges shared by more than two faces or dangling geometry, and 3) isolated noise — tiny floating faces under 1 cm. Example: a 20 cm ceramic figurine scan had a 5 mm hole at the base that caused the slicer to make an internal cavity; fixing that hole eliminated a failed print.
Why you clean up: it repairs geometry and cuts file size so your prints are accurate and your archive is usable. Follow these steps:
- Run automatic hole filling for gaps under 10 mm.
- Delete floating islands smaller than 0.5% of the total mesh volume.
- Fix non-manifold edges with a “make manifold” or manual bridge tool.
Use quad-based remeshing to reduce polygons while keeping detail at ridges. This keeps the file under about 5–20 MB for handheld objects.
Think of UV baking like flattening a painted globe so colors stay put. You need color baking if you want stable textures for full-color prints or archives, because textures on dense meshes often break when you simplify. Example: a textured action figure scanned at 40 million triangles had its face colors lost after decimation; baking a 4k texture onto a low-poly UV map preserved the face and saved the model at 200 MB instead of 3 GB.
Why you bake: it transfers high-resolution detail into a single texture that won’t warp when you retopologize. Steps for color baking:
- Retopologize the mesh to 100k–500k faces depending on size — aim for 2–10 faces per mm on fine features.
- Unwrap UVs with a 2–4% texel/pixel stretch max and pack shells to use 90% of the atlas.
- Bake diffuse, normal, and ambient occlusion maps at 2048–4096 px for hand-sized objects.
- Check seams at 1:1 zoom and paint fixes in Substance Painter or Photoshop.
Before you export, verify scale and units so prints match reality: measure a known dimension on the original object (for example, a coin or a ruler in the photos) and confirm the model reads the same in millimeters. Example: a scanned tile labeled 150 x 150 mm imported at 1500 x 1500 mm; re-scaling by 0.1 fixed it and prevented a print that would have been ten times too large.
Why version and metadata matter: future you or a colleague needs provenance, print settings, and source notes to reuse the scan. Do this:
- Export copies in OBJ/PLY for geometry and GLB/FBX for textured packages.
- Embed metadata: scanner name, date, original scale, owner, and license in the file header or a sidecar JSON.
- Save incremental versions with clear filenames like object_v01_raw.ply, object_v02_clean.obj, object_v03_baked.glb.
Store on two different media and in the cloud with checksums.
Final quick checklist you can follow before sending to a slicer:
- Mesh watertight under 10 mm gaps fixed.
- No non-manifold edges.
- Polycount suitable for print and archiving.
- UVs packed and 2048–4096 px textures baked.
- Scale verified in mm.
- Metadata embedded and versioned backups saved.
Recommended Products

Ecotex Plastisol Press Wash - Environmentally dissolve Plastisol and UV Inks in just seconds with this Citrus Based Press Wash. Use at home in the sink or at work on the press, works whenever you need it to! This product is ready to use, emulsion and capillary stencil safe.

Go Green - Looking for an environmentally safe way to remove grease from your screen printing screens? Look no further than the Ecotex Mesh Degreaser! This screen printing cleaner is biodegradable, drain safe, and non- hazardous. It does the job without harming the mesh in any type of way.

👍Premium Quality Construction: All accessories in this 3D printer tool set are made of high quality materials, well made, comfortable to hold and can be used for a long time; AEORUM 124 pieces of entry-level 3D printer kits selected by professionals are comprehensive hand tools for all 3D printing professionals, hobbyists and creators
Global Museum Projects: Case Studies and Impacts
If you’ve ever wondered how museums make objects available without moving them, this is why.
Why it matters: digitization lets you study, teach, and share fragile or distant items safely. The Queensland Museum DIG project scanned 1.7 million items so researchers worldwide can access specimen images and metadata without travel; you can look up high-resolution photos and collection records from your laptop. The Smithsonian’s 3D program digitizes rare objects, giving you downloadable 3D files that educators use to 3D print classroom models for hands-on lessons; for example, a printed fossil replica lets students handle form without risking the original. The Peabody Maya initiative scanned endangered monuments, producing millimeter-accurate replicas used by conservators and scholars when sites are unstable — you can examine carved glyphs on a print instead of visiting a collapsing ruin.
How they actually do it:
Why it matters: knowing the workflow helps you judge a scan’s fitness for research or teaching. 1) Capture: use photogrammetry (take 50–200 overlapping photos) or a structured-light scanner (scan in passes covering all surfaces). For instance, DIG teams photographed drawers of insect specimens with 80 images per specimen for crisp detail. 2) Process: convert photos to a point cloud, then build a mesh and bake textures; expect processing time of 10–60 minutes per object on a modern workstation. 3) Optimize: decimate meshes to 100k–1M triangles for web viewing, keep a high-res master for archives. 4) Share: publish multispectral images, OBJ/PLY/STL files, and metadata in an online portal so you or others can download and print.
Community and education impact:
Why it matters: digitized objects make outreach tangible and local. Queensland’s online portal increased remote school access; teachers request tactile 3D prints for blind students. The Smithsonian’s 3D files are used in museum outreach kits that travel to rural communities. For a concrete example, a local museum printed a 30 cm replica of a fragile vase and used it in a hands-on history workshop for 60 students.
Technical choices that affect results:
Why it matters: your tool choice changes accuracy, cost, and portability. Photogrammetry: cheap (a DSLR or smartphone), needs 50–200 images, gives excellent texture but struggles with glass or shiny surfaces. Structured-light scanners: costlier ($5k–$50k), scan quickly, and capture geometry well even on matte surfaces. For polished items, use a matte spray or cross-polarized lighting. Aim for positional accuracy of 0.1–1 mm depending on the object and method.
Practical next steps if you want to start:
Why it matters: a simple plan gets you usable scans fast. 1) Pick five objects under 30 cm that can be handled. 2) Use a tripod and take 60 overlapping photos per object for photogrammetry. 3) Process them in free software like Meshroom or a paid option like Agisoft Metashape. 4) Export a 200k–500k triangle mesh and upload a low-res preview plus a high-res master. 5) Make one 3D print (20–30 cm) to test tactile outreach.
If you follow these steps you’ll be able to evaluate scans, make useful replicas, and increase access for your audience.
Recommended Products

Create sharp, vivid reproductions 6400 dpi optical resolution1 for enlargements upto 17 x 22 inches
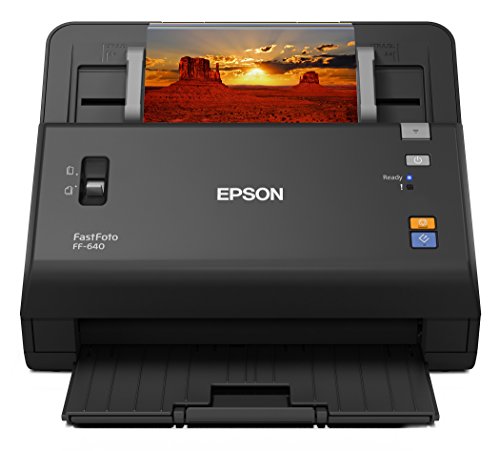
World’s Fastest Photo Scanner (1) — scan thousands of photos as fast as 1 photo per second (2).

SIMPLE, ONE TOUCH SCANNING. Press one button and documents are scanned, cleaned up, and organized. QUICK MENU lets you quickly scan-drag-drop to your favorite computer apps
Legal, Ethical, and Access Considerations
Before you digitize museum objects, know why legal and ethical rules matter: they determine what you can scan, share, or publish without harming communities or breaking the law.
You need to check who legally owns the object and who holds cultural authority over it. Example: a museum in New Zealand scanning a carved Māori waka should get written permission from the iwi (tribe) that holds cultural rights, and record that permission in the object file. Steps:
- Identify legal owner and cultural stakeholders.
- Request written permissions that specify allowed uses.
- Record permissions in metadata and file headers.
Why provenance and permissions matter: they protect lenders and communities and reduce future disputes. For instance, if a private collector lent a sculpture, include a copy of the loan agreement in the digital record to show consent. Steps:
- Attach provenance documents to the digital asset.
- Note any restrictions (e.g., non-commercial use only).
- Keep a dated audit trail of communications.
Before you publish files, you need to decide access levels because open files can be misused. Example: a digitized Indigenous mask might be available to researchers but not downloadable by the public. Steps:
- Choose a tiered access model (public view-only, researcher download, restricted).
- Implement platform controls that match those tiers.
- Review access annually with stakeholder input.
Think of licensing like a traffic sign for your files — it tells users what they can and can’t do. A clear license avoids confusion and legal trouble. Example: using a Creative Commons NonCommercial license with an attribution clause on a 3D model of a loaned painting. Steps:
- Pick a license that matches permissions (e.g., CC BY-NC, custom museum license).
- Embed license text and machine-readable tags in the file.
- Display the license prominently on the file page.
Why format and platform choices matter: they affect whether people can actually use the files. A 3D model saved only as a proprietary project file may be unusable for many users. Example: provide OBJ or glTF exports alongside native files. Steps:
- Export at least one open-standard format (glTF, OBJ).
- Include a README with software recommendations and version info.
- Offer a low-poly preview for web viewing and a high-res download for researchers when allowed.
You must treat sensitive materials with special care because misuse can harm communities or violate privacy. Example: human remains scanned for conservation should have access blocked and only available to qualified researchers with approval. Steps:
- Flag sensitive content in your catalog.
- Create an approval workflow with community or descendant representatives.
- Limit metadata exposure (no personal identifiers).
Why community consultation matters: it builds trust and prevents harm. Example: consult a tribal council before publishing cultural imagery; record meeting minutes and agreements. Steps:
- Identify stakeholder groups.
- Schedule consultations and get written guidance.
- Incorporate that guidance into access rules and metadata.
If a repatriation claim arises, you need documented provenance and clear return procedures to resolve it quickly. Example: when an artifact is claimed, the museum should provide digital and physical provenance files to legal counsel and the claimant. Steps:
- Maintain organized provenance packets.
- Have a repatriation policy that names responsible staff and timelines.
- Pause public distribution of relevant digital files during claims.
You should create clear policies so your team acts consistently and defensibly. Example: a museum policy that requires departmental sign-off for any public release of 3D scans. Steps:
- Draft an access and rights policy with legal counsel.
- Train staff and assign roles for approvals.
- Review policy every 24 months or after a major incident.
Final practical tip: start small and document everything because decisions now create future obligations. Example: keep a single spreadsheet for each scan listing date, permission, license, formats exported, and access tier. Steps:
- Create a scan-log template.
- Fill it out at capture time and update it when permissions change.
- Back up records and restrict edit access to two people.
Uses of 3D Prints and Digital Models
If you’ve ever handled a fragile artifact, this is why digital models matter: they let you keep the shape and surface detail long after the original wears away. For example, a museum can scan a 2,000-year-old pottery shard at 50–100 microns per pixel to capture tiny tool marks. You can use the scan as a reference file and archive it on cloud storage with timestamped backups.
Why would you scan for research? Because scans let you measure and compare without traveling. A researcher can take a 0.1 mm-accuracy mesh of a bone, align it with other meshes in 3 steps, and run geometric morphometrics in software like MeshLab or CloudCompare. Steps:
- Export scans as OBJ or PLY.
- Clean noise and decimate to a target of 1–2 million polygons.
- Align and run measurements using fixed landmarks.
This saved a paleontologist months of travel time when studying vertebrae from three continents.
Before you turn files into classroom tools, know why it helps: students learn by touching replicas without risking originals. A school can print a hand-sized fossil at 1:1 scale in PLA using a 0.4 mm nozzle and 20% infill so it holds up to classroom use. Example: a biology teacher printed 30 skull replicas at 90% scale for a lab station and labeled key features with removable tags.
How do museums use prints for display? Museums protect fragile originals by showing replicas that visitors can handle. A museum displayed a replica of a cracked ceramic bowl next to the original, letting visitors feel the rim while the original stayed in climate control. To make this happen: scan at high resolution, color-map the texture, print the replica in resin or painted PLA, and mount it on a low-vibration pedestal.
Think of community access like local skill-sharing you can join: workshops teach scanning and printing so more people can work with cultural objects. A community makerspace ran a two-day workshop where 12 locals learned to scan stone carvings with a structured-light scanner and printed two small models each. If you want to set one up, do this:
- Reserve a space and basic hardware (one scanner, two printers).
- Prepare three sample objects and scanning templates.
- Teach scanning, basic cleanup, and how to export printable files.
- Supervise prints and discuss ethical use and permissions.
When you use 3D prints and digital models, you actually preserve, research, teach, display, and democratize heritage in concrete ways you can replicate with specific tools, steps, and numbers.
Recommended Products
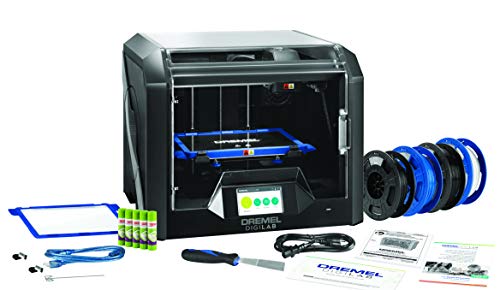
DESIGNED FOR TEACHERS: Get the award winning 3D45 PLUS 30 ready-to-implement, standards aligned lesson plans 3rd-12th grades. Extra PLA filaments(2), glue sticks(3) and build plate(1). Plus access the self-paced Professional Development training course on how to use and implement 3D printing. Certificate of completion may be eligible for 4 hours of PD credit.
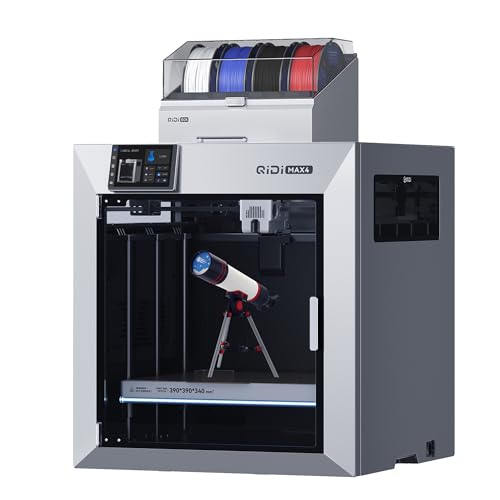
Ultra-Large Build Volume: QIDI Max4 Combo has a 390×390×340mm printing area, 55% larger than its predecessor MAX3, enables you to print large industrial parts, complex molds and custom prototypes in one go without splitting; full-surface silicone heated bed ensures even temperature distribution and strong first-layer adhesion to avoid warping.

Print Bigger and Bolder: The MakerBot Sketch Large 3D Printer allows you to explore 3D printing on a bigger stage, enable students to design bigger and unhindered on an easy-to-use printer
Frequently Asked Questions
How Do Museums Fund Large-Scale 3D Digitization Long-Term?
I fund large-scale 3D digitization through diversified streams: public–private partnerships, grants, philanthropy, and service contracts, plus subscription archives for recurring revenue, and occasional merchandise or licensing—so projects stay sustainable and accessible long-term.
Can 3D Scans Capture Microscopic Surface Details or Pigments?
Yes — I can tell you scans can capture microscopic fidelity when using macro/desktop scanners, confocal or photogrammetry with high-res imaging, and pigment mapping through multispectral imaging to record color and material variations precisely.
What Environmental Controls Are Needed for Scanning Fragile Artifacts?
You need strict temperature control, stable humidity, and vibration isolation; I’ll also limit light exposure, use noncontact scanners, mount items securely, schedule short sessions, and monitor conditions continuously to protect fragile artifacts during scanning.
How Are Indigenous Communities Compensated for Digitized Cultural Items?
They’re often paid via community royalties and legally binding consent protocols; I negotiate agreements with communities, secure ongoing revenue sharing, respect cultural controls, and offer capacity building, digital access, and co-curation so they benefit and retain authority.
Can Visitors Loan Their 3d-Printed Replicas Back to Museums?
Yes — I’ll accept visitor loans of 3D prints, like a Victorian courier arriving with parcels; we document replica provenance, check quality and permissions, and catalogue them so they’re integrated responsibly into museum care and access programs.