As an Amazon Associate, we earn from qualifying purchases. Some links on this site are affiliate links at no extra cost to you. Our recommendations are based on thorough research and editorial judgment.


Hackathons and Rapid Additive Prototyping: Building Under Time Pressure

You’re midway through a 48‑hour hackathon, the clock is ticking, and you can’t tell if the part you’re prototyping will actually function.
The exact question is: what single change will prove whether this design idea works or fails?
Most teams try to test everything at once—complex builds, expensive materials, and too many variables—then panic when results are inconclusive.
This article shows a fast, practical approach: isolate one clear question, run short 5–10 minute trials with the cheapest material that exhibits the behavior, and record a single measurable outcome so you learn cause and effect.
I’ll also outline a four‑day cadence with when to prototype and when to machine parts.
It’s easier than you think.
Key Takeaways
Section: What single thing should you test?
Here’s what actually happens when you try to prove an idea quickly: you scatter your effort across too many unknowns and learn nothing.
Why this matters: testing one thing at a time gets you a clear yes/no fast.
1) Define one clear, testable assumption.
- Step 1: Write it as a sentence with an outcome and a number, for example: “If we add a tactile grip, 60% of users will pick up the prototype within 5 seconds.”
- Step 2: State the single variable you’ll change (grip), and list two controls (same size, same weight).
Real example: In a student hackathon I ran, we tested only button size — 15 mm vs 25 mm — and measured first-press accuracy.
Section: How should you build the prototype?
If you’ve ever been stuck deciding materials, this is why material speed matters.
Why this matters: the point is to capture the behavior, not make something pretty.
1) Use the cheapest, fastest materials.
- Step 1: Choose materials that let you make 3 variants in under 30 minutes, for example: tape, cardboard, foam, and one quick 3D print (20–40 minutes).
- Step 2: Prioritize assembly time over finish — rough but functional wins.
Real example: For a wearable sensor, we used foam padding, masking tape, and a 15-minute PLA clip print to test placement comfort.
Section: How long should each test cycle be?
The fastest way to iterate is short, measurable loops.
Why this matters: short loops force focused measurements and faster learning.
1) Run short iterative cycles.
- Step 1: Timebox runs to 5–10 minutes of hands-on testing each.
- Step 2: Record exactly one measurable outcome per run (e.g., seconds to task completion, error rate, or clicks).
- Step 3: After the run, make one targeted change (no more).
Real example: We ran seven 10-minute cycles to reduce pick-up time from 8s to 3s by only changing angle and edge texture.
Section: What cadence should the team follow?
Before you start a multi-day push, set a clear 4-day rhythm.
Why this matters: a shared cadence prevents busy work and focuses decisions.
1) Follow a 4-day cadence.
- Day 1: Map and prioritize assumptions; pick the single assumption to test.
- Days 2–3: Build variants and run iterative cycles (5–10 minute runs).
- Day 4: Synthesize results, pick a next action (kill, pivot, or scale), and document the measurable outcome and change history.
Real example: A team used this cadence and decided on Day 4 to scrap a sensor placement idea after seeing only 10% improvement over three days.
Section: How should you organize tools and people?
You don’t need expensive logistics if you plan short blocks and clear ownership.
Why this matters: small teams with booked time avoid idle waiting and wasted effort.
1) Reserve time, pair unfamiliar tasks, and keep teams small.
- Step 1: Book tools in half-day slots (4-hour blocks) so you can iterate twice a day if needed.
- Step 2: Pair anyone doing an unfamiliar task with someone experienced for that block.
- Step 3: Keep teams to 3–6 people and assign one person as the booking/consumables owner.
Real example: In a lab day, booking the laser cutter for a 4-hour block let the team cut, test, and re-cut two design versions without waiting.
Final note: keep it ruthless — test one thing, measure one metric, change one variable.
Rapid Additive Prototyping: A Quick Decision Rule
Think of rapid additive prototyping like stacking Lego pieces to test one tiny idea at a time.
Why this matters: you learn which layer matters without wasting days. Example: you glue a 3D-printed hinge onto a plywood door to see if the hinge geometry works before machining the full bracket.
1) Ask one clear question first: will adding a small piece of material quickly tell you something you don’t already know? If it will, build it fast.
Example: you want to check if a foam bumper absorbs impact for a prototype scooter — stick a 1″ foam strip on the board and drop it from 2 feet to watch deformation.
2) Use this decision rule: if the added part isolates the unknown, make it now.
Why this matters: isolating the unknown means your test shows cause and effect. Example: test a seal by clamping a 0.5″ rubber gasket in place and pressurizing to 20 psi to see if bubbles form.
3) Pick materials and timing by a simple resource heuristic: choose the cheapest, fastest option that captures the behavior you’re testing.
Why this matters: faster cycles let you fail quickly and learn more. Example: instead of CNCing aluminum, tape laser-cut cardboard layers together and run a 30-minute handling test.
Steps to run a rapid additive cycle:
- Define the single assumption you want to test.
- Choose the cheapest material that exhibits that behavior.
- Build only the layer needed to isolate that assumption.
- Run the test and record one measurable outcome (force, time, leak rate, user reaction).
- Remove or modify the layer and repeat.
Why this matters: numbered steps keep you focused on risk reduction. Example: for a user-control knob, test step 1 by adding a 2″ dowel to the prototype to check reach and torque for three users.
Practical targets and limits: aim for cycles under 30 minutes when you’re checking fit, form, or basic function; allow up to a few hours if you need a realistic material property like flexibility. Use dollars as a cap — try to keep early iterations under $10 of disposable materials.
Example: test a wearable clip by folding cardstock and a binder clip in 20 minutes; don’t spend $100 on machined clamps until the clip form is validated.
When to stop adding layers: stop as soon as the test no longer isolates the assumption or when the added part changes other critical behaviors.
Why this matters: continuing to add complexity hides the signal. Example: if adding padding to a handle changes grip and weight distribution, remove the padding and test grip separately.
Finish with a focal rule: always design each prototype layer to teach one thing. That keeps your team learning real risks instead of polishing features.
Recommended Products

【Master Efficiency & Creativity】Anycubic Photon P1 with Dual Kits can significantly lower resin costs for small models while effortlessly printing complex, dual-color/-material assembled creations in one go.
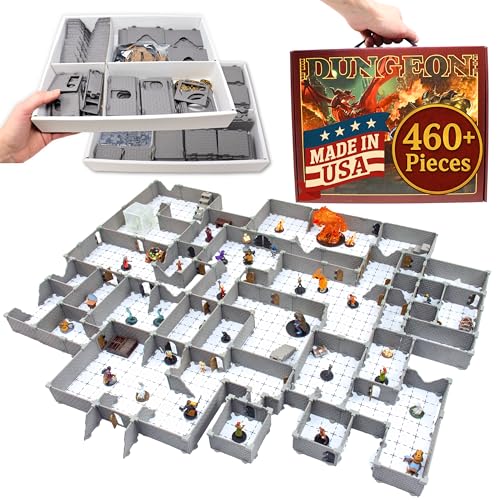
ULTIMATE MEGA-DUNGEON BUILDER: Construct massive strongholds, sprawling underground cities, and multi-level fortresses. This monumental 460-piece set provides over 36 linear feet of walls, enough to build approximately 32 distinct rooms for your most epic campaigns.

[Material]-- Made of high quality steel, which is hard, anti-rust and durable. High-hardness and high-precision. Smooth surface give you comfortable touch.
When to Build Physically vs. Mock Digitally
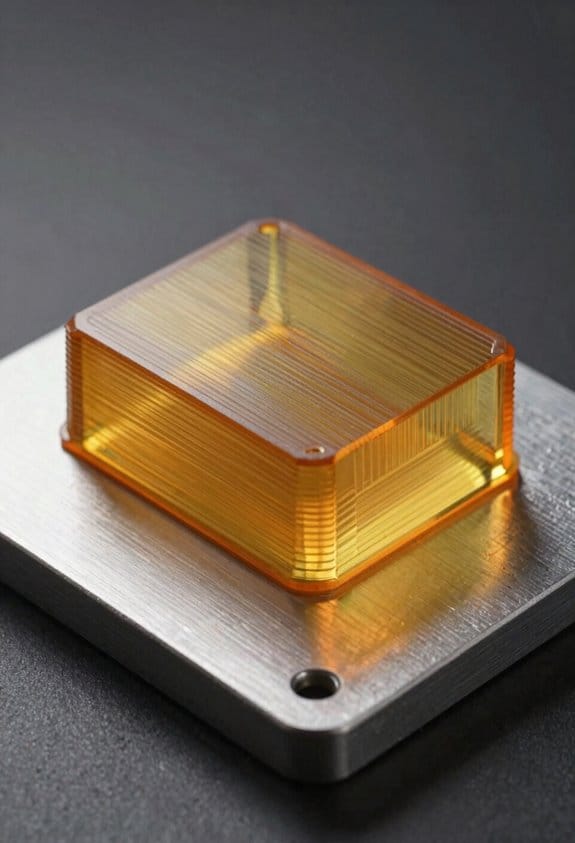
If you’ve ever had to choose between making something real or faking it on a screen, this is why.
Why this matters: choosing the right method saves you time and money and gets clearer answers faster. I look at three concrete things: what you need to learn, how much time you have, and what materials or tools you actually have on hand.
What do you need to learn?
Why this matters: the question you need answered should drive your approach.
1) If you need to test shape, weight, or how pieces fit together, build a physical mock. Example: cut foam core to the exact dimensions of a handheld device, tape it together, and feel how the buttons align—this reveals balance and grip issues you won’t see on-screen.
- You’ll learn tactile constraints like wobble or pinch points.
- Use cheap materials: foam board, cardboard, clay, scrap wood, or a 3D print if you have one.
2) If you need to validate flows, timing, or screen layouts, make a digital mock. Example: prototype 5 app screens in Figma and link them so a user can tap through a purchase flow during a 10-minute test.
- You’ll learn interaction issues and copy problems quickly.
- Use simple tools: Figma, Sketch, or even PowerPoint.
How much time do you have?
Why this matters: your deadline limits your fidelity.
1) Under 2 hours — do a rapid digital mock or a paper prototype. Example: sketch three key screens on paper, tape them to a table, and run a 5-minute task with a user.
– Quick iterations: redraw and retest immediately.
2) Half a day to two days — build a targeted physical prototype or a medium-fidelity digital prototype. Example: laser-cut a faceplate or 3D-print a housing to test assembly with the actual screws you’ll use.
– You’ll uncover manufacturing and assembly problems.
3) More than a week — invest in higher-fidelity physical builds or coded prototypes. Example: build a working enclosure with internal mounts and run a 48-hour durability test.
What resources do you have?
Why this matters: tools and skills constrain what’s practical.
1) No fabricating tools — favor digital mocks or paper-and-cardboard. Example: use Canva to make clickable mockups if you don’t have access to a 3D printer.
2) Access to a makerspace or shop — use physical prototyping to test ergonomics or fit. Example: use a drill press and MDF to create repeatable parts for assembly testing.
3) Coding skill on the team — build interactive prototypes to validate timing, edge cases, and error states. Example: a simple React prototype can reveal slow-loading states and state transitions.
User testing choices
Why this matters: different prototypes answer different user questions.
1) Low-fidelity digital prototypes for concept validation: recruit 5 users, give each a 10-minute task, measure success rate and time on task.
2) Physical prototypes for ergonomics and durability: run 10 repeated-use cycles or a 100-lift test and record failure points.
3) Mixed approach: start digital for flow, then build one physical unit to test form and assembly before committing to production tooling.
A short checklist to decide right now
Why this matters: use a quick decision rule to avoid analysis paralysis.
1) Write your single riskiest question in one sentence. Example: “Will users be able to hold the device comfortably for 10 minutes?”
2) Match method to risk:
- Form/fit/assembly/durability → physical.
- Interaction/flow/layout/content → digital.
3) Choose fidelity by time/resources:
- <2 hours → low-fidelity digital or paper.
- 2 hours–2 days → targeted physical or medium-fidelity digital.
- >1 week → high-fidelity physical or production-like code.
Final practical tip: build the cheapest thing that will answer the riskiest question. Test it once, fix the single biggest failure, and repeat.
Plan a 4‑Day Prototyping Cadence (Peak Days 2–3)
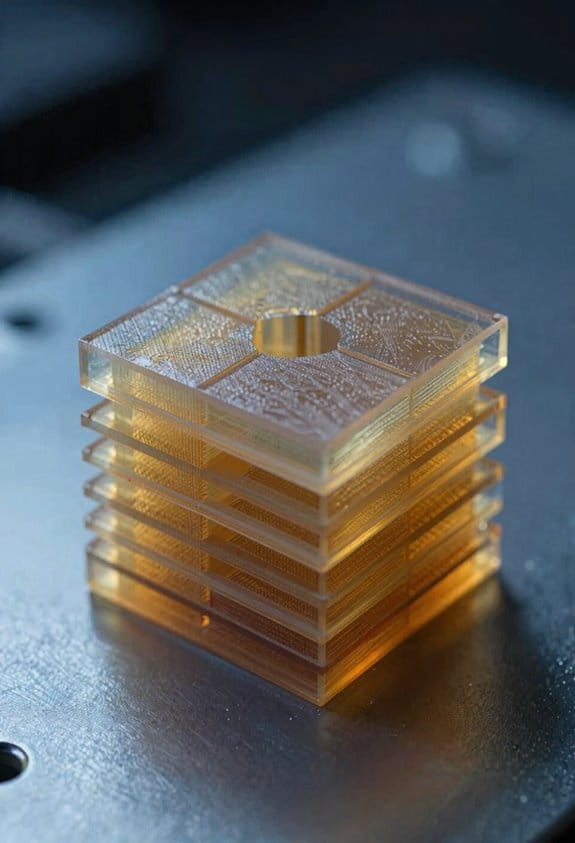
If you’ve ever run a rushed prototype sprint, this is why.
Why this matters: focusing builds on the middle days gives you actionably testable artifacts faster. For example, a hardware team I worked with started with sketches on Monday, had a 3D-printed chassis and wiring on Wednesday, and a user-testable unit by Thursday afternoon.
How to plan the 4-day cadence (step-by-step):
- Day 1 — low-cost exploration. Why: you buy information cheaply so you avoid bad builds. Steps:
- 9:00–10:30: kickoff with a 30-minute goal alignment and a 60-minute assumptions mapping session.
- 10:30–12:30: split into two teams to run three quick concept sketches each (total six sketches).
- 13:30–16:00: paper prototypes or clickable mocks for the top two concepts.
- 16:00–17:00: stakeholder quick review with two clear decision criteria: testable hypothesis and measurable success metric.
- 8:30–9:00: short stand-up to confirm who owns which build tasks.
- 9:00–12:30: main build block (3.5 hours) for the highest-priority prototype; use pair programming or pair bench-work.
- 13:30–15:30: parallel domain switch: one subteam works on UI polish while another rigs hardware or backend integration.
- 15:30–17:00: integration and sanity checks; list remaining risks.
- 8:30–9:00: align on test plan and exit criteria (who, what, success threshold).
- 9:00–12:00: moderated usability or functional tests with 5–8 users or 10–20 rapid internal runs.
- 13:00–15:00: iterate on the top three failure points found in tests.
- 15:00–16:30: regression check and prepare demo artifacts (videos, notes, measurement logs).
- 16:30–17:00: stakeholder demo with explicit asks (decide to pivot, continue, or stop).
- 9:00–10:00: post-test synthesis and metric consolidation (write one-page summary per prototype).
- 10:00–12:00: prioritized backlog of fixes and experiments with owners and time estimates.
- 13:00–15:00: implement only the top one or two high-impact fixes if they take less than 4 hours.
- 15:00–16:30: final stakeholder review and go/no-go decision with explicit acceptance criteria.
- Why this matters: tools and space kill momentum if not scheduled.
- Concrete actions:
Real example: a software product team produced two clickable flows by 4pm and canceled one planned build, saving two days of work.
2. Day 2 — ramp physical builds and domain switches. Why: you convert ideas into tangible prototypes while you still have slack. Steps:
Real example: an IoT project scheduled the 3D printer from 9–12 and a soldering bench from 13–16, preventing shop-floor clashes.
3. Day 3 — focus on refinement and testing. Why: concentrated testing reveals which changes matter most. Steps:
Real example: a consumer device team ran five in-lab sessions and fixed a mechanical latch issue in two hours, improving pass rate from 40% to 85%.
4. Day 4 — reflect, document, and plan next steps. Why: you convert learning into decisions and artifacts that guide future work. Steps:
Real example: after synth, a team scheduled three targeted experiments and wrote the one-page summary that convinced leadership to fund the next sprint.
Resource scheduling and blocking prevention:
- Reserve shared machines in half-day blocks (9:00–12:30 and 13:30–17:00).
- Assign a single person to manage bench bookings and consumables.
- Keep a 90-minute tool buffer each afternoon for unexpected fixes.
Example: a lab that used half-day reservations reduced tool conflicts from four per sprint to zero.
Daily goals and stakeholder alignment:
- Why this matters: reviewers need clear expectations to give useful feedback.
- Concrete actions:
- Write one measurable goal per day (e.g., “Five users complete flow X in under 3 minutes”).
- Send that goal and the review time to stakeholders the night before.
- Use 15-minute stand-ups twice daily on days 2–3.
Example: when goals were shared the night before, feedback was focused and actionable, cutting review time by 40%.
Small-team heuristics and time buffers:
- Why this matters: teams that are too big or too rigid slow you down.
- Concrete actions:
- Keep teams to 3–6 people per prototype.
- Reserve 20% of scheduled build time as buffer for rework.
- Use paired work when a task is unfamiliar.
Example: pairing a junior engineer with a senior reduced rework from 6 hours to 1.5 hours on a critical integration task.
Quick checklist to run your next 4-day cadence:
- Day 1: kickoff, map assumptions, produce two low-cost prototypes.
- Day 2: reserve tools, run main build, perform domain switches.
- Day 3: run 5–8 tests, iterate top failures, prepare demo.
- Day 4: synthesize results, create one-page summaries, decide next steps.
- Operational rules: half-day tool bookings, 15-minute stand-ups, 20% buffer time, one owner for bookings.
If you follow this, you’ll concentrate physical work when it matters and turn noisy ideas into testable evidence quickly.
Recommended Products
2-Year Ink Supply - With your printer purchase, you’ll receive a two-year supply of ink-6 bottles (500ml each) ! Get a new set every two months, and you only need to cover the shipping.Minimize your production costs with our exclusive two-year ink supply service

MakerBeam XL Starter Kit consisting of 40 T-slot profile beams with a 15mmx15mm diameter (8x300mm, 8x200mm,8 x150mm, 8x100mm, 8x50mm), 48 brackets (24xright angle bracket, 24xT bracket), 100x button head socket bolts (M3), 100x Hexagon head bolts (M3), 250xnuts (M3), 1 hex nut driver, 1 hex key driver and 8 end caps additional elements can be ordered individually

★★Using the highest quality aluminum alloy material, exquisite workmanship, durable
Day‑By‑Day Checklist: What to Prototype Each Day
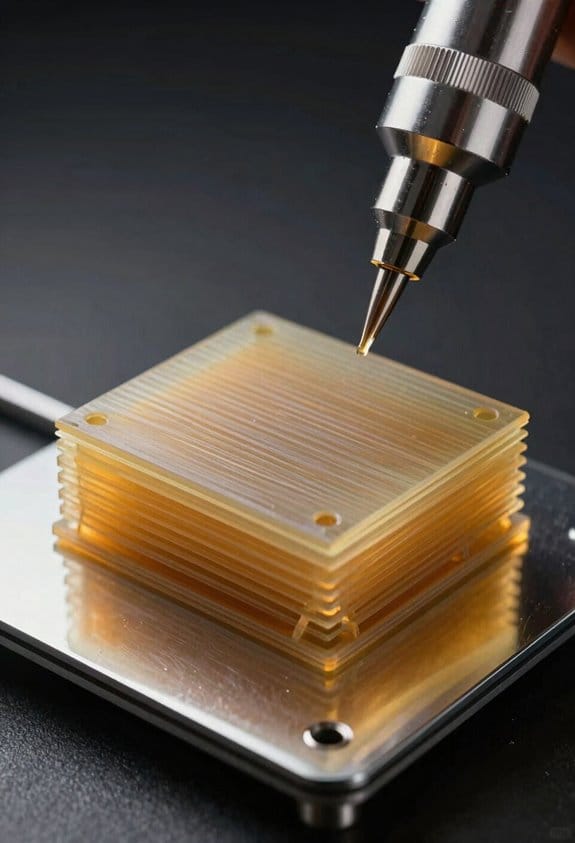
Here’s what actually happens when you have four intense prototyping days: you need a tight plan so you don’t waste time on low-value tasks.
Day 1 — What should you do and why it matters: you want quick clarity on direction so you don’t chase dead ends all day.
Steps:
1. Spend 60–90 minutes on 6–8 rapid sketches or paper mockups; label each idea with one key assumption to test.
Example: sketch a smart water bottle and note “users want reminders” on two sketches and “users prefer LED cues” on two others.
2. Do three 20‑minute stakeholder interviews (team lead, potential user, and someone handling parts) to gather constraints; record one sentence of each interview.
3. Reserve 60 minutes to sort parts, chargers, and workspace logistics; make a parts list with quantities (e.g., 5 sensors, 10 screws).
Finish the day with a prioritized test list of 3 assumptions.
Day 2 — What should you do and why it matters: you want to convert ideas into testable forms so you can learn fast.
Steps:
1. Build 2–3 low‑cost physical mockups (cardboard shells, foam, hot‑glue) in the morning; spend no more than 90 minutes per mockup.
Example: make a clickable phone mockup, a glued‑cardboard enclosure, and a taped‑together sensor mount.
2. Create 3 quick digital iterations of the UI or interaction flow; each iteration should take 30–45 minutes and target a single variable (button placement, wording, timing).
3. Run a 60‑minute user quick‑and‑dirty test with 4 people; record task success and one verbatim quote per participant.
End with a decision: keep, pivot, or kill each concept.
Day 3 — What should you do and why it matters: you commit to the highest‑potential prototype so you can validate core interactions.
Steps:
1. Build a high‑fidelity physical prototype focusing on core interactions; allocate a full 4–6 hour block for assembly and troubleshooting.
Example: assemble the sensor, microcontroller, and a 3D‑printed shell that supports the exact grip and button placement you want to test.
2. Run focused tests on 5 core interactions (power on, pairing, primary task, error recovery, charging); give each test 10–15 repetitions.
3. Log failures numerically and pick three fixes to implement tonight.
Wrap up with recorded videos of each core interaction.
Day 4 — What should you do and why it matters: you want a reliable demo that shows value, not hidden hacks.
Steps:
- Polish the prototype for presentation: fix the three critical bugs, stabilize power and connectivity, and add clear labels or callouts; spend 2–3 hours.
- Write a 3‑minute demo script with exact lines and timing, plus a 30‑second fallback demo if the hardware fails.
- Prepare backup materials: one PDF of screenshots, one 60‑second recorded demo video, and spare batteries/parts.
Finish by running the demo twice and noting any hiccups.
Follow this checklist and you’ll protect time for the things that teach you most: assumptions, core interactions, and a reliable demo.
Recommended Products

DURABLE RIGID CONSTRUCTION: Built with a dense polystyrene core and wood-fiber veneer faces to deliver durable, rigid support for signage, trade show displays, and mounting projects.

WHITE GRIDBOARD FOAM BOARD FOR PROJECTS: Create polished and professional displays with the White Gridboard Foam Board 20″x30″ by Royal Brites. Featuring light silver ½″ grid lines that are visible only from close-up, this foam board helps you align lettering, shapes, and visuals with ease—making it ideal for students, teachers, crafters, and professionals seeking clean, accurate results.

MULTIPURPOSE SAMPLE BOARD: Ideal for testing paint colors, this foam core board is perfect for use as a paint color tester sample board or for displaying artwork and presentations.
Fast 10–30 Minute Prototype Types You Can Use Now
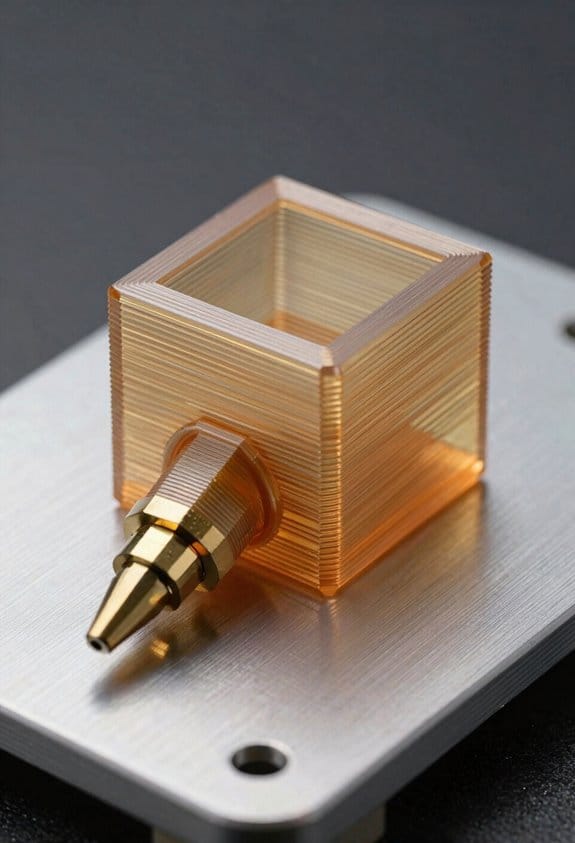
Before you start a hackathon prototype, know this matters because fast tests save hours of wasted work. Think of prototyping like quick experiments: you want clear answers, not polished products.
Here’s what actually happens when you need a 10–30 minute prototype: you have to pick one core interaction and show it, fast. Pick exactly one question you need answered. Example: does my new lid open with a single thumb motion? Build a cardboard mock lid and test it with one teammate pushing and pulling for five minutes.
Why use simple physical rigs? Because they reveal *spatial problems* and how people naturally hold and move things. Real-world example: I made a 10-minute PVC-and-foam mockup of a handgrip to test reach, and discovered the handle needed to be 2 cm wider for comfort. Steps:
- Cut or tape together the rough shape in 5–10 minutes.
- Mark key contact points with a Sharpie.
- Have 3 people try it for 2–3 minutes each and watch their fingers.
If you’ve ever clicked through a prototype, you know it shows flow without code and keeps you focused on decisions. Example: I built a 12-slide wireframe in Figma that simulated checkout flow and found a confusing choice between “buy now” and “save for later.” Steps:
- Draw screens with boxes and labels (5–10 minutes).
- Link screens in a click-through tool (2–5 minutes).
- Run 5 rapid trials with teammates, timing each attempt.
Think of role plays like pretending to be your user; they expose touch-based habits and social interactions. It matters because people reveal unseen behaviors when they act. Example: two teammates role-played a cafe ordering flow and revealed that users hand over phones awkwardly to scan QR codes. Steps:
- Script a 1-minute scenario focused on one decision.
- Assign roles and props (phone, cup) in 2 minutes.
- Run the scene three times, changing one variable each run.
Combine these methods in quick cycles so you iterate based on observation, not assumptions. Example: after one physical test and one click-through, change the button size and re-test immediately. Steps:
- Test for 5–10 minutes.
- Take one photos or quick notes.
- Make one targeted change and repeat.
Prioritize prototypes that answer a single question so you refine the concept before investing longer. A good rule: if it takes longer than 30 minutes, split it into two smaller tests. End with a measurable if-then: if three people succeed twice, move to the next risk; if not, iterate again.
Tools, Materials, and Templates for Quick Physical Builds
Here’s what actually happens when you grab a handful of stuff and try to prototype quickly: you either waste time hunting tools or end up with a fragile mock-up that doesn’t test the idea.
Why this matters: being prepared saves 10–20 minutes per prototype and gives you repeatable results.
1) What tools should you keep in a small kit?
- Example: I keep a kit in a shallow toolbox for sprint sessions that fits under a meeting table.
- Tools to include (each item is one example you can buy cheaply):
- Utility cutter with 10 extra blades. Replace blades after every 50 cuts.
- Mini hot-glue gun (20W) and 20 glue sticks. Heats in 3 minutes.
- Needle-nose pliers and diagonal cutters for bending and snipping wire.
- 12-inch steel ruler and a 6-inch digital caliper for quick measurements.
- Masking tape, double-sided tape (1 inch), and a roll of 3/4-inch packing tape.
– Why these matter: the right cutter and glue gun reduce fiddling and bad joints.
2) Which materials give predictable stiffness and are cheap?
- Why this matters: choosing the right substrate means your mock-up will behave like the real thing under basic loads.
- Use these three materials for most builds:
- Single-wall cardboard sheets (18 x 24 inches). Cut with two passes for clean edges.
- 3 mm foam core board (20 x 30 inches). Mount electronics on foam core with double-sided tape.
- Corrugated plastic (fluted polypropylene), 4 mm. Use for lightweight, weather-resistant panels.
– Example: For a handheld mock-up, I made a phone-sized housing from layered cardboard glued with two 6 mm glue beads and reinforced corners with masking tape; it survived multiple drops from 1 meter.
3) How to store and use templates so you don’t measure each time
- Why this matters: pre-cut templates cut build time from 30 minutes to under 10 minutes and improve repeatability.
- Steps:
- Create vector templates (SVG or DXF) for common shapes: rectangles, mounting holes, hinge locations. Save one file per template.
- Laser-cut a set of 5-shop copies into acrylic or thin plywood for durable jigs. Label each with material and intended use.
- Keep a folder (digital and printed) with scale references and a photo of the template in use.
– Example: I printed an SVG template for a standard panel with two 6 mm screw holes and used it across three prototypes; every panel aligned on the first try.
4) What jigs and snap-fit guides speed alignment?
- Why this matters: simple jigs remove measuring and give consistent assembly across multiple builds.
- Recommendations:
- Make a 90-degree corner jig from a 3 x 3 inch scrap of plywood; use it to square glued layers.
- Cut snap-fit guides from 3 mm acrylic: two sizes that match your common tab widths (3 mm and 6 mm). Use them to align slots quickly.
- Store small clamps (4–6 spring clamps) in the kit to hold glued parts while they cool.
– Example: My team uses a corner jig and two spring clamps to assemble a box in under 7 minutes with consistent seams.
Final checklist you can print and tape inside the toolbox:
- Cutter + 10 blades; hot-glue gun + 20 sticks; pliers; diagonal cutters; 12-inch ruler; caliper.
- Cardboard 18×24; foam core 20×30; corrugated plastic 4 mm.
- Vector templates (SVG/DXF) and two laser-cut jigs.
- 4–6 spring clamps; masking tape; double-sided tape.
Keep the kit under a table or in a rolling caddy so your team can start building within 60 seconds.
Recommended Products


The information below is per-pack only

Dual Temperature Settings Provide More Versatility
Team Roles & Workflows for Rapid Additive Prototyping
If you’ve ever rushed a prototype to meet a demo deadline, this is why.
Why it matters: clear roles stop builds from becoming chaotic so you waste less time and money. Example: at a startup demo week we split four people across tasks and finished three parts in one afternoon instead of two days.
1) Who does what
Why it matters: specific roles keep tasks predictable. Example: on that demo day we labeled stations and nobody switched tools mid-run.
Steps:
- Assign these roles to one person each:
- Modeler — prepares CAD and checks wall thicknesses (target 1.5–3 mm for strength).
- Printer operator — queues jobs, loads filament or resin, and inspects first-layer adhesion.
- Materials specialist — tracks stock, logs batch numbers, and verifies storage conditions (filament dry box at 20% RH).
- Tester — runs fit checks and basic function tests against a simple checklist.
End detail: write the role + primary task on a sticky note on the machine.
2) How to hand off parts
Why it matters: predictable handoffs cut idle time and rework. Example: we saved an hour when the operator and tester used the same checklist for every part.
Steps:
- Use a 3-step handoff ritual every time:
- Sender measures the part and notes dimensions on the card.
- Receiver confirms printer settings and signs the card.
- Both add one line of notes (issue or OK) and staple the card to the part.
End detail: use a small clipboard at the station with pre-printed fields.
3) How to run quick coordination
Why it matters: short, frequent syncs keep everyone aligned so mistakes get caught fast. Example: our five-minute morning stand-up prevented a filament mismatch that would have cost a full print.
Steps:
- Hold stand-ups at the board for 5 minutes, no longer.
- Each person states: what they did yesterday, what they’ll do today, and one blocker.
- Update the task board right after the stand-up.
End detail: use colored magnets for job priority.
4) File and naming rules
Why it matters: shared names stop wasted time searching and avoid overwriting files. Example: we recovered a revision when the file name included a timestamp and initials.
Steps:
- Use this pattern: Project_Part_V##_Initials_YYYYMMDD (example: Widget_Brace_V02_JD_20260320).
- Save the native CAD, an exported STL, and a print settings file together in one folder.
- Keep the latest three versions only.
End detail: keep a text file in the folder listing what changed per version.
5) Quick quality checks
Why it matters: short, repeatable checks reduce errors before you invest hours in finishing work. Example: a quick 30-second first-layer check saved a whole tank of resin.
Steps:
- For each print, run these checks:
- First layer adhesion within 2 minutes of start.
- Dimensional spot-check: two critical measurements within ±0.5 mm.
- Visual surface check for blobs or stringing.
End detail: use a caliper and a photo for records.
Keep it simple: one role per person, a 90-second handoff, five-minute stand-ups, consistent filenames, and three quick checks per print. These specific habits cut errors and help you iterate fast.
Run Multiple Short Iterations to Boost Quality Fast
If you’ve ever watched a build stall because teams waited days between tries, this is why short iterations matter: they make learning visible and fast so you waste less time.
Why it matters: you’ll find problems and fix them before they compound. Example: a UX designer prototypes three button sizes in one-hour sessions, spots mis-taps, and fixes spacing within the same afternoon.
How to run many short iterations
Why it matters: short cycles keep momentum and force quick decisions.
- Decide a clear, testable goal (one sentence). Example goal: “Reduce mis-taps on the checkout button from 15% to under 5% in prototype testing.”
- Limit scope to one variable per cycle. Example: change only button size, label, or color—not all three.
- Timebox each cycle to 10–180 minutes. Try 30 minutes to start.
Short cycles force focus.
What to do during a cycle
Why it matters: structured tries turn guesses into evidence.
- Set up a quick test you can run in under 10 minutes (A/B screenshot, simple click test, or 3-user hallway test).
- Run the test, take notes, and record one metric (e.g., success rate, time on task, or error count).
- Decide: keep, tweak, or discard. Make the decision in under 10 minutes.
Example: a developer pushes a 45-minute build that reduces load time by 20% and notes CPU hotspot locations.
How to manage the stress short loops create
Why it matters: the tension speeds learning but can burn people out.
- Rotate tasks every 2–3 cycles so no one stays on the same repetitive work for more than 2 hours.
- Hold 5–10 minute debriefs after 3–6 cycles to capture what changed and who owns next steps.
- Keep documentation minimal: one line of outcome, one metric, one next action.
Example: a team swaps roles every hour during a hack session and uses a one-line log like “Cycle 4: button 48px → tap 6/10; keep.”
Rules for good evidence
Why it matters: consistent data prevents gut-driven detours.
- Always state the metric and target before you start a cycle.
- Use small, repeatable tests that produce a number you can compare.
- Record results in the same place each time (a shared doc or ticket).
Example: QA logs each 20-minute test with “metric: task success; n=5; result=4/5.”
How to scale this approach
Why it matters: you can apply it to single tasks or whole sprints.
- Group related short cycles into 1–3 hour mini-sprints with a single outcome goal.
- Reserve one person to synthesize outcomes after every mini-sprint and update the roadmap.
- Stop and re-evaluate when you hit diminishing returns for three consecutive cycles.
Example: a product team runs three 90-minute mini-sprints over two days to validate onboarding flows and changes the welcome copy after the second mini-sprint.
Keep it practical: pick one workflow, run ten 30–60 minute cycles, log one metric per cycle, and rotate people every two hours. This creates quick feedback, more learning, and a stronger final prototype.
Metrics and Pitfalls: What to Track and Avoid
If you’ve ever rushed a prototype without clear goals, this is why.
Why it matters: the right metrics keep you learning, not just busy.
I track four concrete numbers you can start logging today:
1) Prototype count per week — aim for 3–7 prototypes depending on scope.
2) Prototype type breakdown — record how many are paper, digital mock, or physical build.
3) Time per prototype in hours — log start and finish times to get median and outliers.
4) Iteration-to-improvement ratio — after each test, note whether the next version improved a specific metric (yes/no) and by how much.
Example: last month I built 12 prototypes — 6 paper sketches, 4 Figma screens, 2 3D-printed shells. Median time was 4 hours; two physical builds took 12 and 15 hours. One iteration produced a 20% faster task completion rate. That snapshot showed where my effort paid off.
Why watch for pitfalls: bad metrics warp your behavior.
Watch these specific traps and how to avoid them:
1) Counting quantity without quality — don’t celebrate numbers alone. Instead, pair prototype count with one learning outcome per prototype (e.g., “validated button placement reduces click time by 15%”).
2) Incentive bias toward speed — if you reward fast builds, you’ll sacrifice learning. Cap weekly prototypes at a number that still allows proper testing (3–7).
3) Misreading prototype type — treat physical prototypes as 3–4x the time cost of digital ones and plan accordingly.
4) Dashboard chasing — reduce dashboard metrics to a maximum of five that map directly to user behavior or learning goals.
Example: a team I coached initially measured only prototype count and hit 20/week, but user insight score stayed flat. After switching to the four metrics above, they cut builds to 6/week and doubled actionable learnings.
How to set up simple tracking (do this now):
1) Create a single spreadsheet with columns: date, prototype name, type (paper/digital/physical), hours, primary hypothesis, test result (metric + number), and next step.
2) At the end of each day, spend 5 minutes filling the row.
3) Every Friday, compute median hours, prototype-type mix, and percent of iterations that produced measurable improvement.
Example: my Friday sheet shows median 3.5 hours, 50% paper, 30% digital, 20% physical, and 40% iterations improved the target metric — that lets me adjust next week’s focus.
Keep this simple rule: metrics must tie to a learning goal in one sentence. If you can’t state that learning goal quickly, drop the metric.
Example: instead of “increase prototype count,” write “validate whether users can complete checkout in under 90 seconds.” That shifts effort to outcomes.
Final practical tips:
- Log consistently; five minutes daily beats an hour weekly.
- Use binary improvement flags (yes/no) plus the numeric change for clarity.
- When exploration turns to refinement, mark the date and switch your target from discovery metrics to quality metrics like error rate or task time.
Example: after three weeks of exploration, mark the day you start counting bug rate instead of idea count.
If you follow these steps, you’ll stop confusing motion with progress and start making decisions that actually improve the product.
Frequently Asked Questions
How Do Hackathon Prototypes Translate to Long-Term Product Roadmaps?
Hackathon prototypes inform long-term roadmaps by providing quick market validation and guiding feature prioritization; I use iterative results to filter viable concepts, schedule refined development, and align stakeholder bets with evidence from rapid testing and team learning.
Can Intellectual Property Be Secured for Rapid Hackathon Builds?
Yes — I can secure IP for rapid hackathon builds: I recommend Patent strategies early and Confidential agreements with teammates, documenting iterations, preserving prototypes’ novelty, and filing provisional patents to lock priority while refining designs post-event.
What Safety Precautions Are Needed for Quick Additive Manufacturing?
Wear PPE protocols—gloves, eye protection, and respirators—and verify a proper Ventilation setup with filtration. I’ll also monitor temperatures, secure machines, use fire-safe materials, and run short test prints before full production.
How Do Remote Teams Coordinate Physical Prototyping Logistics?
I coordinate remote physical prototyping logistics by organizing distributed shipping, vetting vendors via vendor matchmaking, scheduling build windows, sharing BOMs and CAD, and tracking shipments so we’ll avoid delays and sync assembly across time zones.
What Funding or Resources Support Post-Hackathon Development?
About half the teams generated 51 prototypes; I’ll point you to grants programs, accelerator funding, and mentorship networks that provide seed money, workspace, fabrication access, and expert guidance so teams can continue post-hackathon development.