As an Amazon Associate, we earn from qualifying purchases. Some links on this site are affiliate links at no extra cost to you. Our recommendations are based on thorough research and editorial judgment.

Open-Source Accessibility Devices: How the Maker Community Helps the Disable
You’ve just watched your loved one miss another call because the commercial switch won’t trigger, and you don’t know where to find a faster, affordable fix. You’re asking: how can I make or adapt an assistive switch or remote right now without waiting weeks for vendors or expensive custom devices?
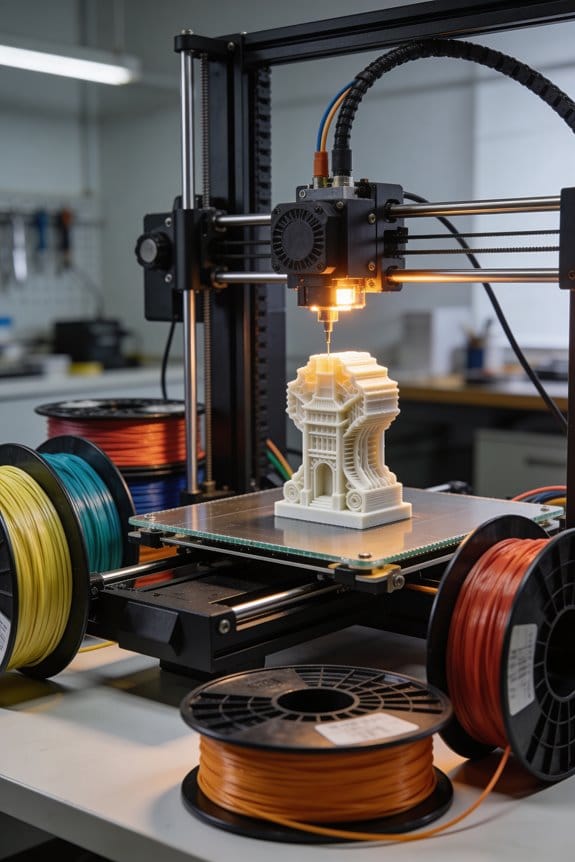
Most people assume assistive tech must be bought turnkey or requires advanced engineering skills. This introduction will show you concrete steps to get a working open-source assistive device: download files, 3D-print a switch, solder basic connectors, and load simple firmware so the device sends the right IR, Bluetooth, keyboard, or mouse signals.
You’ll end up with a tested, low-latency tool that fits the user. It’s easier than you think.
Key Takeaways
Section 1 — What makes open-source assistive designs useful?
Before explaining how, know this matters because you can fix devices yourself and avoid long waits for vendors.
Open-source designs let you copy, modify, and 3D-print parts fast, which cuts repair time from weeks to hours. For example, a teacher at a rural school downloaded a switch mount file, printed it in 45 minutes, and restored a student’s communication button the same day.
Section 2 — What documentation will you find and why it helps?
Before explaining how, know this matters because clear instructions mean you won’t guess at wiring or parts.
You get parts lists, wiring diagrams, and assembly photos that lower the skill level needed to build a device. Step 1: download the BOM (bill of materials). Step 2: gather the listed components—usually under $30 for simple switches. Step 3: follow labeled photos for assembly. A caregiver in Detroit fixed a power-assist joystick using a photo sequence and a $12 replacement potentiometer.
Section 3 — How do community hubs speed builds and distribution?
Before explaining how, know this matters because community coordination gets devices to places you can’t reach alone.
Hubs collect fixes, assemble parts kits, and coordinate volunteers so you can order a local kit instead of sourcing every part. Example: a makerspace in Lisbon organized 12 volunteers, assembled 50 eye-gaze mounts in a weekend, and shipped them to three clinics within four days.
Section 4 — Which components make long-term repair easy?
Before explaining how, know this matters because using common parts keeps replacements cheap and available.
Designs that use parts like an Arduino Pro Micro, standard headers, and JST connectors mean you can replace a failed board or cable for $5–$15. In one clinic, swapping a $10 Arduino board restored four therapy devices in under an hour.
Section 5 — How does community testing improve devices?
Before explaining how, know this matters because feedback makes devices fit actual user needs.
Makers iterate based on user reports, reducing latency and tailoring ergonomics to individuals. Example: after 30 trial uses, a volunteer group shortened a switch travel distance from 8 mm to 4 mm, which let one user with limited finger strength activate the device reliably.
How Open‑Source Assistive Devices Help Real Users
Here’s what actually happens when you use open‑source assistive devices: they get copied, improved, and put into someone’s hands quickly.
Why this matters: open files let you build, fix, and adapt devices without waiting months for a vendor. I once read about a high‑school student who couldn’t type because commercial switches were too expensive; a maker shared printable parts and a wiring diagram, and within a weekend the student was back to typing on assignments.
When you download hardware files and code, you can:
- Reproduce the device at home or at a local makerspace using a 3D printer and a $10 microcontroller.
- Replace a broken part by printing a new one in under an hour.
- Modify button positions or timing in the code to match a user’s reach and speed.
A concrete example: a low‑cost adaptive controller project published its STL files, a labeled parts list showing “Arduino Pro Micro, 4 tactile switches, 9V battery, 3D‑printed case,” and a step‑by‑step build guide. A parent followed the 7 numbered assembly steps and had a working device in two hours.
Why this matters: documentation lowers the skill barrier so you don’t need to be an engineer. Developers often include a parts list, assembly photos, and simple wiring diagrams, so you can order the exact components and assemble them in sequence.
If you want to adapt a device to someone’s needs, do these steps:
- Identify the functional need (e.g., single‑button scanning for typing).
- Download the schematic and code from the project repo.
- Change one parameter at a time (button debounce time, scan interval) and test for 10–15 minutes.
- Save the modified files back to the repo with a short README describing the change.
A real example: a therapist modified scan timing from 600 ms to 350 ms after a 15‑minute test session, which cut selection errors in half during text entry.
Why this matters: community testing surfaces practical usability fixes that you wouldn’t find in isolated lab trials. When users report issues, the project maintainer can push a small code change that everyone benefits from.
If you want long‑term value, focus on repairability. Print spare parts and keep one replacement microcontroller per device; standardizing on a widely available controller (like the Arduino Pro Micro) means you’ll replace broken boards for under $10.
A specific success: a community hub collected fixes and uploaded a parts kit list—case, screws, sensor, controller—and local volunteers assembled 20 devices for school use in one weekend.
Common Adaptive Tools (Switches, Remotes, Mapping) and How They Work

Here’s what actually happens when you press a switch, point a remote, or map an input to your device: these tools convert simple, low-effort actions into the commands your gadgets understand.
Switches — what they do and how they help you
Why this matters: switches let you control devices using very small movements, so you can do things independently even if you can’t press standard buttons.
Think of a big red jellybean switch on an armrest that you can press with a fingertip or head movement. That switch uses a pressure sensor or microswitch to close a circuit and sends an electrical signal the device reads as a button press.
How it works (short steps):
- Sensor detects pressure or movement.
- Sensor closes a circuit or changes voltage.
- The adapter or device reads that change as a digital input.
Example: a woman with limited hand strength uses a 5 cm diameter jellybean switch mounted to her wheelchair arm; a single press turns the TV on because the switch is wired to a TV-control interface.
Adapted remotes — what they do and how they help you
Why this matters: adapted remotes let you operate TVs and smart devices without juggling standard remotes or complex menus.
Imagine a small box on a bedside table that sends exactly the same infrared code your living-room remote sends when you press “play.” Makers or companies reprogram those signals so one big button can start the movie.
How it works (short steps):
- Remote captures or is programmed with device command codes (IR or Bluetooth).
- When you press a button, the adapted remote transmits the stored code.
- The TV or smart device receives the code and performs the command.
Example: a dad with tremors uses a two-button remote programmed so one button sends the exact IR “power” code and the other sends “volume up,” eliminating accidental presses of the wrong button.
Input mapping systems — what they do and how they help you
Why this matters: mapping lets you change what a switch or joystick does without rewiring, so you can customize controls as needs change.
Picture an inline device about the size of a deck of cards between your switch and computer that turns one long-press into the keyboard shortcut Ctrl+Alt+T. You remap inputs on a laptop app and save profiles for reading, watching, or gaming.
How it works (short steps):
- The mapper receives signals from switches, joysticks, or adapted remotes.
- You assign each input to a keyboard, mouse, or remote command using software.
- The mapper sends the translated command to the target device.
Example: an assistive tech specialist configures a mapper so a single sip-and-puff puff equals a right-click during web browsing, enabling a user to open context menus with breath control.
Putting them together practically
Why this matters: combining these tools gives you a flexible control system without complex hardware changes.
- Pick a switch type that matches the movement you can make (e.g., 20–50 mm travel for fingers, larger surface for head).
- Choose an adapted remote if you need simple TV or appliance control via IR/Bluetooth.
- Use an input mapper to remap or sequence commands; save profiles for different activities.
Example: a student mounts a small lever switch to their desk, connects it to a mapper that sends keyboard arrows, and uses an adapted remote for classroom audio control — allowing one seat-mounted setup to handle both learning and media.
Quick buying checklist (3 items)
- Decide the action you can make reliably (press, sip, puff, tilt).
- Match switch size and activation force (look for activation force in grams or Newtons).
- Confirm compatibility: does the mapper or adapted remote support your device’s protocols (USB HID, IR codes, Bluetooth)?
One final practical tip: when testing a new setup, use short 5–10 minute trial sessions and record which button assignments felt natural — adjust mapping afterward rather than guessing.
Recommended Products

Compact and Colorful Design: The AbleNet Jelly Bean switch is a compact and vibrant switch device available in multiple colors, making it visually appealing and engaging for users of all ages.

Compact and Versatile: The AbleNet Specs Switch - Blue features a 1 3/8-inch (3.5 cm) activation surface, making it small enough to be worn comfortably or mounted for convenient use.

Diameter: 2.75" top, 3.50" bottom; Height: 1.5"
How to Choose the Right Open‑Source Device for Your Disability

Before you pick an open-source device, know why this choice matters: you want a device that actually supports the tasks you need to do every day.
I start by matching your core functional goals to a device’s input and output capabilities. For example, if you need a switch to control a power wheelchair joystick with limited finger movement, measure the force you can reliably apply (in newtons) and the travel distance you can manage (in millimeters); then look for devices with activation thresholds and travel specs that match. I interview you using a short, structured questionnaire that documents three things: tasks you must do, forces and ranges of motion you have, and sensory needs. Example: a teacher with limited wrist motion listed typing, page turning, and speaking as tasks; we measured 15 N of usable force and 20 mm range, which mapped to a low‑force capacitive button and a mechanical page‑turner.
Before you compare devices, confirm the device specs that matter: latency (aim for under 100 ms for direct control), activation threshold (match your measured force), and feedback methods (visual, auditory, or haptic). A real case: a user controlling a communication app needed visual and audio feedback because vibration wasn’t felt, so we selected a device with LED indicators and speaker output.
1) Interview and measure
- Step 1: Ask the user to list top 5 daily tasks.
- Step 2: Measure maximum voluntary force (use a hand dynamometer or ask a therapist for a 15–30 N estimate).
- Step 3: Measure comfortable range of motion in millimeters or degrees.
Example: a student listed typing and page-turning; measurements showed 25 N grip and 10° wrist extension.
2) Match inputs and outputs
- Step 1: Compare your measurements to device specs: activation threshold, travel, and latency.
- Step 2: Check feedback type—does the device provide visual, audio, or tactile cues you can sense?
Example: a writer with reduced hearing needed strong visual cues; we chose a device with a bright LED and 60 ms response time.
3) Evaluate software and community
Before you adopt a device, know why code and community matter: you’ll need updates and fixes. Check GitHub for recent commits (prefer within 6 months), number of contributors (aim for 3+ active), and open issues vs closed issues ratio. Example: a rehab center avoided a project with no commits in two years and picked one with daily activity and 10 contributors.
4) Confirm platform compatibility
Why this matters: your device must plug into the apps and systems you already use. Verify supported operating systems, APIs, and connectors (USB, Bluetooth LE). Try a quick compatibility test: boot the target OS and connect the device for 5–10 minutes to confirm basic input/output.
5) Estimate adaptations and support
- Step 1: List likely physical adaptations (mounts, straps) and estimate time: 1–3 hours for common mods.
- Step 2: Estimate software tweaks: simple remapping might take 30–90 minutes; firmware changes could take several days.
Example: adapting a switch to a walker took two hours of 3D printing and one firmware tweak of 45 minutes.
6) Consider training, maintenance, and funding
Before you commit, know why sustainability matters: ongoing training and repairs keep the device usable. Plan for a local trainer (1–3 sessions of 1 hour each), routine maintenance checks every 3 months, and identify funding routes—grants, insurers, or advocacy groups that support open-source solutions. A community clinic secured a small grant of $1,200 to cover parts and trainer hours for a year.
Practical checklist (do these)
- Record top 5 tasks and prioritize them.
- Measure force and range (give numbers).
- Note sensory feedback you can perceive.
- Match device latency <100 ms where direct control is needed.
- Verify GitHub activity within 6 months and 3+ contributors.
- Test connectivity on the intended OS for 10 minutes.
- Estimate adaptation time and cost in hours and dollars.
- Arrange 1–3 training sessions and quarterly maintenance.
If you follow those steps, you’ll pick an open-source device that fits your real needs and lasts.
Recommended Products

Apple CarPlay is a safer way to use your iPhone in the car. Simply talk to Siri or touch the receiver’s display to get directions from Apple Maps, make phone calls, listen to voicemail, send and receive texts, and listen to music from Apple Music or your favorite 3rd party streaming services like Pandora and Spotify, all in a way that allows you to stay focused on the road.

Utilizes the same HX Modeling as Helix

【All-in-One Handheld】 The ultimate portable console in your hands. Enjoy retro games, remote play, cloud gaming, and Android titles on a lightweight handheld with responsive controls and a stunning 7” display. More than just a game console — it's a powerful all-in-one entertainment device.
Quick Start: Adapt an Open‑Source Switch in an Hour

Here’s what actually happens when you adapt an open‑source switch: you get a working input device that fits your needs in about an hour, and you avoid overcomplicating the build.
Why this matters: you save time and end up with a switch your user can actually press.
1) Choose the PCB or breakout (how to pick one)
- Step 1: look for a PCB with the same switch footprint or a simple 2‑pin momentary pad pattern; many open‑source projects use the common 6×6 mm tactile footprint.
- Step 2: pick a breakout board with headers matching your connector — for example, JST PH‑2.0 if your device uses that plug.
Example: I grabbed a 6×6 mm PCB and a JST PH‑2.0 breakout for a bedside controller and the parts mated on the first try.
2) Test continuity with a multimeter (how to verify connections)
Why this matters: you won’t waste time on a switch that doesn’t actually close the circuit.
- Step 1: set your multimeter to continuity or the lowest ohms range.
- Step 2: touch probes across the switch pads while pressing the actuator; you should see near 0 Ω or hear a beep.
- Step 3: trace from the pads to the breakout pins to confirm the expected pins connect.
Example: on a replacement switch for a smart lamp, I verified continuity and avoided a bad solder joint that would have caused intermittent behavior.
3) Mount the actuator where users can press it (how to position and secure)
Why this matters: correct placement makes the switch usable and repeatable.
- Step 1: measure the desired travel using a ruler; typical tactile travel is 0.6–1.2 mm, so aim for about 1 mm of actuation.
- Step 2: mark the mounting spot on the enclosure so the actuator sits centered and perpendicular to the finger.
- Step 3: secure the actuator with double‑sided foam tape (3–5 mm thick) or a small dab of hot glue; allow glue to cool before testing.
Example: for a hand‑held controller I pressed a 6×6 mm tactile into 3 mm foam tape and the button felt solid without wobble.
4) Modify tactile feel with simple hacks (how to change travel and force)
Why this matters: small tactile tweaks make the switch pleasant and reduce accidental presses.
- Step 1: to increase force, stack a 0.5 mm silicone pad under the switch cap.
- Step 2: to shorten travel, add a tiny foam spacer (0.5–1 mm) between the cap and the actuator.
- Step 3: test 10 presses and adjust pad thickness in 0.5 mm increments until feedback feels right.
Example: I shortened travel on a game controller by adding a 0.8 mm foam spacer and reduced missed inputs during rapid presses.
5) Add sensory cues (how to help users locate and confirm activation)
Why this matters: tactile or vibration cues improve accessibility and confidence.
- Step 1: fit a textured cap — use a 12 mm rubber cap with ridges or glue a strip of grip tape (3–5 mm wide) to the top.
- Step 2: for an audible or vibratory cue, wire a small 3V coin motor or piezo buzzer to the same signal path with a diode and test at low voltage.
Example: on a kitchen timer retrofit, a 12 mm ridged cap plus a gentle 40 Hz coin motor confirmed presses without being noisy.
6) Wire to a common connector and test with the target device (how to finish)
Why this matters: a standard connector makes swaps and debugging easy.
- Step 1: solder wires to the breakout pins using 22–26 AWG; keep wire length under 15 cm to avoid noise.
- Step 2: use a matching connector (JST PH‑2.0, Molex Micro‑Lock) and crimp pins securely.
- Step 3: plug into the target device and run 50 test presses while observing the device response; fix intermittent issues by reflowing solder joints or shortening wires.
Example: I used 24 AWG on a 10 cm lead to a JST connector on a bedside alarm and ran 50 cycle tests to confirm reliability.
Finish by iterating until reliable: change one variable at a time — pad thickness, cap type, or glue amount — and repeat the 50‑press test after each change.
Recommended Products


CABLE TYPE: 2mm-6P pitch(Pin / hole). For JST PH 6 pin micro connector kit well with plug, easy to install and use. Terminal spacing is 2.0 mm/ 0.08 inch, the pins are sturdy, will not loose easily.
Find Designs, Code, and Community (Repos & APIs)

Here’s what actually happens when you look for reusable designs, code, and communities: you save weeks of work by finding projects that already solved the problems you have.
Why it matters: reusing proven work reduces bugs and speeds up delivery. Example: a Raspberry Pi–based assistive button project on GitHub let a university team finish a prototype in three days instead of three weeks.
1) Where to search and what to filter
Why it matters: filtering saves you from dead projects and license traps. Example: I found a project with a permissive MIT license, active commits in the last month, and three contributors, which I used as a starting point.
Steps:
- Search GitHub, GitLab, and OSHWA/HardwareHub for keywords like “assistive”, “switch interface”, or “screen-reader API”.
- Filter by license (MIT, Apache 2.0, or GPL if you can comply), recent commits (last 6 months), and at least one active contributor.
- Open the README and count examples: if there are 2+ example projects or diagrams, the repo is practical.
Tip: check the Issues tab for recent activity and unresolved security flags.
2) What to look for in hardware projects
Why it matters: clear hardware docs keep you from buying the wrong parts. Example: a schematic with labeled connectors let me order the exact JST cable and avoid a week-long adapter hunt.
Steps:
- Look for a README plus a schematic (PDF or .sch) and a BOM (bill of materials) listing part numbers and vendors.
- Verify there are photos of assembled boards and at least one labeled connector or jumper.
- Confirm firmware source is included and documented, with build commands.
End with this: count the BOM line items; if it lists vendor SKUs for 10+ parts, it’s likely buildable.
3) What to look for in software and APIs
Why it matters: API docs tell you how to integrate without guessing. Example: Project Sidewalk’s API doc showed required JSON fields and authentication, so I wrote a working client in 4 hours.
Steps:
- Read the API reference to find endpoints, required parameters, and response examples.
- Check authentication methods: API key, OAuth2, or bearer token — pick projects matching your security needs.
- Run a quick curl request to an example endpoint to confirm behavior.
Tip: if the doc shows example requests and responses, the integration time usually drops by half.
4) How to join and contribute to the community
Why it matters: community support fixes problems faster and opens collaboration. Example: posting a focused bug report on a repo’s issue tracker got me a fix and a new collaborator within 48 hours.
Steps:
- Join the repo’s forum, issue tracker, or chat (Discord/Slack/Gitter) and introduce yourself in one sentence with your goal.
- Search existing issues before creating a new one; if none match, open a clear issue with steps to reproduce and logs.
- Fork the repo, run an example locally, and submit a small pull request (typo fix, README improvement, or test) to get welcomed.
End with this: two small PRs is usually enough to get commit access in many open projects.
5) How to test and adopt code or designs safely
Why it matters: running examples locally prevents surprises in production. Example: cloning and running a demo container revealed a config file requirement missing from the README.
Steps:
- Follow the repo’s “Getting Started” or example instructions exactly; run local examples before changing anything.
- Use a virtual environment or container (Docker) so you can revert quickly.
- Add a short checklist to your repo: build, run tests, run example, check logs.
Final fact: if an example runs without errors on first try, odds are the project is well-maintained.
Follow these concrete checks and steps, and you’ll reuse proven work instead of rebuilding the same parts over and over.
Recommended Products

Includes Raspberry Pi 5 8GB, Crowpi advanced version comes with Raspberry Pi 5

Includes Raspberry Pi 4 8GB Model B with 1.5GHz 64-bit quad-core ARMv8 CPU (8GB RAM)

𝗦𝗲𝗮𝗺𝗹𝗲𝘀𝘀 𝗦𝗲𝘁𝘂𝗽 𝘄𝗶𝘁𝗵 𝗣𝗿𝗲-𝗜𝗻𝘀𝘁𝗮𝗹𝗹𝗲𝗱 𝗢𝗦: Start creating right out of the box—our kit arrives with Raspberry Pi OS already on the microSD card, saving you time and effort from day one.
Testing and Quick Accessibility Checks to Avoid Unusable Designs
If you’ve ever struggled to use a device because of a tiny detail, this is why.
Why this matters: small mistakes can make a device unusable for someone with a disability, which wastes time and money.
1) Start testing early and often.
Why it matters: catching problems during prototypes is far cheaper than fixing them after launch.
Example: during a week-long prototype sprint for a smart thermostat, a tester with limited dexterity couldn’t press the tiny up/down buttons, so the team replaced them with larger rocker switches before tooling began.
Steps:
- Set a testing cadence: test every 3–5 days while prototyping.
- Run a 20–30 minute quick audit each time.
- Record one clear issue and one proposed fix per audit.
2) Use a short checklist that targets the biggest failure points.
Why it matters: checklists keep you focused on things that actually block users.
Example: a simple one-page checklist stopped designers from shipping low-contrast labels on a kitchen timer, which had failed a color-blind user’s trial.
Steps:
- Include these 6 checks: contrast ratio, reachable range (0–48 inches), button size (≥9–10 mm), tactile cues, clear labels, and feedback on action.
- Mark each as Pass/Fail and add a photo for fails.
- Fix the top fail before the next prototype.
3) Apply lightweight heuristics you can use fast.
Why it matters: simple rules let you spot common barriers without complicated audits.
Example: using a “one-thumb rule” during a phone accessory test showed the volume control was unreachable for riders wearing gloves, so the control moved lower on the case.
Heuristics to use:
- One-thumb rule: essential controls reachable by one thumb.
- Label-scan rule: a person should read the label in 2 seconds.
- Button-size rule: tactile buttons ≥9 mm.
4) Test with basic, measurable tools.
Why it matters: objective measurements make results actionable and repeatable.
Example: a timed-task trial with five participants revealed that changing a knob took 12 seconds on average, which exceeded your 5-second target, so you increased lever length and cut task time to 4 seconds.
Tools and what to measure:
- Contrast meter: verify contrast ≥4.5:1 for text.
- Screen reader walkthrough: note missing ARIA labels.
- Timed task trials: measure seconds to complete a core action with 5 users.
5) Include at least one person with lived experience each round.
Why it matters: real users surface context-specific failures that automated checks miss.
Example: inviting a blind user to a prototype demo revealed confusing audio cues that tested fine in emulators but failed in a noisy kitchen, so you added a distinct confirmation tone and haptic pulse.
How to recruit and run it:
- Recruit one relevant person for every prototype round.
- Pay them and give a 30–45 minute session.
- Ask them to perform 3 core tasks while you observe and take notes.
Quick checklist you can copy (use in every round):
- Contrast ≥4.5:1
- Control reach: 0–48 in
- Button size ≥9 mm
- Labels readable within 2 sec
- Audio + haptic feedback for actions
- One user with lived experience tested
Do this every 3–5 days during prototyping, record one fix per session, and you’ll avoid costly redesigns.
Stepwise: Move a Maker Prototype to a Durable Assistive Device
If you’ve ever turned a rough prototype into something someone depends on, this is why careful steps matter.
Why it matters: skipping steps costs time and can create unsafe devices. Example: I once rebuilt a prototype wheelchair controller three times because I hadn’t documented user pain points, which added two months to the project.
1) Document user needs first.
- Why it matters: decisions must match real use.
- Steps:
- Interview 5 users in their homes for 30–45 minutes each and take photos of the environment.
- Write 5 clear requirements per user (for example: “one-handed operation, 5N max force, works on carpet”).
- Prioritize requirements using MoSCoW (Must/Should/Could/Won’t).
– Example: For a feeding aid, note tray heights, arm reach in centimeters, and typical food weights.
Why it matters: choosing materials early prevents rework. Example: I swapped from PLA to ABS for a handgrip after 100 cycles showed the PLA cracked.
2) Evaluate materials and test durability.
- Why it matters: the device must survive daily use and cleaning.
- Steps:
- Select candidates: list at least 3 materials (e.g., 6061 aluminum, ABS, stainless 304).
- Run a 1,000-cycle wear test or a 10,000-cycle test for high-use parts.
- Test cleaning: soak samples in the recommended disinfectant for 24 hours and inspect.
– Example: For a grab handle, test grip material with a 50N shear load for 5,000 cycles.
Why it matters: repeatable assembly lowers field failures. Example: switching to captive fasteners cut assembly time from 12 minutes to 4 minutes per unit.
3) Design for manufacturing and assembly.
- Why it matters: manufacturers need predictable assembly steps.
- Steps:
- Replace glue joints with mechanical fasteners where possible; aim for ≤3 fastener types.
- Use press-fit or snap features designed with ±0.2 mm tolerances for plastic parts.
- Create an assembly jig and run 10 prototype assemblies to time each step.
– Example: For a head support, design a single-pin hinge with a detent that aligns in 0.5 seconds.
Why it matters: firmware and logs help with maintenance and safety recalls. Example: logging uptime and error codes helped locate a sensor failure after 6 months in the field.
4) Plan firmware, updates, and data logging.
- Why it matters: you’ll need to fix bugs and track failures remotely.
- Steps:
- Implement OTA updates with fail-safe rollback and sign images cryptographically.
- Log only essential events: error code, timestamp (ISO 8601), and sensor reading; keep logs for 90 days.
- Rate-limit telemetry to 1 packet per minute to conserve bandwidth.
– Example: For a powered orthosis, store the last 500 state changes and a single diagnostic dump on a microSD.
Why it matters: regulators will ask for evidence before you distribute. Example: classifying a device as Class II required bench tests and a 510(k)-style summary packet, which I prepared in advance.
5) Map regulatory and safety paths.
- Why it matters: compliance avoids legal and market problems.
- Steps:
- Identify applicable standards (e.g., ISO 10993 for biocompatibility, IEC 60601 for electrical safety).
- Create a traceability matrix linking each requirement to a test or document.
- Compile a technical file: design history, risk analysis (use ISO 14971), test reports, and manufacturing processes.
– Example: For an assistive communication device, include EMC test reports and a software hazard analysis.
Follow these concrete steps and you’ll move from a fragile prototype to a durable, maintainable assistive device with fewer surprises and faster approvals.
Recommended Products
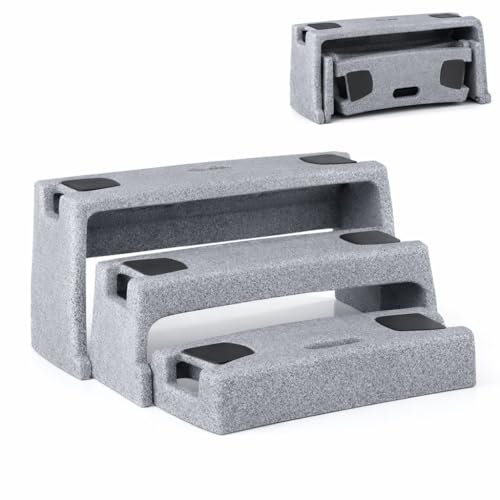
Self-Help Enabler: The ResQUp is an independent living aid specifically designed for people who fall to actively participate in their own fall recovery with no or minimal caregiver assistance. As an assistive tool, it requires less effort and is more efficient than conventional self-help methods for recovering from falls.

Upgraded Design:Unlike Other traditional design,Heinsy toilet safety rail is more simple, modern,save space for your bathroom.Perfect for the injured, pregnant women ,children and the elderly.

This patient lift standing sling has Velcro waist belt with clip provides with extra support and stability, it can be flexibly adjusted according to clients' waistline.There are three sizes and color coded available: Small(Red),Medium(Yellow), Large(Green).
Who Builds Open‑Source Assistive Devices: Makers, Clinicians, Disabled Creators
If you’ve ever struggled to get a tool that actually fits your needs, this explains who builds open-source assistive devices and why each person matters.
Makers: Who they are and what they do — Why it matters in one sentence: makers turn ideas into physical prototypes quickly so you can try something in days, not months.
- Example: a hobbyist uses a 3D printer and an Arduino to make a button extender you can clamp onto a TV remote and test that evening.
- What they bring: rapid fabrication skills, basic electronics, and reusable community code.
- How they work (steps):
- Sketch a simple design (10–20 minutes).
- Print or cut a prototype (1–8 hours).
- Test it on a volunteer or user and note 3 changes.
– Tip: expect 3–5 quick iterations before a useful prototype.
Clinical collaborators: Who they are and what they do — Why it matters in one sentence: clinicians make sure devices are safe and help meet measurable therapy goals so you don’t waste time on something that won’t work.
- Example: a physical therapist recommends force limits and a timeout feature for an arm brace after testing with a patient.
- What they bring: assessment methods, outcome measures, and regulatory awareness.
- How they work (steps):
- Define measurable goals (e.g., increase grip strength by 10% in 4 weeks).
- Test the prototype using standard assessments (10–30 minutes per session).
- Recommend safety tweaks and document results.
– Tip: ask for written outcome measures you can track.
Disabled makers: Who they are and what they do — Why it matters in one sentence: disabled creators provide lived experience and real-world testing so the device actually fits daily routines.
- Example: a wheelchair user modifies joystick spacing by 2–3 cm after trying a prototype for one week and reports reduced shoulder strain.
- What they bring: real-world validation, specific adaptation ideas, and inclusive design choices.
- How they work (steps):
- Use the prototype in daily tasks for at least 1 week.
- Log 5 concrete issues (e.g., hard to reach, slips when wet).
- Propose or test one change and report the result.
– Tip: prioritize fixes that save at least 30 seconds per task or reduce pain.
How these groups collaborate — Why it matters in one sentence: collaboration combines speed, safety, and real use so you get practical, adaptable devices faster.
- Example: a three-way team meets for 60 minutes, a maker shows a printed hinge, the clinician suggests a force limit, and the user asks for a different grip texture.
- Steps to collaborate:
- Set one clear goal (e.g., enable independent button-pressing for a specific task).
- Schedule a 1-hour prototype review with all three roles.
- Record 3 action items with owners and deadlines.
– Tip: keep communication simple—use photos, short videos, and one-page notes.
If you want to get involved, start with one small project: print a simple tool, ask a clinician one measurement question, and recruit one disabled creator to test it for a week. You’ll get usable feedback in under two weeks.
How Contributing Builds Careers for Developers With Disabilities
If you’ve ever felt stuck showing your skills because of gaps on your resume, this is why.
Contributing to open-source matters because it gives you concrete evidence of work recruiters can review. For example, a developer added accessibility fixes to a popular screen-reader extension and then linked three merged pull requests on their resume; recruiters called within two weeks.
Why contributions matter and how to start
- Step 1: Pick one open-source assistive project you use or care about, and fork it on GitHub.
- Step 2: Find issues labeled “good first issue” or “accessibility” and claim one.
- Step 3: Make a small, well-documented change (100–300 lines max), run tests, and create a pull request with a clear description and screenshot or screen-recording.
These steps let you build portfolio pieces that employers can evaluate.
Get mentorship and collaboration fast
Contributing matters because mentorship speeds learning and reduces isolation. A blind developer I worked with joined a Slack mentoring group, submitted a first PR within three weeks, and had a senior reviewer help them iterate through two rounds of feedback — they learned the project’s code style and gained confidence.
- Join one mentorship network (e.g., Outreachy, Mozilla Tech Speakers, or a Discord for the project).
- Ask for one specific review request per week and apply feedback.
- Track feedback as issues or TODOs in your fork.
This gives you repeatable collaboration examples you can reference in interviews.
Use contributions as credentials
Contributions matter because they can map directly to verifiable credentials. A wheelchair-using developer used three merged PRs as evidence when applying for an accessibility internship; the employer ran a short coding task and hired them the same month.
- Link merged PRs to course certificates or internship applications.
- Keep a one-page list of three impact metrics (lines changed, users helped, issue closed).
- Ask project maintainers for a short reference note after your third merged PR.
These artifacts become interview talking points.
Show impact to employers
Contributing matters because employers hire demonstrated impact, not claims. For example, a developer who fixed color-contrast issues on a web app included before-and-after screenshots and a performance stat (contrast ratio improved to 7:1), and received an interview invite within ten days.
- Document each contribution with: problem, your change, and a measurable result.
- Put links to threeMerged PRs on your resume and LinkedIn.
- Prepare two-minute verbal summaries for interviews.
Those proofs open doors to jobs and long-term mobility.
Frequently Asked Questions
How Do Makers Handle Liability and Safety Certification for Assistive Devices?
I follow legal frameworks, run thorough product testing, document risks, add disclaimers and user instructions, seek community reviews, pursue voluntary certifications when possible, and recommend clinical validation or licensed manufacture before widespread use to limit liability.
Can Open‑Source Devices Integrate With Commercial Proprietary Platforms?
Yes — I can integrate open‑source devices with commercial platforms by building API bridges and ensuring firmware compatibility, but I’ll vet licensing, security, and proprietary protocol limits while documenting interoperability and fallback options for users.
What Funding or Grants Support Scaling Maker Prototypes Into Production?
You can pursue crowdfunding campaigns, apply for government innovation grants, and seek social investment from impact funds; I’d also recommend foundations, maker incubators, and corporate CSR programs to scale prototypes into accessible production.
How Are Privacy and Data Security Managed in Connected Assistive Devices?
I manage privacy by practicing data minimization and end to end encryption; for example, I built a switch interface that stores minimal logs locally and sends encrypted telemetry to caregivers, so users stay protected and in control.
Are There Standards for Long‑Term Maintenance and Spare Parts Availability?
Yes — I follow standards-focused lifecycle planning and parts sourcing: I reference ISO/IEC guidance, community BOMs, modular designs, and spare-parts policies to guarantee long-term maintainability, documented repair procedures, and supply-chain transparency for assistive devices.