As an Amazon Associate, we earn from qualifying purchases. Some links on this site are affiliate links at no extra cost to you. Our recommendations are based on thorough research and editorial judgment.
Exploring the Voron Design Community: Crowdsourced Printer Engineering
You’ve bought parts for a DIY 3D printer and now the motor won’t fit the carriage and the heatbed wiring doesn’t match the PCB. You’re left juggling spec sheets, forum threads, and partial builds asking which parts actually work together. Most people assume any quality component will combine cleanly and spend weeks troubleshooting mismatched assemblies.
This piece shows exactly which Voron parts and tested assemblies pair reliably, how matching motor, belt, and heatbed specs prevents fit and firmware issues, and which model choices—V0, V2, Trident—match your size and speed goals.
You’ll be able to pick a compatible BOM and assembly path that avoids trial-and-error. It’s easier than it looks.
Key Takeaways
Here’s what actually happens when you join the Voron community: you get repeatable, near-production printer builds because people share exact BOMs, validated assemblies, and step-by-step build guides. Why this matters: you won’t waste nights guessing parts. Example: a builder in Ohio posted their parts list, build photos, and settings after printing 100 functional brackets, and you can copy those specifics.
If you’ve ever swapped a mod without testing, this explains the feedback loop you’ll rely on: fixes and mods get validated fast on the forum and Discord with photos, vendor part numbers, and test-print results that show before-and-after metrics. Why this matters: you avoid installing a mod that warps prints. Example: someone replaced a belt tensioner and posted tensile-test photos plus a 50mm calibration cube print to prove fit.
Before you pick parts, use the standardized BOMs and sourcing notes to cut trial-and-error down to hours instead of weeks. Why this matters: you can buy compatible parts that work together. Example: the community BOM lists a specific GT2 belt SKU and three proven pulleys, and shows the slicer steps that produced a 20mm tolerance benchy.
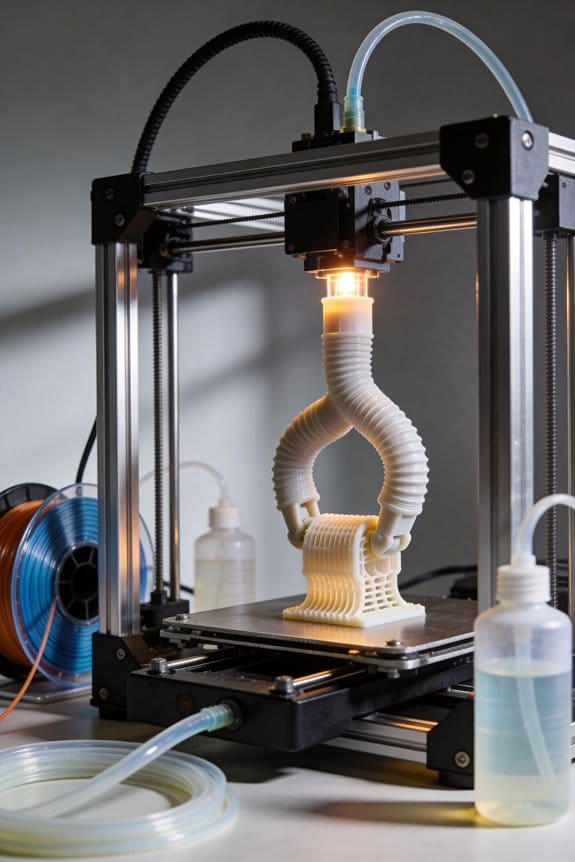
Think of model selection like choosing a tool for the job: V0, V2, Trident, and CoreXY are picked by part size, speed, and material you want to print. Why this matters: the wrong kinematics will frustrate you. Example: if you need a 300×300×300mm ABS enclosure at 60 mm/s, the community recommends a CoreXY variant with a Trident gantry and links to a build that prints 200 functional ABS brackets.
If you’ve ever contributed and felt lost, follow the community contribution workflow: open a GitHub issue or PR, then post quick Discord feedback with CAD files, annotated photos, and multi-sample test results. Why this matters: your change will be reviewed and adopted quicker. Steps:
- Create a GitHub issue with a clear title and attach the CAD.
- Make 3 test prints showing the change, photograph them with a ruler, and list slicer settings.
- Post the issue link to the Discord channel for rapid feedback.
Example: a contributor fixed a mounting flange, submitted the CAD, uploaded three printed samples with dimensions, and had the PR merged within 72 hours.
Final takeaway: use the shared BOMs, validate mods publicly with photos and numbers, pick the model that matches part size and material needs, and follow the GitHub + Discord contribution process for fast results.
Why Voron Matters for Open‑Source 3D Printing
If you’ve ever bought a cheap kit and spent weeks fixing it, this is why Voron matters for open-source 3D printing.
Why it matters: you get a design you can build that actually behaves like a production machine, not a project that constantly breaks. For example, a friend built a Voron 2.4 and went from failed first-layer prints to consistent 0.1 mm quality in under three weekends, using only the community docs and parts list.
How Voron lowers the barrier
Why it matters: clear parts lists and tested assemblies cut your trial-and-error in half.
1) Follow a shared BOM (bill of materials) with exact part numbers and suppliers.
2) Print the recommended printed parts at 0.2 mm, 20% infill, PETG for strength.
3) Assemble using the documented torque values and cable routing photos.
A real example: the Voron BOM listed a specific NEMA 17 motor (1.2 A, 0.9° step), and when one builder swapped a generic motor for that exact spec, their layer shifts disappeared.
How reproducibility helps your community
Why it matters: repeatable builds let fixes spread quickly so you don’t waste time reinventing solutions.
1) When someone posts a wiring fix, you can apply the exact same steps because your machine matches the reference build.
2) You can test firmware changes using the same endstop positions and belt lengths listed in the docs.
Example: a user reported a Z-wobble pattern; two hours later, the forum had a photo-based correction for the lead-screw coupling and a firmware backlash value to enter.
How improvements spread fast
Why it matters: shared channels make upgrades adoptable the same week they’re posted.
1) Check Discord or the forum for pinned changes before you buy parts.
2) Download the updated STEP file or BOM when someone posts a validated mod.
Example: a community member optimized the cooling duct and posted STL, photos, and print settings; dozens of builders reproduced the improvement within days.
Why clear tech explanations help you learn
Why it matters: when docs explain how components work, you troubleshoot faster.
1) Read the PCB heatbed page to learn why a solid copper PCB heatbed gives faster, more even heating; the docs show target resistance (0.15–0.3 Ω) and wiring diagrams.
2) Follow the auto bed leveling guide that lists sensor type, probe trigger height, and a three-step calibration routine.
Real example: the bed-levelling guide helped one builder reduce first-layer failure from 30% to under 5% by setting probe offsets to +0.2 mm and running a 7×7 mesh.
What you do next
Why it matters: concrete steps get you from reading to printing.
1) Choose the Voron model you like and download its BOM.
2) Order the exact listed electronics, fasteners, and motors.
3) Print the parts with the recommended filament and settings, then follow the assembly guide step-by-step.
Example: follow those three steps and you can go from a pile of parts to a printing machine that reliably hits 0.1–0.2 mm over a weekend.
Final practical tip: when you see a change in the community, check for a validated photo, a part number, and the test print results before you adopt it.
How Voron’s Open Engineering and Contribution Process Works
Here’s what actually happens when you want to contribute to Voron’s engineering process: it matters because clear contribution rules keep designs reliable and make your work more likely to be accepted.
Why this matters in one sentence: accepted contributions make printers safer and save everyone time.
How the governance works — who decides what?
Voron balances volunteer input with a small group of maintainers who review technical choices, and that balance prevents frequent design breakage. For example, a maintainer will reject a mount that breaks belts in testing rather than just asking for tweaks. Read the CONTRIBUTING.md file on GitHub first. It lists the maintainers, their roles, and the areas they oversee.
Where contributions start and what to include
It matters because missing files or weak rationale get PRs closed quickly.
- Start a GitHub issue or a forum thread describing the problem in one paragraph.
- Attach CAD files (STEP and native format) and an annotated photo or screenshot showing the affected part.
- Add test results: temperatures, print settings, and at least three photos of the part under load.
Real example: post a STEP file for a fan shroud, include a 30-minute heat test at 60°C, and show photos of the shroud before and after the test.
How the review and revision flow works
It matters because following the flow prevents wasted time.
- Create a PR from your branch once the issue discussion has rough consensus.
- Expect review comments on fit, tolerances, and material choice; respond within a week.
- Revise files and push changes; reviewers will request another test if needed.
A specific example: a PR for a new extruder mount received comments about screw clearance; the contributor adjusted the hole from 3.5 mm to 3.2 mm and reprinted two samples.
Where discussions happen and how to track decisions
It matters because you want to find the reasoning behind changes later.
- Quick feedback happens on Discord; tag the relevant channel and include a link to your issue or PR.
- Formal decisions are recorded in GitHub issues and pull requests, where you can see timestamps, reviewer names, and test artifacts.
Example: an hour-long Discord thread resolved a fit question, but the final decision was posted as a comment on the GitHub issue with photos and measurements.
How to prepare contributions that get accepted
It matters because clear, tested submissions merge faster.
- Clean files: name layers and objects clearly, remove irrelevant components.
- Document tests: state print settings, material, slicer, and number of samples (min 3).
- Communicate respectfully: answer questions, don’t take critiques personally, and acknowledge reviewer suggestions.
Real example: a contributor who cleaned up their assembly tree, listed Cura 5.0 settings, and attached three load-test photos had their PR merged in 10 days.
Quick checklist before you submit
It matters because you can avoid common rejections.
- Issue opened and linked.
- STEP + native CAD included.
- At least three test photos with settings.
- Revision notes explaining design changes.
If you follow those steps, your contribution will be easier to review and much more likely to be merged.
Voron Design Innovations That Changed DIY Printing
If you’ve ever wrestled with prints that curl, shift, or take forever to set up, this is why.
Voron community ideas changed DIY printing by making your printer act more like a dependable small production machine. They focused on things that cut failures and saved you time, so you get usable parts more often.
Why this matters: you spend less time fiddling and more time making finished parts. Example: a friend replaced a cracked PCB heatbed and went from five failed phone dock prints to ten good ones in a row.
1) How PCB heatbeds cut warping and improve first-layer adhesion
Why it matters: even temperature across the bed keeps plastic from shrinking unevenly and lifting at the corners.
Example: printing a 200 x 200 mm ABS case that used to warp at the corners but sat flat after the upgrade.
Steps:
- Buy a 12 V or 24 V PCB heatbed sized to your build plate (e.g., 200 x 200 mm).
- Mount it with thermal paste or silicone pads and wire it to your printer’s power supply via a MOSFET.
- Calibrate PID in your firmware at your target temp (e.g., 100°C for ABS).
A properly PID-tuned PCB heatbed holds ±2°C across the surface.
2) Why removable build sheets speed up your workflow
Why it matters: you can remove parts without tools and keep printing.
Example: using a spring-steel sheet with PEI, a maker popped off a 50 mm prototype bracket in under 10 seconds between prints.
Steps:
- Choose magnetic or clip-style retention sized to your bed.
- Attach a spring-steel sheet with PEI on one side or use textured PEI.
- After cooling 5–10 minutes, flex the sheet to release the part.
You’ll cut post-print handling time from minutes to seconds.
3) How auto bed leveling makes calibration less painful
Why it matters: automated leveling reduces failed prints from incorrect nozzle height.
Example: a hobbyist who swapped to probe-based leveling stopped re-leveling after every filament change and printed 30 parts without adjustment.
Steps:
- Install a probe (BLTouch or inductive) compatible with your hotend and firmware.
- Configure probe offsets and run a mesh grid (e.g., 3×3 to 7×7).
- Save the mesh and enable it for every print.
With a 5×5 mesh you’ll typically see first-layer height repeatability within 0.05 mm.
4) Why enclosed heated chambers let you use high-temp materials safely
Why it matters: consistent ambient temperature prevents cracking and improves layer bonding for materials like ABS and Nylon.
Example: printing a 120 mm PC fan duct at 120–130°C chamber temp produced no delamination compared with open-air prints that split.
Steps:
- Seal your frame with panels and add a silicone gasket where needed.
- Use an enclosure-safe heater or run the chamber passive from bed and hotend waste heat.
- Target chamber temps: 50–80°C for ABS, 80–100°C for Nylon/PC blends.
You’ll avoid layer separation and reduce internal stress in functional parts.
5) Why mechanical layout and quieter operation matter
Why it matters: less vibration means better surface finish and fewer maintenance headaches.
Example: swapping to coreXY belts reduced ringing on a 150 mm bench clamp print and dropped noise by half.
Steps:
- Pick a rigid frame and tensionable belt paths (GT2 belts).
- Use dampers and well-aligned rails or linear guides to cut vibration.
- Lubricate rails and check belt tension every 50–100 hours of printing.
A stable coreXY or well-built Cartesian setup will keep artifacts under 0.2 mm.
6) How clear documentation helps you avoid mistakes
Why it matters: following documented settings saves trial-and-error time and material waste.
Example: a builder who used published slicer settings for a Voron 2.4 profile hit good first-layer prints on the second try instead of the tenth.
Steps:
- Download the official build guide or community-verified profiles for your printer model.
- Use the recommended slicer start G-code and initial layer settings.
- Log any tweaks and the filament lot number for future reference.
You’ll replicate successful prints across different filaments and builds.
Put these ideas together and your DIY printer will be quieter, more reliable, and predictable — producing usable parts faster and with fewer surprises.
Recommended Products

New plate: A upgrade Replacement printing platform-JanusBPS 270x200mm/ 10.6x7.8inch, compatible with 3d printer QID X-plus. Note: Please measure the size of your printing platform before purchasing.

Size: 200x200mm; Power 110V 500W. Can heat up more than 150 degree easily

1. 3-PACK VALUE SET & PREMIUM QUALITY BASE This high-quality 3-pack double-sided textured PEI build plate (220×220mm NOT for Creality K1 SE V3 Series!!!) offers unbeatable value and reliable performance for daily 3D printing needs. Made of premium stainless steel base (not cheap manganese steel), it features excellent bending resistance, no deformation, and long service life. Ideal for daily printing, multi-printer users, frequent replacement, and regular-model printing with all compatible 3D printers (Artillery Genius Pro, Artillery MK2, Artillery MK2A, Anet A6, Anet A8, Wanhao Duplicator i3). NOT for K1 SE!!!
Choosing a Voron Model: V0, V2, Trident, and Use Cases
If you’ve ever tried picking a 3D printer and felt overwhelmed, this will help.
Why it matters: choosing the right Voron model saves you time, filament, and frustration. The V0 is for compact setups where desk space is limited; its bed warms fast and it’s quick to reach printing temperature. Example: if you work from a small apartment desk and print phone cases, the V0’s 160×160–200×200 mm bed (depending on your build) heats to 60°C in about 3–5 minutes with a 12V silicone mat. Steps to decide:
- Measure your intended footprint (use a tape measure).
- List typical part sizes you’ll print (max dimension in mm).
- Match those to a V0 bed if most parts are under 200 mm.
Takeaway: V0 = small, quick, and fits tight spaces.
Before you choose a V2, know why bigger beds matter: they let you prototype larger parts without splitting models. The V2 gives you a stiffer frame and bigger beds—common sizes are 300×300 mm or 400×400 mm—and that extra rigidity reduces ringing on tall prints. Example: a maker printing drone frames (300–350 mm arms) will find a V2 avoids seams and warping during long jobs. Steps to decide:
- Measure your largest single print (mm).
- Count how many prints run overnight each week.
- Prefer V2 if prints exceed 250 mm or you run many long jobs.
Takeaway: V2 = larger parts and steadier production.
Think of the Trident like a middle path between speed and simplicity. Why it matters: it gives CoreXY motion with fewer moving parts, so calibration and maintenance are faster. Example: a small workshop that needs quick turnaround for jigs and fixtures will use Trident to swap filament and get back to printing in under 15 minutes. Steps to decide:
- Estimate how often you’ll service belts or idlers per month.
- Choose Trident if you want CoreXY speed but minimal mechanical complexity.
Takeaway: Trident = fast, simple, and easy upkeep.
Match hotend, bed, and filament choices to your goals because each model supports different options and power needs. Why it matters: the wrong heater or hotend wastes energy and ruins parts. Example: printing Nylon parts on a V0 with a small 12V bed will warp; instead, pick a V2 with a 24V or AC heater and a high-temp hotend (e.g., E3D V6 or MOSFET-switched bed) rated to 280–310°C. Steps:
- Pick primary filament (PLA, PETG, Nylon, ABS, or 3–4 composite).
- Choose hotend and bed voltages compatible with that filament and your model’s frame.
- Confirm your power supply can handle peak draw (add 20% headroom).
Takeaway: match filament to heaters and power.
Follow the official documentation for BOM and assembly because it lists exact parts and wiring to avoid mistakes. Why it matters: a BOM prevents buying incompatible components and reduces build time by days. Example: using the Voron V2 BOM means you’ll order the correct V-slot extrusions, MGN12 rails, and specific belt lengths rather than guessing sizes. Steps:
- Download the BOM for your chosen model from the repo.
- Cross-check local suppliers for exact part numbers.
- Order a small spare parts kit: extra belts, nozzles, and M3 screws.
Takeaway: BOM first, order second.
Recommended Products
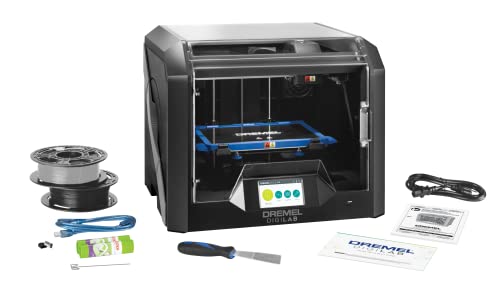
Pcmag 2018 Editors' Choice Award And Google For Education Partner – Dremel 3D45 3D Printer Kit
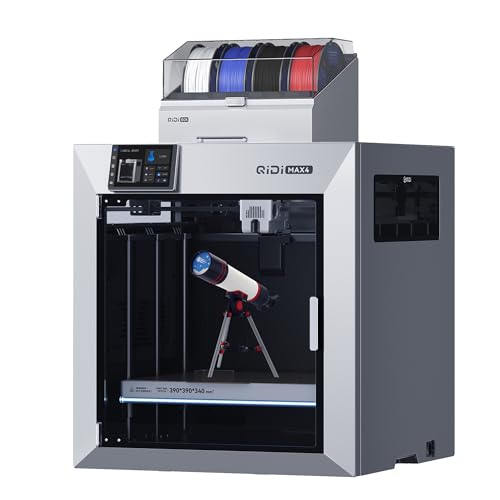
Ultra-Large Build Volume: QIDI Max4 Combo has a 390×390×340mm printing area, 55% larger than its predecessor MAX3, enables you to print large industrial parts, complex molds and custom prototypes in one go without splitting; full-surface silicone heated bed ensures even temperature distribution and strong first-layer adhesion to avoid warping.
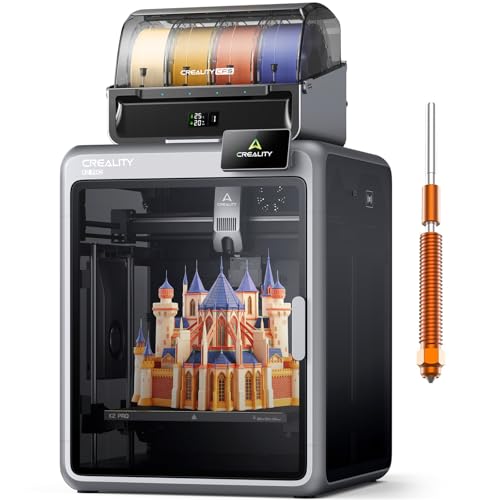
Smarter Multicolor Printing with CFS: Creality K2 Pro Combo 3d printer works seamlessly with the CFS Smart Filament System, enabling up to 16-color and multi-material printing. Auto filament identification, intelligent feeding, and moisture-proof storage provide a hassle-free, worry-free printing experience.
Where the Voron Community Hangs Out (Discord, Forums, GitHub)
If you’ve ever been stuck and needed fast help, this is why.
Why it matters: quick feedback saves hours when your printer won’t home. Use Discord for live troubleshooting and sharing photos or log snippets so people can point out wiring, firmware, or mechanical issues immediately. Example: post a 30-second video of a skipped stepper and the #electronics channel will often spot a loose connector within minutes.
Before explaining how, know this: searchable advice prevents repeated mistakes.
Why it matters: forum threads let you find past fixes without repeating the same question. Use the official forums for longer, organized discussions, step-by-step build notes, and etiquette—search the board first, then post a concise summary of what you’ve tried. Example: search “XY belt tension Voron 2.4” and you’ll find a photo thread showing a 2–3 mm belt deflection method.
The difference between tracking changes and asking for fixes comes down to version control.
Why it matters: matching parts and docs to a release avoids compatibility mismatches. Check GitHub to follow active issues, download tagged releases, and submit bug reports with reproduction steps. Example: if you see a firmware-incompatible wiring diagram, open the repo’s Issues tab, attach a concise reproduction list, and reference the tagged release number (for example, v1.2.3).
How to use each resource effectively:
Why it matters: a clear workflow gets you answers faster.
- Discord (fast chat)
- Step 1: Join the server and read channel descriptions.
- Step 2: Post in the right channel with a one-line problem, three things you tried, and a photo or log file.
- Step 3: React to suggested fixes and follow up with results.
- Step 1: Search specific terms before posting.
- Step 2: If nothing matches, create a new thread with a clear title and numbered steps you’ve taken.
- Step 3: Update your thread with what fixed the issue.
- Step 1: Find the repo matching your hardware version.
- Step 2: Download the tagged release that matches your build (use the release number).
- Step 3: Open an issue with reproduction steps, expected vs. actual behavior, and logs.
Example: you post “Z wobble at 0.2 mm layer height; tried leadscrew re-tighten, X/Y calibration, replaced bearing” plus a short video.
2. Forums (searchable threads)
Example: start a thread titled “Voron Trident PID tuning for 0.12 mm layers” and include temps, PID values, and heater cartridge brand.
3. GitHub (design and issues)
Example: report “Probe offset mismatch on v2.0.1 — G30 returns Z=-1.5 mm; steps to reproduce attached.”
One final tip: keep a short troubleshooting log on your phone with dates and outcomes. It saves you time when asking for help or filing issues.
Start Building: BOM, Part Sourcing, and Getting a Serial Number
Before you start assembling parts, know why a clear BOM and sourcing plan saves you hours and prevents mismatches.
1) Create a clear BOM and sourcing plan
Why this matters: a precise list prevents you buying incompatible parts or duplicates.
Example: I once ordered two different NEMA 17 motors — one 1.2 A and one 2.0 A — and the controller couldn’t handle the higher-current motor, forcing a week-long reorder.
Steps:
- List every item, including fasteners and cables. Include part number, quantity, footprint/size, and a simple note about function (e.g., “X-axis motor, NEMA17, 1.7 A, 42 mm length”).
- Note one preferred vendor and one backup vendor for each part (e.g., Digi-Key, Mouser, AliExpress). Put vendor links next to part numbers.
- Add acceptable alternatives with the exact spec differences (voltage, current, connector type). Highlight the critical spec that must match, such as current rating for motors or pitch for lead screws.
- Estimate timelines: ordering (2 days), shipping (3–14 days depending on vendor), subassembly (2–5 days), final calibration (1–3 days). Put these on a calendar.
- When a part is delayed, compare dimensions and electrical specs before substituting. Check connector pinout, shaft diameter, mounting holes, and voltage/current.
End detail: keep the BOM as a shared spreadsheet and update it the moment you place or change an order.
2) How to inspect substitutes safely
Why this matters: a wrong substitute can cause failures or safety hazards.
Example: I replaced a 12 V power supply with a physically similar unit that was 24 V; the stepper drivers blew instantly.
Steps:
- Compare electrical specs first: voltage, current, polarity, and protection features. If voltage differs, don’t use it.
- Measure mechanical fit: shaft diameter, mounting hole spacing, and cable/connector types. Use calipers for accuracy.
- If specs are uncertain, test on a bench with a current-limited supply or a fuse in series.
- Document the substitution in your BOM: who approved it, date, and test results.
End detail: never assume “looks similar” equals “compatible.”
3) Recording builds and claiming serial numbers
Why this matters: photos, video, and a serial number make warranty claims and community registration simple.
Example: I registered a machine with the community server by uploading three build photos and a 30-second video showing the ID plate; that proof was accepted the same day.
Steps:
- Take photos of major stages: parts laid out, electronics wiring, final assembly front and back. Use a plain background and label each photo with the BOM line item.
- Record a short video (20–30 seconds) that shows the completed machine, pans across the ID plate or engraved serial, and shows the machine powering on if safe.
- Follow the specific community or manufacturer procedure to claim a serial number: fill the online form, upload images/video, and include BOM reference and build date.
- Save all files and registration emails in a folder named with your serial number and date.
End detail: keeping these records speeds warranty replies and helps others copy your successful build.
Keep organized records and exact specs, and you’ll save time, money, and headaches during the build.
Recommended Products

【MULTI-TURN ABSOLUTE ENCODER】 Our smart motor integrates a NEMA 17 Absolute Multi-Turn Encoder with 17-bit single-turn and 32-bit multi-turn resolution. Featuring Power-Off Memory technology, it maintains exact positioning after shutdown without requiring re-zeroing, saving valuable time while boosting operational efficiency.

✅【K12-65 Parameters】Center height: 54mm. Total height: 85mm; Angle: 0.3°/ step. Telescopic stroke: 20mm/ 0.78 inch, ; Speed reducing ratio 4:1.

Motor specifications: Holding Torque:3N.m; Current:5A; Phase:2; Size:60x60x88mm; Step Angle:1.8 degree; Motor Lead Wire: 4-wire; Encoder lines:1000
Voron Troubleshooting: Common Pitfalls and Where to Ask for Help
If you’ve ever had a print that looks fine until a layer shift ruins it, this is why.
Why this matters: identifying the root cause saves you hours and filament. Start by putting the problem into one clear category: mechanical, electrical, firmware, or slicing/print settings. For example, if your X-axis shifts during a long bridge, you’ll avoid swapping firmware when the belt was loose.
Mechanical: what should you check and how.
Why this matters: most failures feel electronic but are physical.
1) Check belts and pulleys.
- Step 1: power off and move the axis by hand; feel for catches or gritty spots.
- Step 2: tension the belt to about 15–25 N (or tighten until there’s about 1–2 mm of give with moderate finger pressure).
- Example: on my Voron 2.4 a 0.5 mm loose belt caused a 2 mm layer shift after 30 minutes of printing.
- If a pulley wobble is visible, tighten the grub screws to 1.5–2 Nm.
2) Inspect linear motion and bearings.
- Step 1: clean rails with isopropyl alcohol and re-lubricate with a light grease (e.g., Super Lube).
- Step 2: check for play by holding the carriage and trying to wiggle the rail; any movement >0.2 mm needs action.
- Example: a dusty rail made prints look under-extruded because the carriage stuck intermittently.
3) Check filament path and hotend.
- Step 1: feed filament by hand to feel for snags; cut 5 mm off the end and reinsert if it skirts debris.
- Step 2: disassemble the hotend if jams repeat and inspect PTFE and throat for carbonized bits.
- Example: a partially clogged nozzle on PLA looked like extrusion underflow until the clog was removed.
Electrical: what to inspect and how.
Why this matters: loose wiring causes intermittent errors that mimic firmware bugs.
1) Visually inspect connectors and crimps.
- Step 1: unplug, reseat, and wiggle connectors while powered off; look for bent pins or loose crimping.
- Step 2: use a multimeter to check continuity for suspect cables.
- Example: a loose stepper connector caused skipped steps under acceleration, showing as layer shifting.
2) Check power delivery and grounds.
- Step 1: measure PSU voltages under load; they should be within 5% of nominal.
- Step 2: tighten ground and power screws to specified torque (typically 2–4 Nm for M3–M5 terminals).
- Example: a weak PSU rail produced temperature swings that affected first-layer adhesion.
Firmware: what to verify and how.
Why this matters: wrong pinouts or accel values can damage hardware.
1) Confirm board pinouts and wiring match the config.
- Step 1: compare your board revision PDF to pins in your printer.cfg; mark any differences.
- Step 2: if you change a motor or endstop, update the pin and stepper settings before testing.
- Example: swapped X/Y stepper wiring left the axes moving oppositely until the motor direction was corrected.
2) Tune motion and thermal settings conservatively.
- Step 1: set acceleration to 1000–3000 mm/s² and jerk/instantaneous change per your Voron guide before increasing.
- Step 2: monitor thermistor readings for variance >2°C which indicates wiring or config errors.
- Example: setting acceleration too high caused skipped steps only at top speeds.
Slicing and print settings: what to isolate and how.
Why this matters: many “hardware” prints fail from bad slicer settings.
1) Test temperature, retraction, and flow one variable at a time.
- Step 1: print a 20 mm calibration cube at three temps (e.g., 200°C, 205°C, 210°C) and compare overhangs.
- Step 2: try retraction at 0.8 mm, 1.2 mm, and 1.6 mm for direct-drive setups to find optimal stringing/under-extrusion balance.
- Example: raising flow by 5% fixed small gaps that looked like under-extrusion but were slicer-related.
Where to get help.
Why this matters: the right forum speeds troubleshooting.
1) Voron Discord for quick, interactive help.
- Step 1: join the channel matching your printer model and describe: firmware, board, exact symptom, and photos.
- Step 2: paste your printer.cfg and a short log if asked.
- Example: someone helped me find a bad stepper driver within minutes using a short log snippet.
2) GitHub and Voron forums for reproducible bugs and documented fixes.
- Step 1: search existing issues first; if none match, open an issue with steps to reproduce and config files.
- Step 2: include photos, exact part numbers, and a short error timeline.
- Example: a documented issue showed that a particular board revision needs a different pin mapping.
Quick checklist to follow in order:
1) Mechanical: belts, pulleys, rails, hotend path.
2) Electrical: connectors, continuity, PSU voltage, ground torque.
3) Firmware: pinouts, motion limits, thermistor configs.
4) Slicer: temp, retraction, flow tests.
If you follow that order, you’ll usually fix the problem in one afternoon.
Recommended Products

Comprehensive line includes parts to fit cars, vans, SUVs and light trucks, domestic and import (European and Asian)

Direct replacement - this accessory drive belt tensioner assembly is designed to match the fit of an original equipment assembly on specified vehicles

Compatible Vehicles: Fit for Chevrolet Camaro 5.7L 1998-2000; fit for Pontiac Firebird 5.7L 1998-2000
Frequently Asked Questions
How Do I Legally Use Voron Designs for a Small Paid-Build Business?
You can, but I’ll follow the Voron open-source license: offer paid builds under its license terms, obtain any required commercial licensing, avoid unauthorized trademark use, credit authors, and consult the community or a lawyer for formal compliance.
Can I Modify Voron Parts for CNC or Laser-Cut Production Techniques?
Yes — I modify dimensions, make material substitutions, and plan fastener adaptations for CNC or laser-cut production, while respecting production tolerances and documenting changes so builds remain reliable and compliant with Voron licensing and community norms.
What Are the Best Practices for Long-Term Archival Storage of Voron Firmware/Configs?
I back up Voron firmware/configs with encrypted backups, a clear versioning strategy, and redundant offsite copies; I document changes, tag releases in Git, rotate keys, test restores regularly, and store checksums alongside secure credentials.
How Do I Obtain Replacement Printed Parts if I Can’t Print Them Myself?
You can buy from third party sellers, join community swaps, or ask on Discord/forum where members sell or trade printed parts; I’ll help vet sellers, check fit files, or point you to reliable community swap threads.
Are There Insurance or Liability Considerations for Lending My Voron to Others?
Yes — I’d suggest a liability waiver and checking an insurance rider before lending your Voron; coincidentally, I once trusted a neighbor and learned the hard way, so I’d document terms, limits, and proof of coverage.