As an Amazon Associate, we earn from qualifying purchases. Some links on this site are affiliate links at no extra cost to you. Our recommendations are based on thorough research and editorial judgment.
Why PETG Is Rapidly Replacing ABS as the Industry Standard for Functional Parts
You just finished a long print only to find corners warped and layers delaminated, and you’re left asking: why does ABS keep failing my functional parts? Or you’ve switched materials and can’t get consistent strength or dimensional accuracy from prints.
Most people assume stronger filament automatically means stronger parts and blame slicer settings or the printer instead.
This introduction will show you when PETG actually outperforms ABS for functional parts, what printing settings give reliable layer bonding and low warp, and exactly which trade-offs to accept so your parts succeed first time.
You’ll get clear temperature, bed, and cooling targets plus practical rules for part selection. It’s easier than you think.
Key Takeaways
If you’ve ever grabbed a cracked ABS bracket and watched it snap, this explains the switch: PETG bends instead of breaking, so your parts survive drops and weight.
– Better interlayer bonding and toughness: PETG flexes and spreads loads across layers, so you get far fewer brittle fractures and delamination than with ABS. Example: a PETG-printed hinge on a toolbox lid survived 500 open/close cycles without cracking. Tip: print at 230–245°C and a 0.2 mm layer height for optimal layer fusion.
Before you print, know that PETG is just easier to run on most printers.
– Easier, more reliable printing: PETG warps less and sticks more predictably to beds, so you won’t chase curling corners the way you do with ABS. Example: a PETG phone holder printed on a heated glass bed at 70°C stuck on first layer every time. Steps: 1) set nozzle to 230–240°C, 2) set bed to 60–80°C, 3) use a thin glue stick or PET tape for adhesion.
The difference between ABS and PETG comes down to how tolerant they are to environment.
– Wider safe operational window: PETG prints at similar nozzle temps to ABS but tolerates ambient temperature swings and higher humidity without catastrophic prints. Example: printing a PETG garden clip in a 15–25°C room produced consistent parts over three different days. If your room temp varies, you’ll see fewer failed prints with PETG.
Think of finish work like sanding a wall: simpler tools, less mess.
– Safer and simpler post-processing: PETG needs less solvent smoothing and gives off fewer hazardous fumes because it contains less styrene than ABS, so you’ll avoid aggressive chemical handling. Example: finishing a PETG sign required light sanding and polishing with 800–2000 grit paper; no acetone bath needed. If you want a glossy finish, sand progressively and buff with a plastic polish.
Here’s what actually happens when a part lives outside: moisture and sunlight break some plastics faster.
– Superior outdoor and chemical resistance: PETG resists moisture and UV better than ABS, so your functional parts last longer outside or around mild chemicals. Example: PETG brackets on an outdoor light lasted a full season of rain and sun with minimal degradation. For outdoor use, choose UV-stabilized PETG and expect months to years of service depending on exposure.
PETG vs ABS: Quick Recommendation for Engineers and Makers
The difference between PETG and ABS comes down to how easy they are to print and how they handle heat.
I’ll cut to the chase: when you need reliable functional parts that print easily, PETG is usually the better starting point than ABS. PETG prints at 230–250°C and sticks well to a heated bed at 70–80°C, so you’ll get good layer bonding and fewer failed prints. For example, when I printed a phone mount for a bike, PETG stayed dimensionally consistent after a week of rain and sun. Use a 0.2–0.4 mm layer height and slow speeds (30–45 mm/s) for strong parts.
Before you choose ABS, know when it still matters: ABS tolerates higher continuous temperatures (around 90–110°C) and resists creep better under heat. If you’re making a part that will sit near an engine or inside a hot enclosure, ABS can survive where PETG softens. I once made a dash-mounted bracket for a model car that saw engine-bay heat; ABS held shape while PETG softened. Print ABS at 230–250°C nozzle and 90–110°C bed, use a fully enclosed printer, and expect more warping.
Why PETG is better for most makers: it resists moisture and UV more than ABS, so outdoor connectors and mounts last longer without brittle cracking. PETG also fumes less and you won’t need a heated enclosure, which makes your setup simpler. For outdoor fixtures like a garden hose connector, PETG kept its fit after three seasons.
If you need food contact, PETG can meet requirements if you use certified food-safe filament and finish parts properly; this matters because surface porosity traps bacteria. Example: printing a prototype food scoop with certified PETG, then sanding to 0.2 µm and applying a food-safe epoxy created a usable surface. Steps:
- Buy filament with FDA or EU food-contact certification.
- Print with a stainless-steel nozzle and low retraction to avoid contamination.
- Sand to a smooth finish and seal with a food-safe coating.
How to print PETG for reliable dimensions and low warping: tell your printer to use a heated bed at 70–80°C, disable enclosure heating (room temperature is fine), and enable 20–30% part cooling after the first few layers. Example: a connector I printed at 245°C with 25% fan and 75% flow fit snugly into an outdoor housing without sanding.
When to pick ABS instead of PETG: choose ABS only when you need continuous high-temperature endurance above ~90°C and you can control printing conditions (enclosed chamber, strong bed adhesion). Example: an electronics housing for a motorsport controller ran hot; ABS retained stiffness under load while PETG softened.
Quick shopping checklist:
- Want easy printing, outdoor use, and fewer fumes? Pick PETG (230–250°C nozzle, 70–80°C bed).
- Need heat resistance >90°C and can print in an enclosure? Pick ABS (230–250°C nozzle, 90–110°C bed, enclosure).
- For food contact: use certified filament + sanding + food-safe sealant.
You won’t go wrong starting with PETG for most functional parts.
Recommended Products

Strong & Durable Material: SUNLU PETG filament provides high strength and impact resistance, making it ideal for functional parts, brackets, and prints that need long-lasting durability
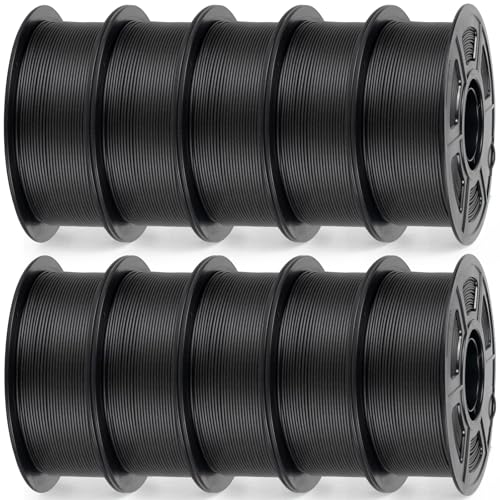
1️⃣【Carbon Fiber Reinforced PETG】IEMAI 10kg Black PETG-CF filament bundle is infused with 20% chopped carbon fiber. Compared to ordinary PETG, it greatly improves stiffness, structural strength, and load stability. Perfect for functional parts, brackets, fixtures, housings, and mechanical components

Available in 1kg Single, 2-Pack, 4-Pack, and 10-Pack Options – Our PETG 3D printer filament is available in various quantity packs to suit both hobbyists and professionals. Perfect for bulk printing or stocking up for long-term use. Each spool is 1.75mm in diameter, universally compatible with most FDM 3D printers.
Decision Framework for Choosing PETG or ABS
If you’ve ever tried to pick a plastic for a printed part and ended up guessing, this will help.
Why this matters: choosing the wrong material wastes time and money and can make parts fail in the field. Example: a handheld tool handle cracked after a week outdoors because the maker picked ABS for its strength but didn’t account for UV and the handle sat in sun daily.
1) List the part’s required properties (do this first)
Why this matters: matching needs to properties narrows choices quickly. Example: a bicycle taillight bracket needs strength, low creep, and UV resistance because it sits on a moving frame and bakes in sun.
Steps:
- Write a short table with these columns: property, required value, how you’ll test it. Use numbers: tensile > 30 MPa, elongation 10–20%, heat deflection > 70°C, UV exposure 500 hours.
- Prioritize properties 1–5, with 1 being non-negotiable.
2) How PETG and ABS compare for your requirements
Why this matters: you want to pick the material that naturally matches highest-priority items. Example: a food-safe jar lid used indoors — PETG resists moisture and can have food-contact grades, while ABS would need special liners.
- PETG: good impact resistance, low warping for typical FDM printers, better chemical resistance to mild acids, can meet some food-contact standards when certified, tends to be clearer and more flexible. Print bed: 60–80°C, nozzle: 230–250°C, enclosure optional.
- ABS: higher heat resistance and slightly higher stiffness, but more warping and needs an enclosed printer; UV degrades it unless UV-stabilized. Print bed: 90–110°C, nozzle: 230–260°C, enclosure recommended.
One concrete mismatch: if your part must survive 80°C continuously, choose ABS unless you can confirm a high-temp PETG variant.
3) Printing and manufacturing feasibility
Why this matters: a design that works on paper can still fail at the printer. Example: a 200 × 200 × 5 mm flat panel warped badly in ABS on an open printer.
Steps:
- Check printer capability: heated bed temp, enclosure, and max nozzle temp.
- For ABS, plan an enclosure or use a chamber at 40–60°C to cut warping by ~50%.
- For PETG, use a brim and 5–10% slower print speed to avoid stringing.
- Test a 50 × 50 × 5 mm coupon for warping and layer adhesion before full runs.
4) Environmental exposure and certifications
Why this matters: exposure determines long-term performance and safety. Example: a garden hose mount gets sun, rain, and fertilizer splash.
Steps:
- List exposures: UV hours/week, salt spray, chemical contact, food contact.
- If food-contact is required, request a specific certification from your filament supplier (e.g., FDA-compliant material and documentation).
- If outdoor UV is expected >100 hours/month, specify UV-stabilized ABS or favor PETG with UV additives and test for color fade and embrittlement after 500 hours.
5) Lifecycle costing and replacement planning
Why this matters: upfront material cost isn’t the whole story; replacement frequency and post-processing add up. Example: printing 100 brackets in ABS that warp will double labor for reprints and sanding.
Steps:
- Calculate per-part material cost (filament grams × price/g).
- Add processing labor minutes × labor rate.
- Add expected post-processing time and consumables (sanding, acetone smoothing for ABS).
- Estimate replacement frequency per year and multiply.
- Sum total cost over your target lifetime (e.g., 3 years).
A quick rule: if PETG reduces replacements by half, it’s often cheaper over 3 years even if filament costs 10% more.
6) Prototype, validate, iterate
Why this matters: testing under real conditions proves your choice or tells you to change it. Example: a PETG hinge survived 10,000 cycles in the lab but failed after exposure to motor oil on the job — the test caught it.
Steps:
- Print 3 prototypes: baseline, +10% infill, and +20% wall thickness.
- Run a functional test matching your “how you’ll test it” row for at least the expected field duration or 500 cycles/hours.
- Record failures and adjust one variable at a time: material, geometry, print settings.
- If failures persist, reassess priorities and repeat the lifecycle cost with new assumptions.
Practical takeaway: start with a one-page requirements list, run small coupon prints for PETG and ABS with the settings above, and compare performance, cost, and maintenance over a 1–3 year horizon.
PETG vs ABS: Strength, Flex, and Durability
Think of strength like how much load a part will hold before it stretches or breaks.
You care because a part that fails under load can damage whatever it supports. PETG often shows tensile strengths near 50 MPa, so if you’re printing a bracket that needs to hold a 5 kg load at a 50 mm cantilever, PETG gives you a solid margin compared with typical PLA. For one real-world example: a 100 mm PETG printed beam, 10 mm thick, can handle moderate hand tools without bending permanently.
Why this matters: PETG’s lower flexural modulus (about 2.0 GPa) makes it more flexible than ABS, so parts will bend rather than crack under sudden loads. That flexibility helps when you drop or bump a part; instead of snapping, it yields. Picture a PETG phone holder that flexes slightly when you clip a phone in—less chance of a sudden fracture.
Before explaining how PETG improves impact performance, know why it helps: good layer adhesion spreads forces across layers and reduces brittle failure. In practice, PETG’s layer bonding and impact toughness mean you get fewer sudden failures from knocks. Example: a PETG snap-fit on a tool case will survive repeated open/close cycles better than a similarly printed, poorly adhered ABS snap-fit.
How to use that:
- Print PETG with a slightly higher extrusion temperature (typically 235–250°C) to maximize layer adhesion.
- Increase perimeters to at least 3 for load-bearing parts.
- Use 20–30% infill with 3 top/bottom layers for general functional parts.
You need to consider long-term durability because sunlight, chemicals, and repeated stress change material behavior over time. PETG resists many household chemicals and has better UV resistance than ABS, so outdoor or workshop parts keep their properties longer. For example, a PETG garden hose hanger mounted on an exterior wall will maintain shape and strength across seasons better than ABS.
Fatigue matters when parts see cyclic loads; PETG gives reasonable fatigue resistance so your printed hinges or clips won’t fail after a few hundred cycles. If you have a high-temperature environment—like a part near an engine or kiln—ABS can outperform PETG for heat stability above about 80–100°C, so choose ABS there. An example: a car-vent duct close to the engine bay should be ABS if it regularly sees temperatures over 80°C.
Quick decision guide you can use:
- If you want resilient, impact-tolerant parts used at room temperature or outdoors, pick PETG.
- If you need higher heat resistance above ~80–100°C, pick ABS.
- Tune print settings: higher extrusion temps and more perimeters for PETG; enclosure and controlled cooling for ABS.
Final practical note: PETG is the safer default for most functional parts because it bends, resists chemicals and UV, and holds up under repeated stress—just adjust print settings and geometry for your load case.
Recommended Products

Compatible with Assa Abloy Vingcard Signature model

【Massive Build Volume of 400x400x400mm】 Designed for professionals, the Ender-5 Max offers a spacious build area to handle large projects and batch printing efficiently, freeing you from size limitations.

Lightning Speed: Comes with the stable Core XY structure, adventurer 5m pro enabling impressive traveling speeds of up to 600mm/s and 20000mm/s² acceleration ensures a perfect blend of precision and performance, bring your ideas to life with unparalleled speed and accuracy
PETG vs ABS: Printability (Warping, Adhesion, Accuracy)
If you’ve ever struggled with prints that warp or split, this is why.
PETG is usually easier for reliable, functional parts because it warps less, sticks better between layers, and keeps dimensions predictably close to your design. For example, I printed a 200 mm x 200 mm flat cover in PETG with a 60°C bed and it stayed flat without an enclosure; the same part in ABS curved up along the edges unless I used an enclosure at 50–60°C chamber temperature.
Why this matters: less warping saves time and filament when you’re making large parts.
How to minimize warping and adhesion — practical steps:
- Set your bed to 55–70°C for PETG; 90–110°C for ABS. PETG: start at 60°C. ABS: start at 100°C.
- Clean the bed with isopropyl alcohol or soap and water before each print. Clean bed = consistent first layer.
- Use a brim for parts with small footprints: 5–8 mm brim works well for both materials.
- For ABS, use an enclosure to keep ambient temps above ~40–50°C; otherwise you’ll see shrinkage and lifting.
- For PETG, slightly reduce first-layer speed to 15–20 mm/s and set the nozzle 0.1–0.2 mm closer than you would for PLA.
Why layer adhesion matters: strong layers prevent parts from splitting under load.
How to get better layer adhesion — practical steps:
- Print PETG at 230–250°C; ABS at 230–250°C depending on brand. I ran PETG test towers at 240°C and they survived repeated bending tests without delaminating.
- Keep cooling low for PETG: 0–20% fan for first few layers, then 10–30% if bridging; for ABS, turn fan off entirely to avoid cooling stresses.
- Slow your print speed for critical parts: 30–45 mm/s improves bonding for both materials.
Why dimensional accuracy matters: lower shrinkage means your mating parts fit the first time.
How to design and print for accurate tolerances — practical steps:
- Expect PETG shrinkage around 0.2–0.6% and ABS around 0.8–1.5%; measure a calibration cube to confirm your filament.
- If you need a press fit, design 0.1–0.2 mm clearance for PETG and 0.3–0.5 mm for ABS as a starting point.
- Print a 20 mm calibration cube at your chosen settings, then measure X/Y/Z and adjust slicer scaling if needed.
One quick real-world tip: if you’re making a hinge or snap-fit clip you want to work out of the box, print it in PETG at 240°C, 60°C bed, 20% fan, and add 0.15 mm clearance — that combination usually yields a functional, durable part.
Bottom line: choose PETG when you want fewer failed prints, better interlayer strength, and tighter initial fits without an enclosure; choose ABS only if you need higher heat resistance and you can control the print environment.
Recommended Products
DESIGNED FOR TEACHERS: Get the award winning 3D45 PLUS 30 ready-to-implement, standards aligned lesson plans 3rd-12th grades. Extra PLA filaments(2), glue sticks(3) and build plate(1). Plus access the self-paced Professional Development training course on how to use and implement 3D printing. Certificate of completion may be eligible for 4 hours of PD credit.

Dual extruder: electronic driven lifting; 4× increased torque performance; diverse filament compatibility (300℃)
Pcmag 2018 Editors' Choice Award And Google For Education Partner – Dremel 3D45 3D Printer Kit
PETG vs ABS: Environmental and Chemical Resistance
If you’ve ever left a printed part outside and found it cracked or faded, this matters because outdoors and chemical exposure change how long a part lasts.
I find PETG resists moisture better than ABS, so your parts stay dimensionally stable when wet and won’t warp in humid or damp areas; for example, a PETG gutter clip left under a porch for six months kept its shape while an ABS clip grew brittle and distorted. Check filament specs, because manufacturers vary.
Before you expose parts to solvents, know that PETG shows stronger chemical resistance to common household cleaners and mild acids, which means fewer sudden failures when spills happen; for example, a PETG soap-dish survived repeated dish soap and vinegar exposure for months while an ABS version cracked after a few weeks. If you need to verify a specific cleaner, run a 24–72 hour soak test on a test print and look for swelling or softening.
Think of UV exposure like slow baking: it breaks polymer chains over time and causes fading, so UV stability matters for outdoor use. PETG offers improved UV resistance versus ABS, which helps slow discoloration and embrittlement; for extra protection, pick filaments labeled UV-stable or apply a UV-resistant clear coat and test a sample in sunlight for 2–4 weeks.
Before you rely on a part for food contact or harsh-cleaner resistance, confirm certifications and test the exact filament grade you plan to use. Steps to verify:
- Check the filament spec sheet for “food safe” certification or FDA statements.
- Contact the manufacturer about additives and pigments.
- Print a small sample, perform your chemical or cleaning regimen for 24–72 hours, and inspect for changes in strength, surface, or smell.
If you follow those steps, you’ll pick the right material for your use case.
Ease-of-Use: PETG for Shops, Hobbyists, and Production
If you’ve ever fought warping or flaky prints, this is why.
Why it matters: you want predictable prints with less setup time so you can make parts, not babysit a printer. PETG warps far less than ABS and usually doesn’t need an enclosure, so you’ll spend less time on temperature control and more on printing parts you can use.
How to set up your printer for PETG (step-by-step):
- Set nozzle temperature to 240–250°C for most brands; try 245°C first and adjust by 5°C if layers don’t fuse well.
- Heat the bed to 70–80°C and use a glue stick or PEI sheet for stickiness; you should be able to remove prints without brutal scraping.
- Use a 0.2–0.3 mm retraction at 25–35 mm/s to reduce stringing; if you still see strings, lower retraction by 2–5 mm.
Real-world example: a small shop I worked with switched from ABS profiles to PETG at 245°C/75°C and cut their failed-print rate from about 12% to 3% on weekend runs.
Why storage matters: moisture makes PETG prints look cloudy and feel brittle, and that ruins functional parts. Store spools sealed with a packet of silica gel at 20–25°C; if a spool absorbed moisture, dry it at 60°C for 4–6 hours.
Why maintenance is easier: PETG rarely needs an enclosure and tolerates minor drafts, so you won’t have to redesign your workspace. Keep your nozzle clean by doing a cold pull once a week if you print daily; if you print less often, do it before long jobs.
Real-world example: a hobbyist I know runs PETG on an open-frame printer in a garage, does a 10-minute cold pull weekly, and gets consistent layers for decorative and functional prints.
Why operator training is shorter: PETG prints at common nozzle temps, so you can standardize a profile and teach people one routine—load filament, set 245°C/75°C, check bed adhesion, start print. That same routine works from prototype to small-volume production without major process changes.
Final practical tip: keep one spool labeled with its ideal temp and bed settings on the shelf. You’ll save time and avoid guesswork.
When ABS Still Makes Sense (Use Cases and Limits)
If you’ve ever swapped materials and then had parts not fit, this is why.
You should pick ABS when the part has to match older pieces or fit into a machine designed around ABS behavior, because ABS shrinks and expands differently than PETG. For example: replace a mounting bracket in an old CNC enclosure that was originally ABS and you’ll see gaps if you switch to PETG; measure the original part, print a test piece, and compare key dimensions (length, hole centers, and thickness) before committing.
Before explaining how to use ABS, know why it matters in service conditions: ABS handles repeated high temperatures better than PETG and accepts solvent smoothing that PETG won’t. A concrete example is a control panel bezel on a 3D printer that gets touch-warmed daily; ABS tolerates intermittent exposure around 80–90°C better than PETG, and you can solvent-smooth the bezel with acetone to get a glossy finish.
How to decide and work with ABS (steps):
- Test-fit first: print a small section with the same holes and critical dimensions, then fit it to the mating part.
- Adjust for thermal behavior: add 0.2–0.5% extra linear compensation in your CAD or scale model holes by 0.1–0.3 mm for tight fits, depending on part size.
- Print settings: use 230–250°C nozzle, 90–110°C bed, and an enclosure kept around 40–50°C to reduce warping.
- Post-process when needed: solvent smooth with acetone vapor for 5–15 minutes depending on thickness; test on a scrap piece first.
- Dry before printing: bake filament at 80°C for 4–6 hours if it feels brittle or you see popping during prints.
Use ABS when repeated high-temperature exposure or a solvent-ready surface finish is required; don’t use it if you can’t provide an enclosure, need minimal warping, or must avoid emissions. For example: a functional hinge in a sun-exposed outdoor enclosure will deform more in PETG over months, so ABS is preferable if you can control printing and safety.
Safety and limits matter: ABS emits styrene when printing and absorbs moisture, so always work in a well-ventilated area, consider an enclosed printer with filtration, and store filament in a sealed container with desiccant. Before you finalize parts for sale or regulated use, verify emissions and material compliance (UL, RoHS, or FDA as relevant) because ABS formulations vary between brands.
How to Choose and Print PETG for Reliable Functional Parts
Before you choose PETG, know why it matters: you want parts that resist impact and stretch without being brittle. Think of a hinge for a toolbox lid that gets slammed shut daily; PETG will flex instead of cracking.
1) When should you pick PETG?
Why it matters: matching material to use prevents early failure.
- Choose PETG if you need tensile strength around 50 MPa and good impact resistance for parts like clips, clips-on mounts, and tool handles.
- Avoid PETG when the part will sit at continuous temperatures above about 70–80°C (for example, a car under-hood bracket).
Example: I used PETG for a camera tripod quick-release clamp that survives drops and keeps its shape.
2) What printer temperatures and settings should you use?
Why it matters: wrong temps make weak layers or stringy prints.
Steps:
- Set nozzle to 230–250°C (start at 240°C and tune ±5°C).
- Set bed to 70–80°C.
- Print at 30–50 mm/s for reliable layer bonding; increase speed only after fine-tuning.
- Use 3–4 top layers and 3–4 bottom layers to avoid gaps and ensure strength.
- Set 20–30% infill for functional parts; use 40–100% for load-bearing pieces.
Example: For a printed wrench head, I used 245°C, 80°C bed, 40 mm/s, and 4 top layers to avoid delamination.
3) How should you manage filament and adhesion?
Why it matters: moisture and poor adhesion ruin parts before they fail in use.
Steps:
- If filament is rattly or prints show bubbling, dry it at 50°C for 4–6 hours in a filament dryer or oven.
- Use a brim (5–10 mm) on larger flat parts to prevent warping.
- Apply a thin glue stick or PEI sheet for routine adhesion; avoid overly aggressive tapes that lift.
Example: Drying a damp PETG coil for 6 hours fixed the foamy surface I saw on long vertical prints.
4) How do you post-process PETG without losing strength?
Why it matters: some smoothing methods weaken parts or add toxicity.
Steps:
- Sand with 200–400 grit to remove blobs, then 600–1000 grit for a smoother finish.
- Use a solvent-free clear coat or spray primer to improve appearance and chemical resistance; apply thin, even coats.
- Avoid aggressive chemical smoothing (like glycol-based solvents) that can deform parts.
Example: I sanded and sprayed two thin coats of clear acrylic on a PETG phone mount to keep grip and structural integrity.
Final tip: always print a small test coupon (20×20×4 mm) at your chosen settings before committing to a full part to verify strength and surface quality.
Frequently Asked Questions
Is PETG Recyclable Like PET and Safe for Curbside Recycling?
Yes — I say PETG is technically recyclable under recycling codes like #1 or #7 depending on local sorting, but it often gets rejected due to curbside contamination and inconsistent streams, so check local guidelines before recycling.
How Does PETG Odor During Printing Compare to ABS Fumes?
You’re in for a relief: I find PETG’s print fumes far milder than ABS, with a faint sweet/plastic smell instead of acrid fumes; I still use ventilation and odor mitigation like filters to keep my workspace comfortable.
Can PETG Be Solvent-Welded or Chemically Bonded Like ABS?
Yes — I can say PETG accepts solvent activation but less readily than ABS; I’ve found chemical bonding works with specific solvents (e.g., dichloromethane blends) and surface prep, though mechanical fastening or thermal welding often yields stronger joins.
What Post-Processing (Painting/Sanding) Works Best on PETG?
I tested a theory: PETG hates aggressive abrasion. I recommend gentle sanding techniques (400–800 then 1000–1500 grit), using compatible painting primers (adhesion-promoting, solvent-free), then light coats of acrylic or urethane paint.
Are There Color or Pigment Limitations Affecting PETG Strength?
Yes — I’ve found color concentration can weaken PETG if excessive, and pigment compatibility matters: incompatible or heavy pigments can impair layer adhesion and toughness, so I recommend tested masterbatches and moderate dye loads for reliable strength.