As an Amazon Associate, we earn from qualifying purchases. Some links on this site are affiliate links at no extra cost to you. Our recommendations are based on thorough research and editorial judgment.
Dissolvable Supports: The Chemical Dissolution Processes of PVA and HIPS
You just spent an hour printing a complex model with built‑in supports and now you’re staring at a maze of material you can’t remove cleanly — should you soak it in water or reach for a solvent? Or maybe the support refuses to separate from your PLA or ABS and you’re left wondering why your usual cleanup method failed.
Most people assume one universal dissolvable support will work for every filament and environment, which leads to ruined prints and wasted time.
This article will show you, in plain steps, how PVA and HIPS supports actually dissolve, what temperatures, chemicals, and post‑print actions reliably finish the job, and how to plan prints so supports come away clean.
You’ll get clear, actionable workflows and safety steps you can use right away. It’s easier than it looks.
Key Takeaways
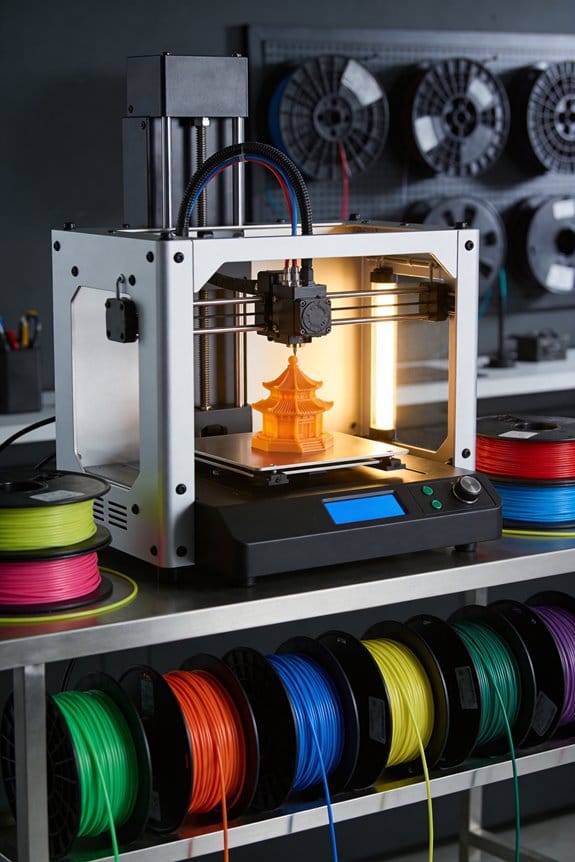
If you’ve ever printed a dual‑material part with supports, this is why dissolvable supports matter: they let you remove supports without scraping or damaging delicate features.
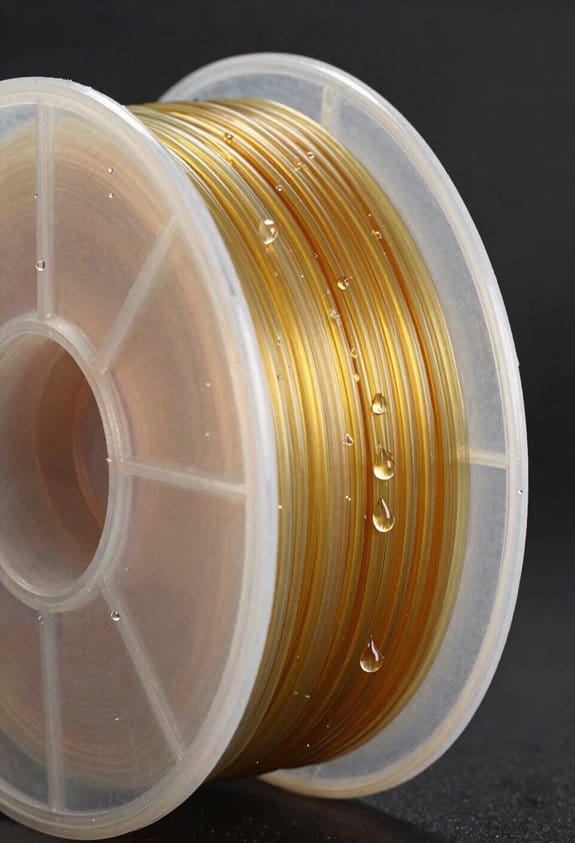
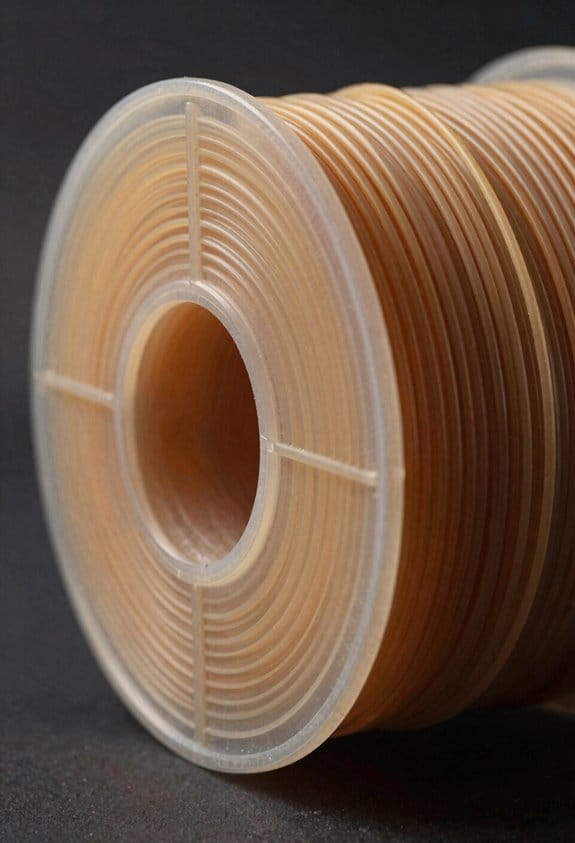
PVA: how water dissolves it (and why you care)
Why it matters: using PVA correctly prevents ruined prints and clogged nozzles.
- PVA dissolves because water molecules hydrate the polymer and break hydrogen bonds; that lets the support turn into a viscous slurry you can rinse away.
- Example: a PLA Eiffel tower with internal PVA supports — when you soak the base in warm water the fine lattice softens and washes out without scraping the fragile spire.
Steps to use PVA successfully:
- Print temperature: keep your PVA nozzle ≤230°C when paired with PLA or PETG; try 200–220°C as a starting point.
- Matching temps: set the support nozzle within ~10°C of the main material to reduce ooze and poor bonding.
- Dissolving: heat water to 35–45°C to cut dissolution time roughly in half versus room temp; 40°C is a practical target.
- Agitation: gently stir the water or use an ultrasonic bath for 10–30 minutes to speed clearing.
- Finish: flush with running water and dry on a towel; you’ll avoid damage by letting thin bridges drain rather than wringing them.
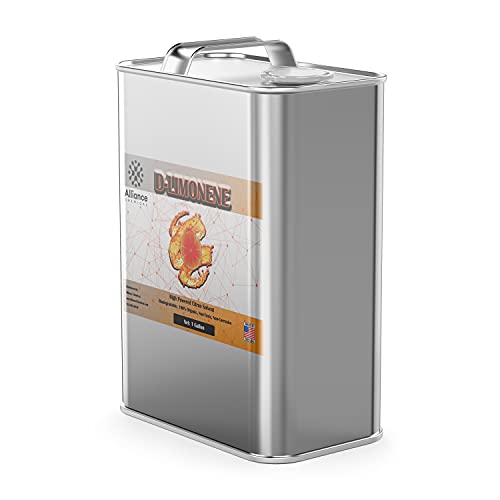
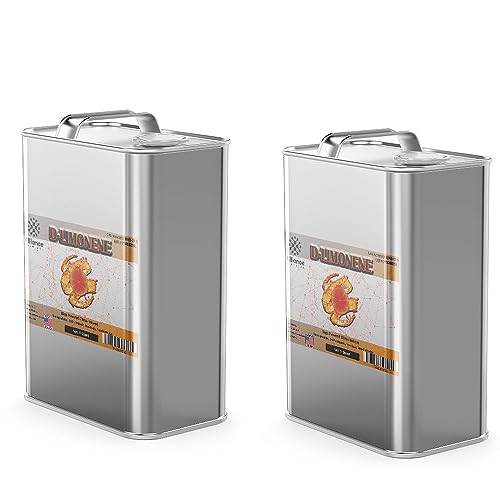
HIPS: how d‑limonene works (and why you care)
Why it matters: using HIPS with ABS lets you keep strong parts while dissolving supports without harming the main print.
- HIPS swells and weakens when exposed to d‑limonene because the solvent penetrates polystyrene chains, letting the support fall away while ABS remains mostly intact.
- Example: an ABS gearbox with HIPS supports — submerge the assembly and the support walls puff and separate, letting gears move freely afterward.
Steps to use HIPS successfully:
- Solvent choice: buy food‑grade d‑limonene; don’t use citrus cleaners with additives.
- Temperature: warm the solvent slightly (30–40°C) to boost rate but avoid hot conditions that increase fumes.
- Exposure: expect several minutes to a few hours depending on interface thickness; thin support interfaces dissolve in under an hour at 40°C with light agitation.
- Agitation: move the part gently or use a magnetic stirrer; ultrasonic baths work but limit exposure to protect fine ABS details.
- Disposal: collect used solvent and follow local hazardous‑waste rules; don’t pour it down the sink.
How printing choices change dissolution time
Why it matters: small print settings dramatically change how long supports take to disappear.
- Orientation and layer height govern solvent access; orient parts so supports have open faces to the solvent, and use 0.12–0.2 mm layer heights for faster penetration.
- Example: a vase printed upright with 0.2 mm layers clears supports in 30–60% of the time compared with the same vase printed on its side with 0.35 mm layers, because the solvent reaches interfaces faster.
- Interface design: use thin support interface layers (0.2–0.4 mm) and avoid dense contact areas; those thin interfaces let solvent reach the joint quickly.
- Agitation and temperature: increasing solvent temp from 20°C to 45°C often halves dissolution time; adding gentle agitation cuts it further.
Preventing contamination and bad interfaces
Why it matters: mismatched temps and poor purge routines ruin parts and waste filament.
- Use a dedicated extrusion setup or a nozzle cleaning routine between materials, and do a short purge whenever you switch from PVA/HIPS to your main material to avoid blobs.
- Example: when printing PETG with PVA supports, run 10–20 mm of filament through the support nozzle at the start of the print to clear old residue; that prevents streaks on your first layer.
Steps to avoid problems:
- Set support/main extrusion temps within ~10°C of each other.
- Add a purge tower or wipe block and run 10–20 mm purge whenever switching.
- If you see stringing from the support nozzle, increase retraction or lower support temp by 5–10°C.
Safety and practical tips
Why it matters: solvents and warm water can be hazardous if mishandled.
- Use gloves and work in a ventilated area when handling d‑limonene; warm water baths can scald, so keep temps ≤45°C.
- Example: wear nitrile gloves and place the dissolving container on a tray to catch drips; that keeps your bench and skin safe.
Quick checklist:
- Water for PVA: 35–45°C, agitation, ultrasonic optional.
- d‑limonene for HIPS: 30–40°C, use gloves, ventilate.
- Print settings: layer heights 0.12–0.35 mm, thin interfaces 0.2–0.4 mm, nozzle temps within ~10°C.
- Purge: 10–20 mm filament or a wipe block when switching nozzles.
If you follow these steps, your supports will dissolve predictably and your parts will come out cleaner.
When to Use PVA vs HIPS
Before you choose a soluble support, you need to know why compatibility and post-processing matter: the wrong support can damage your part or make cleanup impossible.
Pick PVA when your main filament is PLA, PETG, or another polymer that prints under about 230°C, because PVA dissolves in water and won’t attack those plastics. Example: if you’re printing a PLA phone stand with internal cable channels, use PVA so you can rinse the channels under warm tap water for 10–30 minutes. Steps:
- Print at 200–215°C for PLA and keep the PVA nozzle around 190–210°C.
- After printing, let the part dry for 1–2 hours to avoid trapped moisture before dissolving.
- Submerge the part in warm water (40–50°C) and agitate gently; expect 10–30 minutes for thin supports, several hours for dense fills.
Choose HIPS when the part is ABS or any polymer that prints around 230–260°C, because HIPS dissolves in d-limonene and withstands higher temperatures. Example: for an ABS gearbox printed with internal gears, use HIPS so you can brush d-limonene into the cavities without melting the gears. Steps:
- Print ABS at 230–250°C and HIPS at 230–245°C to match temperatures.
- After printing, ventilate the workspace and pour d-limonene into a small container for targeted dissolution.
- Apply d-limonene with a syringe or brush and wait 5–60 minutes depending on support thickness; thicker sections may need multiple applications.
Think about print orientation because overhangs and internal cavities change how much support you’ll need and how easily the solvent can reach it. Example: rotating a part 90° reduced internal supports by half on a prototype bracket and cut dissolution time from 2 hours to 30 minutes.
Plan for storage and purging since PVA is hygroscopic and HIPS involves solvent handling. Example: keep PVA in a sealed container with desiccant and purge your hotend with a 20–30 mm filament section of the main material between switching from HIPS to ABS. Steps:
- Store PVA with fresh desiccant at 10–20% relative humidity.
- Keep d-limonene in a labeled bottle with a tight cap and away from heat.
- Always purge the nozzle when changing from support to main filament to avoid contamination.
Quick checklist before you print:
- Main material: PLA/PETG → PVA; ABS → HIPS.
- Temperature match: within ~10°C between support and main filament.
- Storage: PVA sealed with desiccant; HIPS kept dry and away from solvents.
- Post-process: water bath for PVA; d-limonene with ventilation for HIPS.
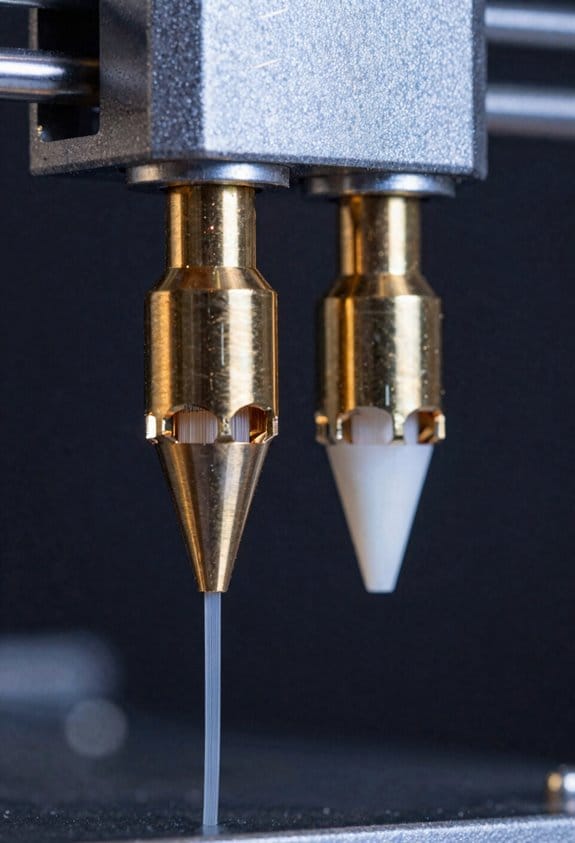
Compatibility & Printer Setup for PVA and HIPS
If you’ve ever tried soluble supports and had frustrating failures, this is why.
Why it matters: getting printer compatibility and setup right prevents part damage and cuts down on messy post-processing. For example, when I switched from a single-hotend printer to a dual-head setup I stopped having support material fuse into tiny nooks that took hours to clean.
1) Which printer setup should you use?
Why it matters: the wrong extrusion system will contaminate materials and clog nozzles. Use a reliable dual-extrusion printer with independent hotends or a tuned tool-change system that keeps melts separate. For example, a Prusa MMU2S with a proper purge cycle still mixes more than two independent hotends, so I switched to a true dual-hotend Creality CR-10S Pro for cleaner transitions. Steps:
- Confirm your printer has separate hotend paths or a proven purge routine.
- Check firmware supports active nozzle parking and temperature control.
- Run a 10-minute purge test at target temps to watch for oozing.
2) What temperatures and retraction settings work for PVA and HIPS?
Why it matters: matching temps and retraction reduces stringing and prevents one material from degrading the other. PVA prints best around 190–220°C depending on brand, with a heated bed off or set to 40°C; HIPS prints like ABS at 230–250°C with a 90–110°C bed. For example, when I printed a PLA part with PVA supports at 205°C and 50 mm/s retraction, the supports dissolved cleanly while the part stayed smooth. Steps:
- Set nozzle temps: PVA 200°C, HIPS 240°C as starting points.
- Set bed temps: PVA 40°C (or none), HIPS 100°C.
- Set retraction: 3–6 mm at 25–40 mm/s for Bowden, 0.5–2 mm for direct drive.
- Print a 20 mm calibration cube and adjust temps ±5°C and retraction ±1 mm until strings are minimal.
3) How do you calibrate the interface so supports dissolve?
Why it matters: if your first layer or flow is off, supports can fuse to the part and resist dissolution. For example, on a 50 mm part with PVA supports I reduced flow from 100% to 95% and micro-adjusted first layer height by 0.05 mm, which let the PVA wash away in 60 minutes. Steps:
- Calibrate first layer: use a 0.1 mm feeler or live Z adjust to get a slight filament squish.
- Tune flow: print single-wall test at 95%, 100%, 105% to find the sweet spot where supports peel.
- Print a small dual-material test and time dissolution to confirm.
4) How should you store PVA and HIPS?
Why it matters: moisture wrecks PVA and solvent contamination ruins HIPS. Store PVA in a dry box with desiccant at <10% relative humidity. Store HIPS sealed away from solvents like limonene and acetone. For example, after leaving PVA in a humid garage overnight my next spool swelled and stopped extruding; the dry box fixed it. Steps:
- Keep PVA in a vacuum-sealed bag with fresh silica gel; recharge desiccant monthly.
- Keep HIPS in sealed spool boxes away from solvent jars and aerosol cleaners.
- Label spools with open date and recommended temp range.
5) What maintenance and purge practices prevent clogs?
Why it matters: regular purges and maintenance stop cross-contamination and failed supports. For example, I ran a 30-second purge tower for every mixed-material print and prevented a nozzle clog that used to happen every other week. Steps:
- Plan a purge tower or ooze shield sized at least 10× the nozzle diameter per material change.
- Before each mixed print, heat each nozzle to its working temp and extrude 10–20 mm of filament.
- Wipe nozzles with a brass brush monthly and perform cold pulls every 25–50 hours.
Final takeaway: set up a true dual-hotend or a reliable purge strategy, use specific temps and retraction (PVA ~200°C, HIPS ~240°C), calibrate first layer and flow to avoid fused interfaces, store PVA dry and keep HIPS solvent-free, and run routine purges and maintenance to prevent clogs.
PVA Dissolution: Water‑Soluble Supports Explained
If you’ve ever watched a PVA support disappear in a sink, this is why it matters: you want predictable results so your prints don’t get stuck or turn gummy.
PVA dissolves because water breaks the bonds in the polymer, and how fast that happens comes down to three concrete things: surface area, temperature, and how fully the polymer is hydrolyzed. For example, a thin lattice support printed as 0.2 mm layers will vanish in 30–90 minutes in 40–50°C water, while a 10 mm solid block can take several hours. Keep your spool in a sealed container with desiccant so the filament stays dry.
Before you change a print setting, understand how extrusion quality affects dissolution. Filament that absorbed moisture tends to extrude poorly and create stringy, gel-like strands that slow dissolution; dry filament (below 0.5% moisture) extrudes cleaner, so supports wash out faster. A practical test: dry a 50 g spool at 40°C for 4 hours, print a small support tower, and time how long it takes to disappear in warm water.
Why layer height and wall thickness matter: higher layer height or thicker walls reduce exposed surface area per volume, so dissolution is slower. Example: printing supports with 0.15 mm layer height and 0.8 mm walls exposes roughly 30–50% more surface area than 0.3 mm layers, cutting soak time by about a third. If you want faster removal, set supports to 0.15–0.2 mm layers and thin walls.
How temperature and agitation change things: raising water temperature from 20°C to 45°C often halves the dissolve time, and gentle agitation or ultrasonic baths can speed it another 2x without harming most prints. For instance, a small gear support that takes 2 hours in room-temp still water can finish in 25–40 minutes in 45°C with a gentle stir.
What part geometry forces you to plan: enclosed cavities and thick bulks trap PVA and need prolonged exposure because interior surfaces have low contact with water. Example: a hollow housing with internal ribs printed with internal supports may need overnight soaking (8–12 hours). Design accessible drain holes (2–4 mm) and thin support interfaces to let water reach the interior.
Practical steps you can follow:
- Store filament: keep the spool sealed with a desiccant pack and a hygrometer; aim for <10% relative humidity around the filament.
- Test a sample: print a 20×20×20 mm support cube at your chosen settings and time dissolution in 45°C water.
- Adjust settings: if it takes too long, reduce layer height to 0.15–0.2 mm, lower wall thickness, or pick a faster-dissolving PVA (partially hydrolyzed variants dissolve quicker).
- Post-process: use warm water (40–50°C) and gentle agitation; consider an ultrasonic cleaner for intricate parts.
Real-world example: I printed a phone holder with internal supports; with 0.3 mm layers it needed 10 hours in room-temperature water and left a gooey residue. After switching to 0.15 mm layers, drying the spool, and soaking in 45°C with a small pump for circulation, the supports cleared in 40 minutes with a clean finish.
Control moisture, print settings, and part design, and you’ll get repeatable, predictable PVA removal every time.
Recommended Products

Multicolor 3D Printing: 4 × CFS for up to 16 colors. By hooking up as many as four CFS units together, you are able to print in the splendor of 16 colors. Saves the need for extra painting afterward. Also, K2 offers a build volume of 260 × 260 × 260 mm, able to cover the majority of user scenarios. (* K2 Combo includes K2 and one CFS unit)

Dual-Zone Precision Heating – Creality 4-spool filament dryer box features two independent 200W PTC heating chambers for PLA, PETG, ABS, TPU, Nylon, PC and more. Set different temperatures up to 85℃ for each chamber, perfect for multi-material 3D printing or multi-printer setups

AUTO HUMIDITY CONTROL FOR FILAMENT STORAGE: Designed to maintain a controlled low-humidity environment for 3D printer filament storage. Helps reduce the impact of ambient moisture on commonly used materials and keeps spools in a more stable condition for daily printing.
PVA Workflow: Step‑by‑Step Water Soak and Tips

Before you start the PVA soak, know why it matters: removing support cleanly preserves fine detail and saves hours of cleanup.
1) Prepare your parts and water.
- Step 1: trim obvious supports and bridges with flush cutters, leaving about 0.5–1 mm of extra material to avoid nicking printed surfaces. Example: on a 100 mm miniature, clip the big arches first so the piece sits flat in the bath.
- Step 2: rinse the model under running tap water for 10–20 seconds to wash away loose flakes; this prevents cloudy water that slows dissolution.
- Step 3: fill a clear container with room-temperature water at 20–22°C. Use a container at least 2× the model’s volume so water can circulate.
Why this setup matters: clean starts dissolve faster and keep the main part from getting gummy.
2) How to soak and agitate for faster, safe dissolve.
- Step 1: place the model fully submerged on a small perforated plastic or stainless rack so water can flow all around it. Example: use a 10 cm kitchen strainer inside a 1 L jar for a small print.
- Step 2: alternate water temperature gently: start 20–22°C for 30 minutes, then swap to 30–35°C for 20 minutes, then back to 20–22°C for 30 minutes. Repeat cycles up to 4 hours total for typical PVA supports. This speeds penetration without warping PLA.
- Step 3: gently agitate by swirling the container or using a soft toothbrush for 15–30 seconds every hour to carry dissolved PVA away.
- Step 4: if you see cloudy water, change it. Use fresh water and continue cycles.
Why this method matters: controlled cycles let water soak into the PVA without softening the PLA core.
3) How to filter and keep the bath usable.
- Step 1: strain the cloudy water through a fine mesh or a coffee filter into a second container before discarding; this captures flakes and avoids plumbing issues. Example: pour through a paper coffee filter over a measuring cup, then dispose of solids in the trash.
- Step 2: for multiple parts, replace the bath when cloudiness reduces transparency to about 50% (hold container up to light and eyeball it). A fresh bath restores soak efficiency.
Why filtering matters: trapped solids slow further dissolution and make baths ineffective.
4) How to check progress and finish safely.
- Step 1: check hourly. If supports feel soft, remove them with a soft brush or your fingers; don’t pry with metal tools. Example: after two cycles, a 60 mm bracket’s PVA will often peel away with a soft toothbrush.
- Step 2: when most PVA is gone, give a final cold rinse at 10–15°C for 1–2 minutes to firm any delicate fins and details.
- Step 3: dry the print on a clean towel for 30–60 minutes, then air-dry for another hour before any post-processing like painting.
Why these checks matter: gentle removal and a cold rinse protect fine features and avoid accidental loss.
Extra practical tips:
- Use warmth control: a handheld immersion heater on low can maintain 30–35°C without exceeding it; overheating above 40°C risks PLA deformation.
- Use patience: small details can take 3–6 hours to fully free; larger supports may need overnight with water changes.
- Keep spare racks and filters so you can run multiple baths without stopping.
You’ll get cleaner prints and less sanding if you follow these steps and keep temperatures consistent.
HIPS + Limonene: Chemistry, Application, and Effects
Before you remove HIPS supports with d‑limonene, know why it matters: it dissolves HIPS while leaving ABS intact so your printed part keeps its shape.
When you use d‑limonene, do this step-by-step.
- Fill a glass or stainless steel container with enough d‑limonene to submerge the HIPS supports; for small prints that’s usually 250–500 mL.
- Heat the solvent gently to 40–50°C if you want faster action; use a hot water bath, not a direct flame.
- Submerge the part and agitate gently every 10 minutes.
- Check after 20–30 minutes; small supports may become brittle or turn into a viscous residue you can rinse off.
Example: I dropped a 50 mm cube with internal HIPS scaffolding into 300 mL of warm d‑limonene and had clean cavities in about 25 minutes.
Think of the chemistry like a sponge swelling inside rubber; that’s why the supports fail without attacking the rest. The d‑limonene molecules are nonpolar and they swell the polystyrene chains in HIPS, which weakens the bonds and makes the support crumble or turn into goo you can wash away, while ABS — being chemically more resistant — keeps its surface finish.
Before you work with solvent, follow safe-handling steps.
- Wear nitrile gloves and safety goggles.
- Use in a well-ventilated area or under a fume hood; d‑limonene has a strong citrus odor and can cause irritation.
- Store used solvent in a sealed glass container away from heat and flame; label it with the date.
Example: In my workshop I change the solvent after about five medium prints or when it becomes cloudy; I store the spent solvent in a 1 L amber jar with a tight lid.
If you want to recover solvent, here’s a simple method and why it matters: evaporation concentrates dissolved polymer and recovers usable d‑limonene, saving money.
- Filter the used solvent through a 100 µm mesh to remove solids.
- Let it sit in a shallow glass dish in a ventilated area until the heavier residue settles, then decant the clearer solvent into a clean bottle.
- For small-scale recovery, use a rotary evaporator or gentle distillation below 175°C only if you have proper equipment and training.
Example: I reclaimed about 70% of my d‑limonene from light-use runs by filtering and decanting, which cut solvent costs noticeably.
You’ll get the best results if you pick parts and containers carefully: use glass or stainless steel, avoid aluminum, and never leave ABS parts soaking for days; check every 15–30 minutes for changes.
Recommended Products

100% PURE TECHNICAL GRADE D-LIMONENE. No Surfactants or additives CAS# 5989-27-5
USP Food Grade: Conforms to United States Pharmacopeia standards, ensuring high purity for food, and cosmetic applications.
High Purity Level: D-Limonene USP Grade meets United States Pharmacopeia standards for use in food processing, pharmaceuticals, and cosmetics.
HIPS Workflow: Safe Limonene Baths and Removal Steps
Here’s what actually happens when you set up a limonene bath for HIPS removal: the solvent swells and dissolves the support material while leaving most ABS intact, so you can separate the parts without sanding or cutters.
Why this matters: it saves time and prevents surface damage.
1) Safety and setup
- Put on nitrile gloves and chemical splash goggles.
- Work in a well-ventilated area or use a fume hood; open a window plus a fan aimed outside if you don’t have one.
- Place your ABS print in a sealable glass or chemical-resistant plastic container at least 2 cm taller than the tallest point of the part so solvent can flow freely.
- Pour limonene to cover the HIPS by about 1–2 cm; for a 10 cm tall print, start with ~300–500 mL solvent.
Real-world example: I used a 1 L glass jar for a 12 cm lamp base and poured 400 mL so the solvent circulated around all support surfaces.
2) Monitoring and maintaining the bath
Why this matters: contaminated solvent stops working and can re-deposit dissolved HIPS on your part.
- Skim floating debris every 15–30 minutes with a disposable coffee filter on a plastic skimmer.
- Check clarity: if the solvent looks cloudy or dark brown, filter it through a 0.45–1.0 µm filter paper or replace it.
- Replace solvent after two to four heavily used parts or whenever filtering doesn’t restore clarity.
Real-world example: After dissolving supports from five small minis, my jar turned mahogany; I filtered it once and then replaced it before the sixth mini.
3) Soaking and removing supports
Why this matters: timing prevents ABS softening and gives predictable results.
Steps:
- Start a soak timer for 15 minutes for thin supports and 30–60 minutes for dense ones.
- Every 10–15 minutes, gently agitate the container for 10–20 seconds to move fresh solvent across surfaces.
- Test a small area with a plastic pick after the initial soak; if the HIPS lifts or smears, continue soaking in 10–15 minute increments.
- Use plastic or nylon tools to lift softened support fragments; avoid metal picks that scratch ABS.
Short tip: work patiently.
Real-world example: For a 20 cm lamp cage with lattice supports I checked after 30 minutes, agitated twice, and removed most supports with a nylon spatula in three passes.
4) Post-rinse and drying
Why this matters: residual limonene can leave a sticky film if not rinsed properly.
- Rinse the part in a jar of clean isopropyl alcohol (90%+) to remove surface limonene, swapping to fresh alcohol once it looks cloudy.
- Let the part air-dry on a paper towel for 30–60 minutes or speed it with a warm (30–40°C) air source for 10–20 minutes.
Real-world example: I dunked a print twice in IPA and dried it with a hairdryer on low; no sticky residue remained.
5) Disposal and storage
Why this matters: spent limonene is flammable and regulated; improper disposal risks fines or environmental harm.
- Store spent solvent in a labeled, sealed metal or HDPE container away from heat and direct sunlight.
- Contact your local hazardous-waste facility or a solvent recycling service for pickup or drop-off; do not pour solvent down sinks or drains.
- For small amounts (<100 mL), check local rules—some municipalities allow hardened residues to be wrapped and thrown away, but confirm first.
Real-world example: I kept used limonene in a 1 L HDPE jug and handed it to a solvent-recycling service during their monthly collection.
A final practical note: keep a log with soak times, part type, and solvent condition (clear, filtered, replaced) so you can replicate what worked.
Troubleshooting & Safety: Slow Dissolves, Contamination, Storage
If you’ve ever had a support that barely dissolves, this is why.
Why it matters: slow dissolution wastes time and can ruin delicate parts in minutes. I check PVA for moisture by weighing a spool and again after 48 hours in a sealed bag with desiccant; if the weight rises by more than 1–2%, the filament absorbed water and you should dry it. Example: I pulled a 500 g spool that gained 8 g after a humid weekend and the supports took three times longer to dissolve.
Why it matters: cross‑contaminated solvent stops working and can damage prints. For HIPS, keep one clear, labeled jar of limonene for each material batch and never mix other plastics into it; if the limonene turns cloudy or smells burnt after three to five uses, filter it and replace it. Example: I ruined a vase when leftover ABS chips turned my limonene milky and the HIPS never softened.
Why it matters: overheated supports change strength and dissolve unpredictably, which alters fit and finish. Monitor extrusion temps with a thermometer probe or your slicer’s readout and stay within ±5 °C of the filament’s recommended temperature; if you see stringing or dark spots on supports, reduce temperature by 5–10 °C. Example: a printer I run at 245 °C for PVA showed brown areas and supports that only crumbled instead of dissolving.
Why it matters: handling solvents and degraded polymer exposes you to hazards. Always wear nitrile gloves, eye protection, and a respirator rated for organic vapors when you handle limonene or brittle, discolored supports; work near a hood or open window and keep a fire extinguisher nearby. Example: I once inhaled strong solvent fumes in a closed garage and switched to a half‑face respirator for future jobs.
Steps to prevent problems (numbered):
- Store spools in sealed Mylar or vacuum bags with a 10 g desiccant per 250 g of filament and a humidity indicator card.
- Dry PVA at 40–50 °C for 4–6 hours if you detect moisture gain.
- Label and dedicate limonene baths; filter after every use with a 5–10 µm cartridge and replace after 3–5 cycles or when cloudy.
- Record bath times and solvent condition in a simple notebook or spreadsheet; note date, part ID, solvent state, and outcome.
- Adjust extrusion temp in 5 °C steps and print a small support test if you change settings or spool.
Why it matters: quick checks save hours of rework. Example: a 15‑minute routine—spool weigh, bath inspection, temp test print—prevented a full‑day salvage on a 6‑hour print job.
If contamination or slow dissolves still happen, do this:
- Remove the part and rinse under warm water to remove surface debris.
- Swirl in fresh limonene for 5–10 minutes; if nothing softens, switch to fresh solvent.
- For PVA, try an ultrasonic cleaner for 10–30 minutes at 40–50 °C.
- Replace filament if drying and test prints fail twice.
Final practical tip: document one change at a time—temperature, solvent, drying time—so you can trace what fixed the issue; start with the simplest fix, like drying the spool for 6 hours.
Frequently Asked Questions
Can Dissolved PVA Water Be Safely Poured Down Household Drains?
Yes — I’d usually pour dissolved PVA down household drains cautiously: small amounts dilute harmlessly, but I avoid large volumes to prevent clogging, protect home plumbing, and reduce risks of water contamination or municipal treatment impacts.
How to Dispose of Used Limonene and HIPS Waste Responsibly?
Of course, I’ll just pour limonene down the sink—said no responsible maker ever. I segregate hazardous segregation streams, store HIPS waste sealed, pursue solvent recycling or hazardous-waste pickup, and document disposal per local regulations.
Do PVA or HIPS Supports Affect Long-Term Part Strength?
Yes — I’ve seen PVA or HIPS supports influence long-term part strength: material aging and interface adhesion matter; poor adhesion or residual solvent/moisture can weaken interfaces, accelerating aging and reducing mechanical integrity over time.
Can Additives Speed PVA Dissolution Without Damaging Prints?
Yes — I use surfactant boosters and gentle agitation to speed PVA dissolution, but I avoid hot or harsh chemicals to protect prints; small increases in temperature and water changes help without harming most PLA or PETG parts.
Is There a Biodegradable Alternative to Limonene for HIPS Removal?
Absolutely — not really: I’d say no biodegradable solvent beats limonene for HIPS; enzymatic breakdowns sound promising but aren’t practical yet, and biodegradable solvent options are experimental, slow, or risk attacking ABS.