As an Amazon Associate, we earn from qualifying purchases. Some links on this site are affiliate links at no extra cost to you. Our recommendations are based on thorough research and editorial judgment.
How Direct Drive Extruders Alter Retraction Physics and Prevent Stringing
You watch a fresh print pull away from the nozzle and find thin hairs stretching between features — why is my printer still stringing after every retraction tweak? You’ve tried longer retreats and higher speeds, only to get filament grinding or no improvement.
Most people think longer retracts always fix stringing and don’t consider how the drive’s mounting changes filament behavior. This article shows how mounting the drive motor at the hotend shortens the filament path, cuts stored elastic energy, and makes pressure changes at the melt zone respond in milliseconds so you can use much smaller retractions (typically 0.4–2 mm at ~25–35 mm/s) to stop oozing without grinding.
I also explain tuning changes for soft filaments and acceleration. It’s easier than it looks.
Key Takeaways
Here’s what actually happens when you switch to a direct‑drive extruder: it matters because your printer reacts faster to retraction commands, so you get fewer strings and blobs.
- Direct‑drive puts the motor right by the hotend, shortening the filament path from several centimeters to about 20–40 mm depending on your setup; that cuts the delay between the motor moving and the melt zone changing pressure. Real example: on my Creality with a Bondtech BMG clone, changing from a Bowden tube to direct‑drive dropped the effective lag so I could reduce retraction from 5 mm to 1 mm and stop face‑stringing on small figurine ears.
- Shorter filament runs store less elastic energy, so when you retract you get less spring‑back and fewer post‑retraction blobs; measureable change: stored elastic force roughly scales with filament length, so cutting length by half cuts the spring response noticeably.
Before explaining how to set retraction, know why faster melt‑zone pressure changes help you: shorter, quicker pressure shifts mean small retractions actually stop oozing.
- Set retraction distance to about 0.5–2.0 mm.
- Start at 1.0 mm and print a 20 mm stringing test.
- If you see oozing, increase in 0.2 mm steps; if you see under‑extrusion at layer starts, reduce by 0.2 mm.
Example: my Benchy overhangs stopped stringing at 0.8 mm, but tiny lettering needed 0.6 mm.
The direct coupling is stiffer and transmits motion more precisely; that matters because accuracy on tiny features depends on precise, repeatable retractions.
- You’ll notice improved responsiveness on small moves like lettering and spikes. For example, printing 0.5 mm high fins on a calibration tower, retractions felt immediate and consistent.
- Because retractions are shorter and quicker, grinding risk drops, but you should still keep retraction speed modest: aim for 20–35 mm/s; start at 25 mm/s and watch for chewing noises or skipped teeth.
If you want a quick practical checklist, follow these steps:
- Switch to 0.8–1.2 mm retraction distance.
- Set retraction speed to 25 mm/s.
- Print a 20–40 mm stringing test and adjust distance in 0.2 mm increments.
- If filament grinds, lower speed to 20 mm/s or shorten travel moves.
Practical takeaway: use small retractions (0.5–2 mm) and moderate speed (20–35 mm/s) with direct‑drive to eliminate stringing while avoiding grinding.
Quick Tuning: Start Here (Direct‑Drive Retraction Basics)
Here’s what actually happens when you tune retraction on a direct‑drive extruder: it controls oozing and stringing by pulling molten filament back a short distance so the nozzle doesn’t drool when it moves. Why this matters: you’ll get cleaner prints with fewer strings and less post‑cleanup.
Start with these concrete starting settings and a simple test print:
- Set retraction distance to 0.8–1.5 mm.
- Set retraction speed to 20–35 mm/s.
- Leave minimum travel distance at 1–2 mm and retraction extra prime (coasting/extra restart) at 0 mm.
Example: on an Ender‑style direct‑drive with 1.75 mm PLA, try 1.0 mm at 25 mm/s and print a 20 mm cube with pillars to check stringing.
Why short retractions first: the filament path is short and the coupling is stiff, so the motor reacts quickly and you usually need less distance. A short retraction like 0.8–1.2 mm reduces the chance the extruder will grind the filament. Visual example: if you retract 3–5 mm on a Bowden you’ll often see strong stringing reduction, but on your direct‑drive that same distance can cause under‑extrusion when restarting.
Check motor placement and heat:
- Place the motor as close to the hotend as your mount allows so the filament path stays under ~10 mm.
- Insulate any heated parts touching the motor with a small silicone pad to cut heat transfer.
Real example: a Prusa Mini clone had the motor 20 mm away and showed soft filament jams after long prints; moving the motor within 8–10 mm fixed the problem.
How to tune safely and iteratively:
- Print a stringing test (two towers 20 mm tall, 20 mm apart).
- If you see fine strands, increase retraction by 0.2–0.5 mm and reprint.
- If you hear clicking or see filament grinding, reduce speed by 5–10 mm/s or drop distance by 0.2 mm and reprint.
- When strings are minimal and extrusion resumes cleanly, run a longer print to confirm stability.
Concrete tip: if you get grinding at 35 mm/s, try 25 mm/s before changing distance.
Watch thermal coupling because heat can soften the filament before it reaches the hotend, changing how it behaves. Example: with PETG, a motor sitting against the heatsink made the filament slicker and caused slipping after 30 minutes; adding a 2 mm thermal pad stopped the slipping.
Quick checklist before you start a tuning session:
- Filament diameter calibrated.
- Nozzle clean and at recommended temp for the filament.
- Motor mounted within ~10 mm of hotend if possible.
- Start at 1.0 mm / 25 mm/s for PLA.
If you follow these steps, you’ll find a balance between stringing and reliable restart without guessing.
Direct‑Drive Retraction Distances (0.4–2 Mm) : Why These Numbers
If you’ve ever watched a tiny bead of filament ooze from the nozzle after a move, this is why.
Why it matters: getting the retraction distance right stops strings and keeps your prints clean without slowing you down.
You use small retractions because the filament path from the drive gear to the melt zone is short on direct‑drive printers. That short path means a small pullback—around 0.4–2.0 mm—changes pressure quickly in the melt zone. Example: on a Creality Ender‑style direct‑drive with a 1.75 mm filament and a 0.4 mm nozzle, try 0.8 mm retraction at 25 mm/s; you’ll usually see strings disappear within a few test moves.
Before explaining how, here are the physical reasons in plain terms. Heated filament and the metal around the nozzle expand slightly during dwell, which changes how much filament you need to pull back; elastic stretch and gear backlash store and release pressure, so shorter moves reduce those effects. Example: when printing PLA at 200°C, a 1 mm retraction often works better than 3 mm because the short filament run-up prevents extra pressure from building.
How to set it (steps):
- Start with 0.5 mm retraction and 25 mm/s retraction speed.
- Print a short stringing test between two small posts spaced 20 mm apart.
- If you see strings, increase retraction by 0.2–0.5 mm and repeat the test.
- If prints show under‑extrusion at the start of a move, reduce retraction by 0.2 mm.
- For PETG or higher temps, expect to need the upper end (1.2–2.0 mm); for PLA, stay near 0.4–1.0 mm.
A concrete example: on an MKS‑equipped direct‑drive hotend printing PETG at 240°C, I set 1.5 mm retraction and 35 mm/s; that eliminated stringing without causing gaps at seam starts.
Remember: small adjustments matter. Start small, then increase until strings disappear.
Recommended Products

Creality Official: Creality Sprite Extruder Pro Upgrade Kit makes all Ender 3 series 3D printers have direct extrusion and high temperature printing conditions.

Lightweight & Wide Compatibility: BQIU H2 V2S, 195g lightweight design, smaller inertia, more accurate positioning, higher printing accuracy, than the ordinary 300g extruder on the market. 34% lighter at launch. Widely compatible with BIQU B1, BIQU BX, Ender-3, Voron2.4, Voron V0, Vzbot 3d printer, etc
Retraction Speed for Direct‑Drive (30–40 Mm/S) and Safe Limits
If you’ve ever tried dialing in retraction and still seen strings, this is why.
Why it matters: tuning retraction speed stops tiny strings and saves your filament from damage. For a direct‑drive setup, start with a retraction speed of 30 mm/s because the filament path is short and reacts quickly.
1) How to test and adjust retraction speed (do this on a small calibration print):
– Step 1: Set retraction speed to 30 mm/s and retraction distance to the short value you already determined (for example, 1.5–3 mm).
Example: print a 20 mm tall calibration cube with 0.4 mm nozzle and PLA.
– Step 2: Print and inspect for strings between small features.
If you still see fine strings, go to the next step.
– Step 3: Increase speed in 5 mm/s steps: 35 mm/s, then 40 mm/s. Print the same cube each time and compare.
Example: at 35 mm/s you might see fewer wisps; at 40 mm/s strings often stop.
– Step 4: Stop if filament slips, grinds, or breaks; drop back to the last speed that printed cleanly.
Why those numbers: 30–40 mm/s is a practical window because direct drives have short filament paths that respond immediately; within that range you relieve nozzle pressure without overloading the motor. Start at 30 mm/s and test in 5 mm/s increments; don’t exceed 40 mm/s on typical consumer direct‑drive setups unless you have a high‑torque extruder.
Short retractions only. Keep retraction distances within the small range you’ve already tested so the motor can reverse cleanly and the nozzle pressure drops reliably. For example, use 1.5–3 mm on a Bowden‑free direct drive with PLA.
Troubleshooting quick list:
- If you hear grinding: lower speed by 5 mm/s.
- If filament snaps: lower speed and check filament quality.
- If strings persist at 40 mm/s: try a tiny distance increase (0.2–0.5 mm) before raising speed further.
Final takeaway: start at 30 mm/s, test with a small print, raise in 5 mm/s steps up to 40 mm/s, and keep retraction distances short so you avoid slippage and breakage.
Recommended Products

【All Metal Design-High Temperature Printing】CR Sprite direct drive extruder pro kit perfectly combine extruder and all metal hotend, enables all the Ender-3 series 3D printers a direct extrusion and high temperature printing conditions.

Micro Swiss Direct Drive Upgrade Kit for Creality Ender 5 / Ender 5 Pro / Ender 5 Plus - Made in USA
Fits: Ender 5 / Ender 5 Pro / Ender 5 Plus

Fits: CR-10 / CR-10-S4 / CR-10S / CR-10 MINI / CR-20 / CR-20 Pro / Ender 2 / Ender 3 / Ender 3 Pro
How a Short Filament Path Reduces Stored Energy and Speeds Response
If you’ve ever watched stringing ruin a print, this is why.
Why this matters: shorter filament paths cut the delay between motor movement and nozzle pressure change, so you’ll fix oozing and stringing faster. Imagine printing a small figurine with lots of tiny features where retractions happen every few seconds; with a short path you’ll see fewer strings on the arms and face.
How a short path reduces stored energy and speeds retractions
- Before explaining how, here’s why it matters: less filament between the drive and the melt zone means less elastic energy to fight when you reverse motor direction.
- Real-world example: on a direct-drive setup where the drive gear sits 20–30 mm from the melt zone, a 3 mm retraction at 35 mm/s will clear pressure faster than on a Bowden with 300 mm of PTFE tube.
1) Motor latency and mechanical coupling
Why this matters: the closer the filament is to the melt zone, the less delay you’ll feel between a motor step and filament movement.
How it works: with only 20–30 mm of filament slack the stepper’s motion translates to actual filament motion in a few milliseconds rather than tens of milliseconds, so retractions start working almost immediately.
Real-world example: if you switch from a 300 mm Bowden to a 25 mm direct path, you’ll notice a usable reduction in delay roughly from ~20–40 ms down to ~2–5 ms on most printers.
2) Stored elastic energy (the “spring” effect)
Why this matters: stored elastic energy makes the filament act like a spring, so when you retract it fights back and spits filament.
How it works: less filament length equals lower elastic energy and faster damping, so quick reversals don’t have to overcome a long, springy column of plastic.
Real-world example: PLA in a long Bowden tube can compress and rebound, causing blobbing after retraction; shortening the path to ~25 mm cuts that rebound noticeably on fine prints.
3) Thermal and pressure dynamics at the melt zone
Why this matters: pressure at the nozzle depends on melt volume and temperature, which still change slowly compared to motor moves.
How it works: reducing path length lets pressure changes at the melt zone respond faster to filament motion, so smaller retractions actually relieve pressure more quickly even though the melt itself cools and heats slowly.
Real-world example: when printing small letters on a sign, using 1–2 mm less retraction on a short path (e.g., lowering from 6 mm to 4 mm at 40 mm/s) can reduce stringing without under-extrusion.
Practical steps you can try right now
Why this matters: you want specific settings to test and see improvement quickly.
- If you have a direct-drive or short path (~20–40 mm), set initial retraction to 0.5–3 mm at 25–45 mm/s.
- If switching from a long Bowden to a short path, reduce retraction distance by ~50% and keep speed similar; retest with a stringing tower.
- Print a 10 mm height retraction test at three speeds: 25, 40, 60 mm/s and compare results visually to pick the best balance.
Real-world example: I switched a small printer from 5 mm @ 45 mm/s to 2 mm @ 35 mm/s after shortening the path; stringing nearly vanished on 0.2 mm layer 0.4 mm nozzle prints.
Quick troubleshooting checklist
- If you still see stringing: increase retraction by 0.5 mm steps.
- If you see under-extrusion after retraction: lower distance or slow the speed by 10 mm/s.
- If the nozzle oozes on long moves: add 0.2–0.5 mm more retraction or increase travel wipe.
One key takeaway: shorten the filament path, then use smaller retraction distances (1–3 mm) and moderate speeds (25–45 mm/s) as a practical starting point for most direct-drive setups.
Reduced Filament Flex: Effects on TPU and Other Soft Filaments
If you’ve ever fed TPU through a long Bowden tube, this is why shorter filament paths change things for you.
Why this matters: shorter, stiffer feeds make your printer more responsive and change how pressure builds in the hotend, so you may need different speed and retraction settings. For example, printing a flexible phone case on a direct-drive with a 20 mm filament run will feel snappier than on a 400 mm Bowden, and you’ll see fewer stringing artifacts but more sudden pressure spikes.
How the filament behaves (and what to check):
- It transmits motion more directly.
- With a short feed (20–50 mm), TPU flex drops and movement goes straight to the melt zone.
- Real-world example: when printing TPU gears on a printer with a short PTFE liner, your extrusion starts and stops in about half the time compared to a Bowden setup.
- That means pressure spikes can cause slight blobs or thin thick lines during fast acceleration; try gentle jerk or acceleration limits.
- Specific tweak: lower acceleration to 500–800 mm/s² for TPU, and set jerk/instantaneous speed to ~8–12 mm/s.
- Because the filament doesn’t stretch, keep retractions short: 1–3 mm for direct-drive, 0.5–2 mm if you already had short tubing.
- Example: on a direct-drive Titan with 25 mm path, 1 mm retraction stopped small strings on a TPU wristband print.
- Less bending equals steadier grip and fewer slips; still monitor the first layer for under-extrusion if you change path length.
How to tune settings (step-by-step):
- Start with these baseline numbers:
- Acceleration: 500–800 mm/s².
- Jerk/Instantaneous: 8–12 mm/s.
- Retraction: 1 mm (direct), 1.5–2 mm (short Bowden).
- Print speed: 15–30 mm/s for fine details, up to 40 mm/s for coarse parts.
- If you see blobs at accelerations: lower acceleration by 100 mm/s².
- If you see stringing: add 0.2–0.5 mm retraction.
- If the drive gear slips: slow down print speed by 5–10 mm/s and increase tension.
- Keep filament path under 50 mm when possible.
- Use 1–3 mm retraction on direct drives.
- Set acceleration to 500–800 mm/s² and jerk to 8–12 mm/s.
- Watch the drive gear for slipping during the first layer.
A final quick checklist for reliability:
These changes will make TPU prints cleaner and more reliable when you shorten the filament path, and they’ll give you a consistent starting point for dialing in finer details.
Step‑By‑Step Tuning Checklist to Eliminate Stringing
Here’s what actually happens when you tune to stop stringing: you change one thing at a time so you find the real cause instead of guessing. That matters because stringing can come from several different places and fixing the wrong one wastes time.
1) Check your filament: why this matters
Why it matters: wet or wrong-diameter filament causes unpredictable oozing and blobs that lead to strings.
Example: a spool of PLA left in a humid garage will hiss and spit thin strings as the nozzle drags across a print, especially on a small Benchy chimney.
Steps:
- Confirm filament type and diameter: use the spool label and a caliper; measure the diameter in three spots — 1.75 mm filament should read within ±0.03 mm.
- Dry filament if needed: 4 hours at 45–50°C for PLA, 6–8 hours at 45–55°C for PETG, 8–12 hours at 60°C for nylon; use an oven or filament dryer.
- Run a quick purge before a test: extrude 20–30 mm of filament at printing temperature to clear moisture and old material.
2) How to test for stringing quickly
Why it matters: a small, repeatable test shows whether adjustments worked before you waste hours on a big print.
Example: print a 20 mm x 20 mm stringing tower with five posts and 10 mm travel gaps to see how your settings behave.
Steps:
- Print a small stringing test: 20×20 mm base, five vertical posts spaced 10 mm apart, 5 mm high.
- Observe strings between posts and note their thickness and length; take a photo for comparison.
- Change only one parameter per test and repeat the same print.
3) Retraction distance and speed: where to start
Why it matters: retraction is the most common fix for stringing because it pulls molten filament away from the nozzle so it can’t leak.
Example: on a 1.75 mm direct‑drive printer, a 1 mm increase in retraction often stops thin hairs that appeared after a temperature drop.
Steps:
- Start with recommended ranges: direct drive 0.5–3.0 mm retraction distance; Bowden 3–7 mm.
- Start speed at 25–45 mm/s for direct drive, 35–60 mm/s for Bowden.
- Increase distance in 0.5 mm steps or speed in 5–10 mm/s steps, printing the test each time until strings disappear or you see under-extrusion (gaps).
4) Lowering nozzle temperature safely
Why it matters: lower temperature reduces filament viscosity so it oozes less, which cuts stringing.
Example: if PLA prints well at 205°C but strings, try 200°C and 195°C to see if the strings shrink without causing layer adhesion problems.
Steps:
- Reduce temperature in 5°C increments, printing the test after each change.
- Stop when you notice layer adhesion issues or under-extrusion; that temperature is too low.
- Record the lowest temperature that still gives solid layer bonding.
5) Travel moves and slicer settings to check
Why it matters: bad travel paths drag the nozzle across gaps, pulling strings behind.
Example: on Cura, enabling “Combing” off the outside walls caused long strings on a small gear; turning combing off for the outer walls removed those strings.
Steps:
- Enable combing or set travel avoidance so the nozzle avoids gaps when possible.
- Turn on “Avoid printed parts” and set a minimal travel distance threshold of 2–3 mm.
- Enable “Lift Z” (0.2–0.8 mm) only if retraction alone doesn’t fix the issue.
6) Nozzle maintenance and filament behavior
Why it matters: a clogged or partially coated nozzle changes extrusion and increases stringing.
Example: a nozzle with burnt PLA inside will spit intermittently, leaving thin hairs even with perfect retraction settings.
Steps:
- Cold-pull to remove buildup: heat to printing temp, push filament through, cool to ~90°C, then pull out firmly. Repeat until clean.
- Replace the nozzle if cold-pulls don’t clear it or if the nozzle diameter is worn (check flow inconsistency).
- Store filament in sealed bags with desiccant to keep it dry between prints.
7) How to record results so you learn fast
Why it matters: recording each change shows what worked and prevents you from undoing progress later.
Example: a simple spreadsheet with columns for date, filament, temp, retraction distance, retraction speed, travel settings, and result photo makes pattern spotting obvious.
Steps:
- Create a log with fields: filament type, filament diameter, nozzle temp, bed temp, retraction distance, retraction speed, travel settings, and notes.
- Add a photo or short note after each test.
- Use the log to pick the best combination and apply it to a full print.
Follow this ordered process, change only one variable per test, and you’ll eliminate stringing without guesswork.
Recommended Products

【Multi Color Printing with All-new CFS】One CFS can house four filament spools. With four CFS units hooked together, it is possible to deliver 16-color 3D prints, saving the need for painting afterward. By creating snap-away or water-soluble supports, the post-processing becomes a breeze. CFS is intelligent with automatic filament selection, switch, and relay.
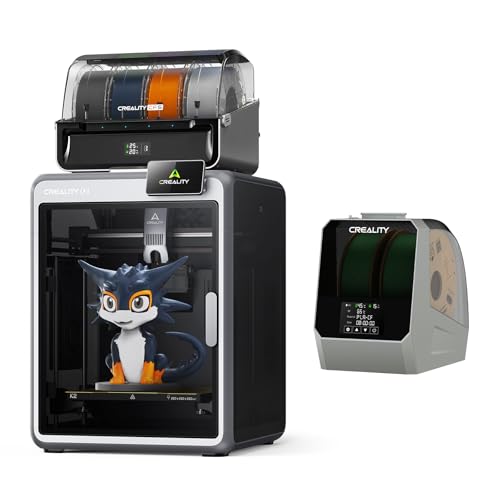
Multicolor 3D Printing: 4 × CFS for up to 16 colors. By hooking up as many as four CFS units together, you are able to print in the splendor of 16 colors. Saves the need for extra painting afterward. Also, K2 offers a build volume of 260 × 260 × 260 mm, able to cover the majority of user scenarios. (* K2 Combo includes K2 and one CFS unit)

Multicolor 3D Printing: 4 × CFS for up to 16 colors. By hooking up as many as four CFS units together, you are able to print in the splendor of 16 colors. Saves the need for extra painting afterward. Also, K2 offers a build volume of 260 × 260 × 260 mm, able to cover the majority of user scenarios. (* K2 Combo includes K2 and one CFS unit)
Troubleshooting: Stringing, Filament Slip, and Failed Priming
Think of nozzle clogging like a kinked garden hose: if the flow is blocked, pressure builds and nothing comes out smoothly.
Why this matters: clogged nozzles raise backpressure and make extrusion inconsistent, which causes stringing and failed priming. Example: when a leftover bit of PLA chars in the hotend, you’ll see fine hairs between parts and a weak first layer.
1) Check and clear a clog.
- Step 1: Heat the nozzle to printing temperature for your filament (e.g., 200°C for PLA, 240°C for PETG).
- Step 2: Manually push 10–20 mm of filament through by hand or use a slow cold-pull at 90–120°C for nylon/ABS if needed.
- Step 3: If filament won’t move, remove the nozzle and soak it in acetone (for ABS) or use a nozzle-cleaning needle sized to your nozzle (0.4 mm).
Real-world example: I had a PLA blob in a Creality Ender 3 nozzle — heating to 200°C and doing a cold-pull with glossy PETG cleared it in two tries.
If drive-gear debris reduces grip, your extruder will slip and under-extrude; cleaning the gear fixes that.
Why this matters: filament bits on the drive gear cut traction, causing intermittent extrusion and skipped steps. Example: after switching filaments without cleaning, I saw the extruder teeth packed with melted PLA and the motor clicking.
2) Inspect and clean the drive gear.
- Step 1: Retract filament and expose the drive gear.
- Step 2: Use a small brush or compressed air to remove debris, then run the gear by hand to check smoothness.
- Step 3: Reinstall filament and test with a 100 mm extrusion; measure actual versus commanded to confirm proper feed.
Tip: a toothbrush works well for the teeth.
If the stepper motor overheats, torque drops and slipping starts; cooling fixes that quickly.
Why this matters: a hot motor produces less torque, so the extruder can’t push filament reliably. Example: printing a long PETG vase caused the motor to feel very hot after 20 minutes and the filament to skip.
3) Prevent motor overheating.
- Step 1: Monitor the motor temperature after a 15–30 minute print by touching the motor for 5 seconds; it should feel warm, not burning (roughly <60°C).
- Step 2: If it’s too hot, add short cooling pauses: pause every 10–20 minutes for 30–60 seconds, or install a small fan aimed at the motor.
- Step 3: Reduce microstepping or increase current slightly in 0.1 A increments if your driver allows, testing for quieter operation each time.
Retraction settings that are too long or too fast can cause slip in direct‑drive systems; set them conservatively.
Why this matters: excessive retraction pulls filament back into the hot zone too far or too fast, increasing grip loss and stringing. Example: on a direct‑drive E3D Hemera, reducing retraction from 6 mm to 1 mm stopped the slipping instantly.
4) Set proper retraction for direct drive.
- Step 1: Use 0.5–2.0 mm retraction distances and 20–40 mm/s retraction speeds for most direct‑drive setups.
- Step 2: Print a retraction test (10 small towers) and watch for clicking or gaps.
- Step 3: Adjust in 0.5 mm or 5 mm/s increments until strings disappear without slipping.
If priming fails after a pause, you need to restore pressure before printing resumes.
Why this matters: a cold or partially clogged nozzle won’t push filament right away, which ruins the first lines after a pause. Example: after a 5 minute pause on PETG, my printer left a gap; a manual 2–3 mm extrude fixed it immediately.
5) Handle failed priming after pauses.
- Step 1: After a pause, heat the nozzle to final temp and manually extrude 2–5 mm to reestablish pressure.
- Step 2: If manual extrusion is weak, repeat clog-clearing steps (heat, cold-pull, nozzle-cleaning needle).
- Step 3: Add a short 0.5–2.0 mm pre-extrude in your pause G-code so the printer primes automatically.
Final practical tip: when you change any setting, change only one thing at a time and run a small 10–20 minute test print so you can see the effect and revert if needed.
Recommended Products

【All-in-One Beginner Set】Say goodbye to missing parts. CrestWave air brush kit with air compressor comes fully loaded with a quiet 1/6 HP compressor, dual-action airbrush (pre-installed with 0.4mm nozzle), extra 0.3mm and 0.5mm nozzle/needle sets, 12 bottles of 30ml acrylic paints, and a dedicated Cleaning Pot Set. We include a detailed instruction manual, practice sheets, and even a color wheel—so you can start painting right out of the box, no extra purchases needed.

Designed for Constant Drying, Preserving Filament Integrity. The Bestery Filament Storage Box is made of high-density transparent material, offering excellent impact resistance to withstand drops and daily wear. It maintains stable internal humidity while blocking external moisture, ensuring filament integrity. Included labeling stickers help categorize filament types and colors, track inventory, and avoid shortages—so you can focus on the joy of 3D printing.
A truly versatile airbrush, used for covering medium to large areas
Direct‑Drive vs Bowden: Practical Retraction Differences
The difference between direct‑drive and Bowden comes down to how much filament can compress and slide before the nozzle reacts.
Why this matters: if you don’t tune retraction for your setup, you’ll get stringing or gaps. For example, printing a small Eiffel Tower replica with a 0.4 mm nozzle shows stringing immediately when retraction is wrong.
Direct‑drive retraction: how far and how fast
Why this matters: the motor is right on the hotend, so stored pressure is small and reactions are quick.
1) Set distance: start at 0.5 mm and test with 0.1 mm increments up to 2.0 mm — typical good values are 0.5–2.0 mm.
2) Set speed: try 30 mm/s first, then 35 mm/s if you still see tiny strings; avoid speeds above 45 mm/s to prevent filament slip and wear on the drive gear.
3) Watch for artifacts: if you see little blips on corners, reduce distance by 0.2 mm.
Real-world example: printing a 20 mm calibration cube on a direct‑drive Ender‑3 with PLA usually needs 0.8–1.2 mm at 30–35 mm/s to eliminate hairs.
Bowden retraction: how far and how fast
Why this matters: the PTFE tube stores more energy and adds friction, so you must pull farther to clear the nozzle.
1) Set distance: start at 2.0 mm and increase in 0.5 mm steps until stringing stops; common working ranges are 2–6 mm.
2) Set speed: 35–60 mm/s works for most filaments; begin at 40 mm/s and raise if blobs remain, but don’t exceed 80 mm/s with flexible filaments.
3) Fine tune: if you see under‑extrusion after travel moves, reduce distance by 0.5 mm or lower speed by 10 mm/s.
Real-world example: printing thin tree branches on a Bowden‑tube Prusa MK3 often needs 3.5–4.5 mm at 45 mm/s for PLA to avoid wisps.
A simple tuning sequence you can follow
Why this matters: following steps avoids guessing and wasted filament.
1) Print a stringing test (10 small pillars).
2) Tune distance in the ranges above for your setup.
3) Tune speed after distance is good.
4) Adjust if you change filament type or nozzle size.
Concrete tip: when switching from PLA to PETG, add ~1.0 mm to Bowden retraction and drop speed by 10 mm/s.
One more practical note: if you use flexible filament, move the extruder motor as close as possible to the hotend or use direct‑drive; flexible filament in Bowden tubes often jams unless retraction is minimal and speed is very low.
Recommended Products

【600×600mm Extra-Large Working Area】The Laser Engraver Handle Big Projects & Batch ProductionTired of small laser machines that limit your creativity? The TTS-20 Max laser cutter features a massive 600×600mm engraving area, 2.25x larger than standard 400×400mm models. Perfect for large signs, furniture panels, wall art, and batch production of custom products. No more piecing together small sections—create full-size masterpieces in one go.

600mm/s Ultra-Fast Printing with CoreXY. Vibration compensation and linear rails deliver print studio-grade precision even at max speed – cut project time by 70% with 0.1mm layer resolution.

【500mm/s High-Speed Fast Printing】Driven by a lightweight CoreXY motion system, the Creality K2 SE delivers up to 500mm/s high-speed printing with 20,000mm/s² acceleration. The built-in vibration sensor and input shaping algorithm actively reduce ringing and resonance for smoother walls, sharper details, and consistently high-quality results—even at fast print speeds
Frequently Asked Questions
Can Direct Drive Help With Oozing During Multi-Material Printing?
Yes — I find direct drive greatly reduces multi material oozing, letting me rely less on wipe towers because short path and precise control stop nozzle drip, improving color changes and minimizing cleanup during prints.
How Do Slicer Pressure Advance Settings Interact With Direct-Drive Retraction?
Imagine a spring: I set pressure anticipation to counter nozzle lag, then tweak flow compensation so direct-drive retraction and pressure advance harmonize, preventing oozing while keeping extrusion responsive and minimizing stringing during travel moves.
Should I Change Retraction for Different Nozzle Diameters on Direct Drive?
Yes — I adjust retraction for nozzle scaling; I perform retraction tuning as nozzle diameter changes since larger nozzles need slightly longer retracts and tuning preserves clean travel moves while avoiding over-retraction or filament stress.
Does Filament Diameter Tolerance Affect Direct-Drive Retraction Consistency?
Yes — I find filament variability does affect retraction consistency; I recommend diameter calibration so I can adjust retraction distance/speed for tighter tolerance, reducing unpredictable pressure changes and improving direct‑drive performance with flexible filaments.
Can Firmware Linear Advance Replace Mechanical Retraction Adjustments?
Yes — I think firmware tuning like linear advance helps, but it can’t fully replace mechanical retraction adjustments, especially with varying filament elasticity; I still dial retraction distances to manage oozing and startup pressure reliably.