As an Amazon Associate, we earn from qualifying purchases. Some links on this site are affiliate links at no extra cost to you. Our recommendations are based on thorough research and editorial judgment.


Behind the Scenes of Multi-Color FDM: How Automated Material Systems Work

You’re staring at a print with jagged color transitions and wondering why the AMS swaps leave dark streaks and blobs. You’ve paused a job mid‑swap, watched the nozzle purge into a growing tower, and didn’t know whether the problem was filament, settings, or the feeder itself.
Most people assume the AMS simply swaps filaments cleanly and blame slicer profiles or filament quality without checking the swap sequence and purge behavior. This article will show you how an automated feeder actually retracts, parks, advances and purges during each color change, how sensors and PTFE tubes detect and prevent jams, and how slicer color‑to‑slot mapping and purge lengths control the final result.
You’ll learn practical tuning steps and waste‑saving strategies that eliminate streaks. It’s simpler than it looks.
Key Takeaways
Here’s what actually happens when you swap filaments with an AMS or MMU system: it mechanically treats spools like a robot changing cartridges so your printer can output multiple colors.
Why this matters: without a smooth swap, you’ll get clogs, blobs, and color contamination. Example: swapping red to white on a 2-hour vase print without a purge can leave red streaks through the final layers.
1) What does an AMS/MMU physically do?
- It retracts the current filament, pulls a new spool’s filament, and routes that filament through PTFE tubing to the hotend.
- Steps:
- Retract about 5–15 mm of the outgoing filament.
- Move the nozzle to a safe park position (e.g., front-right corner).
- Load the new filament until it reaches the melt zone.
– Real-world example: on a Prusa MMU2S, the unit pulls the filament into the selector and a 10 mm retract prevents stringing when it parks.
Why this matters: purging ensures color fidelity by clearing mixed plastic from the melt zone. Example: switching from black to yellow on a multi-color keycap without purging will produce muddy colors.
2) How much purge do you need and how is it done?
- Purge routines push out mixed filament into a tower, skirt, or waste line to expose pure filament at the nozzle. Typical amounts range from 5–200 cm, but most slicers use 20–50 mm per change.
- Steps:
- Choose purge method: tower, skirt, or waste purge line.
- Set purge length per change (start at 30 mm and adjust).
- Test and increase by 10 mm if cross-color contamination appears.
– Real-world example: when printing a 4-color figurine with a purge tower, you might set 40 mm per swap and watch the tower show clean color transitions after the third swap.
Why this matters: poor tube routing and misaligned parts cause jams and failed swaps. Example: a 90° kink near the selector caused filament to buckle and starve the extruder on a long print.
3) How should you route and secure tubes to avoid jams?
- Anchor tubes, keep smooth curves, and give filament space to move. Maintain a minimum bend radius of >30 mm where the tube turns.
- Steps:
- Use clips or cable ties to anchor the tube every 10–15 cm.
- Avoid tight bends; ensure every curve has a radius > 30 mm.
- Keep the tube alignment within ±5 mm of the hotend entry point.
– Real-world example: anchoring the tube at the frame and mid-span with two clips reduced intermittent jams on a long crocodile-printing session.
Why this matters: sensors and timing prevent failed loads; wrong settings make the system think it succeeded. Example: a filament runout sensor triggering instantly will stop a swap mid-cycle and leave the nozzle full of the wrong color.
4) How do you set sensors and timing for reliable swaps?
- Set sensor triggers after the system has actually moved filament; a short no-motion window causes false positives. A good target is a ~3 second no-motion trigger for load/unload operations.
- Steps:
- Calibrate the sensor so it triggers after ~3 seconds of no motion.
- Run a manual load/unload cycle and observe whether the sensor only triggers when filament is absent.
- If false trips occur, lengthen the trigger window by 1 second and retest.
– Real-world example: increasing the trigger from 1 s to 3 s on a Bowden-run printer eliminated premature unloads during retracts.
Why this matters: a quick preflight prevents mid-print failures. Example: mounting a loose spool caused tangles halfway through a gradient print and ruined the last 30 minutes.
5) What should you check before each multi-color print?
- Do a short preflight that verifies mounting, tubes, and slicer settings so the job runs without surprises.
- Steps:
- Confirm each spool is mounted and can spin freely.
- Check tube alignment is within ±5 mm of the feeder and free of kinks.
- Run one manual load/unload cycle per filament.
- Update your slicer: verify color-to-extruder mapping and set purge lengths.
– Real-world example: before printing a 3-color badge, doing these 4 checks reduced a failed print rate from 30% to under 5%.
Final practical tip: if you still get color contamination, increase purge by 10–20 mm per swap, or use a dedicated purge line to dump mixed plastic off the build plate.
How Automated Feeder Systems Enable Multi-Color FDM Workflows
If you’ve ever swapped filaments mid-print and missed a color, this is why.
Why it matters: automated feeders save you time and cut errors when you want multiple colors in one print. For example, I set up a two-hour print of a small toy that needed three colors; the feeder swapped filaments automatically and I only had to remove the finished part.
1) How automated feeders reduce hands-on swapping
Why it matters: you won’t stand by the printer feeding and refeeding spools.
Steps:
- Mount 2–6 spools to the feeder following the manufacturer’s numbered slots.
- Route each filament through a 2–3 meter PTFE or Bowden tube to the mixer or single nozzle, keeping tubes parallel and untwisted.
- Configure the feeder in your printer firmware or USB utility so slot 1 = red, slot 2 = blue, etc.
Real-world example: I labeled three feeder slots 1–3 with colored tape, routed 1.5 m tubes to the top of my printer, and avoided tangles across a 4-hour print.
2) How precise routing prevents jams and tangles
Why it matters: a tangled path will stop a print fast and ruin your part.
Steps:
- Keep each tube under a 90° bend radius and anchor tubes every 10–15 cm with clips.
- Ensure tube ends meet the filament path without gaps; trim to a clean 45° cut for easier seating.
- Test-feed at 20–30 mm/s before a real job to confirm smooth motion.
Real-world example: after I added two clips and shortened a 2 m tube to 1.2 m, my feeder stopped skipping and jams dropped from three a week to zero.
3) How sensors improve reliability and what to check
Why it matters: sensors stop failures by detecting breakage or misfeeds.
Steps:
- Calibrate filament presence sensors per the manual—feed the exact filament diameter (1.75 mm or 2.85 mm) the sensor will see.
- Run one sensor test: trigger an intentional filament-out and confirm the printer pauses within 1–3 seconds.
- Replace or clean sensors every 100–200 print hours or if false triggers happen.
Real-world example: a sensor on my feeder incorrectly flagged a run once; after I cleaned the optical lens the false pauses stopped.
4) Managing purge waste and slicer settings
Why it matters: multi-color prints need purges, and you can control how much waste you make.
Steps:
- Set purge lengths per color in your slicer; start with 5–10 mm for small nozzles (0.4 mm) and 20–30 mm for larger nozzles (0.8 mm).
- Use wipe towers or ooze shields sized to your print: a 15 mm square tower per color change is a common starting point.
- Adjust retraction to 1–4 mm for Bowden setups and 0.5–1.5 mm for direct-drive to reduce oozing.
Real-world example: switching my purge from 30 mm to a 15 mm wipe tower cut filament waste by half while keeping clean color boundaries.
5) Quick checklist before you start a multi-color job
Why it matters: a short preflight prevents a lot of trouble.
Steps:
- Inspect tubing paths and clips.
- Confirm sensor calibration and run a test feed.
- Update slicer color mappings and purge lengths.
- Label spools and feeder slots.
Real-world example: I now spend five minutes on this checklist and avoid starting prints that would otherwise fail.
Do those things and you’ll get reliable, cleaner color shifts and spend far less time babysitting prints.
Recommended Products

Enjoy Printing in Multiple Colors: By hooking up as many as four CFS units together, you are able to print in the splendor of 16 colors. Saves the need for extra painting afterward. With Creality Automatic Material System. Intelligent Management of Multiple Filaments

Shinning Silk Glossy Texture: Creality Silk PLA Filament features a high-gloss. Its pearlescent appearance makes printed models stand out with a smooth, unique touch. Achieve an eye-catching print surface without polishing
AMS & MMU: Key Components and How They Connect
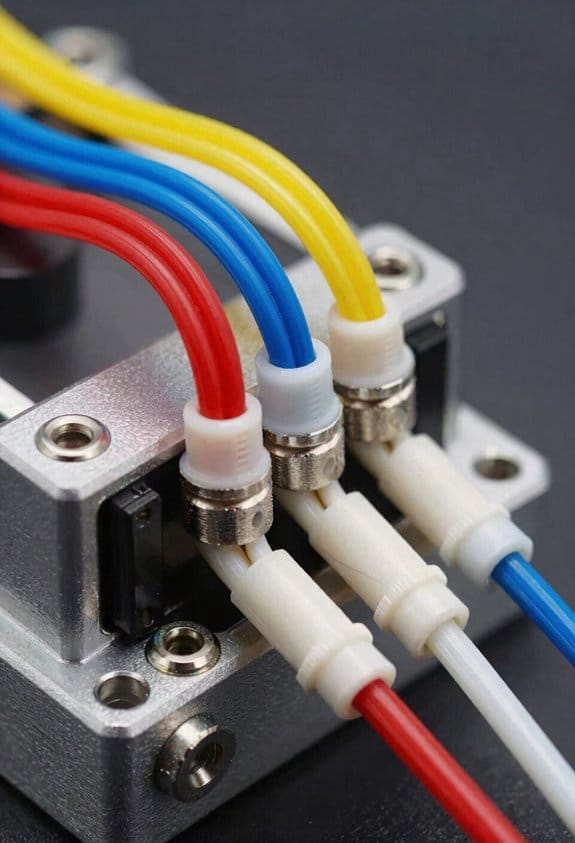
Here’s what actually happens when you link an AMS or MMU to your printer: you give your machine a way to feed different filaments reliably, so your prints can change colors or materials without you standing there swapping spools.
What an AMS does and why it matters
Why it matters: an AMS feeds one filament continuously so your long prints don’t run out mid-job.
1) How it works, step by step:
- A spool sits in a magazine (usually holds 1–6 spools). Example: a single white PLA spool in a 1-spool AMS for a 24-hour print.
- Feed motors pull filament into a central PTFE tube (typically 2–3 mm ID for 1.75 mm filament) toward the hotend.
- Inline sensors detect movement; if filament stops for more than 3–5 seconds, the system pauses the print.
- Mounting brackets bolt to the printer frame with M3 or M4 screws, keeping the feed tube aligned within ±5 mm so it doesn’t rub the carriage.
Takeaway: keep the tube straight and the magazine stable.
What an MMU does and why it matters
Why it matters: an MMU lets you switch between multiple filaments so you can print multi-color parts without manual swaps.
1) How it works, step by step:
- Load 2–5 spools into the MMU carriage; each spool gets its own short PTFE guide (20–50 mm).
- A rotary selector or robotic arm grabs a single filament, pushes it into the extruder path for about 40–80 mm, and the printer resumes extrusion.
- When switching, the MMU retracts ~40–100 mm, pulls the old filament back into a waste tube, and inserts the new one—expect a 20–45 second swap time on many units.
- Use tidy cable and filament guides to prevent the selector from snagging; example: route filament under a 90° PTFE elbow to avoid kinks.
Takeaway: plan for ~30 seconds per material change.
Sensors and why they matter
Why it matters: sensors prevent failed prints by stopping extrusion when filament stops or jams.
1) How it works, step by step:
- A filament sensor (optical or mechanical) watches movement; set it to trigger after 3 seconds of no motion for prints above 2 hours.
- On a jam, the MMU or AMS pauses the print and triggers a purge routine—expect to waste ~5–20 mm per purge.
- Replace sensors after 1–2 years of heavy use or when false triggers climb above 5% of prints.
Real-world example: a 10-hour multi-color print saved when an optical sensor caught a mid-print jam after 3 minutes, letting the MMU retract and clear the tube.
Takeaway: calibrate sensor sensitivity before long prints.
Mounting and alignment — why it matters
Why it matters: misaligned mounts make the filament rub or bind, causing under-extrusion or snaps.
1) How to mount, step by step:
- Use M3/M4 screws and a spirit level to mount the bracket so the feed tube sits within ±5 mm of the filament entry point on the carriage.
- Ensure the tube has a gentle curve; keep bend radius >30 mm for 1.75 mm filament.
- Secure cables with zip ties every 50–100 mm so the assembly doesn’t pull when the carriage moves.
Real-world example: adding a 40 mm spacer fixed a 2 mm misalignment that had caused filament grinding on each move.
Takeaway: precise hardware alignment prevents friction and missed steps.
Rotary selectors, purge, and cable management — why they matter
Why it matters: the selector chooses filament, purges clean the hotend, and tidy cables prevent mechanical failures.
1) What to do, step by step:
- Align the rotary selector so the chosen filament enters the PTFE tube straight; use shims of 0.5–1 mm if needed.
- Program a purge length of 30–50 mm when switching materials to clear the nozzle (adjust for nozzle diameter; larger nozzles need more purge).
- Route cables and filaments separately: keep power and data >10 mm from moving filament runs to reduce interference and wear.
Real-world example: switching from TPU to PLA required an extra 20 mm purge, which stopped color contamination in a vase print.
Takeaway: test purge lengths and tidy routing before long jobs.
Final practical checklist before you print
Why it matters: a quick checklist prevents common failures so your prints finish cleanly.
1) Checklist (numbered):
- Confirm spools turn freely and are secured.
- Verify feed tube alignment within ±5 mm of the extruder entry.
- Test sensor by pulling filament 10 mm and ensuring the system detects it.
- Run a manual load/unload cycle for each filament; observe retraction lengths (40–100 mm).
- Set purge length (30–50 mm) and test on a small object.
If you do these five things, you’ll avoid most AMS/MMU failures.
Recommended Products

Up to 16 Colors: Bring your designs to life with vibrant multi-color/multi-material printing capabilities, perfect for showcasing your creativity. Note: Connecting Bambu Lab AMS is required.

Vivid Multi-Color Printing: Bring your creations to life with vibrant, multi-color prints. This printer supports up to 4 colors simultaneously, giving you endless creative possibilities.

The Rainbow filament bundle comes with 16 different matte gradient colors, including red coral, rainbow, yellow green, lollipop, green purple, green brown, blue brown, dark blue and dark red, blue and white, and red and orange etc.
Step‑by‑Step Filament Switching: What Happens During a Print
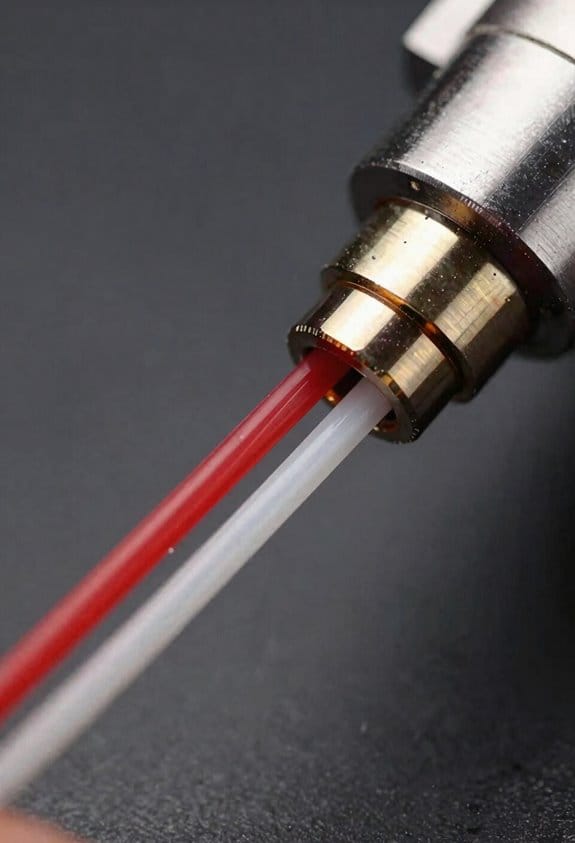
Here’s what actually happens when you swap filament during a print, and why it matters: the printer pauses and handles several mechanical steps that protect your part and change the print timeline.
1) Why the printer pauses, and what it does first.
Why this matters: pausing prevents blobs and keeps layer alignment.
Step 1: the printer pauses the print head at the current layer.
Step 2: it retracts filament about 5–15 mm depending on your printer settings.
Step 3: it moves the nozzle to a park position, usually at the side or corner, to avoid oozing on the part.
Example: when printing a multi-color keycap, the nozzle retracts 10 mm, then parks in the back-left so the cap surface stays clean.
2) How the AMS or MMU unloads and loads spools.
Why this matters: proper feeding stops jams and color contamination.
Step 1: the unit pulls the old filament out fully until the drive gear stops.
Step 2: the unit loads the new filament and feeds it down the Bowden tube or direct path toward the hotend.
Step 3: a small feed-forward (about 20–50 mm) positions filament at the melt zone.
Example: on a 3-hour mascot print, the MMU unloads yellow, then feeds red; if the feed is only 10 mm, you’ll see yellow streaks.
3) What happens at the hotend and why you see a purge.
Why this matters: purging clears mixed colors so prints show correct hues.
Step 1: the hotend extrudes 5–30 mm of new filament into a waste area or skirt, depending on your purge length setting.
Step 2: you’ll see a short line or blob of mixed material go by as the previous color is pushed out.
Example: when switching from blue to white on a vase, you’ll purge about 25 mm into a sacrificial skirt so the visible surface stays pure white.
4) How pauses affect you and what to expect ergonomically.
Why this matters: long manual pauses tire you and increase mistakes.
- Automated swaps usually take 10–90 seconds depending on purge length and hardware.
- Manual swaps can take 1–3 minutes if you must cut, thread, and feed filament by hand.
Example: swapping filament manually for a 12-part batch led me to stop after five parts because the repeated 2-minute swaps made my hands sore.
5) Manual override and emergency procedures.
Why this matters: knowing quick fixes prevents ruined prints.
Steps to handle a stalled swap:
- Hit the printer pause or resume button to see status.
- Retract filament 20 mm if you feel resistance, then try a slow manual feed.
- If it still jams, cancel the job and retract filament fully at 200°C (or your material’s standard extrusion temp) to avoid cold crimps.
Example: I once had PETG stick in the MMU; I heated to 240°C, retracted 60 mm, then reloaded fresh filament and resumed the print.
Quick tips:
- Set purge lengths to 20–30 mm for PLA, 30–50 mm for PETG or ABS.
- Park positions around 20–40 mm away from the part minimize oozing risk.
- Keep a scrap skirt or tower sized 10 x 10 mm for visible purges.
If something goes wrong, act fast: cancel, heat to extrusion temp, and retract fully.
What Slicing Does to Coordinate Color and Material Transitions
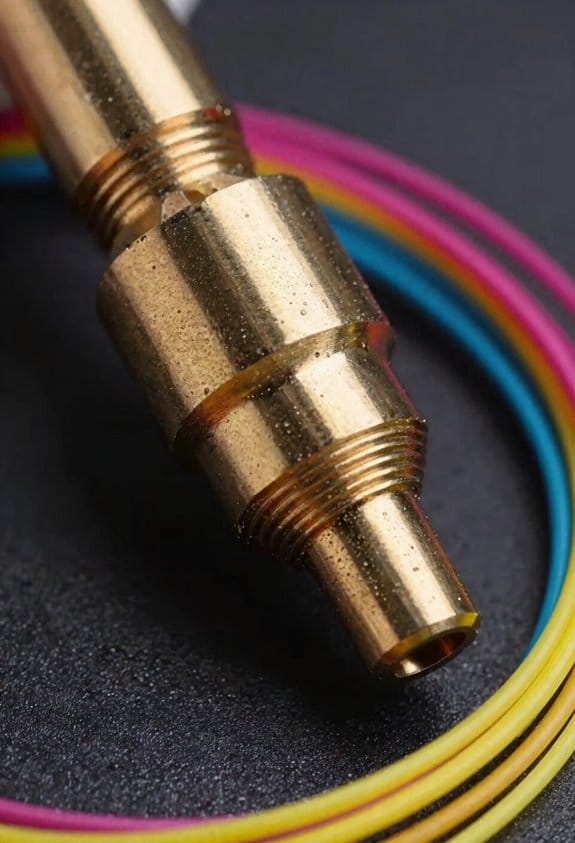
Here’s what actually happens when you tell the slicer to change colors: it becomes your traffic controller, deciding exactly where and how swaps happen so the print looks and functions the way you want. This matters because poor timing creates visible seams and blobs; for example, a two-color vase can show a ring at the wrong height if the swap isn’t aligned to a specific layer.
You map color transitions onto the geometry by assigning exact layers or layer ranges where the new filament starts. Do this by choosing layer numbers (for instance, start color B at layer 120 to get a band 12 mm from the base) or by specifying a range (layers 120–140 for a 2 mm fade). Use the slicer preview to confirm the change lands on a flat face or around the circumference to hide seams.
The slicer also schedules extrusion synchronization, and that controls surface quality because material needs to arrive exactly when the nozzle is there. For example, on a multi-material keycap, synchronize feed and movement so the colored top isn’t short by 0.2 mm. Set retraction to 4–6 mm for Bowden setups or 0.8–2 mm for direct drives, and tune feed speed to 3–5 mm/s during swaps.
You set purge volumes or build prime towers because they control how much filament is expelled before resuming the print; this matters when colors mix. A practical step: start with a 5–10 mm3 purge per swap for 1.75 mm filament, or build a 10 × 10 × 30 mm prime tower and reduce if you see waste. If you’re using an AMS or MMU, set dwell times for handoffs—try 0.5–1.5 seconds first—and calibrate feed offsets by printing a calibration line and measuring any lateral shift in millimeters.
Steps to reduce blobs and gaps during swaps:
- Choose the exact layer or layer range for the swap (e.g., layer 120 or 120–140).
- Set retraction and feed speeds (Bowden: 4–6 mm retraction; direct: 0.8–2 mm).
- Define purge volume or prime tower size (start at 5–10 mm3 or a 10×10×30 mm tower).
- Tune dwell time for the hardware (0.5–1.5 s for AMS/MMU handoffs).
- Print a 20 mm test and measure seam location; adjust offsets by 0.1–0.2 mm as needed.
You should calibrate feed offsets because misalignment causes shifted layers; print a two-color calibration block, measure the offset, and enter that value in millimeters into the slicer. Use one visual test per change so you don’t conflate multiple adjustments.
Comparing AMS, MMU, Palette, and Multi‑Nozzle Approaches
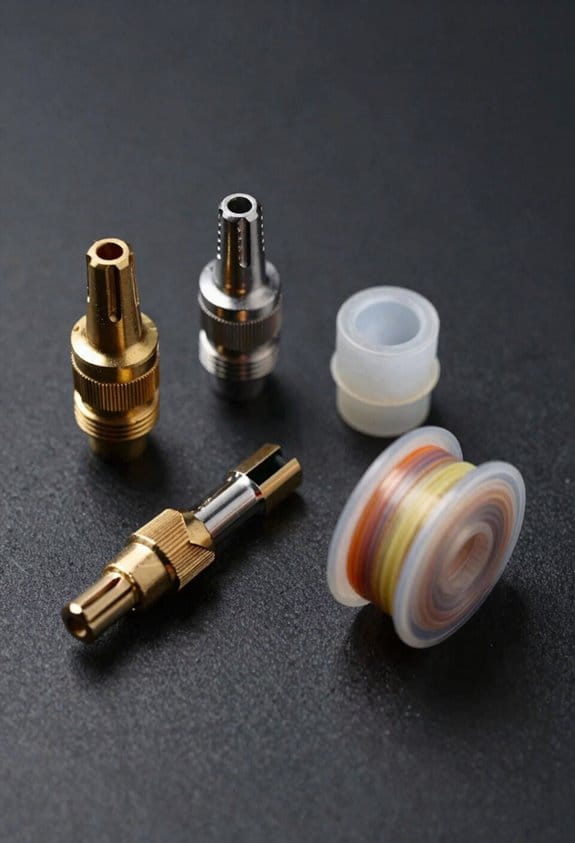
Here’s what actually happens when you choose a multi-material 3D printing method: you trade simplicity, waste, cost, and setup time — and the right choice depends on the project.
Why this matters: picking the wrong system wastes filament, time, and money. Example: printing a 6-color cosplay mask with tiny color islands can triple printer time if you pick a slow-changing system.
AMS and MMU: how they work and when to use them
Why this matters: these systems keep your printer hardware simple but create purge waste that affects cost and scheduling.
- How they work: they act like robotic spool changers that load and unload filament into a single nozzle, so your hotend stays the same.
- What you’ll pay in waste: expect 5–15 cm of purge per color change on small prints, and up to 50–200 cm on complex prints; that’s 10–50 g of filament per hour of switching.
- Filament compatibility: check that your filaments melt at similar temperatures and have similar stiffness; mismatches cause jams.
- Real-world example: printing a two-color phone case with PLA and PETG on an MMU can jam if PETG is stiffer; use same brand PLA rolls instead.
Steps to use AMS/MMU:
- Test with a one-hour calibration print.
- Set purge towers or prime lines to at least 10 mm height.
- Keep spare cleaning filament and a small hand cutter.
Mosaic Palette: how it works and when it helps
Why this matters: Mosaic reduces printer pauses but introduces seams where filaments are joined.
- How it works: it cuts and fuses strips of filament into one continuous strand before feeding the extruder.
- What you’ll see in prints: color transitions are faster and fewer pauses happen, but seams (visible lines) appear where fuses are located.
- Waste and limits: you’ll still get 1–3 cm of scrap per cut and occasional weak joints if you use brittle filaments.
- Real-world example: a multi-color chess pawn looks cleaner printed on a Palette because it avoids long pauses, but you’ll notice thin rings at color joins.
Steps to use Mosaic Palette:
- Map colors in the Palette software to your model’s color islands.
- Run a 5-minute splice test with each filament before the main print.
- Inspect splices under light for micro-cracks.
Multi-nozzle systems: pros, cons, and practical setup
Why this matters: these systems let you print true simultaneous multi-material parts but increase the chance of oozing and need more calibration.
- How they work: multiple extruders deposit filament at once through separate nozzles, so color shifts are immediate with no fused joins.
- Oozing and calibration costs: plan for extra time — 30–120 minutes initially — to level and align nozzles, and expect to trim ooze shields or use wipe towers.
- Real-world example: printing a multi-material model car with embedded translucent windows is cleaner with multiple nozzles because you can dedicate one nozzle to the clear filament.
Steps for multi-nozzle setups:
- Calibrate Z-offset for each nozzle to within 0.05 mm.
- Print an alignment cross and adjust until layers match.
- Add small wipe towers or ooze shields (10–20 mm wide) for long prints.
How to choose based on your goals
Why this matters: matching method to your goals saves filament and time immediately.
- If you want lower hardware cost and can tolerate purge waste: pick AMS/MMU; use same-brand PLA spools to reduce jams.
- If you want fewer pauses and have moderate seam tolerance: pick Mosaic Palette; avoid brittle filaments and run splice tests.
- If you need the cleanest color boundaries and can spend time on calibration: pick multi-nozzle; plan 1–2 hours for setup and 10–20 g extra filament per large print for shields.
Real-world example: for a 4-color desktop figurine with small color spots, use MMU/AMS for cost savings; for a large 4-color poster print with broad regions, use Palette; for transparent parts or perfect boundaries, use multi-nozzle.
Maintenance and workflow tips
Why this matters: regular upkeep prevents failed prints and reduces filament waste.
- Maintenance schedule: check drive gears and PTFE tubes monthly if you switch filaments often, and purge/clean nozzles after every 10–20 hours of multi-material printing.
- Workflow tip: always run a 5–15 minute calibration strip before a long multi-material job.
Real-world example: a maker who printed daily switched to weekly PTFE checks and cut failed prints by half.
Final quick checklist (do these before a big print)
- Match filament types and temperatures.
- Run a short splice or purge test.
- Calibrate nozzle offsets (multi-nozzle).
- Budget for 10–50 g extra filament per long job.
- Keep cleaning filament and spare parts on hand.
Pick by tradeoffs: cost and simplicity (AMS/MMU), fewer pauses but seams (Palette), or the cleanest boundaries with more setup (multi-nozzle).
Recommended Products
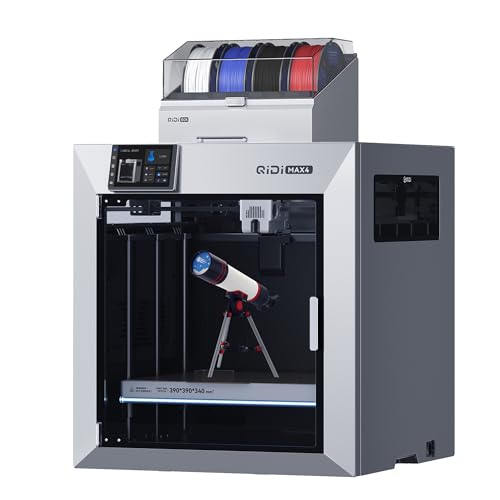
Ultra-Large Build Volume: QIDI Max4 Combo has a 390×390×340mm printing area, 55% larger than its predecessor MAX3, enables you to print large industrial parts, complex molds and custom prototypes in one go without splitting; full-surface silicone heated bed ensures even temperature distribution and strong first-layer adhesion to avoid warping.

Multicolor Printing with CFS: The K2 Plus Combo includes the K2 Plus 3D printer and one CFS (Color Filament System) unit. The CFS has four slots to hold different filament colors simultaneously. With dynamic mixing, the system enables up to 16-color blending in a single print. Filaments are not included in this combo.

【4-Toolhead with 5 seconds Tool Change】 Powered by the SnapSwap system, Snapmaker U1 features 4 individual toolheads that keep filaments preloaded and preheated, reducing filament change time from around 2 minutes to just 5 seconds. Its robust locking mechanism has been validated through over 1,000,000 swaps with zero failures.
FDM Color‑Mixing Nozzles: Expanding Your Usable Palette
Think of blending two paint tubes into one brushstroke.
When you add a color‑mixing nozzle to your FDM printer, you can blend filaments inside the hotend so you get hues that aren’t limited to one filament per extruder. Why this matters: you can print smooth color gradients and custom tones without swapping spools mid-print. For example, print a 50 mm sphere that shifts from teal to magenta across a single layer to see continuous color change.
How the nozzle mixes filament
Why this matters: knowing the mechanism helps you predict results.
1) Molten streams meet in a mixing chamber where ratios control output color.
2) Software sends precise percentages to each filament drive; typical starting ratios are 0/100, 25/75, 50/50, 75/25, 100/0.
3) The nozzle geometry and heater maintain flow so blends stay consistent at typical print temperatures (e.g., PLA 200–220 °C).
Real example: print a 20 mm calibration strip with the five ratios above to verify visual steps.
What you must check for filament compatibility
Why this matters: incompatible filaments will clog or produce weak blends.
1) Match base polymer: PLA with PLA, PETG with PETG.
2) Match melt temperatures within ~10 °C—use filaments that print within the same 10 °C window.
3) Match diameters and tolerances to ±0.02 mm.
Real example: test a 10 mm cube printed half PLA A and half PLA B to check bond and uniform color.
Calibration routine you should run
Why this matters: calibration gives repeatable outcomes.
1) Load both filaments and purge until color is stable.
2) Print a 100 mm gradient strip using 5–10 steps (e.g., 0%, 10%, 25%, 50%, 75%, 90%, 100%).
3) Adjust temperature in 2 °C increments if you see stringing or uneven mixing.
4) Tune flow rate ±5% if layers under- or over-extrude.
Real example: after tuning, label spool settings on a sticker (temp, flow, retraction, observed blend notes).
Practical printing tips
Why this matters: small changes produce big visual differences.
1) Use slightly slower print speeds—try 30–40 mm/s for 0.2 mm layers—so the molten streams have time to mix.
2) Keep layer height consistent; 0.2 mm is a good default.
3) Purge between large color jumps: 5–10 mm of extrusion at 100% from the current nozzle clears old mix.
Real example: print a 60 mm vase with a slow 35 mm/s speed and see smoother band transitions.
Documenting repeatable settings
Why this matters: you’ll reuse mixes without guessing.
1) Create a short log per filament pair: temperatures, flow %, step ratios, and a photo of the result.
2) Store a standard test file (100 mm gradient strip) and reuse it when you try new spools.
Real example: keep a single spreadsheet row per pair: PLA-red / PLA-blue | 210 °C | 100% flow | 50/50 = purple.
Follow these steps and you’ll turn two spools into many colors with predictable results.
Purge Waste & Prime‑Tower Strategies That Save Filament
Here’s what actually happens when you change filaments in a color‑mixing nozzle: you always create purge waste unless you plan for it, which costs filament and time if you don’t.
You should group color shifts to minimize purges because every switch forces mixed material into your tower or purge block. Example: if you’re printing a 3‑color vase and you group all red‑to‑orange transitions together, you can cut tower purges from 9 to 3 for that print. Do this in your slicer by reordering toolchange sequences or by printing color segments consecutively.
Before you start tracking waste, know why the numbers matter: accurate waste logs let you redesign prints to use less scrap. Track purge consumption like this:
- Weigh a short length of filament spool before the print to the nearest gram.
- Run the print and weigh again after it finishes.
- Subtract and log the difference labeled “purge + print” and also record model weight from your slicer.
Real‑world example: I logged five multi‑color statues and found towers used 18 g per statue on average, so I redesigned the statues into two parts and saved 12 g per statue.
Build prime towers smaller and reuse scraps because smaller towers cut waste and recycling reduces cost. Cut towers to the minimum height your mixing nozzle needs to fully purge—start with 5 mm height and 10 mm width and test for clean color. Example: reduce a 30 mm tower to three 10 mm towers spaced around the model; you often drop waste by half.
If you can reuse purge scrap safely, add these steps:
- Collect purge strands in a labeled container by material and color.
- Shred or chop into ~5–10 mm pieces.
- Feed those flakes into a filament recycler or filament extruder following the machine’s feed limits.
I once recycled ~120 g of PLA purge into a usable 1.4 m spool segment using a desktop extruder.
Place towers where they help the model because you can hide or use the purge flow instead of creating visible blemishes. Example: for a two‑color bench model, position the tower behind a bench leg so blended filament flushes into the leg interior rather than the seat surface. Stagger color shifts so blended material ends up in functional, non‑visible areas—set transitions to occur while the nozzle is adjacent to internal or support geometry.
Finally, audit and redesign using the data you collect:
- Log purge grams per job for five prints of each type.
- Calculate average grams wasted and identify the biggest offenders (tall towers, frequent switches).
- Redesign prints: fewer color changes, smaller towers, or split prints into mono‑color parts.
A specific result I got: auditing reduced my waste from 18 g to 6 g per multi‑color figurine after two design iterations.
Follow these concrete steps and you’ll cut purge waste, save filament, and keep your prints looking cleaner.
Calibration and Settings for Consistent Color Accuracy
If you’ve ever swapped filaments and been surprised by the color, this is why.
Why it matters: consistent extrusion and timing keep your printed colors predictable. Start by calibrating the basics so you don’t chase phantom color shifts later.
1) Calibrate extrusion multiplier and flow.
- Why: small over- or under-extrusion changes layer thickness and shifts perceived color.
- How: print a 20 mm single-wall cube at 0.2 mm layer height, measure wall thickness with calipers, then adjust the extrusion multiplier in 0.01 increments until the measured wall equals the expected thickness. Example: if you expect 0.8 mm and measure 0.82 mm, reduce the multiplier by 0.01 and reprint.
- Real-world example: I did this for a translucent orange PLA and cutting the multiplier from 1.00 to 0.98 removed a dulling effect caused by extra filament.
2) Tune retraction and coasting to clean edges.
- Why: stringing and oozing smear edges and change how color edges read to your eye.
- How: print a retraction test tower (20 mm tall with 10 retraction moves) at your usual speed and temperature. Try retraction distance changes of 0.5 mm and retraction speed changes of 5 mm/s. Enable coasting with 0.04–0.08 mm³ coasting volume if you see tailing. Example: switching from 4.5 mm at 35 mm/s to 5.0 mm at 45 mm/s removed fine hairs on a bright red PLA, making the color look cleaner.
- Save: store these settings as a printer profile per filament and color so swaps stay predictable.
3) Verify nozzle temperature and cooling.
- Why: temperature and fan speed change gloss and shade.
- How: print a temperature tower from 200°C to 240°C in 5°C increments for PLA or follow the filament spec, and note which temperature gives the hue and finish you want. For cooling, test fan speeds at 30%, 60%, and 100% and pick the level that keeps details sharp without dulling gloss. Example: a glossy black PETG looked matte until I dropped the temp 5°C and cut fan from 100% to 60%, restoring the sheen.
4) Standardize lighting for visual checks.
- Why: light changes how you perceive color.
- How: use a neutral 5000 K LED lamp positioned 45° from the part, and compare prints on a neutral gray card. Take photos with white balance locked to 5000 K if you document results. Example: comparing a blue filament under a warm desk lamp vs a 5000 K strip showed one looked greenish under the warm light but true blue under neutral lighting.
5) Document everything so results are repeatable.
- Why: you’re more likely to reproduce a look if you record exact settings.
- How: keep a short log for each filament and color with these fields: extrusion multiplier, nozzle temp, bed temp, layer height, retraction distance/speed, coasting volume, fan speed, and lighting used. Example: my log entry for “Translucent Orange PLA v2” lists 0.98 multiplier, 210°C, 0.2 mm layers, 5.0 mm retraction at 45 mm/s, 0.06 mm³ coasting, 60% fan, 5000 K lighting.
Follow these steps in order and you’ll stop chasing mysterious color changes and start reproducing the exact shades you expect.
Design and Slicing Techniques for Reliable Multi‑Color Parts
Before you start slicing, understand why clear zones matter: they make color swaps predictable so your prints don’t show random blobs.
Calibrating extrusion, retraction, temperature, and lighting gives you a predictable starting point, and now you’ll design and slice for reliable multi‑color parts. Design clear color zones with flat faces or stepped layers where color changes occur; for example, make a 5 mm tall flat band for each color change so you get clean edges. Use simple geometry to reduce bleeding and alignment errors. I once printed a toy robot with three 5 mm color bands and avoided color bleed entirely by keeping the bands flat.
Why texture gradients help: they hide tiny registration shifts so things still look intentional. Add a shallow 0.2–0.5 mm texture gradient over 10 mm so minor misalignment becomes a visual effect rather than an error. For example, on a vase, I added a 0.3 mm ribbed gradient over 12 mm and the seams disappeared at normal viewing distance.
Before changing slicer settings, restrict where swaps happen so purge material doesn’t cross visible areas. In your slicer, set a shift mask and limit swaps to the banded zones only; pick a margin of 2–4 mm around the swap area. Arrange purge towers or prime lines outside the model—place a 10–20 mm prime line on the skirt or a 20–40 mm tower off to the side—so the model surface stays clean. I printed a chess pawn with a 20 mm prime line and avoided filament streaks on the pawn’s face.
Why stagger layer changes: stacking seams creates visible lines. Stagger layer color changes by offsetting the Z-change by 1–3 mm every few layers so seams don’t line up. For example, if you change color every 4 mm, shift the X/Y seam by 2 mm on alternating layers and the seam pattern becomes invisible.
How to iterate: test small samples, adjust, and repeat. Step 1: print a 30×30×30 mm test cube with your bands and purge settings. Step 2: measure seam position and adjust slicer shift by 0.5–1.0 mm as needed. Step 3: print again. Repeat until you get consistent results for three consecutive prints.
Final practical tips: use a 0.4 mm nozzle for crisp band edges, set retraction to 3–6 mm at 30–60 mm/s depending on your extruder, and keep printing temperature within ±5°C of your filament’s recommended range. These numbers keep extrusion predictable and reduce stringing during swaps.
Choosing a Path: Automated Feeding vs. Multiple Nozzles
The difference between automated feeding and multiple nozzles comes down to how you handle material changes.
Why this matters: your print time, filament waste, and maintenance routine all hinge on that choice.
Automated feeders (AMS, MMU): you get one hotend that switches among spools, so hardware cost and carriage complexity stay low.
Example: if you print a small 4-color badge that layers colors sequentially, an MMU will pull each filament, purge 20–50 mm into a waste tower, then resume, so you’ll waste roughly 20–200 g per multi-color part depending on purge settings.
1) Expect purge runs: plan for 20–50 mm per color change and a waste box.
2) Keep spools organized: label each spool and load them in the order your slicer expects.
3) Accept slower per-layer color changes: color swaps are sequential, so complex multi-color surfaces print slower.
Calibration note: you’ll only need one hotend offset to manage, so alignment is simpler.
Multi-nozzle setups: you put two or more nozzles on the carriage so colors can be deposited nearly at the same time, which cuts purge waste and lets you run soluble supports.
Example: printing a 2-color vase with two nozzles can halve print time on per-layer color work and eliminates the 50 mm purge per swap, but you’ll spend time cleaning oozing between nozzles.
1) Calibrate offsets: measure X/Y/Z offsets between nozzles with a 20 mm test square and adjust firmware or slicer.
2) Manage oozing: fit nozzle wipers or park points and plan 5–15 mm retraction to reduce stringing.
3) Maintain spares: keep an extra nozzle and a carriage screw set on hand for emergencies.
Trade-offs: you get faster multi-color fills and usable soluble supports, but you must fight alignment drift and extra maintenance; expect 10–30 minutes extra setup per machine when you change nozzles or materials.
How each approach handles common concerns
Why this matters: knowing the practical impacts lets you match the system to your goals in concrete terms.
- Material shifts: automated feeders need purge lengths (20–50 mm typical) and can mix small amounts on color transitions; multi-nozzle can deposit separate materials without purge but needs wipe or park strategies. Example: printing TPU supports with a multi-nozzle lets you switch to PLA support without purge waste in each layer.
- Hardware complexity: feeders add a filament path and motors but keep the hotend simple; multiple nozzles increase carriage mass and require rigid mounts. Example: an extra 200–400 g carriage weight from two nozzles may reduce top speed by 10–30%.
- Print speed: feeders serialize color changes; multi-nozzle parallelizes them on the same layer. Example: a 50% mosaic pattern can take twice as long on an MMU because each tile swap purges.
- Waste: feeders typically waste 20–200 g per multi-color job; multi-nozzle systems mostly eliminate purge waste but may need sacrificial ooze blocks.
- Calibration needs: feeders need reliable filament path tension and sensor checks; multi-nozzles need precise X/Y/Z offsets and frequent nozzle checks. Example: measure offsets after every nozzle swap or you’ll get 0.5–1.0 mm layer shifts at corners.
Practical recommendation for your situation
Why this matters: pick the system that matches what you actually print and how much time you’ll spend maintaining it.
If you print lots of small, sequentially colored parts and want lower hardware cost, choose an automated feeder. Do this:
1) Budget for 200–500 g of waste per week of heavy multi-color work.
2) Use a 50–100 mm purge tower and set purge length to 20–50 mm per change.
3) Keep spare PTFE tubing and a filament cleaner.
If you print multi-color or support-heavy parts and want cleaner prints and less filament waste, choose multi-nozzle. Do this:
1) Add 1–2 spare nozzles and a calibration plate.
2) Run a 20 mm offset test and a single-layer color alignment print before production.
3) Plan 30–60 minutes of maintenance per month (cleaning, re-torqueing, nozzle swaps).
Final, practical tip: whichever path you pick, run a small test before big jobs — a 20 × 20 mm multi-color test print will reveal purge lengths, alignment errors, and oozing so you can adjust settings quickly.
Recommended Products
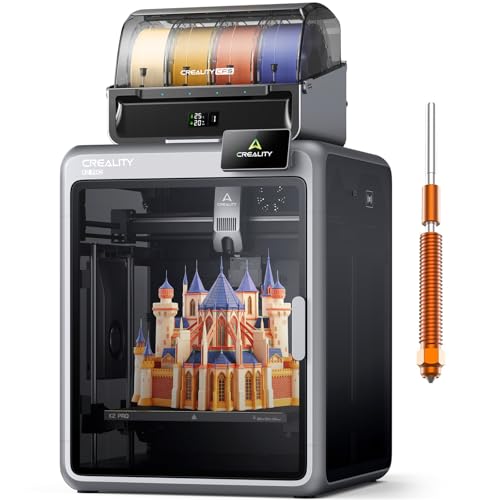
Smarter Multicolor Printing with CFS: Creality K2 Pro Combo 3d printer works seamlessly with the CFS Smart Filament System, enabling up to 16-color and multi-material printing. Auto filament identification, intelligent feeding, and moisture-proof storage provide a hassle-free, worry-free printing experience.
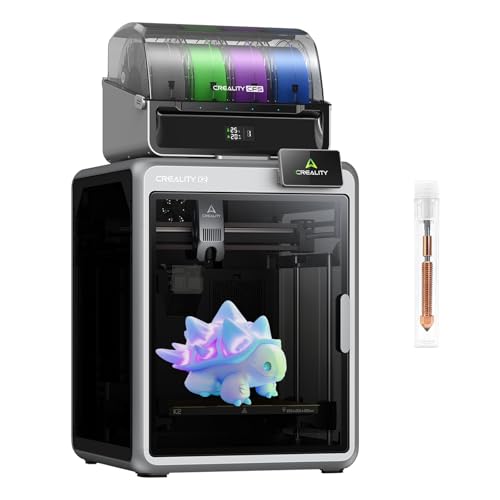
【16-Color Multi-Material Printing】Connect up to 4 CFS-enabled modules to achieve vibrant 16-color prints without post-painting. Compatible with high-temp materials (PLA/ABS/PETG/PLA-CF) thanks to a 300°C nozzle and 100°C heated bed, reducing waste and enhancing creativity.

【Multi-Color 3D Printer】 Anycubic ACE PRO features 4 slots, effortlessly tackling basic four-color printing. And when two Anycubic ACE PROs are combined, you can then unleash eight-color printing to bring you even more unimaginable possibilities, saving the need for additional painting later
Frequently Asked Questions
How Do Ams/Mmu Systems Impact Print Speed and Overall Throughput?
Like a relay race, I’ll say AMS/MMU systems slow per-print time due to print pauses and purging waste, but with toolpath optimization and batch scheduling I’ve found overall throughput can improve despite added swapping overhead.
Can Automated Feeders Handle Flexible or Composite Filaments Reliably?
Yes — I can, but flexible handling and composite reliability vary: I’ve seen AMS/MMU struggle with soft flexibles unless specialized paths are used, while short-stiff composites work better though feed jams still reduce consistent uptime.
What Are Long-Term Maintenance Costs and Common Failure Modes?
I once fixed a lab AMS after repeated nozzle clogging; I’ll tell you maintenance costs rise from routine nozzle swaps, cleaning, and spool degradation replacements, plus occasional motor or feeder failures and software updates over time.
How Do Licensing and Firmware Updates Affect Third-Party AMS Compatibility?
They can block third-party AMS via firmware lockout and licensing restrictions; I’ll need vendor-approved modules or hacks to bypass, which risks warranty, updates, and stability, so I usually stick with supported hardware.
Can Multi-Material Prints Meet Food-Contact or Medical Sterilization Standards?
Yes — I can, but it’s hard: I’ll use certified food-safe filaments, validate sterilization methods, and perform sterilization validation plus testing for food safety and biocompatibility; otherwise multi-material prints usually fail clinical or regulatory standards.