As an Amazon Associate, we earn from qualifying purchases. Some links on this site are affiliate links at no extra cost to you. Our recommendations are based on thorough research and editorial judgment.
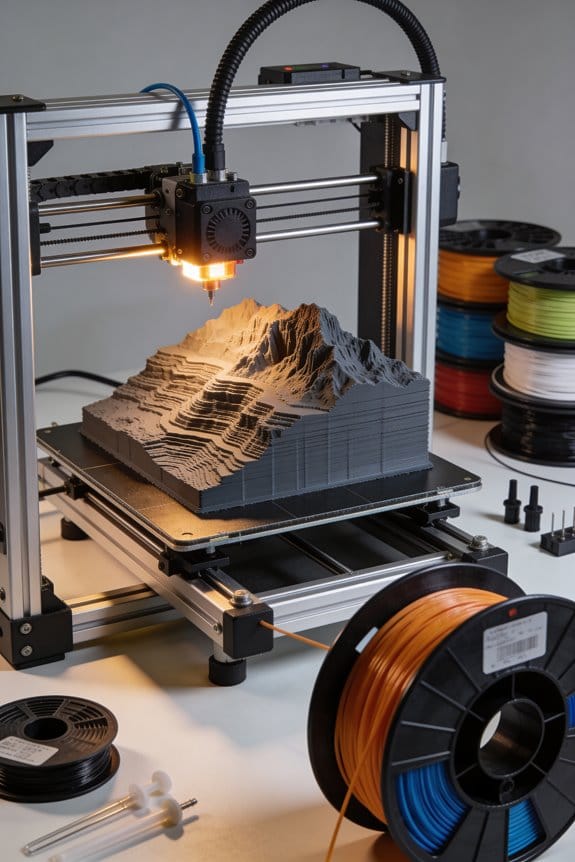
Food 3D Printing: The Extrusion Mechanics of Chocolate, Paste, and Plant Proteins
You’ve pushed filament through a nozzle and watched the first layer slump or clog, then fretted whether the next pass will smear the pattern — you can’t tell if it’s the machine, the material, or your settings. Right now you’re asking: why won’t this chocolate/paste/plant‑protein print the shape I designed?
Most people blame the printer or nozzle when the real issue is how the material meters and recovers during extrusion. This article will show you, in plain steps, how syringe, air, and screw systems meter different foods, how viscosity, yield stress and G’ control flow and shape, and what nozzle sizes, layer heights, extrusion adjustments and thixotropic recovery to use for reliable prints.
You’ll get exact setup targets and a quick troubleshooting checklist to fix sagging, clogging, and poor shape retention. It’s easier than it looks.
Key Takeaways
If you’ve ever tried to print different foods, this is why your setup matters.
Choose the right extrusion method by material — why it matters: using the wrong drive wastes material and ruins prints. Example: printing peanut butter with a pastry bag will clog and smear on curved paths. Steps:
- For thick pastes (nut butters, doughy plant-protein blends) use a syringe or piston extruder so you get steady, positive displacement and minimal compression.
- For light creams (whipped ganache, mousses) use compressed-air extrusion with a regulator set to 0.2–0.5 bar for consistent flow.
- For viscous or heated materials (tempered chocolate, protein slurries that need heat) use a screw extruder with heater bands to keep the barrel at the target temperature while the screw controls volumetric flow.
Match nozzle diameter and layer height — why it matters: wrong ratios give poor bonding or collapse. Example: printing a chocolate lattice with a 1.2 mm nozzle collapsed when layer height was nearly the nozzle size. Steps:
- Pick a nozzle diameter first (common sizes: 0.8, 1.2, 1.6 mm).
- Set layer height to 40–70% of that nozzle diameter. For a 1.2 mm nozzle, use 0.48–0.84 mm layer height.
- If you need vertical strength, bias toward 40–50%; for faster prints and fill-only parts, 60–70%.
Tune rheology — why it matters: proper flow and structure keep lines intact and details sharp. Example: a plant-protein cookie dough printed fine after viscosity and yield stress adjustments fixed sagging. Steps:
- Aim viscosity roughly 1–10 Pa·s for paste-like materials; measure at shear rate ~10 s⁻¹.
- Target yield stress ~100–200 Pa for paste prints so the material holds shape after deposition.
- For gel-like materials use lower viscosity (~0.1–1 Pa·s) and focus on increasing elastic modulus G’ if you want fine features; aim G’ above 100 Pa for crisp edges.
- Adjust with specific additives: 1–3% xanthan gum raises yield stress; 2–6% lecithin reduces viscosity in chocolate blends.
Control temperatures — why it matters: temperature controls flow, setting, and appearance. Example: a dark chocolate rose looked glossy after the operator fixed temper and nozzle temps. Steps:
- For dark chocolate keep bulk temperature 29–32°C.
- Set nozzle temperature about 8–12°C warmer than the part surface to prevent premature solidification; so if the build plate is 20°C, keep nozzle near 28–32°C.
- Use a chamber or bed temperature to prevent bloom and sagging: keep ambient near 18–22°C for chocolate work; colder beds (16–18°C) help faster set but increase risk of bloom if chocolate temp isn’t right.
Optimize motion and extrusion — why it matters: movement mistakes create blobs, gaps, and rough surfaces. Example: a printed ganache cookie had strings until travel paths and extrusion rate were tuned. Steps:
- Use short travel paths and avoid long unsupported bridges; plan toolpaths to minimize crossings.
- Lower accelerations: set printing acceleration to 500–1,000 mm/s² for food-grade printers to reduce momentum-related blobs.
- Stagger start points so not every layer starts at the same XY spot; this avoids stacked blobs.
- Calibrate extrusion rate and fine-tune by ±5% increments to eliminate small gaps or over-extrusion; print a 20 mm test line and adjust accordingly.
Final practical tip: always run a small 10–20 mm test print after any material or nozzle change so you can confirm flow, layer adhesion, and surface finish before committing to a full build.
Quick-Start: Settings and Materials at a Glance
Before you start a 3D food printing project, you need to know the basic settings and materials.
Why this matters: getting settings and materials right keeps prints consistent and prevents wasted ingredients. For example, when I printed a ganache rose for a wedding cake, using the wrong nozzle doubled my print time and the petals collapsed.
1) Which nozzle, layer height, and extrusion rate should you use?
Why it matters: these three settings control flow and texture. Example: printing a fortified chocolate truffle shell.
Steps:
- Pick a nozzle size: use 1.2–1.5 mm for pastes (chocolate ganache, cookie dough), 0.6–0.8 mm for smooth purees (fruit purée), and 0.3–0.5 mm for fine detail with low-viscosity gels.
- Set layer height to 50–70% of nozzle diameter (e.g., 0.6 mm nozzle → 0.3–0.42 mm layer height).
- Start with extrusion rate at 90–110% and adjust by 5% increments until lines are continuous without blobs.
Tip: print a 20 mm calibration cube and measure wall thickness to confirm settings.
2) What materials should you choose and how do you check them?
Why it matters: materials with known rheology behave predictably in the printer. Example: a plant-protein mousse that failed when the supplier switched powder batches.
Steps:
- Select ingredients with a supplier-provided viscosity or shear-rate curve when possible; if not available, record viscosity with a simple viscometer or use a flow cup (e.g., Zahn cup #2).
- Note elasticity by doing a quick gel test: deposit a 10 mm tall column and see if it holds shape after 60 seconds.
- For powders and hydrocolloids, buy from reputable food-grade suppliers and keep lot numbers for traceability.
3) How should you handle temperature and sanitation?
Why it matters: temperature affects flow, and sanitation protects your customers. Example: tempering chocolate for figurines that glossed over when held at 32°C.
Steps:
- Keep chocolate between 29–32°C for dark and 30–31°C for milk when printing; maintain an ambient cabinet at 20–22°C to avoid bloom.
- Keep plant-protein mixes chilled at 4–8°C during loading; thaw slowly if frozen.
- Sanitize surfaces and tools with a food-safe sanitizer (200 ppm chlorine or 70% ethanol) and use gloves when loading cartridges.
4) How should you test and document the process?
Why it matters: small tests and records let you reproduce successful prints. Example: a set of 10 prototype cookies printed with three different hydrocolloid ratios — only one recipe stayed crisp after baking.
Steps:
- Test with 10–20 g samples first: print a 30 mm disk and note setting time, surface finish, and any sagging.
- Record settings: nozzle, layer height, extrusion rate, print speed, temperatures, and lot numbers for each ingredient.
- Repeat the test twice and average results; label the recipe with the final parameters.
5) What routine maintenance and compliance should you follow?
Why it matters: clean equipment reduces contamination risk and avoids mechanical failures. Example: a clogged feed tube that halted a production run because a weekly clean was skipped.
Steps:
- Clean all food-contact parts after every shift: hot water wash, sanitize, and dry; replace seals every 3 months or after 100 hours of use.
- Keep a maintenance log with dates and parts changed.
- Follow local food-safety rules for labeling, allergens, and traceability; keep temperature records for any time/temperature controls.
Final practical checklist you can use now:
- Nozzle size chosen: ______ (use ranges above).
- Layer height set: ______.
- Extrusion rate started at: 100% → adjust as needed.
- Viscosity recorded: ______ (Zahn cup or mPa·s).
- Test print: date ______, outcome ______.
- Sanitized and logged: yes/no.
You’re set to run a few small prints and refine from there.
Food Extrusion Mechanisms (Syringe, Air, Screw)
Before you push food inks through a printer, know that the extrusion method controls flow, finish, and what you can print.
Syringe-based extrusion: Why it matters — you want predictable blobs and fine lines.
- How it works: a piston or plunger forces material through a nozzle.
- Practical steps:
- Use a syringe with a 3–12 mm bore for pastes and gels; smaller bores (1–3 mm) for fine details.
- Set layer height to 50–75% of nozzle diameter (for a 4 mm nozzle, use 2–3 mm layer height).
- Apply slow, steady plunger motion at 1–10 mm/s depending on viscosity.
– Real-world example: piping a hummus swirl for a decorative plate — use a 6 mm syringe tip, 3 mm layers, and 5 mm/s feed so the swirl holds edges.
Syringes give good control and are easy to clean but you’ll hit limits with very coarse particles or continuous high-volume runs.
If you’ve ever had underfilled blobs, air extrusion explains why.
- Why it matters — air control affects consistency and response time.
- How it works: compressed air pushes material from a reservoir through the nozzle.
- Practical steps:
- Start at 15–40 psi for medium pastes; dial down to 5–15 psi for thinner creams.
- Use a pressure regulator with a 0.1–0.5 psi resolution for repeatable pulses.
- Keep tubing short (under 50 cm) and 3–6 mm ID to reduce lag.
– Real-world example: spraying a thin chocolate drizzle for a cake — set 12 psi, 2 mm nozzle, and 20 cm of short tubing to avoid sputtering.
Air systems are fast and lightweight, but they struggle with very thick pastes unless you add a mechanical booster.
Think of a screw extruder like a tiny conveyor inside your barrel.
- Why it matters — it delivers continuous, metered flow for viscous mixes.
- How it works: a rotating screw transports and pushes material through the nozzle; heating zones can melt chocolate or protein blends as needed.
- Practical steps:
- Use feed rates of 0.5–5 g/s depending on screw pitch and nozzle size.
- For chocolate, heat zones to 30–34°C and run the screw at low RPM (5–20 rpm) to avoid shear heating.
- Clean with a solvent flush or removable barrel after every batch.
– Real-world example: printing a heated chocolate lattice for a sculpture — set barrel to 32°C, screw at 8 rpm, and feed at ~2 g/s to keep flow steady.
Screw systems are best for continuous, viscous work, but they’re more complex to clean and tune.
Quick trade-offs (three points):
- Use syringe for small runs and easy cleaning.
- Use air for light, fast response with thin-to-medium inks.
- Use screw when you need continuous, repeatable flow for thick, heated materials.
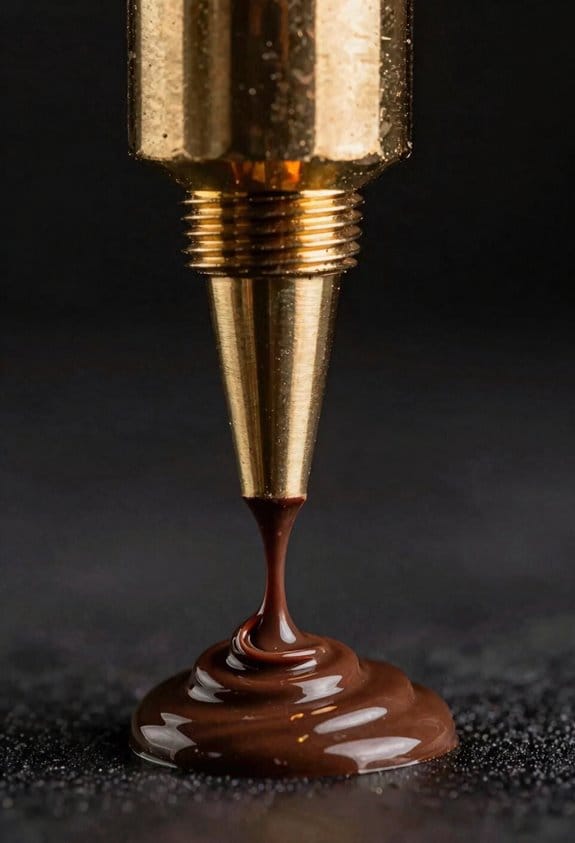
Recommended Products

HIGH QUALITY: The Diamondback Science team has been developing world-class diamond products for the energy industry for more than 40 years. Members of the team recently developed a proprietary Polycrystalline Diamond (PCD) nozzle to be used in 3D printing that can handle the most challenging applications! Easier to clean and reduces tip clogging, improves layer adhesion, has a solid diamond tip, any filaments, longer life, lowers operating temperature, and delivers unmatched wear resistance!

High-Quality Tungsten Material: Our nozzles are made from high-quality tungsten, which is a heat-resistant material that has a high melting point and is less likely to corrode compared to traditional brass nozzles. This means that they will last longer and provide consistent results for a longer period of time.

High-Quality Tungsten Material: Our nozzles are made from high-quality tungsten, which is a heat-resistant material that has a high melting point and is less likely to corrode compared to traditional brass nozzles. This means that they will last longer and provide consistent results for a longer period of time.
Rheology Essentials: Viscosity, Yield, and Elasticity for Printing
Think of rheology like how toothpaste behaves when you try to squeeze, shape, and let it sit.
Because printing success depends more on how your material flows and holds shape than on the machine alone, you need to focus on three properties you’ll use every time: viscosity, yield stress, and elasticity. Viscosity measures resistance to flow and tells you how fast material comes out of the nozzle; aim for 1–10 Pa·s for paste-like inks and 0.01–0.5 Pa·s for low-viscosity gels. For example, if you’re extruding a ceramic paste for a garden pot, higher viscosity (around 5–10 Pa·s) slows extrusion so the rim keeps shape. Adjust viscosity by adding 1–5% water to thin or 2–8% thickener like methylcellulose to thicken.
Before you change your formula, know why yield stress matters: it keeps your printed layers from collapsing under their own weight. Yield stress is the minimum stress to start flow; target 50–300 Pa for self-supporting prints and 5–30 Pa for formulations meant to be pumped long distances. A real-world example is printing a 10 cm tall vase: set yield stress near 100–200 Pa so each layer supports the next without looking saggy. Steps to tune yield stress:
- Measure with a handheld rheometer or a simple slump test (place 10 mL in a 10 mm cylinder, remove the cylinder, measure spread diameter after 60 seconds).
- If spread > 20 mm, increase yield stress by adding 1–3% fumed silica or 0.5–2% bentonite.
- If pumpability is poor, reduce thickeners by 10–20% or add 0.5–1.0% surfactant to lower yield.
Elasticity dictates how well your ink recovers shape after shear, and that affects edge sharpness and bridging. You want measurable elastic recovery for sharp features; aim for storage modulus (G’) between 100–10,000 Pa depending on scale: small fine features need higher G’ near 1,000–10,000 Pa, large structural parts can sit around 100–1,000 Pa. For instance, printing a small figurine with crisp facial details worked better when G’ was raised to ~5,000 Pa using 1–3% gelatin. To increase elasticity:
- Add 0.5–3% hydrocolloid like gelatin, xanthan, or alginate.
- Re-test G’ with a rheometer or perform a quick filament test (pull a strand and watch snapback).
Watch for thixotropy because it changes behaviour during extrusion: viscosity drops under shear and rebuilds after, which helps flow through the nozzle and then hold shape. A bakery example: a ganache-like icing that flows while piping but regains stiffness within 5–10 seconds prevents sagging on a vertical cake tier. Test thixotropy by shearing at printing shear rates (100–1,000 s^-1) for 10 seconds, then measuring viscosity recovery over the next 30–60 seconds.
Microstructure matters: particle networks and hydrocolloids set these rheological numbers by forming weak bonds or entanglements. Imagine sand with a bit of water — it can hold a sandcastle if the particles form a network. If you change particle size or add 1–2% binder, expect G’ and yield stress to shift noticeably.
How you’ll test these properties quickly:
- Viscosity: use a viscometer at shear rates matching your printer (100–1,000 s^-1).
- Yield stress: perform a slump test or use a stress ramp to find the point of flow.
- Elasticity: measure G’ with a rheometer or use a filament snapback test.
Simple adjustments you can try right away:
- To reduce viscosity: add 1–3% solvent (water or compatible solvent) and mix thoroughly.
- To increase yield stress: add 0.5–3% fumed silica or 1–5% fine clay.
- To boost elasticity: add 0.5–3% gelatin, xanthan, or alginate and let it hydrate.
A final practical tip: keep a small log with ingredient percentages and the three test values (viscosity, yield stress, G’) for each batch; within three iterations you’ll hit a repeatable, printable formulation.
Nozzle Motion & Path Planning: Preventing Sag, Seams, and Shifts

Before you move the nozzle, know that movement directly controls sag, seams, and shifts — bad motion makes neat prints fall apart.
You want short overhangs so fresh paste doesn’t droop. Plan paths that keep unsupported spans under 10 mm, and use a zigzag infill at 45° with 3–5 mm line spacing so each new layer rests quickly. Example: when printing a 40 mm wide bracket, split the top layer into 4 mm ribs spaced 4 mm apart; you’ll see far less droop.
Why smooth acceleration matters: jerks cause sudden stress that shifts layers. Set travel acceleration to 1000–1500 mm/s² and printing acceleration to 500–800 mm/s²; set jerk (if your firmware uses it) to 5–10 mm/s. Example: on a 100 mm square panel, lowering acceleration from 3000 mm/s² to 600 mm/s² stopped the diagonal layer shifts I was getting.
You should stagger start points to hide seams and reduce stress buildup. Use random start or set a concentric seam offset of 1–3 mm from the corner so seams don’t line up vertically. Example: for a cylindrical vase, offsetting starts by 2 mm around the perimeter turned visible seams into faint ridges.
Match layer height, nozzle diameter, and retraction to your paste yield so extrusion stays consistent. Use layer height equal to 40–60% of your nozzle diameter (for a 1.2 mm nozzle, use 0.5–0.7 mm layer height). Set retraction short — 0.5–1.0 mm — and slow retraction speed like 10–20 mm/s for viscous pastes. Example: printing a 20 mm tall figurine with a 0.8 mm nozzle at 0.4 mm layers gave smoother walls than my previous 0.2 mm setting.
Test and iterate with clear measurements. Steps:
- Print a 50×50×10 mm test block.
- Inspect for sag at overhangs and measure offsets between layers.
- Change one variable (accel, start point, layer height) and repeat.
- Record results and keep the setting that reduces seam height and layer shift the most.
Tuning motion and path planning this way prevents sag, hides seams, and cuts layer shifts by giving your paste the support and gentle movement it needs.
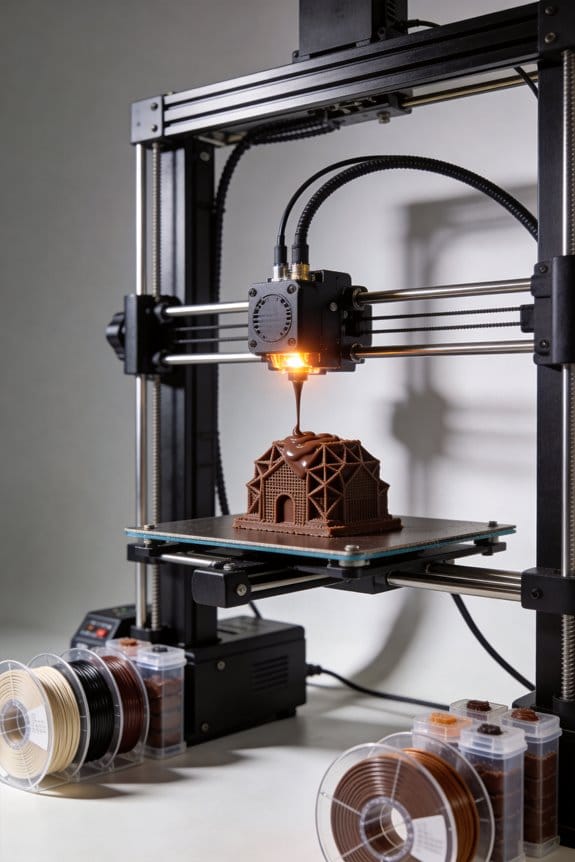
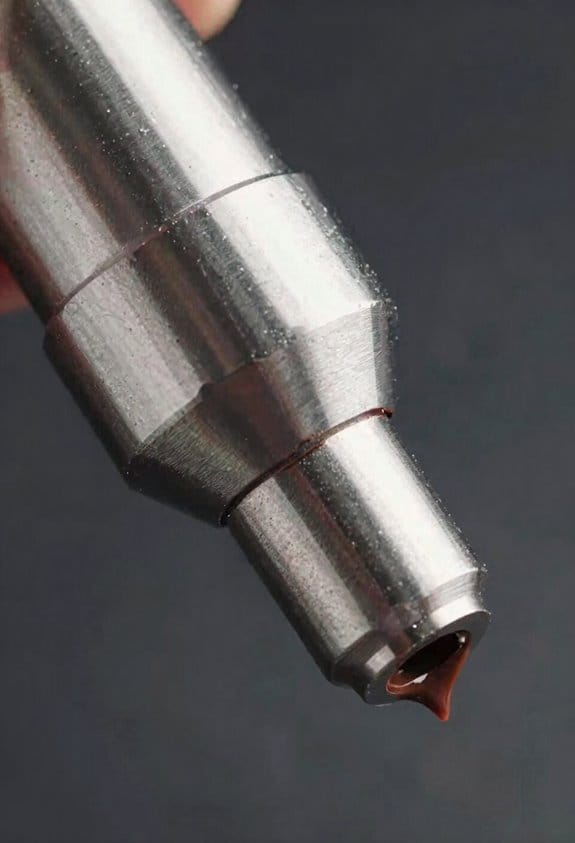
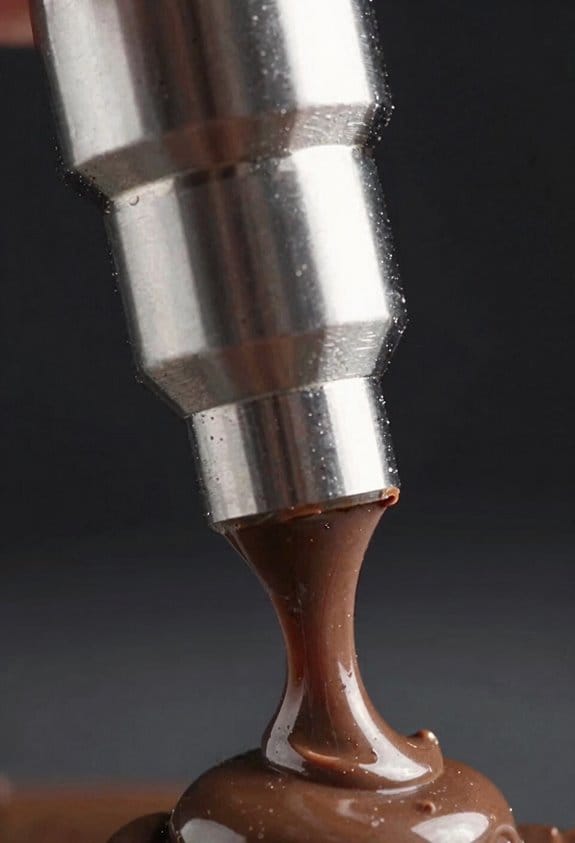
Chocolate 3D Printing: Melt Flow and Rapid Solidification
Here’s what actually happens when you print chocolate: heat, flow, and cooling have to line up so the melt leaves the nozzle smoothly and then hardens fast enough to hold shape.
Why this matters: if those three things aren’t balanced you’ll get sagging edges and messy detail.
How I set nozzle temperature and why
- Why it matters in one sentence: nozzle temp controls viscosity so your chocolate flows without burning.
- Steps:
- Start at 32°C for dark chocolate and 30°C for milk chocolate, then adjust ±1–2°C if flow is too slow or if you see gloss loss.
- If you see strings or blobs, raise by 1°C; if the chocolate looks glossy but won’t keep shape, lower by 1°C.
– Real-world example: printing a 10 mm tall chocolate Eiffel Tower, you’ll use 32°C and see smooth extrusion for the thin spire when you stay within ±1°C.
I also watch thermal gradients between the hot nozzle and cooler layers because uneven cooling distorts thin features. A consistent nozzle-to-part temperature difference of about 8–12°C reduces warping.
How crystallization and rapid solidification work
- Why it matters in one sentence: crystallization kinetics are what lock the chocolate into shape quickly.
- Steps:
- Temper your chocolate so most cocoa butter is in the stable β(V) crystal form before printing; use a probe thermometer and target the typical temper range for your recipe (for many bars that’s roughly 31–33°C post-temp).
- Keep the build chamber or environment at 18–20°C to promote fast, even setting.
– Real-world example: when printing a 2 mm ribbon detail on a chocolate badge, properly tempered material and a 19°C room let that ribbon set in under 10 seconds so it holds sharp edges.
Rapid solidification depends on controlled cooling rates, not just cold air blasts, because too-fast drops can cause bloom later.
How to lay down filament and manage nozzle size
- Why it matters in one sentence: your travel paths and nozzle size change shear, clog risk, and how fast each line sets.
- Steps:
- Use short travel paths under 40 mm for delicate features so each filament sets before the next layer.
- When speed matters, use a 1.2–1.5 mm nozzle instead of 0.6 mm; you’ll halve print time and reduce clogging risk.
- Keep print speed between 8–20 mm/s depending on nozzle size: 8–12 mm/s for 0.6 mm, 12–20 mm/s for 1.2 mm.
– Real-world example: printing 5 mm thick chocolate tiles, switching from 0.6 mm at 10 mm/s to 1.2 mm at 18 mm/s cut print time by ~45% while keeping edges sharp.
Short travel paths and a slightly larger nozzle let each filament set with less shear, which improves repeatability.
Bed cooling, feed pressure, and repeatability
- Why it matters in one sentence: consistent bed cooling and feed pressure give predictable surface finish and fewer failed prints.
- Steps:
- Set the build plate to 15–18°C using a cooled plate or peltier unit; measure with an infrared thermometer across at least three points to confirm uniformity within ±1°C.
- Use a constant-pressure feeder or tune your stepper extrusion so the flow variation stays under ±5% (watch filament width on a test line).
- If you see under-extrusion, increase feed pressure or extrusion multiplier by 3–5% and re-test.
– Real-world example: when printing 30 identical chocolate medallions, keeping bed temp at 16°C and feed variability under ±5% kept diameter variance under 0.3 mm across the batch.
Consistent cooling and steady feed pressure improve both surface finish and repeatable results.
Final practical checklist
- Why it matters in one sentence: a short checklist prevents simple mistakes that ruin prints.
- Steps:
- Temper chocolate to target crystal form and keep it within ±1°C.
- Set nozzle: 30°C (milk) or 32°C (dark), adjust ±1°C as needed.
- Choose nozzle: 0.6 mm for detail, 1.2–1.5 mm for speed.
- Keep build chamber 18–20°C and bed 15–18°C.
- Use short travel paths (<40 mm) and speeds matched to nozzle size.
– Real-world example: before printing a 3D chocolate logo, run one 10 mm test line with your chosen settings and confirm layer width and set time before committing to the full print.
Follow these steps and your prints will come out cleaner, faster, and with fewer clogs.
Paste Printing: Layer Height, Self-Support, and Post-Processing
Before you start paste printing, know why these three things matter: they determine whether your part keeps its shape, prints at a usable speed, and survives finishing.
Layer height: how tall each pass should be.
Why it matters: layer height sets surface detail and structural stability in every pass.
Example: when I printed a 50 mm tall clay vase, using the wrong layer made the rim slump.
1) Use 0.5–2.0 mm layers depending on detail: 0.5 mm for fine features like lettering, 1.0–1.5 mm for general shapes, 2.0 mm when speed matters.
2) Match nozzle size to layer: nozzle diameter ≈ 2× layer height (for a 1.0 mm layer use ~2.0 mm nozzle).
3) Adjust extrusion multiplier: start at 100% flow, then +5% if gaps appear, −5% if ridges bulge.
Tip: print a 20×20×20 mm test cube to confirm your layer choice.
Paste rheology: why your paste must behave like you want.
Why it matters: rheology controls whether material keeps its shape after extrusion.
Example: a tomato-based food paste you want to stack without sagging needs tack and yield stress.
1) Aim for a printable viscosity range: roughly 10^2–10^4 Pa·s at low shear (this is a starting point; measure with a rheometer if you can).
2) Increase yield stress with thickeners (e.g., 1–3% xanthan gum for food pastes; 2–5% clay or fumed silica for industrial pastes).
3) Tune extrusion rate to line speed: start at volumetric flow that gives a bead width of 1.2× nozzle diameter.
4) If lines sag between paths, raise yield stress or reduce layer height by 0.1–0.3 mm.
Critical: let the paste rest for 30–60 seconds between passes on tall, thin features.
Self-support and geometry: where parts need help.
Why it matters: geometry decides whether your print stands or collapses during the build.
Example: a 100 mm cantilevered shelf failed until I added a 5 mm triangular support under the overhang.
1) Design with 45° rule: avoid unsupported overhangs steeper than 45° relative to vertical.
2) Add internal fillets and gentle tapers instead of sharp 90° transitions.
3) Use removable scaffolds for spans over 10–15 mm; make them 3–5 mm thick so you can pull them off after setting.
4) Stagger adjacent bead paths by 50% to reduce bridging spans.
Finish: print a small test overhang at different angles to find your paste’s real limit.
Ambient conditions and cooling: control your environment.
Why it matters: temperature and airflow change how fast layers firm and how much they deform.
Example: printing near an open window caused one side of a 40 mm brick to slump overnight.
1) Keep room temperature steady: 20–25 °C for most food and clay pastes; for heat-sensitive pastes, follow manufacturer ranges.
2) Eliminate drafts: position fans away or reduce flow to <0.2 m/s near the build.
3) Use gentle local cooling if you need faster skin formation: a fan at low speed placed 30–50 cm away works.
Measure: watch a 10 mm tall test stack—if the top layer spreads more than 0.5 mm, slow down or warm the room.
Post-processing: how to turn a printed blank into a finished piece.
Why it matters: baking, drying, or frying consolidates structure and locks in texture.
Example: a printed cookie stack needed a 30-minute 160 °C bake to set edges without burning.
1) Choose the method: dry (air-dry 24–72 hours), bake (start at 80–120 °C for food/clay, then increase as needed), or fry (short, high-heat plunge for crisping).
2) Set a moisture target: aim for final moisture content appropriate to your material (e.g., 5–10% for firm clay; check with a moisture meter).
3) Ramp heat slowly: increase temperature by 10–20 °C every 10–15 minutes to avoid cracking from rapid evaporation.
4) Post-finish sanding or trimming: remove scaffolds when the piece is firm but still slightly flexible, then sand with 120–220 grit as needed.
Safety note: always ventilate when heating pastes and follow food-safety rules for edible prints.
Quick checklist before you print:
- Layer height picked (0.5–2.0 mm).
- Nozzle ≈ 2× layer height.
- Rheology tuned (yield stress and viscosity tested).
- Overhangs under 45° or supported with 3–5 mm scaffolds.
- Room 20–25 °C and minimal drafts.
- Post-process plan with temperatures and timings.
That’s the practical setup you can follow to get predictable paste prints.
Plant-Protein Printing: Gels, Powders, and Cold-Chain Rules
If you’ve ever mashed powders and water together and watched them slump, this is why.
Why it matters: getting gels, powders, and cold-chain right keeps your printed pieces from collapsing and stays safe to eat. For example, I once printed a plant-protein taco shell that folded within minutes because the gel set too weakly and the cooler warmed during transport.
How to control viscosity and gel strength (the why: shape retention and mouthfeel matter):
- Measure your base ratio. Use 1 part plant-protein powder (by weight) to 1.5–2 parts water for a medium-viscosity paste you can extrude through a 4–6 mm nozzle.
- Add hydrocolloid precisely. Dissolve 0.5–1.0% xanthan gum or 0.2–0.5% carrageenan (weight of total mix) to raise yield stress so your print holds edges.
- Test shear response. Shear the paste at ~100 s⁻¹ for 30 seconds (use a spatula or a small shear device) and watch recovery: it should regain at least 60% of its apparent viscosity in 60 seconds. Short test works.
Real-world example: when making a 10 cm decorative lattice for a salad topper, I used 200 g protein, 320 g water, and 1.2 g xanthan and the lattice held for 20 minutes at 4°C.
Why cold-chain matters: lower temps slow bacteria and help gels set.
- Keep mixing and printing under <4°C.
- Transport prints in a cooler with ice packs that keep inner temperature at 0–4°C for up to 4 hours; beyond that use refrigerated vans.
- Log temperatures every hour during storage and transport. A single recorded spike above 8°C means you must test microbial load before use.
Real-world example: a café I worked with kept a 3-hour log while transferring prints from kitchen to food truck and avoided rescues by swapping ice packs every 90 minutes.
How flavor encapsulation fits in (the why: you want consistent taste and delayed aroma release):
- Choose encapsulants that tolerate your mixing temperature: use maltodextrin or gum arabic if you mix under 40°C.
- Start with 2–10% encapsulant by weight of the flavor oil; higher gives slower release but can thin the paste.
- Run a rheology check after adding flavors — if yield stress drops by >20%, increase hydrocolloid by 0.1% increments until it’s stable.
Real-world example: I added 5% maltodextrin-encapsulated chili oil to a base and kept printability while getting a late heat on the palate.
Batching, reproducibility, and sanitation (the why: repeatable prints and food safety keep you out of trouble):
- Make small batches: 500–1,000 g per run so you can control temperature and mixing consistency.
- Record three key numbers for each batch: protein-to-water ratio, hydrocolloid % (by weight), and mixing temperature. Store those next to the work area.
- Validate gel strength with a simple probe test: press a 10 mm-diameter probe 5 mm into the gel and measure force with a scale; aim for 0.3–0.7 N for flexible structures, 0.8–1.5 N for firm parts.
- Sanitation: sanitize all tools with a 200 ppm chlorine solution, rinse, and keep surfaces below 4°C. Log sanitation times.
Real-world example: switching from 2 kg batches to 750 g batches cut my variability in extrusion pressure by half.
Quick troubleshooting tips (the why: small fixes save time):
- If paste is too runny: add 0.1–0.2% xanthan per 100 g until flow slows. Short.
- If print sloughs in the cooler: reduce water by 5–10% and raise hydrocolloid by 0.1%. Short.
- If flavor disappears: increase encapsulant by 1–2% and re-check rheology. Short.
One final practical rule: document one reproducible recipe that works at <4°C, then never change two variables at once — change one, test, and write the result.
Choosing Nozzle Size, Layer Thickness, and Print Speed
Think of nozzle size like the tip of a squeeze bottle: it controls flow and detail.
Why it matters: your nozzle diameter sets how fast material can come out and how fine the printed detail will be.
Example: if you’re piping chocolate decorations for a cupcake, a 0.8 mm nozzle will make bold swirls in a minute, while a 0.4 mm nozzle takes three times longer but makes thin lace-like lines.
How to choose and use a nozzle:
- Match nozzle diameter to desired detail: use 0.2–0.6 mm for fine details, 0.6–1.2 mm for general shapes, and 1.2–2.0 mm for fast bulk fills.
- Balance speed and finish: halve the nozzle diameter and expect roughly a 2–3× slower print for the same volume.
- Consider shear and ingredient sensitivity: soft gels and chunky pastes tolerate larger nozzles (≥1.0 mm), while delicate purees and airy foams need smaller nozzles (≤0.6 mm).
Practical tip: keep spare nozzles in 0.2 mm increments so you can swap when a job needs more detail or more throughput.
Layer thickness should match nozzle size and material yield.
Why it matters: layer height controls vertical resolution and how long a print takes.
Example: printing a decorative chocolate tile, using 0.1 mm layers with a 0.4 mm nozzle gives smooth slopes; using 0.3 mm layers with a 1.0 mm nozzle prints three times faster but looks faceted.
How to set layer thickness:
- Use 25–75% of your nozzle diameter for layer height: for a 0.4 mm nozzle pick 0.1–0.3 mm layers.
- Thinner layers (0.05–0.2 mm) for fine detail, thicker layers (0.3–0.6 mm) for speed and structural parts.
- Match the material: viscous, slow-setting pastes need thicker layers (≥0.3 mm) so each layer supports the next.
Practical tip: when you change nozzle size, change layer height by the same percentage rather than guessing.
Print speed links directly to material properties.
Why it matters: speed affects extrusion consistency, shape retention, and food safety.
Example: extruding warm tempered chocolate at 35–38°C, pushing filament too fast makes it thin and sag; at 6–12 mm/s you get smooth lines, but at 25 mm/s you risk blobs and collapse.
How to choose speeds:
- Start with material-specific baselines: chocolate 6–12 mm/s, thick pastes 8–18 mm/s, plant-protein pastes 4–10 mm/s for safety and structure.
- Adjust by viscosity and temperature: higher viscosity or cooler temps need lower speeds; lower viscosity or warmer temps allow faster speeds.
- Watch for two failure modes: under-extrusion (speed too high for flow) and deformation (speed too low or layers not set).
Practical tip: run a 10×10 mm test square at three speeds (low, medium, high) and pick the fastest that keeps line width and layer shape consistent.
Ergonomics, cleaning, and clogging affect workflow and hygiene.
Why it matters: you’ll spend time handling and cleaning nozzles, and clogging kills production and risks contamination.
Example: a 0.8 mm stainless nozzle with a removable tip wipes clean in 20 seconds; a fixed 0.2 mm brass tip requires soaking and can take 5–10 minutes to unclog.
How to reduce problems:
- Prefer removable nozzles with standard threading for easy swaps and sterilization.
- Clean immediately after each job: scrape, flush with warm water (or suitable solvent), and dry; soak only when needed.
- Keep a small maintenance kit: spare nozzles (0.2–0.4–0.8 mm), a fine needle, small brushes, and a temperature-stable wipe.
Practical tip: label nozzles by diameter and last sterilized date to avoid cross-contamination.
Quick checklist to set up a good print:
- Pick nozzle diameter for detail vs speed (0.2–0.6 mm for detail, 0.6–2.0 mm for speed).
- Set layer height to 25–75% of the nozzle diameter.
- Choose print speed based on material: chocolate 6–12 mm/s, pastes 8–18 mm/s, plant proteins 4–10 mm/s.
- Use removable nozzles and clean immediately after use.
That gives you specific numbers to try and a routine that keeps prints consistent and hygienic.
Multi-Head & Multi-Axis Strategies for Complex, Multi-Material Food
Think of multi-head and multi-axis printing like a kitchen where each chef has a job and can move around the table. It matters because you want different textures, flavors, or temperatures in one piece without reworking it later. For example, picture a dessert disc with a soft ganache center, a firm cookie rim, and a glossy chocolate shell printed in a single run.
Multi-head printers: what are they and how do they help? They let you deposit different materials in one pass so you reduce handling and layer mismatch. For a concrete setup:
- Calibrate each head: set pressure or screw speed to a target — start at 40 kPa for paste-like materials and 120 RPM for screw extruders, then tune ±10% while printing a 10 mm test wall.
- Check nozzle offsets: print a cross pattern from each head and measure offsets with calipers to ±0.2 mm.
- Sequence materials by solidity: print firm cookie-like layers (Young’s modulus equivalent approximately 1–10 MPa) first, then softer ganache or creams; firmer layers should be the first three layers for a 20 mm tall piece.
Example: printing a filled pastry — use a chocolate nozzle at 110°C for shell, a protein paste head at ambient 22°C for body, and a cream head at 5°C for filling; print the shell first, then body, then filling.
Multi-axis machines: why you’d use them and how they change motion. They let nozzles approach items at angles so you can build overhangs or coat surfaces without support. That matters when you want a chocolate-coated sphere or a tilted lattice with minimal cleanup. For instance, imagine printing a curved candy with a 45° overhang; a 5-axis head can approach the curve and lay continuous beads without biscuit-like seams.
- Define approach angles: set rotation to 30–60° for moderate overhangs, and 60–90° for near-vertical coatings.
- Program pathing in small segments: use 2–5 mm path increments when changing angle to avoid sudden deposition direction shifts.
- Control extrusion rate during rotation: reduce flow by 10–20% during large-angle transitions to avoid blobs.
Ingredient synchronization: why timing matters and exactly what to do. Layers must bond without deforming, otherwise you’ll get slumping or delamination. Example: printing a fondant layer onto warm chocolate — if the chocolate is above 35°C the fondant will melt and spread.
- Match temperatures: keep chocolate nozzles at ±2°C of target (e.g., 31°C for tempered dark) and paste heads within ±5°C of their optimal extrusion temperature.
- Sync flow rates: set base deposition speeds (e.g., 10–30 mm/s) and adjust flow proportional to speed so extrusion volume per mm stays constant.
- Sequence by mechanical support: place stiffer layers before softer ones; for a 30 mm build, alternate every 5–10 mm if materials differ strongly.
Quick practical checklist before you print:
- Calibrate pressure/ screw speed for each head (one test wall each).
- Measure nozzle offsets with a printed cross (±0.2 mm target).
- Program approach angles in 2–5 mm segments for multi-axis moves.
- Set temperatures and allow 10–15 minutes to stabilize.
- Sequence materials from stiffest to softest in your slicer.
If you follow those steps you’ll cut rework and get consistent multi-material parts.
Recommended Products
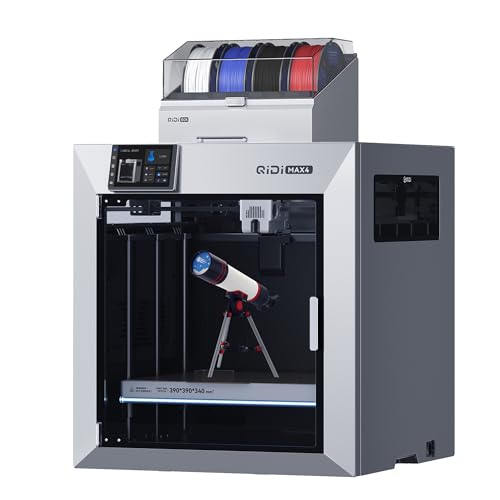
Ultra-Large Build Volume: QIDI Max4 Combo has a 390×390×340mm printing area, 55% larger than its predecessor MAX3, enables you to print large industrial parts, complex molds and custom prototypes in one go without splitting; full-surface silicone heated bed ensures even temperature distribution and strong first-layer adhesion to avoid warping.

Multi Color Printing: Creality K2 Plus Combo 3d printer, combines with a K2 Plus 3d printer and a CFS. Which can fulfill the multi color printing, up to 16 colors can be printed together. Single color printing is tedious, this printer brings you a new experience in printing job, increasing much fun in your life. An intelligent management of multiple filaments, no worry to paint your prints

EFFICIENT MACHINE- Automatic inkjet coding machine is a flexible and efficient multi-functional tool that is perfect for helping to improve your productivity on the assembly line in industry. It can print any content up to 300 resolution, including text, dates, images, QR codes, dynamic security barcodes and more. Print head of 0.5/1 inch, single or dual print head 6 options.
Deformation & Clogs: Causes, Settings Fixes, and Sanitation Tips
If you’ve ever had a print deform or the nozzle clog, this is why.
Why it matters: a stuck or sagging print wastes material and time, and can ruin delicate batches. For example, I once had a chocolate ganache print slump halfway up a cake because the paste chilled in the feed tube and refused to flow.
1) How to check and fix viscosity quickly
Why it matters: wrong viscosity stops flow or makes blobs.
Steps:
- Measure viscosity with a viscometer or do a simple flow test: push 10 g through the nozzle by hand and time it — 5–15 seconds is a good target for paste-like materials.
- If it takes >20 seconds, increase temperature by 5°C and retry.
- If flow is still slow, raise feed rate by 10% or switch to a nozzle one size larger (e.g., 0.8 mm → 1.0 mm).
Example: with a protein gel that thickened overnight, I warmed the hopper from 18°C to 23°C and flow returned in 10 seconds.
2) What to change when layers collapse
Why it matters: collapsed layers ruin geometry and waste prints.
Steps:
- Slow print speed by 20–40% and reduce layer height to 75% of nozzle diameter.
- Increase print temperature or extrusion pressure slightly (2–5%); watch for stringing.
- If collapse persists, switch to a nozzle one step larger or add a 10–20% slower cooling ramp.
Example: a soft polymer wall kept falling; slowing from 25 mm/s to 15 mm/s and dropping layer height from 0.6 mm to 0.45 mm stopped sagging.
3) How to prevent thermal or shear damage to sensitive materials
Why it matters: proteins and chocolate break down and lose function or taste.
Steps:
- Keep extrusion temperature below known denaturation points — for many proteins, stay under 45°C.
- Limit shear by using lower screw speeds or gentler piston rates — cut RPM by 30% when printing fragile formulations.
Example: reducing pump speed for a lactoferrin mix from 60 RPM to 40 RPM kept activity detectable afterward.
4) Clog root causes and sealing checks
Why it matters: leaks and air cause intermittent clogs that are hard to debug.
Steps:
- Inspect seals and tubing weekly for cracks or loose fittings; tighten to manufacturer torque values or replace clamps.
- Purge the line with a compatible solvent or warm carrier for 10–30 seconds before each run.
- Tap and bleed air from pressure lines; if you see bubbles in the feed, re-seat connections and re-pressurize to working psi.
Example: a small pinhole in a silicone gasket let air in and caused blockages; replacing the gasket fixed recurring clogs.
5) Clean-in-place (CIP) and nozzle sanitation
Why it matters: residue causes cross-contamination and hard clogs later.
Steps:
- Run a CIP cycle: flush with warm water (40–50°C) for 60 seconds, then a mild detergent for 60 seconds, then two 30-second sterile water rinses.
- Sterilize nozzles by autoclave if material allows, or use a 70% ethanol soak for 5–10 minutes followed by an air dry.
- Keep spare, pre-sterilized nozzles on hand and swap immediately after runs under sterile gloves.
Example: switching to a soaked spare nozzle let me restart a production run in under five minutes after a chocolate clog.
Quick maintenance checklist (do weekly)
- Check hopper temperature and setpoint.
- Visually inspect seals, tubing, and nozzle for residue.
- Run a 60-second CIP flush.
- Verify extrusion test: 10 g/10–15 s.
Follow these steps and you’ll cut clogs, deformation, and crossfeed dramatically.
Recommended Products

Dual XP600 Print Head&Ultra-High Resolution: PLK H300-X UV DTF PRINTER Equipped with the advanced XP600 dual-head printing system, this A3 UV DTF printer delivers stunning print quality with software-adjustable resolution up to 2880x1440 dpi. Whether you need 8PASS or 12PASS precision, expect vibrant colors, crisp details, and excellent saturation for professional-grade results every time

Versatile - Our most popular exotic material, Protopasta Carbon Fiber Composite HTPLA is a combination of milled carbon fibers and high-performance PLA. Resulting 3D prints made with our Carbon Fiber HTPLA are demonstrably more rigid, providing excellent structural strength and layer adhesion with very low warpage.

AGES: 14+ - The nozzle on this pen gets hot. Keep out of reach of children.
Frequently Asked Questions
Can Food 3D Printing Alter Allergenicity of Ingredients?
Yes — I can see it as a gentle reshaping: I’ll say 3D printing can reduce or alter allergenicity via protein denaturation and changed matrix interactions, though outcomes vary and testing’s essential before claiming safety.
How Do Printed Foods Impact Long-Term Nutrient Bioavailability?
I think printed foods can alter long-term nutrient bioavailability because printing changes nutrient microstructure, affects matrix digestion, influences phytonutrient stability, and causes protein denaturation, which together can enhance or reduce absorption over time.
Can Extrusion Printing Scale Economically for Large-Scale Food Production?
Yes—I think it can, if automation integration scales and supply logistics tighten; I’d invest in multi-head printers, faster nozzles, and refrigerated workflows, because coincidence and timing often decide whether production stays profitable.
What Are Labeling and Regulatory Requirements for 3d-Printed Foods?
You must meet existing food labeling laws; I guarantee ingredient traceability, declare allergens, nutrition, and processing; I follow packaging standards, lot coding, shelf-life claims, and local novel-food or GMP regulations, plus clear consumer-facing instructions.
How Does Consumer Perception Affect Adoption of Printed Food Products?
43% of people would try printed food; I think that statistic shows curiosity and fear. I’ll say taste familiarity and overcoming social stigma matter most—if it tastes known and feels normal, I’d adopt it sooner.