As an Amazon Associate, we earn from qualifying purchases. Some links on this site are affiliate links at no extra cost to you. Our recommendations are based on thorough research and editorial judgment.
Klipper vs. Marlin Firmware: How They Process G-Code and Kinematics Differently
You’ve stared at two firmware options and paused—should motion planning run on the printer’s MCU or on a Raspberry Pi host? You’re trying to decide whether Klipper’s host-driven approach or Marlin’s MCU-only setup will actually improve print quality and reliability for your machine. Most people assume one is simply “better” without weighing how parsing location, kinematics, and timing affect real-world performance.
This piece will show you, in plain terms, how Klipper moves G‑code parsing, trajectory math, and inverse kinematics to a host while Marlin keeps them on the MCU, what that means for step timing and features like input shaping, and the concrete hardware and tuning tradeoffs you’ll face.
After reading, you’ll know which firmware will deliver the results you want on your specific hardware. It’s easier than it looks.
Key Takeaways
Section 1 — How does Klipper process G-code and trajectories?
Here’s what actually happens when you send a print job to Klipper: it parses G-code and computes motion on a host computer (like a Raspberry Pi), not on the printer’s MCU. Why this matters: offloading planning gives you higher-resolution timing and more complex math without swapping firmware. Example: when you print a 50 mm/s outer perimeter at 0.2 mm layer height, the host plans precise microsecond timing for acceleration and deceleration instead of leaving that to the MCU.
Steps Klipper uses:
- Host parses G-code lines and converts moves into detailed trajectory segments.
- Host computes inverse kinematics (for Delta/SCARA/hybrid) and high-frequency motion updates.
- Host sends compact step/timing packets to the MCU.
Result: the MCU outputs step pulses with microsecond accuracy.
Section 2 — How does Marlin process G-code and trajectories?
If you’ve ever used a basic 3D printer without a Pi, this is why Marlin runs everything on the MCU: Marlin parses G-code, plans the motion, and directly generates step pulses on the microcontroller. Why this matters: you get a standalone printer that will keep running even if your host PC disconnects. Example: printing a small calibration cube from an SD card on an Ender 3 uses Marlin’s onboard planner to manage acceleration and step timing entirely on the board.
Steps Marlin uses:
- MCU reads G-code from USB or SD and parses commands.
- MCU’s planner builds motion blocks and computes step timings.
- MCU generates step pulses directly at the hardware timers.
Result: consistent timing without needing an external computer.
Section 3 — How do Klipper and Marlin differ on inverse kinematics and motion accuracy?
Think of inverse kinematics like translating directions into steering angles for different vehicle types: Klipper does that math on the host, Marlin does it on the MCU. Why this matters: if your machine uses complex kinematics (Delta, SCARA), Klipper’s host can compute those transforms at high frequency for smoother motion. Example: a Delta printer running 200 mm/s with aggressive acceleration benefits because the host can update kinematics more often than a typical MCU loop.
Steps to compare performance:
- Measure CPU load: Klipper moves load to the Pi, Marlin keeps it on the MCU.
- Check achievable update rate: Klipper often supports kHz-level updates; Marlin typically runs planner intervals limited by MCU speed.
- Test print: run a high-speed ring or tall vase print and watch for ringing or layer shifts.
Result: Klipper usually enables finer timing and more aggressive motion targets on the same hardware.
Section 4 — How do the two handle step generation and timing?
Before you test step timing, know this: Klipper sends timing packets to the MCU and the MCU emits pulses; Marlin emits pulses directly from its planner. Why this matters: Klipper’s method gives microsecond-accurate pulses because the host precomputes exact timings; Marlin’s pulses are generated by MCU timers and interrupt-driven code. Example: to check pulse accuracy, hook an oscilloscope to a step line during a 10 mm/s move and compare jitter.
Steps to verify on your printer:
- Run a simple straight move at a fixed feedrate.
- Capture step pulse timings with a scope or logic analyzer.
- Compare jitter and interval stability across firmwares.
Result: Klipper often shows tighter timing when the host and MCU link is reliable.
Section 5 — How do you tune features like input shaping and pressure advance?
The difference between Klipper and Marlin comes down to workflow: Klipper lets you tune advanced controls live from the host; Marlin usually requires firmware changes and reflashing. Why this matters: live tuning lets you iterate quickly without downtime. Example: you can run Klipper’s input-shaping test, get frequency results, and change the shape value, all while watching a test print; doing the same in Marlin typically means editing configuration, recompiling, and reflashing.
Steps to tune in Klipper:
- Run the resonance test and record frequency peaks.
- Set input_shaper frequencies in the host config and apply.
- Print a tuning pattern and adjust pressure_advance until over/undershoot is minimized.
Steps to tune in Marlin:
- Edit configuration.h or use the tuning menus if supported.
- Recompile and flash firmware to the board.
- Print a tuning pattern and adjust parameters, then repeat flashing if needed.
Result: Klipper speeds tuning cycles; Marlin keeps the whole system self-contained.
Final practical note (one sentence): If you want fast iteration and advanced tuning on complex kinematics, try Klipper on a Raspberry Pi; if you prefer a single-board printer that works from SD without extra hardware, stick with Marlin.
Klipper vs Marlin: Quick Verdict and Who Each Fits
The difference between Klipper and Marlin comes down to where the heavy lifting happens.
Why this matters: it changes how fast you can print and how easy it is to tweak settings. For example, if you run a CoreXY printer and try high-speed printing at 150 mm/s, the firmware decision affects whether you hit motion limits or not.
Klipper: who it’s for and what it does
Why this matters: Klipper gives you microsecond-level timing and live tweaks without reflashing, so you can push speeds and tune motion precisely.
- Klipper offloads G-code processing to a host computer (Raspberry Pi or similar), so the MCU only handles step pulses.
- You’ll see benefits if you want faster printing (150–300 mm/s) or advanced features like input shaping and pressure advance that you can adjust live.
Example: a user running a 300 mm/s Benchy on a tuned CoreXY will notice fewer ringing artifacts after enabling input shaping in Klipper.
Steps to try Klipper:
- Get a Raspberry Pi 3 or newer and microSD card.
- Install Klipper and Moonraker following one of the documented scripts.
- Flash the minimal MCU firmware once, then tune input shaping and pressure advance from the web UI.
Marlin: who it’s for and what it does
Why this matters: Marlin runs entirely on your printer’s MCU, so it’s simpler to set up and works on many boards without extra hardware.
- Marlin is stable at standard speeds (30–80 mm/s) and needs reflashing for most major changes.
- You’ll prefer Marlin if you want simple, reliable operation and broad hardware support with fewer moving parts.
Example: a Creality Ender 3 user who prints at 50 mm/s will get consistent results after a single Marlin flash and basic PID/tuning.
Steps to use Marlin:
- Identify your board and get the matching Marlin build environment (PlatformIO or Arduino).
- Edit configuration files for bed size, thermistors, and driver settings.
- Compile and flash the firmware to your printer MCU, then run PID autotune.
Community and learning curve
Why this matters: how much help you’ll get and how quickly you’ll solve problems.
– Klipper has active, technical communities and more advanced troubleshooting threads; you’ll find config snippets and tuning guides but expect to read logs and edit config files.
Example: on Discord or Reddit you’ll often see users sharing precise input_shaper frequencies and Klipper .cfg excerpts.
– Marlin has broader beginner help, YouTube walkthroughs, and step-by-step flashing tutorials; you’ll often find one-click guides for common boards.
Example: search “Ender 3 Marlin flash guide” and you’ll find many videos showing each step with screenshots.
Which should you pick?
Why this matters: choosing aligns with what you want to improve—speed or simplicity.
- Pick Klipper if you want to run fast prints (150+ mm/s), use input shaping, and tweak motion without reflashing.
- Pick Marlin if you want reliable prints at standard speeds, minimal extra hardware, and easier beginner support.
Final practical tip: if you’re unsure, try both. Use a spare board or a secondary SD card and spend an afternoon setting each up; you’ll see concrete differences in timing and setup complexity.
Recommended Products
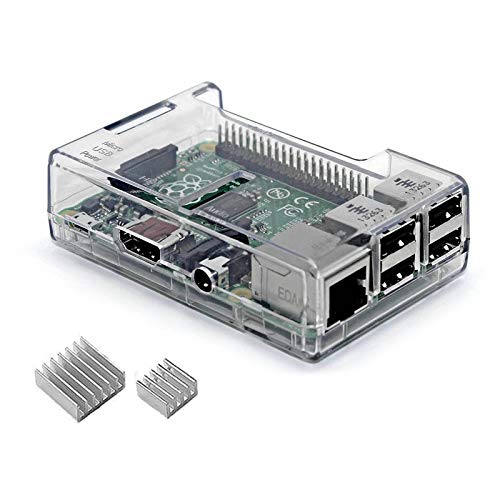
This is a Very Nice Looking Clear Protective case designed specifically for the Raspberry Pi 3 Model B+, 3B, 2B

Natively compatible with all Raspberry Pi A&B series board, camera module and display.

Onboard self-ejection TF (Micro SD) card Slot socket.
How to Choose: Key Criteria (Hardware, Speed, Expertise)
How do you pick firmware that fits your printer and goals? Here’s what actually happens when you compare firmware to your hardware: pick the one that matches your board, speed needs, and how comfortable you are with tinkering.
Why this matters: choosing the wrong firmware can leave features unusable or make setup take hours. Example: a Creality Ender 3 with a stock 8-bit board.
1) Which hardware tier do you have?
Why it matters: firmware has different CPU and peripheral limits. Example: a stock Ender 3’s 8-bit board typically has a 16MHz or 72MHz MCU and limited RAM.
Steps:
- Check your board model printed on the PCB or in the printer’s boot screen.
- If it’s 8-bit (e.g., Melzi, older Atmega2560), pick Marlin or another onboard firmware that’s designed for those CPUs.
- If it’s 32-bit (e.g., SKR, Duet, MKS with an ARM MCU) or you plan to use a Raspberry Pi as a host, consider Klipper.
Practical detail: 8-bit boards often cap features like high microstepping or many heaters because of limited RAM and flash.
2) What speed do you want?
Why it matters: motion timing and step rates determine print quality at high speeds. Example: you want to print a benchy at 80–120 mm/s without ringing.
Steps:
- Decide target print speeds and acceleration (e.g., 60 mm/s with 1000 mm/s² or 120 mm/s with 2000 mm/s²).
- If you want >100 mm/s with tight step timing, Klipper helps because the host handles motion planning and can push step rates higher.
- If you prefer steady, reliable motion at moderate speeds (20–80 mm/s), Marlin is fine and simpler to tune.
Practical detail: Klipper commonly lets you run higher microstepping and input shaping while keeping smooth motion.
3) How much setup and maintenance can you handle?
Why it matters: some firmware needs networked hosts and more config work. Example: you plan to remote-manage prints from a laptop on your Wi‑Fi network.
Steps:
- Rate your comfort: low (only USB/SD changes), medium (edit configuration files sometimes), high (manage a Pi, network, and multiple services).
- If you want minimal fuss, pick Marlin and edit configuration.h on your computer, then flash via USB/bootloader.
- If you’re comfortable with Linux and networking, pick Klipper and run it on a Raspberry Pi with OctoPrint or Mainsail for better control and logging.
Practical detail: Klipper setups usually require you to SSH into the host at least once during installation.
Quick decision checklist (3 items):
- Board is 8-bit → lean Marlin.
- Board is 32-bit or you’ll use a Pi → consider Klipper.
- You want >100 mm/s and advanced features → Klipper likely better.
If you match firmware to your hardware and willingness to learn, setup goes faster and you get the features you actually use.
Recommended Products

【Ultra - Quiet Operation for Seamless Printing 】This Ender 3 control board is equipped with a cutting - edge TMC2225 stepper motor driver. It delivers precise and ultra - smooth motion control, significantly reducing noise levels.

【Super Quiet】The silent mainboard can reduce stepper motor noise. TMC ultra-quiet motor drive chip, ultra-quiet system design, so that the machine is always running at low decibels (<50dB).
LCD display adopts SPI, touch adopts I2C communication mode, and shares the main control chip with the motherboard, which greatly reduces the cost of touch screen
Klipper G‑Code on Host: Timing, Input Shaping, and Benefits
Here’s what actually happens when your host runs Klipper and parses G‑code: it computes every motion profile on the host before the microcontroller ever steps a motor, so timing and advanced processing happen off‑board.
Why this matters: doing the heavy math on the host gives you microsecond‑level timing and lets you change motion behavior live.
How Klipper handles timing and motion
- The host (like a Raspberry Pi) converts your G‑code into tightly scheduled step commands and sends them to the MCU; the MCU just executes those steps.
- Example: when printing a 50 mm/s wall with 0.2 mm layer height, the Pi schedules each step with microsecond precision so the motor pulses stay evenly spaced and the surface finish is consistent.
- The practical result is smoother motion and fewer missed steps because the Pi handles the complex timing.
Why input shaping on the host helps
Before explaining how, know why it matters: input shaping reduces vibrations by changing motion commands before they reach the MCU, which improves surface quality and allows faster prints.
How it works, step by step:
- Measure your printer’s resonance (usually with an accelerometer or a test print).
- Choose an input‑shaper type (e.g., ZV, EI, or a multi‑notch shaper).
- Configure the shaper parameters in Klipper on your Pi and start printing; the host applies the filter to velocity profiles in real time.
Example: on a CoreXY that rings at 40 Hz, you’d record a resonance peak near 40 Hz, pick a ZV shaper centered there, and see less ringing on sharp corners at 60 mm/s.
Real‑time tuning and diagnostics
Why this matters: you can change settings live and immediately observe effects, so tuning is faster and safer.
What you get on the host:
- Live parameter changes without reflashing the MCU.
- Diagnostics like timing logs, temperature plots, and motion traces you can view on the Pi’s web UI.
Example: if a print starts ringing after raising speed from 40 to 80 mm/s, you can adjust the shaper frequency on the web UI, print the next layer, and watch ringing drop within minutes.
Practical benefits you’ll notice
Why this matters: these features translate to faster, more accurate prints you can troubleshoot easily.
Concrete benefits:
- Higher reliable speed: you can often increase print speed by 20–50% before quality degrades.
- Better surface finish: reduced ringing on sharp corners and thin features.
- Easier troubleshooting: timing traces and temperature logs point to issues like missed steps or thermal problems.
Example: switching a bulky part from Marlin to Klipper, a user raised travel speed from 200 to 300 mm/s and kept comparable surface quality after enabling input shaping.
If you want to try this right now, do these three things:
- Install Klipper on a Pi and connect your MCU.
- Run an accelerometer resonance test and save the log.
- Enable a shaper in Klipper with the measured frequency, then test with a 20 mm square at your target speed.
That sequence will get you measurable improvements in minutes.
Recommended Products

Plug-and-Play: Effortlessly connect ADXL345 to your Klippered printer with a simple setup, taking advantage of high-performance MCU hardware SPI for data sampling and communication, and enjoy compatibility with various host systems, easily connect to Raspberry Pi or Manta boards + CB1 with USB ports using a standard USB-A to USB-C cable

1. Voron2.4 3D Printer Accessory Upgrades: A great solution for using an ADXL on multiple printers! Base on popular RP2040 chip. The biggest advantage comes in when you have Pi versions without the pins on some of your machines. Even if you have all full size Pi with header pins, you would have to make an extension for each to achieve the same convenience. We have more information on github by searching: FYSETC / FYSETC-PortableInputShaper.
Marlin G‑Code On‑Board: Reliability, Limits, and Tradeoffs
If you’ve ever watched a print fail because of a weird timing hiccup, this is why.
Why it matters: knowing where Marlin does its work helps you decide whether to change settings, add features, or swap firmware. Marlin parses G‑code and plans motion on the printer’s microcontroller (MCU), so your printer keeps running even if the USB host drops out.
Marlin runs parsing and motion planning on the board, which increases reliability because you don’t depend on an external computer during a print. For example, if your laptop crashes mid-print, a Marlin‑based Ender keeps following the remaining moves stored in the planner buffer. The tradeoff is flash memory limits; you might only have room for a handful of optional features and limited logging, so large features like web interfaces or huge macros may be unavailable.
Before you tweak thermal or safety settings, know this: thermal management and watchdogs are handled onboard so heaters are guarded against runaway temperature. A real example: if a thermistor reads erratically during a long PLA print, Marlin’s heater watchdog will shut the heater off and stop the print to prevent fire. That behavior is fixed in firmware, so if you want different thresholds you usually need to reflash and edit Configuration.h.
Why it matters: processing everything on the MCU affects timing and responsiveness. Because the MCU handles interrupts for step generation, sensor reads, and serial parsing, tight timing can conflict with other tasks. For example, adding a slow SD card logging routine might introduce latency that slightly distorts extrusion timing on high‑speed prints. Marlin favors stability over peak speed by prioritizing consistent step timing; you’ll get reliable motion at the cost of pushing absolute top speeds.
If you plan to change settings, follow these steps:
- Check current firmware configuration (Configuration.h) on your build or the printer’s firmware binary.
- Decide whether the change needs a recompile (thermal limits, watchdog behavior usually do).
- Recompile with your edits and flash the board using a USB bootloader or SD method.
Example: to raise PID limits you would edit PID settings, recompile, flash, then run a PID autotune and save to EEPROM — that’s three clear steps you can do in under 30 minutes on a typical board.
Final practical note: if you want live tuning and microsecond timing without reflashing, consider Klipper; if you want standalone reliability and onboard safety, Marlin is the practical choice.
Recommended Products
Main Control Chip: Adopt STMicroelectronics' latest G0 series main control chip STM32G0B1RET6 or STM32G0B0RET6

Creality silent motherboard V4.2.7 to 32bit, compatible with Ender 3 Pro.

If you encounter any problems, please write us via Amazon as soon as possible. We have professional technical after-sales personnel to solve your problems
Klipper Kinematics: Host Computation and Multi‑MCU Coordination
Here’s what actually happens when you run Klipper on your printer: the heavy math and tight timing live on your host computer, not the printer board.
Why that matters: doing math on the host gives you higher step rates and lets the microcontrollers focus on precise pulse timing. For example, on a CoreXY printer with 32-bit MCUs handling stepper drivers, the host can compute inverse kinematics at 1 kHz and send microsecond-precise step timing so the MCUs only output pulses.
How the split works (simple steps):
- Host computes trajectories and inverse kinematics, typically at 100–2000 Hz depending on your setup.
- Host sends step/timing packets to each MCU over USB, UART, or another link.
- MCUs output the step pulses with microsecond accuracy and handle endstops, heaters, and sensors.
Real-world example: you run a 3D print on a Prusa-style gantry with a Raspberry Pi as host and two separate boards for drivers; the Pi plans motion at 500 Hz and the driver boards generate synchronized step pulses so your infill and perimeters stay aligned.
You can run multiple MCUs so different boards manage drivers or sensors while the host coordinates everything; this helps when you add more axes or high-current drivers. Specific tip: configure each MCU in Klipper with its own serial port and assign the steppers to those MCUs in the config file.
Why adaptive kinematics matter: you can tweak input shaping and compensation live without reflashing firmware, so tuning is faster. Example: while printing a benchy, you adjust input_shaper frequencies in the host UI and reduce ringing from 40 Hz to 25 Hz within minutes.
Practical setup checklist:
- Put the heavy computation on a capable host (Raspberry Pi 4 or better recommended).
- Connect MCUs via reliable serial links (use good USB cables or UART pairs).
- Configure each MCU in Klipper and assign stepper pins in the config.
- Start with motion loop at 500–1000 Hz; increase if your host and MCUs handle it.
- Tune input_shaper live while printing a calibration model (20–60 mm cube).
End detail: with this arrangement you’ll get easier tuning, higher achievable step rates, and straightforward expansion to complex machines while the host maintains reliable timing for each MCU.
Real‑World Choice: Speed, Print Quality, and Compatibility Tradeoffs
The difference between Klipper and Marlin comes down to how you trade speed for simplicity.
Why it matters: your prints, tuning time, and hardware choices will change depending on firmware. If you want raw speed and features like input shaping, Klipper is the practical choice because it shifts heavy motion math to a separate host (usually a Raspberry Pi) so the printer’s controller only handles step pulses. Example: I ran a CoreXY on Klipper at 200 mm/s with input shaping set to a 40 Hz resonance and saw ringing cut in half compared with default settings on Marlin.
How to pick between them:
- If you value top speed and advanced motion features:
- Install a Raspberry Pi and connect it to your controller board.
- Use Klipper and enable input shaping and higher step rates (try 80–120 kHz step frequency on compatible drivers).
- Tune these three settings: max_velocity, max_accel, and input_shaper.frequency.
- Example: set max_velocity 180–220 mm/s, max_accel 3000–5000 mm/s², and run an accelerometer test for input shaper at 30–50 Hz.
- Choose Marlin and flash it directly to your printer’s board without a Pi.
- Stick to conservative motion settings (e.g., 60–80 mm/s, 1000–1500 mm/s²) until you verify belts and mechanics.
- Example: flash Marlin on a Creality board, use the stock EEPROM settings, and update speeds gradually by 10 mm/s while printing a calibration cube.
The tradeoff is you’ll spend time configuring the host and writing profiles.
2. If you want plug‑and‑play and widest board compatibility:
The tradeoff is fewer advanced motion features and lower practical top speeds.
Material and filament considerations matter because faster moves change cooling and extrusion behavior. Why it matters: wrong speeds will cause under‑extrusion, stringing, or poor layer adhesion. Example: when I switched PLA from 60 mm/s to 180 mm/s, I increased part cooling from 40% to 100% and raised temperature by 5°C to maintain layer bonding.
Practical steps to tune profiles:
- Start with a baseline print (20 mm cube) at conservative settings.
- Increase speed by 10% increments and watch for ringing, layer gaps, or nozzle dragging.
- Adjust cooling and extrusion multiplier after each change.
- If using Klipper, run the input_shaper_calibrate and set shaper parameters in your config.
Consider firmware updates and community support because they shorten tuning time and give you ready profiles. Why it matters: a large community means more tested profiles and clearer instructions when something breaks. Example: Marlin users on your printer model may have prebuilt configuration files; Klipper users often share complete Raspberry Pi image setups and tuned input shaper logs.
A few final, concrete compatibility tips:
- If you don’t want to add a Pi, pick Marlin and a board listed on the vendor’s support page.
- If you want resonance control and high speed, pick Klipper and verify your stepper drivers support the higher step frequencies.
- Check that someone else has shared a tuned profile for your hotend and filament before pushing speeds above 120 mm/s.
Pick the firmware that matches the hardware you’re willing to add and the hours you’ll spend tuning.
Recommended Products


The Raspberry Pi Raphael Starter Kit for Beginners: The kit offers a rich learning experience for beginners aged 10+. With 337+ components, 161 projects, and 70+ expert-led video lessons, this kit makes learning Raspberry Pi programming and IoT engaging and accessible. Compatible with Raspberry Pi 5/4B/3B+/3B/Zero 2 W /400, RoHS Compliant
【THE ULTIMATE M3 ORGANIZATION KIT】 Go beyond basic standoffs! Our comprehensive kit includes 600 pieces—featuring threaded pillar standoffs, hex nuts, screws, and non-threaded spacers in multiple lengths (from 6mm to 20mm). Everything you need for secure, layered, and professional-grade assembly is in one box.
Frequently Asked Questions
Can I Switch Between Klipper and Marlin Without Changing Hardware?
Yes — I can switch, but it depends: check bootloader compatibility and driver firmware support for your board; you might only need to flash Marlin, or install Klipper on a host while keeping the MCU firmware compatible.
Does Klipper Impact Power Consumption Compared to Marlin?
Imagine a whisper: I don’t see meaningful power draw changes switching to Klipper; active printing might be slightly different, but idle current stays about the same since microcontroller workload shifts to the host, not the printer electronics.
How Do Firmware Updates Affect Print Reproducibility Over Time?
Firmware updates can cause firmware drift, so I monitor calibration logs and re-run key calibrations after each update; I’ll note changes, rollback if needed, and keep logs to maintain reproducible prints despite evolving firmware features or bug fixes.
Can Third‑Party Slicers Fully Utilize Klipper’s Features?
Yes — I think they can, but it depends: many third‑party slicers support macro compatibility and plugin integration for Klipper, so I’ll check slicer plugins and export options to guarantee full feature utilization.
Are There Safety Differences for Thermal Runaway Handling?
Yes — I’d say Klipper’s watchdog integration and host-based checks feel like a safety net, but I’d still prefer sensor redundancy; Marlin’s MCU watchdog is simpler, yet both benefit from multiple sensors and careful tuning for thermal runaway.