As an Amazon Associate, we earn from qualifying purchases. Some links on this site are affiliate links at no extra cost to you. Our recommendations are based on thorough research and editorial judgment.
The Chemistry of Thermochromic and UV-Reactive Color-Changing Filaments
You printed a bright blue vase that turned streaky and pale after you left it in the sun, and now you’re trying to figure out why the color changed. You want to know whether heat, UV, or a poor filament choice caused the fading or the sudden color flip. Most people assume all color-changing filaments behave the same and blame the printer or cooling settings.
This article will show you, in plain terms, how thermochromic and UV‑reactive filaments actually change color, what damages them, and how to pick and care for filaments so your prints keep their intended look. You’ll get clear, practical tips to avoid fading and unexpected color shifts. It’s easier than it seems.
Key Takeaways
Section 1: What are thermochromic filaments and why they matter?
Here’s what actually happens when you heat or cool thermochromic filament: the color change comes from tiny capsules that switch states with temperature, so your print can visibly tell you when it’s warm or cool. This matters because you can make functional parts like a temperature-warning knob that visibly fades at 40°C, helping you spot overheating before damage occurs.
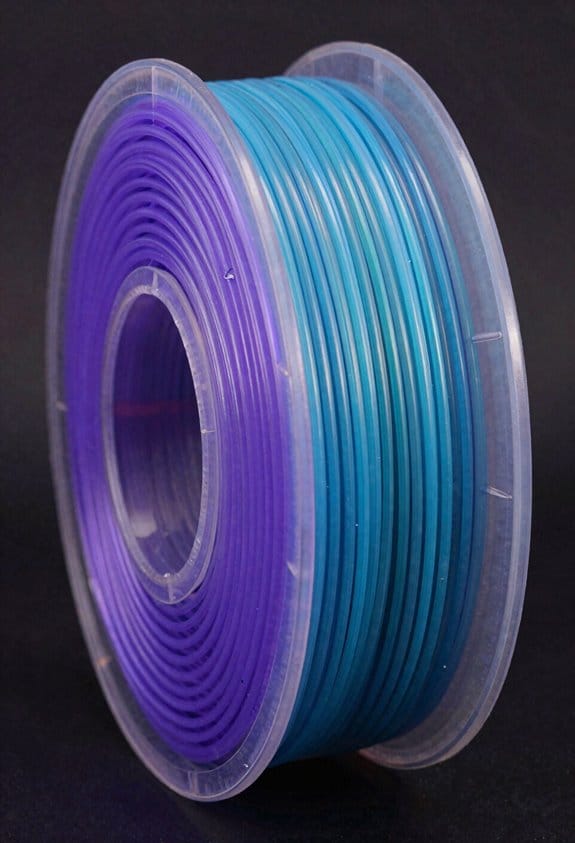
- Thermochromic filaments contain microencapsulated leuco dyes, plus a developer and solvent. The dye changes structure with temperature, and the developer/solvent control the color and the switching temperature.
- Example: print a 20 mm diameter fan grill with a thermochromic ring that turns white above 40°C so you can see when a motor is running hot.
Section 2: How do photochromic filaments work and why you’d use them?
If you’ve ever left a printed sign in the sun and watched it darken, this explains why: photochromic filaments have UV-sensitive molecules that rearrange under UVA (≈320–400 nm) to absorb visible light and then revert when UV is gone. You’d use them to make outdoor labels or novelty parts that indicate sun exposure without electronics.
- The active molecules change shape under UVA and create visible color; they relax back when UV drops.
- Example: print a bike frame badge that darkens on sunny trails, giving an instant visual cue of UV exposure.
Section 3: How microcapsules affect durability and what to expect
Before you print with these materials, know that the microcapsules are fragile and determine lifespan; if they rupture, the color-change stops permanently. Expect that capsules are typically 1–50 µm in diameter and they’ll fail from high heat, shear in the nozzle, or abrasion on the finished part.
- Real example: a printed thermochromic badge left rubbing against a backpack strap will lose its effect in weeks because capsules get abraded.
- Tip: test a small 10 × 10 mm sample with repeated bending to see how your design holds up.
Section 4: What lifespan should you expect and why that matters?
Think of lifespan like mileage on a car: usage, environment, and storage determine how long it lasts, so treat these filaments similarly. In practice, expect about 500–2,000 hours of UV or thermal cycling in the field, and up to ~3 years in sealed, dark storage under ideal conditions.
- Example: a thermochromic label on a greenhouse window might last ~700 hours of sun exposure before noticeable fading.
- Actionable figure: count on roughly 1,000 hours as a median for planning replacement or maintenance.
Section 5: How to preserve function — specific steps you can follow
Before you print, follow these exact steps to maximize life; they keep capsules intact and reduce chemical breakdown. Why it matters: following them can double the useful life of your parts in many cases.
- Print at the filament’s low recommended temperature — reduce nozzle temp by 5–10°C from the top of the manufacturer’s range.
- Minimize melt residence time — use a direct-drive printer or shorten the hotend retraction settings so filament spends less time melted.
- Dry your spools before use — bake unopened spools at 40°C for 4–6 hours or use a filament dryer set to 45°C for the same duration.
- Store sealed and dark — put the spool in a resealable Mylar bag with fresh desiccant and keep it in a drawer or opaque box.
- Example: if a filament spec lists 220–240°C, print at 210–215°C and dry the spool at 45°C for 6 hours before first use.
- Final detail: mark the bag with the date you opened the spool so you can track storage time.
How to Choose and Care for Color-Changing Filaments
Before you pick a color-changing filament, know why it matters: the wrong type won’t react the way you expect and can ruin a project. Think of thermochromic and photochromic filaments like different camera filters: one reacts to heat, the other to UV light, and they need different care.
Which filament should you choose?
- Why this matters: picking the right chemistry gives you the effect you want without wasted prints.
- Steps:
- Identify the activation trigger you need: temperature or UV light. Example: use thermochromic for a mug handle that changes color when hot coffee is poured, and photochromic for a sun-sensitive phone case.
- Match activation range: pick thermochromic that switches around the temperatures you expect. Example: choose a pigment rated to change at 35–40°C for warm-touch effects, or 50–60°C if you want only hotter contact to trigger it.
- Check the filament spec sheet for printing temperature and microencapsulation notes; look for phrases like “microencapsulated” and a recommended nozzle temp (e.g., 200–220°C for PLA blends).
- Real-world example: a thermochromic PLA that lists 35–40°C activation and prints at 205°C will work for a cup handle you touch but not for oven-safe items.
- Takeaway: pick chemistry and activation numbers that match your use.
How do you print color-changing filament without damaging it?
- Why this matters: wrong print settings or handling can break the pigment capsules and stop the effect.
- Steps:
- Set nozzle temp to the lower end of the recommended range. Example: if the filament says 200–220°C, start at 200°C.
- Slow your print speed by 20–30% versus normal PLA speed; try 30–40 mm/s for first layers.
- Avoid excessive retraction and high build-plate temps; keep bed temps in the filament’s recommended window (e.g., 50–60°C).
- Use a gentle first-layer fan profile: 30–50% fan after the first few layers.
- Real-world example: printing a photochromic phone case at 220°C caused fading after a few uses; reducing to 205°C preserved the effect for months.
- Takeaway: lower temps and gentler settings protect the capsules.
How should you store unused spools?
- Why this matters: moisture and sunlight degrade the pigments, shortening the filament’s life.
- Steps:
- Put the spool in an airtight bag with 10–15 g of silica gel per 500 g spool immediately after opening.
- Store at room temperature, 15–25°C, and away from direct sunlight; use an opaque container if possible.
- If you won’t use the spool for more than a month, vacuum-seal it.
- Real-world example: a photographer’s drawer full of exposed photochromic filaments stopped changing after a season because they were left in a sunny window.
- Takeaway: airtight, dry, and dark storage lasts longer.
How do you care for finished prints?
- Why this matters: washing or UV exposure can fade or break the pigments if you’re not careful.
- Steps:
- Hand-wash with cool water (under 30°C) and mild soap; rinse gently.
- Avoid abrasive scrubbers and ultrasonic cleaning.
- Limit continuous sun exposure: if your print will sit outside, provide shade or use it intermittently rather than leaving it in direct sunlight for hours daily.
- Real-world example: a color-changing garden tag left in direct sun faded after six weeks, while an identical tag kept under a pergola retained its effect for a year.
- Takeaway: gentle washing and limited sun preserve the change.
One last practical tip
- Why this matters: testing saves time and filament.
- Steps:
- Print a 2 × 2 cm test tile at your intended settings.
- Test activation: apply a hairdryer at the expected distance or expose it to sunlight for a minute, and check reversibility over several cycles.
- Real-world example: a single test tile revealed that the pigment only activated at 45°C, so the maker switched to a different filament before printing a whole set.
- Takeaway: test before you commit.
Thermochromic vs. Photochromic Filaments : How They Differ
The difference between thermochromic and photochromic filaments comes down to what triggers the color change.
Thermochromic filaments change with temperature, so why this matters is you can use them as simple heat indicators. For example, a 3D-printed mug handle that turns from blue to white at 40–45°C shows when a drink is hot. They work by using encapsulated dye systems that shift color when heat alters molecular interactions, and they often show temperature hysteresis — the color might change at 45°C while heating but won’t revert until, say, 35°C while cooling. If you want this behavior, choose a filament rated for the temperature range you need (look for trigger points like 31°C, 45°C, or 65°C listed by the supplier).
Photochromic filaments react to light, so why this matters is you can make visible UV indicators or objects that change outdoors. For example, a 3D-printed badge that turns vivid purple in sunlight and fades indoors gives a clear UV cue. They work by undergoing structural changes when exposed to a specific activation wavelength, usually UVA around 320–400 nm, and then they revert under visible light or heat. Pick a filament specified for outdoor UV exposure if you expect strong sun; expect noticeable fading after hundreds to a few thousand hours.
How to choose between them, in three steps:
- Decide the trigger: temperature or UV light.
- Match the trigger point: pick the thermochromic trigger temp or the photochromic activation wavelength listed by the maker.
- Factor lifespan: plan for reduced color lifetime — expect major fading after 500–2,000 hours of UV or repeated thermal cycling.
Quick durability tips: store unused filament in a dark, cool place (under 25°C and in sealed bags); print parts with thicker walls (2–4 mm) to slow fading; and consider applying a clear UV-resistant coat for photochromic parts to extend life by months.
How Pigment Chemistry Makes Filaments Change Color
Think of pigment chemistry like a tiny switchboard that controls your filament’s color.
Why this matters: if you want predictable color changes in prints, you need to know what actually flips the switch. For example, a thermochromic coffee mug goes from colored to pale when you pour a 60–80°C drink into it — you can see the dye change across the surface as the cup warms.
How thermochromic leuco dyes work, step by step:
- The leuco dye exists in two states: a colorless form and a colored form.
- A weak acid developer donates a proton to the dye, changing its electronic structure so it absorbs visible light differently.
- Manufacturers trap the dye, the developer, and a solvent inside tiny microcapsules (typically 1–50 micrometers across) so the chemistry stays confined inside the filament matrix.
- When temperature changes the solvent phase or the capsule’s permeability — for example, the solvent melts around 25–40°C — proton transfer happens and the color flips.
Short and visual: picture millions of tiny beads inside the plastic, each switching on or off like pixels.
A concrete example: a thermochromic filament printed into a phone case will look one color at room temperature (~22°C) and shift when you hold it (skin temperature ~32–36°C), because the capsule solvent softens and lets the proton move.
Photochromic pigments work on a similar idea but with light:
- Why this matters: if you want a filament that darkens in sunlight and returns indoors, photochromics let you do that without heat.
- Mechanism in plain terms: light (usually UV) causes the pigment molecule to change shape; that structural change alters how it absorbs visible light, so the filament darkens. When the UV source is removed, the molecule relaxes back and the original color returns.
Example: sunglasses printed with photochromic filament darken outdoors in bright sun and clear up inside, because UV triggers the molecular flip.
One more practical tip you can use right away: if you need the color change to be reversible and last through many cycles, pick filaments where the manufacturer specifies microcapsule size and the solvent transition temperature; those numbers tell you how the filament will behave on your prints.
Manufacturing and Printing Tips That Preserve Color-Change
Before you start printing, you need to know why preserving color-change matters: broken microcapsules or degraded dyes mean your filament won’t respond to temperature or light anymore.
I recommend these concrete settings and habits you can use right away.
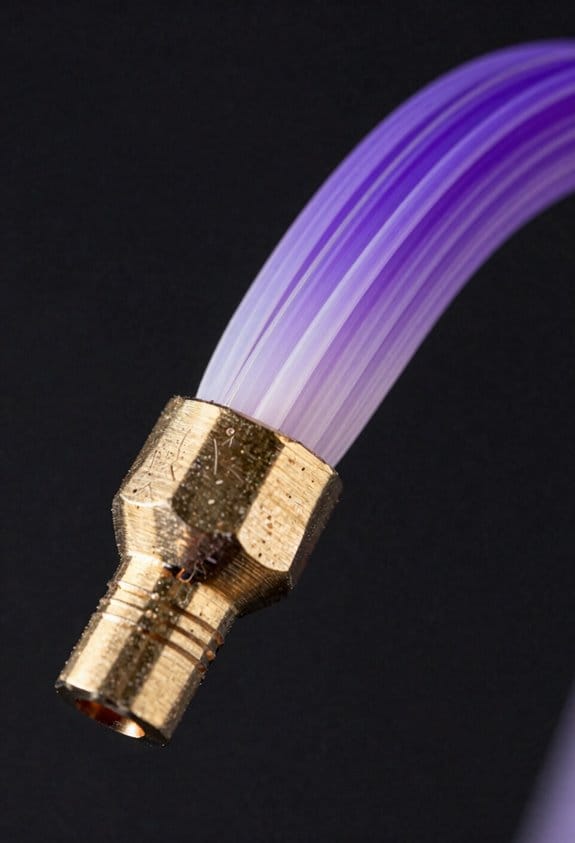
1) Keep nozzle temperature low. Use the bottom of the filament’s recommended range — for PLA that means 180–190°C, for PETG 220–230°C, and for nylon 250–260°C. Example: printing a thermochromic PLA at 185°C kept color-change after five prints.
2) Print at a steady speed. Aim for 30–45 mm/s so the filament doesn’t sit hot in the melt zone. Short bursts of speed are fine, but avoid long slow moves.
Why drying and storage matter: moisture promotes chemical reactions that can permanently change dyes.
3) Dry your filament before use. Put spools in a filament dryer or an oven at 45–50°C for 4–6 hours. Example: a spool dried for 6 hours printed transparently and retained UV-reactive behavior.
4) Store spools sealed with desiccant packs and a humidity indicator; keep relative humidity below 10%.
Why minimizing shear and residence time helps: too much mechanical and thermal stress breaks microcapsules and dyes.
5) Reduce shear and residence time during extrusion. Use a larger nozzle (0.6–0.8 mm) and a moderate layer height (0.2–0.3 mm) so the filament spends less time melting. Short sentence.
6) Avoid high retraction and high screw speeds on pellet extruders — keep motor RPMs moderate.
Why UV exposure is a problem for UV-reactive types: light causes photodegradation that stops color-change.
7) Limit pre-exposure to UV light. Keep spools in opaque bags and remove them from light only when loading. Example: a UV-reactive spool kept in a black plastic bag held function after weeks on the shelf.
8) Use UV shielding on your printer; a simple opaque cover or a UV-blocking film over spool holes reduces photodegradation.
Why post-processing choices affect function: long high-temperature anneals can destroy microcapsules and dyes.
9) Choose gentle post-processing. Hand-sanding and cold solvents are safer than hot baths. Short sentence.
10) If you must anneal, use the lowest effective temperature and short times — for color-change PLA try 60–70°C for 10–20 minutes and test a scrap first.
Extra practical tips you can apply:
- Test scraps: always print a 1×1×1 cm test piece before committing a whole part. Example: a 1 cm test cube revealed loss of color after a 15-minute anneal.
- Label spools with dry date and storage humidity to track shelf life.
- When in doubt, consult the filament datasheet for max processing temperatures and follow the lower bound.
Follow these steps and you’ll keep the color-change behavior much longer.
Troubleshooting, Lifespan Limits, and Best-Use Examples
Think of troubleshooting like diagnosing a car — quick checks save long headaches.
Why it matters: if you can’t tell why your color-changing filament fails, you’ll waste prints and money. Example: a classroom teacher prints thermochromic name tags that stop responding after a month in a sunny window.
1) What are the common problems and why they happen?
- Heat-exposed or UV-bled pigments stop changing because the microcapsules that hold the dye break down after repeated high temperatures or long sunlight exposure.
- Printing at too-hot nozzle temps or leaving filament in a hot lead-up chamber increases thermal stress and speeds failure.
- Moisture and temperature swings can make the filament brittle or change the response temperature.
2) How to troubleshoot — quick steps you can follow
Why it matters: troubleshooting gets you printing usable parts again instead of guessing. Example: you reprint a 2 cm test disc and compare its color change to a new spool sample.
Steps:
- Print a 20 mm test disc at 200°C for PLA-like thermochromic filament, or at the filament maker’s suggested temp range if provided.
- Reduce nozzle temperature by 5–10°C and print the same disc again.
- Minimize dwell time by increasing print speed 10–20% for the test disc.
- Check a fresh filament sample from a sealed spool or the manufacturer’s sample to confirm whether the filament itself has degraded.
- If the fresh sample works, dry and clean your spool: dry at 40–50°C for 4–6 hours, then store sealed with desiccant.
3) How long will these filaments last?
Why it matters: knowing lifespan helps you plan replacements and storage. Example: a model maker stores spools in a closet away from windows and tracks date-opened on a label.
- Typical field life: months to about 2 years under mixed conditions.
- Best-case lab life: up to 3 years when kept sealed, dry, and out of UV.
- Rapid failure happens within weeks if exposed to direct sun or repeated high-heat cycles.
4) Best uses — where you’ll get reliable results
Why it matters: matching application to material maximizes lifespan and usefulness. Example: use these filaments for a thermostat demo that sits indoors under controlled lighting.
- Use for low-wear displays, classroom demos, and short-term temperature indicators.
- Avoid parts that will see constant outdoor UV, high friction, or continuous high temperatures.
Final practical tips
Why it matters: small habits extend useful life and save you time. Example: label spools with open date and store them in airtight tubs with silica packs.
- Print small test specimens when you open a spool.
- Label spool with date opened and expected replacement window (6–24 months depending on exposure).
- Keep spools in the dark at 20–25°C and <50% relative humidity.
Frequently Asked Questions
Can Thermochromic Pigments Affect Filament Biodegradability?
Yes — I think thermochromic additives can alter biodegradability: pigment leaching may inhibit microbial degradation by releasing toxic components or by physically blocking microbes, so I’d test degradation rates and leaching under realistic conditions.
Are Color-Change Additives Safe for Food-Contact Prints?
No, I wouldn’t assume they’re safe; thermochromic or photochromic additives often need food safe coatings and must meet regulatory limits, so I’d verify certifications, migration tests, and manufacturer declarations before using them for food-contact prints.
Can I Dye or Paint Over Photochromic Filaments?
Yes — but I’d warn you it’s like painting a sunrise on glass: coatings can harm surface adhesion and cause color blocking, so I’d test primers, thin paints, and translucents to preserve the photochromic effect.
Do Color-Changing Filaments Work With Flexible Materials?
Yes — I’ve found color-changing filaments can have flexible compatibility, but they need careful printability testing; I’d recommend low-temperature extrusion, slower speeds, and prototype prints to confirm elasticity, color response, and pigment microcapsule integrity.
How Do Cold Storage Temperatures Impact Pigment Stability?
Cold storage can slow cold degradation, preserve microcapsules, and reduce reactions; but it can also cause phase separation, embrittle binders, and alter color thresholds. I’d monitor samples, cycle tests, and adjust formulations accordingly.