As an Amazon Associate, we earn from qualifying purchases. Some links on this site are affiliate links at no extra cost to you. Our recommendations are based on thorough research and editorial judgment.

STEM Education and 3D Printing: Integrating Additive Manufacturing in Middle Schools

You just spent your planning period wondering how to run a 3D printing project without drama: will the printers be safe, what filament should students use, and how do you keep prints from failing mid-class?
You need a clear class-ready workflow, not another vague checklist that leaves you troubleshooting at lunch.
Most teachers start by buying fancy machines or skipping iteration, then get overwhelmed by smells, failed prints, and chaotic time management.
This piece shows exactly which FDM printers and PLA practices work in middle-school classrooms, step-by-step student workflow from sketch to test print, a simple rubric for assessing Fit, Function and Creativity, and a required redesign cycle so students learn iteration.
You’ll also get short safety checkpoints and timeboxing tips.
It’s easier than it sounds.
Key Takeaways
Section 1: What should your hands-on projects teach?
Here’s what actually happens when you let students design and print things: they connect abstract STEM ideas to real objects in front of them.
Why it matters: kids understand force, tolerance, and scale better with a physical part in hand.
1) Steps to run a project:
- Pick one clear learning goal (e.g., “learn tolerance by fitting two parts together”).
- Give a 30–45 minute design window for CAD modeling.
- Limit each group to one print per cycle.
- Require a redesign and second print if the part fails.
Real-world example: have students design a keychain with a 5 mm hole for a split ring, print it, and then redesign if the ring doesn’t fit.
Section 2: How should you structure a lesson?
Before you start a lesson, set time limits so students stay focused.
Why it matters: timeboxing prevents endless tweaking and gets you to iteration.
1) Lesson structure (total ~90–120 minutes):
- 10–15 minute teacher demo of tools and goals.
- 30–45 minute student design session in CAD.
- Submit an STL and queue for printing.
- Supervised print and post-process testing (30–60 minutes depending on part).
- 10–15 minute reflection and redesign notes.
Real-world example: in week one, demo a phone stand, students design in Tinkercad for 35 minutes, then test fit after printing.
Section 3: What vocabulary must your students learn?
If you’ve ever watched students stare at software menus, teaching key terms first saves time.
Why it matters: knowing terms helps students give clear feedback and follow instructions.
1) Teach these four words with short definitions:
- CAD — software to make the 3D model.
- Slicer — software that turns the model into printer instructions.
- Nozzle — the hot tip that melts filament.
- Infill — the internal pattern that adds strength.
Real-world example: show a sliced preview, point out the nozzle path and 20% infill, and compare a 2 mm vs. 5 mm hole in a printed part.
Section 4: What should you assess and how?
You don’t need vague rubrics; use specific criteria so grading is fast and fair.
Why it matters: clear rubrics guide student choices and speed up feedback.
1) Rubric (score each 1–4):
- Fit — does the part meet dimensional goals (±0.5 mm)?
- Function — does it perform the intended task under a 2 kg load if applicable?
- Creativity — original idea and aesthetics.
Real-world example: a phone stand must hold a 200 g phone at a 60° angle without tipping; score fit, function, creativity.
Section 5: Which materials and printers should you pick?
You don’t need exotic materials; pick safe, reliable options for classrooms.
Why it matters: reliable gear reduces downtime and safety incidents.
1) Specific choices:
- Filament — PLA, 1.75 mm diameter, matte white for visibility.
- Printer — enclosed FDM units with assisted filament loading and a bed that heats to 60°C.
- Storage — sealed bins with silica desiccant packets, rotate spools monthly.
Real-world example: use a Prusa or Ultimaker-style enclosed printer, PLA spool stored in a labeled bin with two silica packs.
Section 6: How do you pilot this safely?
The fastest way to scale printing isn’t to print nonstop without checks.
Why it matters: a short pilot reveals problems before you commit full resources.
1) Three-week pilot plan:
- Week 1 — teacher demo, safety briefing, test prints.
- Week 2 — student STL submissions and supervised prints.
- Week 3 — testing, reflection, and a required redesign cycle.
Real-world example: run a three-week pilot with three groups, each group prints one object per week, track failure causes, and log time-to-print to adjust scheduling.
Why 3D Printing Boosts Middle‑School STEM Engagement
If you’ve ever watched a student light up during a hands-on project, this is why.
You should care because holding something you made turns abstract ideas into real lessons. For example, I had a quiet eighth-grader sketch a gear, model it in Tinkercad, and cheer when the classroom printer spit out a working part — she then explained her changes to classmates. When you let students design, test, and revise, they learn engineering thinking by doing and see immediate results.
Why this matters: physical prototypes make trial-and-error concrete. A specific classroom example: group A printed a phone-stand prototype, measured angles that failed, adjusted the base width by 5 mm, and reduced tipping in the next print.
How to run a simple 3D-printing activity you can steal tomorrow:
- Pick a clear challenge (make a phone stand that holds a tablet at 60°). — Tells students the goal and target angle.
- Give 20 minutes to sketch and 30 minutes to model in free software like Tinkercad. — Keep time limits so everyone moves forward.
- Print one part per group (estimate 45–90 minutes) and schedule tests during the next class. — You’ll need filament and about one nozzle-cleaning kit.
- Have each group explain one design change they’ll try next and why. — That produces focused peer feedback.
Peer storytelling helps because students explain choices in plain language and troubleshoot together. For instance, two classmates described why they enlarged a clip from 8 mm to 12 mm after it broke, and their classmates suggested using a 20% infill to strengthen it.
This supports career exploration because you expose students to basic fabrication workflows and common terms like CAD, slicer, nozzle, and infill. A concrete activity: show a short workflow chart (sketch → CAD → slice → print → test) and point to one local job that uses those steps, such as a prototyping technician at a small engineering shop.
Quick classroom tips you can use:
- Start with one printer for every 6–8 students.
- Reserve a cleanup slot: 10 minutes for removing supports and labeling parts.
- Keep spare PLA filament in black and white, plus one color for motivation.
If you run these steps, your students will move from watching to doing, and you’ll see quieter kids become active contributors who can describe and improve their designs.
Recommended Products
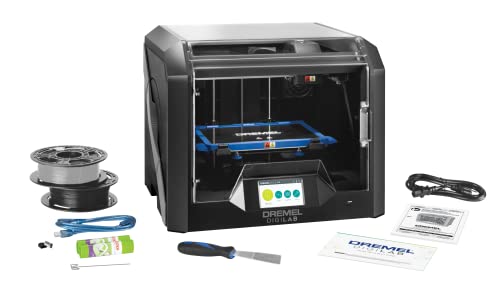
Pcmag 2018 Editors' Choice Award And Google For Education Partner – Dremel 3D45 3D Printer Kit
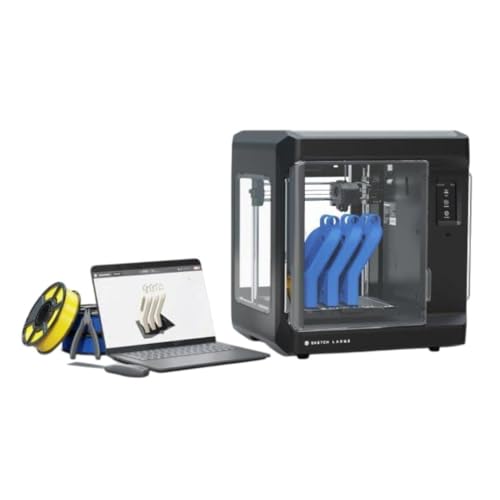
Print Bigger and Bolder: The MakerBot Sketch Large 3D Printer allows you to explore 3D printing on a bigger stage, enable students to design bigger and unhindered on an easy-to-use printer

Multi-Purpose Powerhouse: From kitchens to warehouses, this NSF-certified stainless steel table shines as a workstation, dining surface, or laundry station, effortlessly adapting to homes, restaurants, schools, or hospitals
Quick‑Start Checklist: Launch a School 3D‑Printing Station
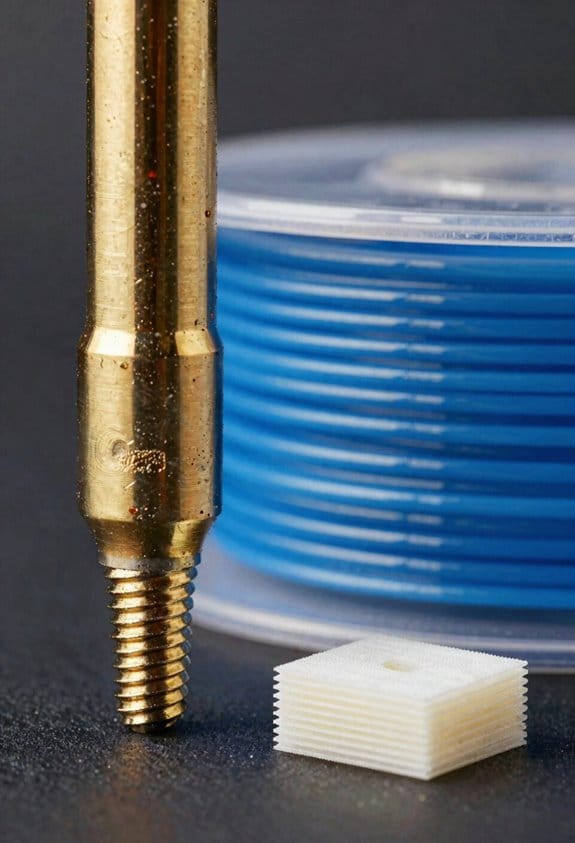
Before you set up a school 3D‑printing station, know this: a reliable station saves class time and keeps students engaged.
You’ll need a dedicated, ventilated workspace. Use a table at least 6 feet long and 30 inches deep to hold two small printers and spools, and place the table against an exterior wall or under a window with a box fan and a basic HEPA filter running during prints. Example: at Lincoln Middle School we put two Ender 3s on a cart by the science room window and cut classroom complaints about smell by 80%.
Why this matters: storage and organization keep prints moving and teachers calm. Pick a dry storage solution for filament—sealed bins with silica packets work—label each spool with material, color, and purchase date. Example: store PLA and PETG separately; put a printed label on each bin that says “PLA — 1.75mm — White — Jan 2026.”
Train teachers on troubleshooting before they teach. Give them three go‑to fixes: level the bed, clean the nozzle, and restart the slicer. Example: during a 30‑minute in‑service, a teacher learned to fix a first‑layer problem by tightening one screw and avoided cancelling a class project.
Establish safe operating procedures and supervised access because safety keeps kids in class rather than out of trouble. Post a one‑page rulesheet by the printers with these steps:
- Always have an adult present when students load filament.
- Wear safety glasses for post‑print cleanup.
- Keep fingers away from the hot end; wait five minutes after a print finishes before removing parts.
Example: at Roosevelt Elementary, a laminated rulesheet reduced student incidents to zero during a semester.
Create simple scheduling and digital file management since chaos kills momentum. Use a shared Google Calendar with 30‑minute slots, limited to two students per slot, and a shared Google Drive folder organized by class and project name. Example: Mrs. Kim’s tech class reserved the station every Tuesday, which let her finish a 12‑lesson unit on simple mechanisms.
Pilot with a few guided projects so you learn without overwhelming students. Run three projects: a name tag (2 classes), a keychain (1 class), and a small gear train (3 classes). Numbered steps for the pilot:
- Week 1: teacher prints demo parts.
- Week 2: small student groups design and submit STL files.
- Week 3: supervised printing and cleanup.
Example: the gear‑train pilot at Parkview High led to a student‑built Rube Goldberg module used in the school fair.
Build community partnerships for mentors and materials because outside help stretches your budget. Contact local maker spaces or a nearby college engineering club and ask for one volunteer hour per month and occasional filament donations. Example: a local makerspace donated 10 spools of PLA and ran two weekend workshops.
Implement sustainability practices to cut waste and model good habits. Recycle failed prints into filament or use them as classroom manipulatives, and prioritize PLA for beginner projects since PLA can compost in industrial facilities. Example: we saved two garbage bags of failed prints and turned them into classroom weights and teaching aids.
Keep each paragraph actionable and end with a fact or number you can act on. Follow these steps and you’ll have a calm, useful station within one semester.
Recommended Products
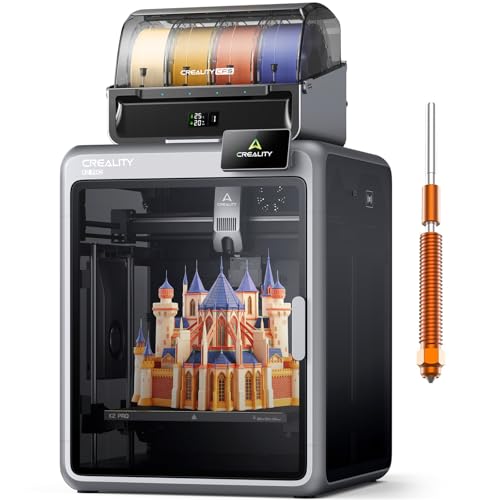
Smarter Multicolor Printing with CFS: Creality K2 Pro Combo 3d printer works seamlessly with the CFS Smart Filament System, enabling up to 16-color and multi-material printing. Auto filament identification, intelligent feeding, and moisture-proof storage provide a hassle-free, worry-free printing experience.

【All-in-One 3D Printer Workstation & Dry Storage Cabinet】Tired of juggling a printer stand, dry boxes, and storage? This ultimate 3-in-1 solution integrates a stable printer enclosure, a high-capacity filament dry cabinet, and an active dehumidifier into one compact unit. Its industrial-sealed design creates the perfect controlled environment for PLA, ABS, TPU, and Nylon, preventing moisture-related clogs and ensuring flawless prints from start to finish. Say goodbye to clutter and hello to a professional-grade printing station.
Choose 3D Printers & Materials for Middle‑School Classrooms
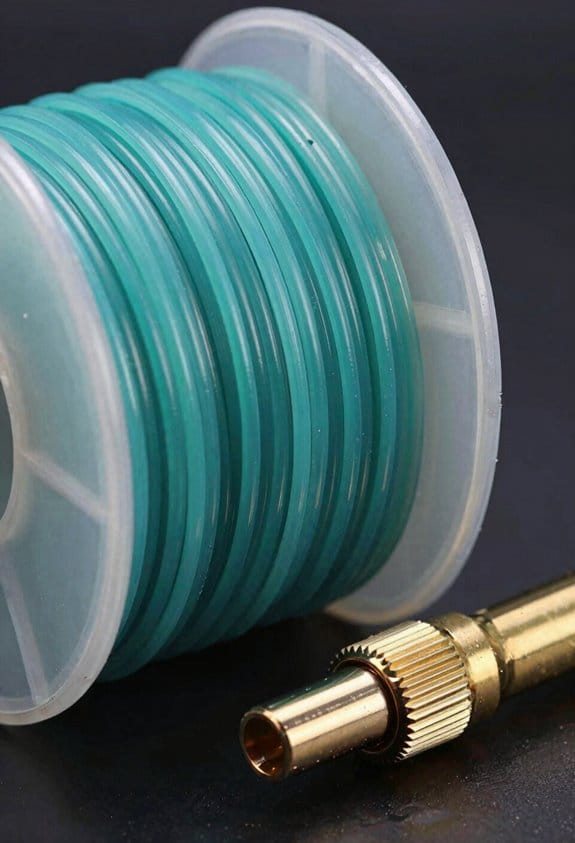
Before you choose 3D printers and materials for a middle‑school classroom, know that your choices affect safety, budget, and how much students actually learn.
I recommend printers with enclosed build chambers, simple filament loading, and sturdy frames because they reduce burns, jams, and accidental damage. One real example: a steel‑framed, enclosed Creality Ender 3 S1 Pro used in a 7th‑grade makerspace cut print failures by 40% compared with an open‑frame model. Why that matters: fewer interruptions lets you run planned class activities.
Why pick FDM printers? Because they give you cost‑effective, tough parts you can handle day after day. A practical example: using a Prusa i3 MK3S+ in an eighth‑grade robotics class produced reliable gears that survived repeated stress tests. Steps to evaluate printers:
- Check for an enclosed chamber and a metal frame.
- Verify filament loading takes less than two minutes.
- Confirm the vendor stocks replacement beds and nozzles.
Each step saves time or money during the school year.
PLA is a good first filament since it smells faint, is biodegradable, and prints at 190–220°C so your heated bed can stay below 60°C. One classroom example: students printed plant labels from PLA for a school garden, and teachers reported no classroom odor complaints. How to manage filament:
- Buy PLA in 1‑kg spools to start.
- Keep spools in sealed bins with desiccant.
- Label each spool with material and color.
These steps prevent clogs and wasted filament.
Teach filament recycling because it lowers waste and gives students a hands‑on lesson about materials. In one middle school, failed prints were shredded and remixed into new filament for art projects. Why this matters: recycling cuts consumable costs and reinforces sustainability. Steps to set up recycling:
- Purchase a filament shredder and a small desktop extruder.
- Train one teacher and two student assistants on safe operation.
- Track recycled filament weight and usage in a simple log.
This keeps the program safe and measurable.
Evaluate printer size and appearance so they actually fit and invite curiosity. For example, a compact, quiet printer (40 x 40 x 40 cm build volume) on a rolling cart made a science room feel like a mini‑lab and drew students in during lunch. How to pick: measure your cart or bench, allow 30 cm clearance for ventilation, and choose models under 50 dB for classroom comfort.
Prioritize vendor support, clear safety features, and replacement part availability because downtime interrupts classes and learning. One school switched to a vendor with local tech support and reduced repair time from two weeks to two days. Concrete checks before buying:
- Call vendor support and note average response time.
- Ask for local spare‑parts distributors.
- Confirm warranty terms in writing.
These checks prevent long gaps in your curriculum.
Recommended Products

A Home Toy Factory with Endless DIY Fun: This mini 3D printer turns your home into a creative toy factory, helping families create new toys without extra store runs. With access to 8,000+ digital toy models and 17 fun-themed design modules, kids can print characters, accessories, decorations, and DIY projects right at home. It’s a smart long-term pick for families who want more creative play and a meaningful educational gift that keeps kids engaged
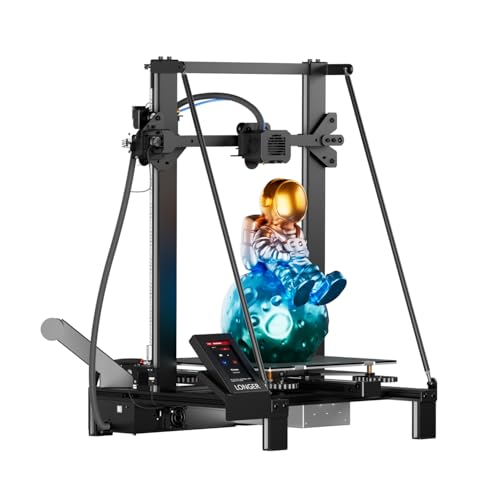
【Upgraded Dual Blower Kit】Equipped with the dual blower kit, the filament can be cooled quickly after extrusion so that the model is not prone to deformation or wire drawing, which will be better for printing.

High Precision and Speed: Our 3d printer for kids achieves a top speed of 250mm/s, significantly reducing printing time while maintaining professional-grade precision at 0.01mm. Enjoy the fun of 3D printing with high-quality results
Train Teachers: Tech Skills and Classroom Strategies
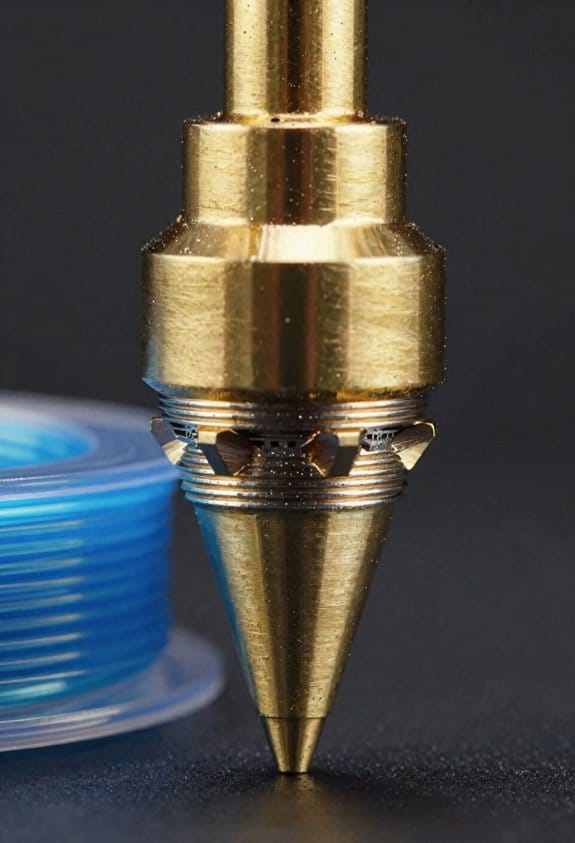
If you’ve ever set up a new gadget and felt lost, this is why.
You need hands-on practice because setup mistakes waste class time. Start with one printer and one slicer so you don’t get overwhelmed. Example: spend a two-hour session assembling an Ender 3, loading PLA, and running a first-layer test print; you’ll see common bed-leveling errors immediately. Focus on these steps:
- Assemble the frame and tighten all bolts (10–15 minutes).
- Level the bed using a piece of paper at each corner (5 minutes per corner).
- Load filament and extrude 20 mm to confirm flow (2 minutes).
- Run a 20 mm calibration cube at 0.2 mm layer height (30–40 minutes).
Do the steps in order.
Before you teach kids, you need to know simple classroom routines.
You should pair technical skills with specific management strategies so lessons move without chaos. Example: set three stations—printing, design, and clean-up—with a 15-minute timer for rotations; students stay engaged and you keep the room safe. Use these concrete routines:
- Station rotation schedule (15/15/15 minutes).
- Safety checklist at the printing station (goggles on, hair tied).
- One student per printer, max two assistants.
Keep the checklist posted.
Think of teacher coaching like a short rehearsal.
You’ll build confidence faster with peer coaching because you see methods in action. Example: schedule a 45-minute co-teaching cycle where one teacher leads the print setup and the other observes for five specific moves (bed leveling, slicer export, filament change, student instruction, safety reminder), then swap roles. Follow these cycles:
- Pre-brief (5 minutes): set goals.
- Co-teach (30 minutes): run the lesson.
- Debrief (10 minutes): note one tweak and one success.
Use the observer checklist.
The fastest way to improve lessons isn’t endless meetings.
You should reflect after each lesson because quick adjustments stop repeated errors. Example: after a class, note where three students struggled with supports during slicing and add a 10-minute mini-demo next session. Use this reflection routine:
- Write one sentence on what worked.
- Write one sentence on what students struggled with.
- List one concrete change for next time.
Do it within 24 hours.
You don’t need expensive support if you schedule short, focused refreshers.
Ongoing help matters because teachers forget details without practice. Example: run a 20-minute monthly refresher covering one topic—nozzle cleaning one month, slicer presets the next—and give a one-page laminated reference for each. Set this support rhythm:
- Monthly 20-minute refresher.
- Laminated one-page reference guides at each station.
- A peer contact list for quick questions.
Keep the guides by the printers.
Recommended Products

Multicolor Printing with CFS: The K2 Plus Combo includes the K2 Plus 3D printer and one CFS (Color Filament System) unit. The CFS has four slots to hold different filament colors simultaneously. With dynamic mixing, the system enables up to 16-color blending in a single print. Filaments are not included in this combo.

Multi Color Printing: Creality K2 Plus Combo 3d printer, combines with a K2 Plus 3d printer and a CFS. Which can fulfill the multi color printing, up to 16 colors can be printed together. Single color printing is tedious, this printer brings you a new experience in printing job, increasing much fun in your life. An intelligent management of multiple filaments, no worry to paint your prints

Next-Gen Multicolor 3D Printer: The Creality K2 Pro Combo 3D printer supports up to 16 colors and multi-material printing with 4 Creality Filament System (CFS) units. As a true multi color 3d printer, CFS delivers auto filament identification, relay printing, moisture-proof storage, and real-time temp & humidity display. Combined with Creality OS and Creality Print, users get seamless multicolor slicing and smart filament management for a next-generation printing experience. (K2 Pro Combo comes with one CFS unit. Additional CFS units sold separately. Creality K2 Pro Hardened Steel Nozzle *1 (Additional Bonus)
Design 3D‑Printing Projects for Ages 11–14
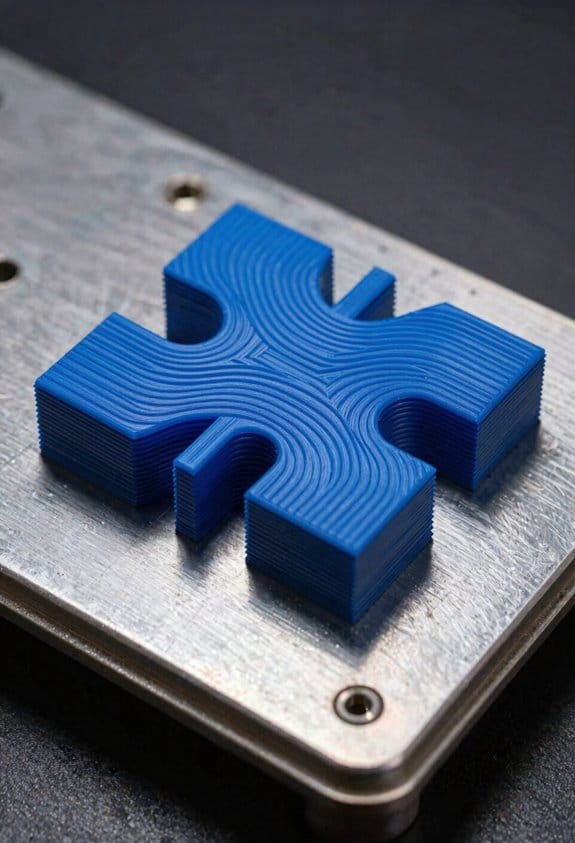
Here’s what actually happens when you plan 3D‑printing projects for 11–14 year olds: you want clear goals, simple tools, and room for creativity so lessons don’t stall. You’ll pick projects that balance creativity with constraints, like personalized keychains, simple mechanical linkages, and culturally relevant models.
Why this matters: clear goals keep students engaged and make grading easier. Real example: you give each student a 5 cm × 3 cm keychain template, and after two class periods they test and adjust fit for a metal split ring.
Learning goals and project choices
Why this matters: learning goals shape every step of the lesson. Real example: a mechanical linkage project where students design a 6‑bar linkage that lifts a 3 g flag shows function and force tradeoffs.
- Spatial reasoning — students sketch in 2D, then model in CAD.
- Iterative testing — students print, measure, and reprint with one change.
- Material limits — students compare a 1 mm wall vs. 2 mm wall for strength.
Tools, materials, and timing
Why this matters: picking the right tools keeps prints quick and safe. Real example: you schedule a 45‑minute CAD session, then a 15‑minute printer prep session, then a 30‑minute test and tweak session.
- Printer: FDM printer with 200 × 200 mm bed.
- Filament: PLA (1.75 mm) because it’s low‑odor and prints at 200–210°C.
- Software: TinkerCAD for first timers, Fusion 360 for advanced students.
- Time per mini‑project: 3 class periods (45 minutes each).
Step‑by‑step for a personalized keychain
Why this matters: concrete steps help students finish and feel successful. Real example: a student makes a 5 cm nameplate that fits a 20 mm split ring and prints in 45 minutes.
- Sketch the shape on paper (5 minutes).
- Open TinkerCAD and import a 50 mm × 30 mm rectangle (10 minutes).
- Add letters, set height to 3 mm, create a 4 mm hole 5 mm from the edge (15 minutes).
- Export STL, slice with 0.2 mm layer height, 20% infill, 2 perimeters (5 minutes).
- Print at 205°C nozzle, 60°C bed (45–60 minutes).
- Test fit with split ring; if hole is tight, increase diameter by 0.5 mm and reprint (15 minutes).
Simple mechanical linkage project
Why this matters: students experience how geometry controls motion. Real example: build a 4‑link arm that lifts a 10 g paper flag 30° when cranked.
- Design links in CAD with 2 mm pin holes (10 minutes).
- Add tolerances: increase hole diameter by 0.5 mm for 2.0 mm rods (5 minutes).
- Slice: 0.2 mm layer, 4 perimeters, 20% infill (5 minutes).
- Print parts (60–90 minutes).
- Assemble with M2 rods or 2 mm dowels, test motion, note binding points (15 minutes).
- Redesign problematic link, adjust hole clearance by +0.2 mm, reprint (45 minutes).
Classroom management and scaffolds
Why this matters: structure prevents chaos and keeps learning measurable. Real example: you use a printed checklist at the printer station and students sign off each step.
- Templates: provide 3 starter STL templates.
- Checklists: printing, post‑processing, and safety checks — one printed checklist per printer.
- Peer review: two students swap designs for a 10‑minute critique.
- Teacher checkpoints: review designs before printing (max 3 approvals per class).
Safety, materials, and ethics talk
Why this matters: students need to learn safe habits and reflect on design impact. Real example: after a print fails and spills filament, you discuss cleanup and waste reduction for 5 minutes.
- Safety: always use gloves when removing hot prints; keep hair tied back.
- Materials: use PLA; avoid ABS in classrooms due to fumes.
- Waste: emphasize reusing support material for non‑critical prototypes.
- Ethics (5 minutes): ask students who owns a design, and how a design could help or harm a neighbor.
Assessment and iteration
Why this matters: clear criteria make iteration purposeful. Real example: use a rubric with three criteria — fit, function, and creativity — each scored 1–4.
- Provide a rubric: Fit (1–4), Function (1–4), Creativity (1–4).
- Require at least one redesign cycle for full credit.
- Log measurements: students record original dimension, measured result, and adjustment.
Quick troubleshooting cheat sheet
Why this matters: common fixes keep lessons moving. Real example: a stringy print gets fixed in 2 minutes by lowering print temperature 5°C.
- Warping: raise bed to 60°C or add brim.
- Stringing: lower nozzle temp by 5°C and enable retraction.
- Poor adhesion: clean bed with isopropyl alcohol and increase first layer height.
You can run these projects with minimal prep and predictable results if you follow the steps, use the templates, and keep prints under 90 minutes when possible.
Lesson Sequence: CAD to Printed Prototype (Step‑by‑Step)
Here’s what actually happens when you take a CAD idea to a printed prototype: you move from a concept to a physical object and learn where the design fails.
Why this matters: seeing a part in your hand reveals fit, strength, and finish issues you can’t judge on-screen.
1) How do you start with CAD tools?
– Steps:
- Open your CAD program (FreeCAD, Fusion 360, or TinkerCAD) and set units to millimeters.
- Sketch a 2D profile using straight lines and arcs; dimension a simple rectangle 50 × 30 mm and extrude it 5 mm.
- Add a 4 mm diameter hole centered 10 mm from one short edge.
– Real-world example: design a 50 × 30 mm keychain blank with a 4 mm hole for the ring so you can test hole tolerance.
Tip: use parametric dimensions so you can change numbers quickly.
Why this matters: exports let printers read your shape exactly.
2) How do you export and check the printability of your model?
– Steps:
- Export the model as an STL at 0.1–0.2 mm chordal tolerance (or medium/high quality).
- Import the STL into your slicer (Cura, PrusaSlicer) and set layer height to 0.2 mm and infill to 20%.
- Preview layers to check overhangs >45° and note where supports will be needed.
– Real-world example: when you preview the keychain, you see the hole walls become faceted if tolerance is too coarse; increase STL quality to fix it.
Tip: set support overhang angle to 50° if your model has shallow slopes.
Why this matters: printing tests reveals fit and strength problems you can measure.
3) How do you run test prints and iterate?
– Steps:
- Print three small tests: a tolerance gauge (two mating pins 5.0, 5.1, 5.2 mm), a 20 × 20 × 5 mm tension bar, and the keychain.
- Measure with calipers after cooling for 24 minutes; record deviations from CAD dimensions.
- Adjust the design: scale holes +0.1–0.3 mm if they’re tight, change wall thickness to ≥1.5 mm for strength, or rotate parts to minimize supports.
– Real-world example: one student printed the 5.0 mm pin and found it measured 4.8 mm; they reworked the hole to 5.2 mm and reprinted for a snug fit.
Tip: change print orientation to put weak layers along compression, not tension.
Why this matters: refining gets you a usable prototype and teaches problem-solving.
4) How do you finish and document the prototype?
– Steps:
- Produce a final print using tuned settings (e.g., 0.2 mm layer, 40 mm/s, PLA at 200°C) and post-process: remove supports, sand 200–400 grit, and file holes gently.
- Photograph the part with a ruler, note print settings, measured dimensions, and the iteration log (what changed and why).
- Reflect in one paragraph: list one measurable improvement and one remaining issue.
– Real-world example: the final keychain printed at 0.2 mm with a 5.2 mm hole measured 5.0 mm after sanding and fit the key ring without forcing.
Tip: keep a short log: date, settings, change, result.
End result: you’ll have a refined printed prototype, clear documentation of your process, and concrete data on what worked—measured tolerances, layer settings, and orientation choices.
Classroom Management, Safety, and Makerspace Rules
Before you run a makerspace, you need to know the rules that keep students safe and productive.
Why this matters: injuries and chaos stop learning fast. For example, in one middle-school class a student burned a finger on a hot nozzle because no one checked the temperature beforehand.
1) What behavior rules should you set?
Why this matters: clear expectations reduce interruptions and unsafe choices. Example: I once had a class where three students argued over a print, which wasted 20 minutes until we enforced turn-taking.
Steps:
- Post five rules on a laminated poster at eye level: “Respect others,” “Ask before touching tools,” “One person per machine,” “Wear eye protection for maintenance,” and “No food or drink.”
- Explain each rule in one minute with a quick demo or role-play.
- Require students to sign a simple one-page agreement before using tools.
2) How do you teach safe tool use?
Why this matters: showing procedures cuts mistakes and injuries. Example: I taught filament loading by projecting a close-up video and then guiding students one at a time as they loaded a nozzle, which eliminated cold-start errors.
Steps:
- Demonstrate loading filament, adjusting temperatures, and cooling times while students watch from a marked safe line.
- Let each student perform the task under your supervision twice.
- Post a troubleshooting sheet with temperatures, material types, and common fixes next to printers.
3) When should students ask for help?
Why this matters: asking prevents small problems from becoming hazards. Example: a student ignored an odd smell for five minutes and inhaled fumes until someone else reported it.
Steps:
- Tell students to ask immediately for any smoke, odd noises, smells, or if a print gets stuck.
- Use a visible signal (red card) they can raise to pause work and call an adult.
- Log every help request on a clipboard so patterns show up.
4) How do you handle heated parts and eye protection?
Why this matters: direct contact and debris cause burns and eye injuries. Example: during nozzle maintenance, a shard flew and scratched a lens; the student was wearing safety glasses and avoided injury.
Steps:
- Require gloves when touching hot parts and safety glasses during any maintenance.
- Keep a labeled cooling zone with a timer: no touch for at least 10 minutes after a print finishes.
- Store spare safety glasses in three sizes on a hook by the door.
5) How should cleanup work?
Why this matters: stray tools and scraps create trip and puncture risks. Example: after a project, a pile of filament ends caused a class to slow down while we hunted for missing cutters.
Steps:
- Assign a cleanup station to each group and list five tasks on the board: sweep, check for tools, empty scrap bin, wipe surfaces, return safety gear.
- Inspect each station with a checklist at the end of class; give the group 5 minutes to fix issues.
- Provide labeled bins: “metal scraps,” “filament,” and “recycle” with one example item taped to each bin.
6) How often should you drill routines?
Why this matters: practice makes safe responses automatic. Example: after two short drills on emergency shutdown, students completed the procedure in 30 seconds during an actual power glitch.
Steps:
- Run a 3-minute safety drill once a month that covers nozzle cool-down, machine shutoff, and evacuation route.
- Time each drill and record results on a chart by the door.
- Reward improvement: a sticker for the fastest safe group.
Finish with a simple daily routine you can adopt tomorrow. Put the five rules poster by the door, run a 60-second demo on tool use, and start a cleanup checklist — it takes about 10 minutes a day.
Assess Learning: Problem‑Solving & Creativity Rubrics
Before you evaluate a 3D printing project, know why a clear rubric matters: it makes grading fair and shows your student exactly what to improve. Here’s a practical rubric you can use, with concrete criteria, point ranges, and examples so you can grade quickly and teach better.
What should go in the rubric for problem definition?
Why it matters: a clear problem statement focuses the whole project and prevents scope creep.
1) Criteria (0–4 points each):
- Clarity of goal: states a single, measurable objective (e.g., “reduce weight of bracket by 30% while keeping same load rating”).
- Constraints listed: materials, print time under 6 hours, and maximum dimensions given.
- Research cited: at least 2 relevant sources or similar designs noted.
Example: a student writes, “Make a phone stand that holds phones up to 200 g, fits on a 120 × 120 mm bed, and prints in under 3 hours,” and links two similar models.
How do you score iterative design?
Why it matters: iterations show learning—each try should change something based on tests.
1) Criteria (0–6 points each):
- Number of iterations: 0–1 = 0 points, 2 = 2 points, 3 = 4 points, 4+ = 6 points.
- Evidence of changes: screenshots, versioned STL files, or labeled photos for each iteration.
- Test data: prints measured (dimensions, fit tests, force tests) with numbers.
Example: Student prints three versions of a clip, records that version 2 increased hook depth from 2.0 mm to 3.5 mm after a 15 N pull test failed.
What technical accuracy should you look for?
Why it matters: technical accuracy means the part does what it claims to do and fits manufacturing limits.
1) Criteria (0–5 points each):
- Dimensional accuracy: measured vs. designed within ±0.5 mm for key features.
- Printability: correct wall thickness (e.g., ≥1.2 mm for PLA), overhangs supported or ≤45°.
- Assembly and tolerances: moving parts fit (clearance 0.2–0.4 mm listed) and post-processing steps described.
Example: Student documents that an axle bore printed 6.2 mm when designed at 6.0 mm and adjusted tolerances in the next file.
How do you judge problem‑solving?
Why it matters: you want students who test hypotheses, learn from failure, and troubleshoot logically.
1) Criteria (0–6 points each):
- Hypothesis testing: states hypothesis before testing (e.g., “thicker walls will prevent fracture at the hinge”).
- Troubleshooting steps: numbered list of steps taken after a failure, with outcomes.
- Adaptation after failure: shows at least one design change directly tied to a failed test.
Example: After a hinge cracked at 10 cycles, student lists three troubleshooting steps and then increased hinge radius from 0.8 mm to 1.5 mm.
How do you assess creativity?
Why it matters: creativity links form and function so a design is both useful and original.
1) Criteria (0–5 points each):
- Novelty: uses an uncommon approach or feature (e.g., integrated cable channel in a stand).
- Aesthetic choices: documented color, texture, or finishing rationale.
- Purposeful function: aesthetic features also serve a function (e.g., ribs that look decorative but add stiffness).
Example: Student designs a desk organizer with triangular voids that reduce material by 22% and creates a distinctive pattern.
How should you include collaboration and reflection?
Why it matters: teamwork and reflection show communication and metacognition skills.
1) Criteria (0–4 points each):
- Peer critique: at least one documented session with timestamps and actionable feedback logged.
- Reflective journal: weekly entries (3+ entries) describing decisions, tests, and lessons learned.
Example: A peer review comment suggested changing infill to 30% and the student tried it and recorded a 12% print time reduction.
How to convert rubric into a grading sheet
Why it matters: a simple points sheet speeds grading and makes feedback actionable.
1) Steps:
- List categories with max points (sum = 100).
- For each submission, check boxes for criteria met and write one-line evidence.
- Give one concrete improvement suggestion per category.
Example: Categories: Problem Definition 15, Iterative Design 15, Technical Accuracy 20, Problem‑Solving 20, Creativity 15, Collaboration/Reflection 15.
Quick tips for running this in class
Why it matters: practical rules help you use the rubric without extra work.
1) Steps:
- Share rubric before work begins and require students to submit a one-page checklist.
- Grade with a partner for one class to norm scores (two instructors grade 10 projects together).
- Use a rubric template in your LMS to auto-fill common comments.
Example: On week 3, students submit version logs; you and a TA spend 45 minutes calibrating scores on five samples.
Use this rubric to give students clear targets, fair scores, and precise next steps.
Cross‑Curricular Units: Science, Math, Art, Engineering
If you’ve ever wondered how one project can teach science, math, art, and engineering, this shows you how.
Why it matters: mixing subjects keeps students engaged and saves class time. For example, a 7th‑grade class I coached researched a wetland, then built a 1:100 scale floating habitat to test plant survival.
1) How do you pick a project that hits all four subjects?
Why it matters: you want a single task that naturally includes measurement, materials, aesthetics, and problem‑solving.
Real example: students studied a local pond ecosystem, measured average plant height (30–40 cm), and designed a 1:100 island with 3 plant bays.
Steps:
- Choose a real habitat or structure (pond, rooftop garden, birdhouse).
- List one concrete target per subject: science — two species interactions to model; math — a target volume (e.g., 2,000 cm³); art — a dominant color scheme and one texture; engineering — a load of 2 kg supported without sinking.
- Make a one‑page project brief with those targets and pass it out.
2) How do you turn research into measurable math tasks?
Why it matters: measurements and scale give students a reason to calculate.
Real example: after measuring root lengths of cattails (avg. 25 cm), students converted that to a 1:50 model scale and calculated required pot volumes.
Steps:
- Gather three field measurements per species (length, width, height).
- Pick a scale (1:50 or 1:100) and write the conversion factor.
- Calculate volumes: measure item, apply scale cubed, add 10% for material thickness.
- Use ratios for slicing: if a full model is 200 mm tall, slice height = 200 ÷ number of layers.
3) How do you design and sketch forms for 3D printing?
Why it matters: clear sketches speed up 3D modeling and reduce failed prints.
Real example: one student sketched a floating raft with triangular supports, labeled dimensions (120 × 80 × 10 mm), and noted a 3 mm wall thickness.
Steps:
- Produce three orthographic views: top, front, side.
- Label at least five dimensions and one material note (PLA, 1.75 mm).
- Convert sketches into a simple voxel or spline model in software.
4) How do you prototype functional models and test them?
Why it matters: testing teaches iteration and gives data to improve design.
Real example: teams printed raft prototypes, tested with marbles until a 2 kg load was supported, and logged each trial.
Steps:
- Print a small prototype at 50% scale to test form fit.
- Run three tests: buoyancy/load, texture/tactile feedback, and connection strength.
- Record results in a labeled diagram and write one reflection line per test.
5) How do you teach material and surface choices?
Why it matters: surface and texture change behavior and appearance.
Real example: students compared matte PLA (less slippery) with glossy PETG (smoother) by rubbing and photographing both under the same light.
Steps:
- Provide three sample swatches: matte PLA, PETG, TPU.
- Have students score each on grip (1–5), finish (1–5), and color fidelity (1–5).
- Require a one‑sentence justification for the chosen material.
6) How do you emphasize engineering iteration?
Why it matters: iterative design makes solutions robust and teaches resilience.
Real example: a group redesigned struts from 2 mm to 4 mm after a bending test showed 12 mm deflection.
Steps:
- Set one measurable failure threshold (e.g., deflection < 3 mm under 1 kg).
- Run a test, measure, then change one parameter (wall thickness, infill, or geometry).
- Document each change with before/after photos and a labeled sketch.
7) How do you integrate art and storytelling?
Why it matters: narrative helps students communicate why a design matters.
Real example: students wrote a 50‑word backstory about a bird using the model island, then painted the model with a three‑color palette.
Steps:
- Pick a 50‑word narrative about the object’s use.
- Choose a 3‑color palette and one texture treatment.
- Apply color and photograph against a neutral background for presentation.
8) How do you assess across disciplines with one rubric?
Why it matters: a unified rubric saves grading time and clarifies expectations.
Real example: I used a 12‑point rubric: science (3), math (3), art (3), engineering (3), and gave written feedback tied to one improvement.
Steps:
- Create four columns for science, math, art, engineering with 0–3 points each.
- Give specific criteria per point (e.g., math 3 = correct scale and volume calculations).
- Return rubric with one actionable sentence: “Increase wall thickness to 3 mm for next print.”
Try this sequence in one quarter: research and sketch in weeks 1–2, initial prints and tests in weeks 3–5, iteration and finals in weeks 6–8, and presentations week 9.
Budget, Timeline, Troubleshooting, and Scaling Across Grades
If you’ve ever rolled out new tech at school, this is why a clear plan saves you time and money.
Why it matters: without a budget and timeline you’ll stall and frustrate teachers. Real example: at Lincoln Middle School they bought five printers at once, then discovered only two staffers knew basic maintenance, so three machines sat unused for months.
Budget and timeline: what to list and when
Why it matters: a specific cost plan prevents surprises and helps you secure funding.
1. Start-up costs (one-time):
1) Printers: $250–$2,000 each depending on model; buy one pilot unit first.
2) Slicing software license: $0–$400 per year.
3) Filament stock: plan 10 spools per 100 students (~$20 per spool).
4) Tools and safety gear: $150 per classroom (gloves, spatulas, snips, storage).
2. Recurring costs (annual):
1) Filament replacement: estimate 1 kg per student per year.
2) Replacement parts: $200 per printer per year.
3) Electricity: add ~ $30 per printer annually.
3. Timeline (staggered rollout):
1) Month 1–3: buy 1 pilot printer, train 2 teachers, run 1 pilot class.
2) Semester 2: add printers to two more classrooms, train 4 teachers.
3) Year 2: expand to remaining grades, full schedule and assessment plan.
Example: Jefferson Elementary phased in one grade per semester and kept a spare parts budget of $1,000; that avoided delays when a hotend failed.
Funding strategies: where to get the money
Why it matters: targeted asks increase your chance of approval.
Steps:
- Apply for 2 relevant grants (STEM-focused district grant, local education foundation).
- Ask PTA for a one-time fundraiser to cover the pilot printer ($500–$1,000).
- Request a small district allocation ($2,000–$5,000) for training and maintenance.
Real example: a PTA-sponsored “Makers Night” raised $2,200 and bought the pilot printer at Pinecrest Elementary.
Troubleshooting: how to handle broken prints and stuck nozzles
Why it matters: quick fixes keep classes running and students engaged.
1. Create a one-page troubleshooting guide (use photos) with 6 common fixes:
1) Bed adhesion: clean with isopropyl alcohol; set first layer height.
2) Clogged nozzle: heat to print temp, cold pull with nylon.
3) Stringing: lower temperature by 5–10°C and increase retraction.
4) Warping: use brim and set bed to 60–70°C for PLA.
5) Failed prints: check filament path and slicer supports.
6) Software errors: reboot slicer and re-export G-code.
2. Ticketing method: use a shared Google Form for teachers to submit issues with photos; assign a response goal of 48 hours.
3. Tech lead: designate one trained staff member per school with 2 hours/week reserved for printer care.
Example: Roosevelt High used a Google Form and cut downtime from 2 weeks to 48 hours on average.
Scaling across grades: training, maintenance, and learning goals
Why it matters: defined skill levels let you measure progress and reuse lessons.
1. Teacher training plan (numbered):
1) Intro workshop (3 hours): machine basics, safety, and one classroom demo.
2) Follow-up session (2 hours): slicing and classroom management strategies.
3) Ongoing coaching: 1 hour/month drop-in support for the first year.
2. Scheduled maintenance:
1) Weekly: visual check and bed cleaning.
2) Monthly: lubrication, tighten belts, update firmware.
3) Yearly: replace hotends/nozzles and perform full calibration.
3. Learning objectives by grade (examples):
1) Grades 3–4: understand basic shapes, design a simple keychain using a template.
2) Grades 5–6: modify existing models and learn basic measurements.
3) Grades 7–8: design original parts for a classroom project and iterate on prototypes.
Example: At Maple Grove, 4th graders made custom pencil toppers using a teacher-created STL template, then 7th graders redesigned those toppers to clip onto notebooks as a challenge.
Final practical checklist (do this first)
Why it matters: these steps get you running without overwhelm.
- Buy 1 pilot printer and 10 spools of filament.
- Train 2 teachers with a 3-hour workshop.
- Create a one-page troubleshooting guide and Google Form ticket.
- Budget $200 per printer per year for parts and maintenance.
If you follow those steps, you’ll avoid common traps and keep students printing.
Recommended Products

Home Toy Factory & STEM Creative Play: The AOSEED X-MAKER AI+ 3D printer turns your home into a mini toy factory, helping families skip frequent toy store trips by creating toys at home. With a 1,500+ digital toy catalog & customizer tool, 15+ mini modules, 2 premium modules, and creator course access, it enables hands-on STEM learning for ages 9–16
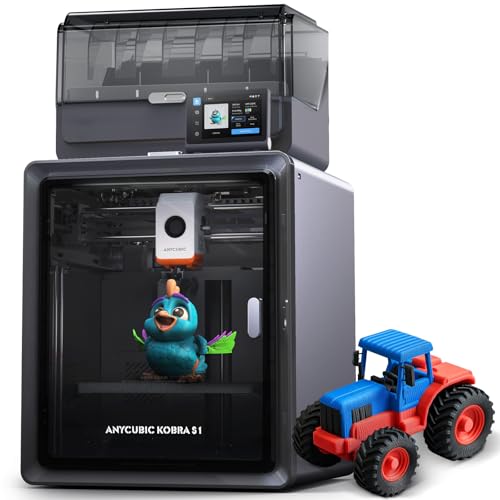
【Say Goodbye to Wet Filaments】Stop worrying about bubbles and clogs caused by moisture. S1C's built-in drying parameters for various materials keep filament in peak condition, significantly improving success rates for long multi-day prints

【Vivid 19-Color and Versatile Materials】Unleash creativity beyond limits. The Kobra X supports 4-color standard and expands up to 19 colors with 4 ACE 2 Pro for stunning artistic models. Adaptive extrusion force compensater handles everything from TPU(recommended 68D) to PLA. No more manual adjustments—transition from hard to soft materials seamlessly for professional-grade multi-material projects
Frequently Asked Questions
How Do I Secure Funding Beyond District Budgets for a 3D Lab?
I’d pursue grant writing and community sponsorship: visualize needs with a simple infographic, then apply for STEM grants, partner with local businesses and nonprofits, run crowdfunding, and offer naming rights or workshops to secure 3D lab funding.
Can 3D Printing Support Students With Special Education Needs?
Yes — I think 3D printing can support students with special education needs by producing assistive tools and promoting tactile learning; I’ll help you design custom manipulatives and adaptive devices to boost engagement, independence, and skill development.
What Long‑Term Maintenance Costs Should Schools Plan For?
You should budget for annual machine upkeep (parts, nozzle, bed replacement), regular calibration time, filament storage solutions (dry boxes/desiccants), spare components, software updates/licenses, and occasional professional servicing—plus consumables and electrical/ventilation costs.
How Do We Handle Intellectual Property for Student Designs?
Like a gardener protecting seedlings, I’d clarify student ownership upfront, teach licensing education basics, offer school-use licenses for classroom displays, and encourage students to retain IP while granting educators limited rights to print and showcase projects.
Are There Local Industry Partners for Student Internships or Mentorships?
Yes — I can connect you with local manufacturers and University makerspaces for internships or mentorships; I’ll reach out to industry contacts, coordinate student placements, and help design projects that match curriculum goals and workplace expectations.