As an Amazon Associate, we earn from qualifying purchases. Some links on this site are affiliate links at no extra cost to you. Our recommendations are based on thorough research and editorial judgment.
10 Best Desktop 3D Printer Picks Even Hobbyists Will Love
You’re at your workbench at midnight, filament tangled, a half-printed phone stand peeling off the bed, and the “leveling failed” message blinking on the screen — again.
Or you’ve just watched a fine-detail print warp halfway through because the chamber wasn’t enclosed and the draft ruined hours of work.
What separates a dependable machine from one that wastes time is often overlooked: poor bed leveling, weak community support, and ignoring whether the printer handles the materials you actually need.
This guide gives you ten vetted desktop 3D printers chosen for ease of setup, reliability, and real-world features like auto‑leveling, filament sensors, and enclosed builds.
By the end you’ll know which models match your needs for speed, detail, and materials.
Key Takeaways
If you’re just getting started and don’t want to fight with setup, choose a fully assembled, pre-calibrated desktop 3D printer so you can start printing right away. For anyone who likes tinkering and squeezing out speed or precision, look for CoreXY or modular units that let you upgrade parts and tune performance. What makes this kind of kit stand out is that rigid frames, metal guide rails, and dual Z or linear rails cut vibration and give you crisper prints at higher speeds. You get stronger mechanical stability without sacrificing ease of use when the frame and rails are built from metal instead of plastic. The printers you pick should match the materials you want to print, so choose a 320°C hotend for engineering filaments and carbon blends. Perfect for hobbyists who mainly print PLA, PLA Pro, or TPU, a regular 180–260°C hotend handles those materials well. If you hate fiddling with first layers, look for auto-bed leveling, magnetic removable plates, and touchscreen or app control to make bed prep quick and predictable. For anyone who wants simple setup and cloud printing, a model with preloaded slicer profiles or cloud print support saves time and frustration. What makes high-speed printers useful is CoreXY motion with input shaping, which reduces ringing so you can push acceleration and still keep detail. Use smaller nozzles and lower layer heights when you want fine surfaces, and switch to larger nozzles or thicker layers when you need faster prints.
| Fully Assembled Mini 3D Printer Starter Kit (Green) |  | Best For Kids | Build Volume / Print Volume: 3.9 × 4.7 × 3.9 in (small desktop) | Printer Type / Technology: FDM (mini desktop filament) | Assembly / Ready-to-Print: Fully assembled, out of box | VIEW LATEST PRICE | Read Our Analysis |
| Creality K2 SE High-Speed 3D Printer (220×215×245mm) | 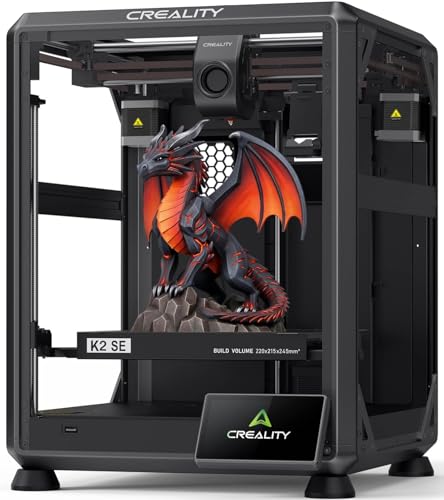 | High-Speed Performer | Build Volume / Print Volume: 220 × 215 × 245 mm (220 × 215 × 245 mm) | Printer Type / Technology: FDM (CoreXY high-speed) | Assembly / Ready-to-Print: ~5-minute assembly (mostly preassembled) | VIEW LATEST PRICE | Read Our Analysis |
| ELEGOO Centauri Carbon CoreXY High-Speed 3D Printer |  | Industrial-Grade Speed | Build Volume / Print Volume: 256 × 256 × 256 mm (10 × 10 × 10 in) | Printer Type / Technology: FDM (CoreXY) | Assembly / Ready-to-Print: Fully assembled and pre-calibrated | VIEW LATEST PRICE | Read Our Analysis |
| Estink Beginner Compact Desktop 3D Printer (100mm) |  | Ultra-Compact Beginner | Build Volume / Print Volume: 100 × 100 × 100 mm (4 × 4 × 4 in) | Printer Type / Technology: FDM (desktop beginner) | Assembly / Ready-to-Print: Fully assembled, plug-and-play workflow | VIEW LATEST PRICE | Read Our Analysis |
| Entina TINA2S WiFi 3D Printer — Beginner Friendly | 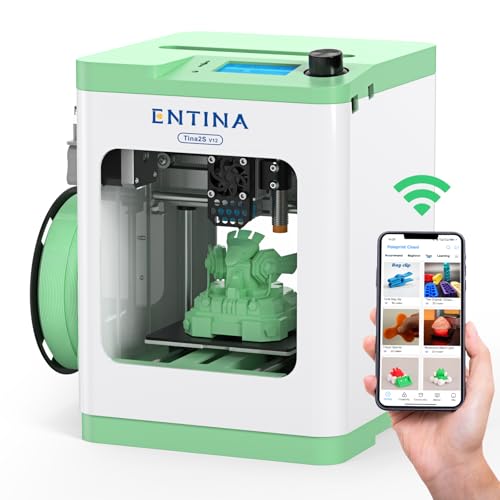 | App-Friendly Starter | Build Volume / Print Volume: 3.9 × 4.7 × 3.9 in (compact desktop) | Printer Type / Technology: FDM (compact filament) | Assembly / Ready-to-Print: Fully assembled, ready to use | VIEW LATEST PRICE | Read Our Analysis |
| ELEGOO Mars 5 4K Mono Resin 3D Printer | 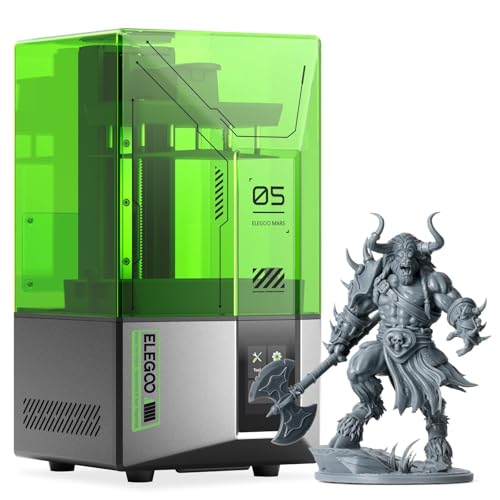 | High-Detail Resin | Build Volume / Print Volume: 5.65 × 3.53 × 5.91 in (resin print volume) | Printer Type / Technology: MSLA / Resin (4K Mono LCD) | Assembly / Ready-to-Print: Desktop unit with one-click leveling (ready after setup) | VIEW LATEST PRICE | Read Our Analysis |
| TRONXY CRUX 1S Mini Desktop 3D Printer for Beginners | 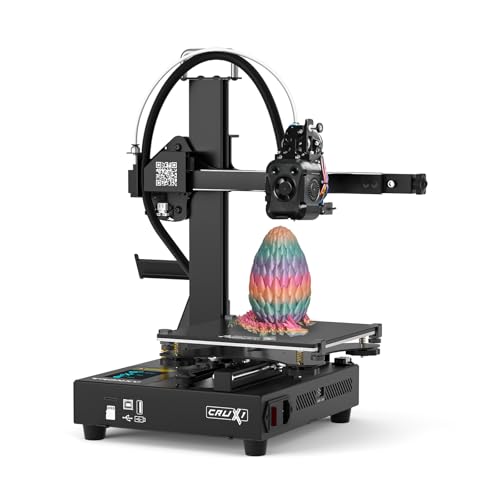 | Fast Entry-Level | Build Volume / Print Volume: 180 × 180 × 180 mm (7.09 × 7.09 × 7.09 in) | Printer Type / Technology: FDM (desktop filament) | Assembly / Ready-to-Print: 95% pre-installed, fast assembly | VIEW LATEST PRICE | Read Our Analysis |
| QIDI Q2C Enclosed 3D Printer with Auto Leveling | 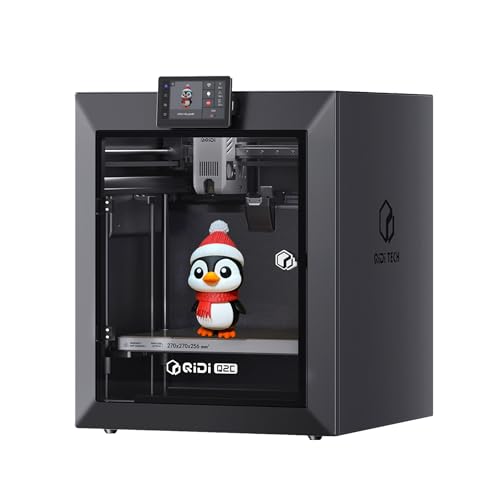 | Professional Enclosed | Build Volume / Print Volume: 270 × 270 × 256 mm | Printer Type / Technology: FDM (enclosed CoreXY) | Assembly / Ready-to-Print: Pre-assembled components, ~15-minute setup to print | VIEW LATEST PRICE | Read Our Analysis |
| ANYCUBIC Photon Mono 4 Resin 3D Printer |  | Ultra-High Resolution | Build Volume / Print Volume: 153.4 × 87 × 165 mm (6.04 × 3.42 × 6.49 in) (resin) | Printer Type / Technology: MSLA / Resin (Mono LCD) | Assembly / Ready-to-Print: Desk unit with simple leveling (ready after initial setup) | VIEW LATEST PRICE | Read Our Analysis |
| Anycubic Kobra S1 Multicolor Core XY 3D Printer | 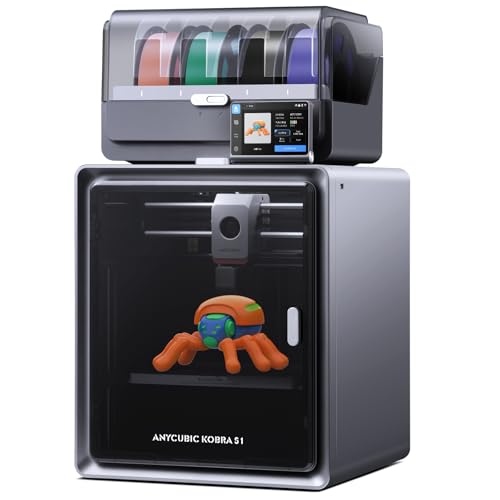 | Multicolor Powerhouse | Build Volume / Print Volume: 250 × 250 × 250 mm (9.8 × 9.8 × 9.8 in) | Printer Type / Technology: FDM (CoreXY multicolor) | Assembly / Ready-to-Print: Combo units with out-of-box auto calibration | VIEW LATEST PRICE | Read Our Analysis |
More Details on Our Top Picks
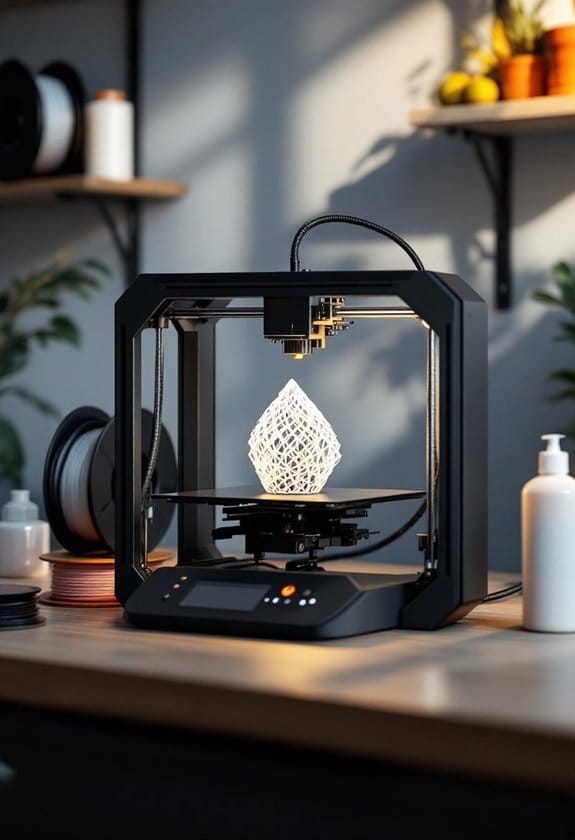
Fully Assembled Mini 3D Printer Starter Kit (Green)
If you want a compact 3D printer that’s kid-friendly and ready to run, the Fully Assembled Mini 3D Printer Starter Kit (Green) is a solid pick; it comes put together so you don’t have to build or calibrate before printing. The small, 6.4-pound unit has auto-leveling and dual Z-axis rails that keep your layers steadier, which helps when you’re teaching a child or prototyping small parts. It also has a flexible magnetic build plate that makes removing prints simple.
For anyone who wants to start printing quickly without fuss, the kit includes 10 m of PLA and a preloaded microSD with slicer software so you can begin right away. You can use 1.75 mm PLA, PLA Pro, or TPU filaments to try different project types, from basic toys to slightly flexible parts. It’s a good option if you want an easy, low-friction entry into 3D printing.
- Build Volume / Print Volume:3.9 × 4.7 × 3.9 in (small desktop)
- Printer Type / Technology:FDM (mini desktop filament)
- Assembly / Ready-to-Print:Fully assembled, out of box
- Auto-Leveling / Bed Calibration:Auto-leveling system
- Supported Materials:1.75 mm PLA, PLA Pro, TPU
- Connectivity / File Input Options:microSD (preloaded), WiFi-capable, USB; macOS/Windows/Linux
- Additional Feature:Flexible magnetic build plate
- Additional Feature:One-touch filament load
- Additional Feature:Dual Z-axis rail
Creality K2 SE High-Speed 3D Printer (220×215×245mm)
If you need fast prototyping without waiting hours for parts, the K2 SE reaches speeds up to 500 mm/s so you can crank out iterations much quicker than usual, and its lightweight CoreXY motion system keeps inertia low for snappier moves. The die-cast aluminum frame with corner gussets and dual-side crossbeams adds strength so prints stay accurate when you push speed and acceleration. It accelerates at 20,000 mm/s².
For anyone who hates ringing and ghosting on fast prints, input shaping plus a built-in vibration sensor help cut down those wavy artifacts so your surfaces look cleaner. The modular direct-drive extruder with hardened dual-drive gears gives you better filament grip for flexible and standard filaments, and the quick-swap nozzle means less downtime when you need to change sizes. You get a filament sensor too.
What makes this desktop 3D printer stand out for hobbyists and small shops is the one-tap leveling, which makes setup simple instead of fiddly, so you spend more time printing than tweaking. The whole build is designed for speed without being fragile, so it works for iterative prototyping and functional parts alike. Go faster.
- Build Volume / Print Volume:220 × 215 × 245 mm (220 × 215 × 245 mm)
- Printer Type / Technology:FDM (CoreXY high-speed)
- Assembly / Ready-to-Print:~5-minute assembly (mostly preassembled)
- Auto-Leveling / Bed Calibration:Fully automatic one-tap bed leveling
- Supported Materials:Wide range (PLA, PETG, TPU, engineering blends; high-temp capable)
- Connectivity / File Input Options:Touchscreen, likely SD/USB and Creality Print; CFS (optional) integration
- Additional Feature:Input-shaping vibration sensor
- Additional Feature:Lightweight CoreXY motion
- Additional Feature:Quick-swap nozzle
ELEGOO Centauri Carbon CoreXY High-Speed 3D Printer
If you need fast, precise parts for prototypes or functional prints, the Centauri Carbon CoreXY’s CoreXY layout and rigid die-cast aluminum frame cut vibration so you get cleaner details at speed. The build volume is a roomy 256 × 256 × 256 mm, so you can print larger components without splitting them. Nice and simple.
For anyone who hates fiddly setups, it arrives assembled and pre-calibrated with auto bed leveling and pressure advance that make first prints less painful, and vibration compensation helps keep quality steady during quick moves. The enclosed chamber keeps temperatures steadier for filaments that like warmth, and the chamber camera lets you check prints remotely when you’re away from the printer. Very convenient.
What makes this 3D printer stand out for makers who use tough, lightweight blends is the hotend that reaches 320°C, which lets you print advanced materials like carbon-fiber mixes and many engineering filaments. You get more material options for functional parts. That’s useful if you need strength and lightness.
You get a user-friendly package without a long learning curve because the machine’s setup and monitoring features focus on getting you printing sooner rather than forcing hours of tuning. The frame and motion system help your parts come out cleaner at high speed, and the enclosed design helps with warp-prone materials. It’s a solid pick if you want performance without extra hassle.
- Build Volume / Print Volume:256 × 256 × 256 mm (10 × 10 × 10 in)
- Printer Type / Technology:FDM (CoreXY)
- Assembly / Ready-to-Print:Fully assembled and pre-calibrated
- Auto-Leveling / Bed Calibration:Auto bed leveling
- Supported Materials:PLA and advanced filaments including carbon-fiber-reinforced
- Connectivity / File Input Options:Touchscreen controls, camera/remote adjustments (supports standard file workflows)
- Additional Feature:Built-in chamber camera
- Additional Feature:320°C hotend capability
- Additional Feature:Dual-sided PLA build plate
Estink Beginner Compact Desktop 3D Printer (100mm)
If you want an easy way to learn 3D printing without wrestling with setup, this compact desktop unit comes fully assembled and prints from a memory card so you can get started fast. The 100 mm cubed build area fits small projects and classroom work, and you can load 1.75 mm PLA or flexible TPU with confidence because the all-metal nozzle handles them well. It heats up quickly to around 180°C and the uniform heating cuts down on layer problems. Simple controls with a plus and minus on the intuitive panel put basic functions at your fingertips.
For anyone who needs a low‑risk first printer, the insert-a-card-and-press-start workflow removes most of the learning curve and the sample files get you printing right away. You’ll like that the machine is aimed at beginners, so setup headaches are mostly gone. Small size means it won’t dominate your desk.
What makes this compact desktop 3D printer stand out is how straightforward the user experience is: no fiddly assembly, straightforward controls, and a predictable filament path. If you want to teach students or tinker at home, the modest build volume keeps projects manageable and materials inexpensive. It’s an ideal starter option.
- Build Volume / Print Volume:100 × 100 × 100 mm (4 × 4 × 4 in)
- Printer Type / Technology:FDM (desktop beginner)
- Assembly / Ready-to-Print:Fully assembled, plug-and-play workflow
- Auto-Leveling / Bed Calibration:Simple workflow (implied easy leveling; beginner-focused auto/support)
- Supported Materials:1.75 mm PLA and TPU
- Connectivity / File Input Options:Memory card (offline), simple USB/memory card workflow
- Additional Feature:Rapid 180°C heat-up
- Additional Feature:All-metal nozzle
- Additional Feature:Simple + / – controls
Entina TINA2S WiFi 3D Printer — Beginner Friendly
If you want an easy way to learn 3D printing without wrestling with setup, the Entina TINA2S arrives fully assembled and gets you printing fast. It has auto-leveling to remove manual bed adjustments, so you won’t waste time fiddling with screws. Quick and simple.
For anyone who likes sending jobs from a phone or hates running SD cards back and forth, the one-click WiFi printing and Poloprint Cloud app make sending files painless, and you can still use a TF card if you prefer. Open-source slicers are supported for more control when you want it. That makes the machine friendly for both beginners and tinkerers.
What makes this desktop printer stand out for hobbyists and students is the mix of precision and user-friendly features: 0.04 mm layer precision, a quick-swap nozzle, a heated flexible bed, and quiet electronics. You get reliable detail on small prints and easier part removal. It’s handy for detailed models and everyday prototyping.
You get a beginner-focused experience without sacrificing options for advanced users, because guided software and Wiibuilder simplify the basics while more advanced slicers are available. You can grow into more complex projects as your skills improve. Perfect for learning and progressing.
- Build Volume / Print Volume:3.9 × 4.7 × 3.9 in (compact desktop)
- Printer Type / Technology:FDM (compact filament)
- Assembly / Ready-to-Print:Fully assembled, ready to use
- Auto-Leveling / Bed Calibration:Built-in auto-leveling system
- Supported Materials:PLA (and typical filament types), quick-change nozzle for varied materials
- Connectivity / File Input Options:WiFi cloud app, TF card, USB, Wiibuilder/Cura compatibility
- Additional Feature:Poloprint Cloud app
- Additional Feature:0.04 mm precision
- Additional Feature:Quick-change nozzle
ELEGOO Mars 5 4K Mono Resin 3D Printer
If you want finely detailed miniatures or tight-surface prints for tabletop gaming, the 4K monochrome LCD and COB light source give you much finer layers and crisper detail than lower-resolution systems, and that means your models come out with sharper faces and cleaner textures. The build area is 5.65 × 3.53 × 5.91 inches, which fits plenty of small runs and several minis at once. Setup is simple thanks to one-click automatic leveling, so you won’t spend hours calibrating before your first print.
For anyone who likes a sturdy-feeling machine that still looks tidy on a desk, the metal-and-polymer construction feels solid without being overly heavy, and the body keeps things steady during long prints. It runs MSLA resin printing using a masked LCD to cure resin layer by layer, which is why you’ll get high-fidelity parts with smooth surfaces. The machine also adds safety features like overheat protection and residue sensing to help protect your prints and the hardware.
What makes this resin printer stand out for small studios and hobbyists is the combination of high resolution and simple controls, letting you focus on designing and painting rather than fiddling with settings. You also get resin-shortage alarms and cooling to avoid failed prints and overheating during long jobs. It’s a good pick if you want pro-looking results from a compact, user-friendly printer.
- Build Volume / Print Volume:5.65 × 3.53 × 5.91 in (resin print volume)
- Printer Type / Technology:MSLA / Resin (4K Mono LCD)
- Assembly / Ready-to-Print:Desktop unit with one-click leveling (ready after setup)
- Auto-Leveling / Bed Calibration:One-click automatic leveling
- Supported Materials:Resin (photopolymer for MSLA printing)
- Connectivity / File Input Options:USB / software workflow; camera supports remote monitoring
- Additional Feature:4K mono LCD
- Additional Feature:One-click self-check
- Additional Feature:LED overheat protection
TRONXY CRUX 1S Mini Desktop 3D Printer for Beginners
If you want a simple printer for classroom projects or weekend hobbies, the CRUX 1S gives you a 180 × 180 × 180 mm build volume so you can print most small to medium models without upgrading. It’s compact and metal-bodied, so it sits neatly on a desk and feels solid.
For anyone who dislikes long assembly times, the unit ships about 95% pre-installed so you’ll be printing quickly with minimal fuss. The modular design includes a built-in power supply and a 2.8-inch touchscreen that keeps controls straightforward.
What makes this desktop FDM stand out for first-time users is the 0.4 mm nozzle and capability to print up to 300 mm/s, which cuts print time for simple parts. You’ll also notice high acceleration and dual-axis metal guide rails that make movements smoother and reduce operating noise.
You get a beginner-friendly setup without sacrificing durability, since the metal frame and guide rails add strength and stability for everyday prints. It’s light at about 7.5 kg, so you can move it between rooms easily.
The CRUX 1S solves the “where do I start?” problem by balancing speed, size, and ease of use, making it a practical choice for students, hobbyists, and families. It won’t replace a professional machine, but it will get you printing fast and learning the basics.
- Build Volume / Print Volume:180 × 180 × 180 mm (7.09 × 7.09 × 7.09 in)
- Printer Type / Technology:FDM (desktop filament)
- Assembly / Ready-to-Print:95% pre-installed, fast assembly
- Auto-Leveling / Bed Calibration:Assisted setup with calibration (touchscreen controls)
- Supported Materials:Standard filaments (PLA, TPU, etc.)
- Connectivity / File Input Options:Touchscreen, SD/USB support (simple file loading)
- Additional Feature:2.8″ color touchscreen
- Additional Feature:External double-roller rails
- Additional Feature:95% pre-installed assembly
QIDI Q2C Enclosed 3D Printer with Auto Leveling
If you want a printer that handles engineering plastics for functional parts, the QIDI Q2C’s 370°C bimetal hotend makes that possible and lets you print PPS‑CF and other high-temp composites. It has a full-metal CoreXY frame and precision linear rails that cut wobble and keep layers accurate during fast moves. Nice.
For anyone who dislikes fiddly bed leveling at the start of a print, the nozzle-integrated sensor auto-levels the first layer no matter the bed condition, so you spend less time tweaking settings and more time printing. You also get power-loss recovery so long prints can survive a brownout. Handy feature.
What makes this enclosed desktop printer stand out for hobbyists and small workshops is that it supports a wide range of filaments while staying user-friendly, so you can move from PLA to tougher materials without a big learning curve. It connects to the QIDI BOX for multi-color or dried filament feeds, which is helpful if you want longer runs or color swaps. Great for makers.
You get a stiff, reliable build without sacrificing ease of use, which benefits both beginners who want predictable results and experienced makers needing repeatability. The combination of a metal frame, linear rails, and a high-temp hotend gives you the hardware to tackle demanding projects. Practical choice.
- Build Volume / Print Volume:270 × 270 × 256 mm
- Printer Type / Technology:FDM (enclosed CoreXY)
- Assembly / Ready-to-Print:Pre-assembled components, ~15-minute setup to print
- Auto-Leveling / Bed Calibration:Nozzle-integrated auto first-layer leveling
- Supported Materials:PLA, ABS, PETG, TPU, PA, PC, carbon/glass-fiber composites, PPS-CF
- Connectivity / File Input Options:USB/SD and app/software support; open-source firmware
- Additional Feature:370°C bimetal hotend
- Additional Feature:Nozzle-integrated leveling
- Additional Feature:QIDI BOX multicolor support
ANYCUBIC Photon Mono 4 Resin 3D Printer
If you want very fine, consistent resin prints for small, detailed parts, the 7″ Mono LCD and 10K native resolution give you a major boost in XY detail. The 9024 x 5120 screen and 17 μm pixels render tiny features sharply because smaller pixels produce finer surface detail. Short prints look great.
For anyone who paints minis or prototypes, the LighTurbo matrix light evens out curing across the bed so you get fewer layer lines and raster artifacts. The even light also helps fragile fins and tiny text come out cleaner. You’ll notice the difference when you compare parts side by side.
What makes this resin printer stand out for hobbyists is the 153.4 x 87 x 165 mm build volume that still handles most miniatures and small models. You can fit several figures per print depending on how you lay them out. It’s handy for batch work.
You get faster turnaround without sacrificing detail thanks to the 70 mm/h print speed and the precise LCD. The laser-engraved platform helps parts stick during printing and pop off more predictably after. That saves you time and frustration.
- Build Volume / Print Volume:153.4 × 87 × 165 mm (6.04 × 3.42 × 6.49 in) (resin)
- Printer Type / Technology:MSLA / Resin (Mono LCD)
- Assembly / Ready-to-Print:Desk unit with simple leveling (ready after initial setup)
- Auto-Leveling / Bed Calibration:4-point leveling (minimal repeat leveling)
- Supported Materials:Resin (photopolymer for MSLA printing)
- Connectivity / File Input Options:App not supported; standard resin file workflow via USB/SD
- Additional Feature:10K native resolution
- Additional Feature:LighTurbo matrix lighting
- Additional Feature:Laser-engraved Print Platform
Anycubic Kobra S1 Multicolor Core XY 3D Printer
If you need fast multicolor prints for small-batch projects, the CoreXY motion system and four-color printing cut your production time while improving surface detail for complex models. The 250 mm cubic build volume gives you room for decent-sized parts, and the rigid frame lets you push for higher acceleration and speed without losing layer alignment. Works well.
For anyone who hates fiddling with bed leveling and extrusion settings, the auto calibration handles both so you spend less time tuning and more time printing. Anycubic’s flow correction helps reduce blobs for smoother surfaces, which matters when you’re printing fine details on multi-material pieces. That’s convenient.
What makes this Core XY 3D printer stand out is the built-in ACE PRO dryer and sealed printing area that keep filament dry and stable for tricky materials like nylon or TPU. The dryer stores and conditions filament so you don’t get brittle or moisture-filled strands mid-print, and the sealed chamber helps keep warping down on temperature-sensitive jobs. Nice touch.
You get remote control via the app without being tied to the machine, so you can start or monitor prints from another room. That’s handy when you’re juggling other tasks or running overnight prints. Helpful feature.
The Anycubic Kobra S1 Combo is perfect for makers and small shops that want quicker multicolor parts without an overly steep learning curve, and it gives you a sensible balance of speed, detail, and convenience. You should consider it if your workflow needs multi-filament capability and less setup overhead.
- Build Volume / Print Volume:250 × 250 × 250 mm (9.8 × 9.8 × 9.8 in)
- Printer Type / Technology:FDM (CoreXY multicolor)
- Assembly / Ready-to-Print:Combo units with out-of-box auto calibration
- Auto-Leveling / Bed Calibration:Auto calibration routines for leveling
- Supported Materials:PLA, PLA+, TPU, ABS, ASA, PETG, specialty PLAs
- Connectivity / File Input Options:App remote control, sealed/remote options, standard SD/USB support
- Additional Feature:Built-in filament dryer
- Additional Feature:Multicolor combo support
- Additional Feature:Anycubic Kobra OS
Factors to Consider When Choosing a Desktop 3D Printer
If you want to print large models without splitting them, match the printer’s build volume to the biggest pieces you plan to make, since that determines the largest single object you can produce. For anyone who switches between PLA, PETG, and ABS, check material compatibility and the temperature ranges the machine supports so your parts come out strong and clean. What makes this desktop 3D printer stand out for hobbyists and small-business users is that you can balance print speed with precision by choosing slower, higher-resolution settings when detail matters and faster modes when you’re prototyping quickly. You get easier setup and fewer headaches with a simple interface, sturdy hardware, and good customer support, which save time over the life of the machine. Perfect for someone who values reliability, pick a model with clear documentation and an active user community so troubleshooting is faster and parts are easier to source. The right choice helps you spend less time fighting prints and more time making things.
Print Volume Needs
If you need to print one big piece without seams, check the printer’s build volume so your tallest, widest, and deepest designs fit. Pick a machine with a bit more X, Y, and Z room than your biggest model so you don’t get awkward slices or forced seams. You want extra space.
For anyone who also prints lots of small items, match the bed to your biggest planned object while keeping in mind removable beds, enclosures, or hotend clearance can cut into usable space. That means the specs might overstate what you actually get. Measure and compare before buying.
What makes this choice stand out for assembly-free prints is that larger volumes let you run single, seamless parts that save time on post-processing, but they also lengthen print times and use more filament. Longer runs raise the chance of warping or failure, so be ready for occasional trouble. Plan for that.
You get better throughput without buying a giant machine if you mainly print small detailed items and occasionally larger parts by choosing a mid-size bed that supports batch printing. A mid-size setup balances speed and flexibility. It suits most hobbyists.
The printer solves future upgrade pain by giving you a little headroom beyond your current projects, so you won’t need a new machine as soon as your designs grow. Think ahead and save money later.
Material Compatibility Options
If you want parts that match certain strengths and finishes, pick a printer that handles the filaments you plan to use and check supported types and hotend temps. For everyday PLA or PETG printing, look for machines that run cooler and stay simple, so your first prints come out clean. If you’re printing flexible phone cases or wearables, choose a direct-drive or dual-drive extruder because those systems feed TPU without it buckling. For tougher engineering plastics like nylon or filled composites, get a hotend rated around 300–320°C and hardened nozzles so the filament doesn’t wear the hardware.
For anyone who battles warping and layer adhesion when printing ABS or polycarbonate, pick a printer with a heated bed up to about 110°C and an enclosure to keep the chamber warm. If you need multi-material reliability, check that the firmware, slicer profiles, and sensors support material-specific settings so switching filaments doesn’t become a guessing game. For abrasive filaments, choose hardened nozzles and a high-temp hotend, and swap components before you grind through stock parts.
What makes this choice practical for hobbyists is that TPU-friendly drives, high-temp hotends, and enclosures directly translate into fewer failed prints and better part performance. If you care about print finish and strength, match your printer to the material instead of forcing a filament it can’t handle. Finally, remember to confirm slicer presets and sensor compatibility so your settings match the material you’re using.
Speed And Precision
If you want parts fast and still usable, look at maximum print speed and acceleration because higher numbers finish jobs sooner but can introduce vibration and worse surface quality if the printer isn’t built for them. Check the motion system and frame rigidity next; CoreXY or CoreXZ layouts with a stiff frame and precision rails keep positional errors and layer misalignment low when you push speed. Think about extruder and hotend design, nozzle size, and thermal stability since they affect how fine your detail stays as you speed up. Use printers with input shaping and vibration compensation if you print thin-walled or detailed parts; these features cut ringing and improve surface finish. For anyone who switches between prototypes and final parts, remember layer height and nozzle choice trade speed for precision. Pick larger nozzles and taller layers when you need quick drafts, and smaller nozzles with thin layers when you need detail.
Ease Of Use
If you want a 3D printer that doesn’t eat your time with setup, choose a fully or mostly pre-assembled unit so you can print within minutes instead of wrestling with parts. For beginners and busy people who need reliable first layers, automatic bed leveling and one-click calibration take the guesswork out of starting a print by adjusting the build surface for you. What makes this kind of desktop printer stand out for casual users is simple filament loading and quick-swap nozzles that cut maintenance time and make changing materials painless. You get easier job control without fiddling with menus because intuitive touchscreens, Wi‑Fi or app printing, and remote monitoring let you start and check prints from your phone. Perfect for someone who forgets to check filament, built-in fail-safes like filament run-out detection and resume-after-power-loss protect jobs and lower frustration.
Reliability And Support
If you’re tired of unexpected downtime, check the warranty length and what it covers because you want parts, electronics, and labor to be included. That way you won’t be stuck waiting for repairs. For anyone who prefers quick help, pick vendors that offer email, phone, or live chat and publish support hours or response times so you know when someone will answer.
What makes this kind of printer stand out for hobbyists and small businesses is active user communities and regular firmware updates that fix bugs and add features. These communities help you troubleshoot issues fast. You get spare-part availability without hunting for obscure components, and you can compare costs before you buy.
You get faster repairs with modular, quick-swap components that let you replace a failed part yourself. It saves time and often money. Perfect for people who rely on uptime, choose models with clear maintenance guides and built-in diagnostics so common failures are easier to prevent and resolve.
Frequently Asked Questions
Can I Safely Leave a 3D Printer Running Overnight Unattended?
If you want to run prints overnight without babysitting every layer, check that your printer has thermal runaway protection and an automatic shutdown so a stuck heater can’t keep heating. Those safety features stop the worst electrical or heater failures, and they help you sleep easier. Do this first.
For anyone who deals with stringy prints or failed first layers, make sure filament feeds cleanly and the bed adhesion is solid before you walk away; a jam or an unbonded print can cook for hours. Check your firmware settings and run a quick test print when you tweak things, because small changes can lead to big failures. Do a test.
What makes this setup safer is putting the printer in a ventilated, non-flammable spot and having a smoke detector nearby, which lowers the chance of small mishaps turning into emergencies. Add a camera so you can spot problems from your phone and decide if you need to cut power. Stay connected.
You get peace of mind without watching every minute by combining good hardware, sensible placement, and remote monitoring—those three things work together to reduce risk. If you’re using older gear without safety features, consider upgrading the electronics or adding a thermal cutoff device before attempting an unattended run. Take that step.
What Are the Recurring Costs Besides Filament or Resin?
If you print often and hate fiddly jams, expect to replace nozzles and wear-prone build surfaces like tape or pads every so often because heat and abrasion slowly eat them up. They aren’t expensive, but they add up.
For anyone who runs long prints or makes mechanical parts, you’ll need spare belts, bearings, and occasionally a motor because moving parts wear with use and can introduce layer shifts if ignored. Buy a spare belt now and you’ll thank yourself later.
What makes this hobby-friendly is that basic maintenance is simple: you’ll want cleaning supplies, a good lubricant, and a small toolkit for routine care and unclogging. Keep those on hand.
You get paid slicer features or cloud storage when you want convenience without managing software yourself, but those can carry subscription fees if you choose them. Subscriptions add ongoing cost.
Perfect for people who produce functional or load-bearing parts, this setup also means higher electricity use and the occasional calibration sensor or upgrade if you need repeatable accuracy. Expect those bills and upgrades from time to time.
How Noisy Are These Printers During Long Print Jobs?
If you want to work near your printer without getting distracted, expect about 60–70 dB from many desktop printers during long prints, roughly the level of a normal conversation. That level comes from fans for part cooling and enclosure ventilation, stepper motor clicks when the axes move, and occasional sharper sounds from layer shifts. It can get wearing during a long print run.
For anyone who prints in a shared space and needs quieter operation, enclosed printers with quieter fans and TMC stepper drivers run nearer 40–50 dB, which makes a noticeable difference for your ears and concentration. You’ll still hear some cooling airflow. You’ll also get less mechanical ticking.
What makes this category useful for night printing is that you can further cut noise with a few simple mods: add dampers to the motors, slow your print speeds a little, or put the machine in a soundproof box. These changes are inexpensive and practical. They help a lot.
Can I Use Third-Party Slicer Profiles and Firmware Safely?
If you want to tweak prints without frying your printer, check that the profile or firmware matches your exact model and version, because wrong settings can cause failed prints or hardware damage. For anyone who tinker with slicer settings or install custom firmware, back up your original firmware and printer settings before you change anything so you can revert if needed. What makes this approach useful is that testing changes on small, cheap prints lets you see effects quickly and saves time and material. You get safer updates without guessing, so only download firmware and profiles from trusted community builds or the printer maker’s pages. The guide solves the recovery problem by reminding you to learn basic reset and bootloader steps, and you should keep a documented recovery plan so troubleshooting is faster. Perfect for hobbyists and beginners, this method balances experimentation with caution so you can improve prints while protecting your gear.
What Basic Maintenance Schedule Should I Follow for Longevity?
If you let residue build up and your prints start peeling, clean the nozzle and bed weekly so filament sticks and extrusion stays consistent. You’ll remove leftover plastic and dust, and this small habit saves you from failed prints and clogged nozzles. Do it.
For anyone who loses print quality from loose motion, check belts and pulley alignment monthly to keep movement accurate and parts fitting right. Tighten anything that feels slack and listen for odd noises while the printer moves. Act now, not later.
What makes this maintenance routine helpful for long-term reliability is that lubrication cuts wear on moving parts, so oil rods and lead screws about once a month. A light machine oil protects metal surfaces without gumming up. Simple step.
You get safer operation and cooler electronics without guessing when you inspect wiring and fans quarterly by opening panels and looking for frayed wires or blocked airflow. Replace cheap fans or re-seat connectors if things look loose, and you’ll avoid intermittent crashes. Be proactive.
The firmware and slicer profiles affect print results, so update them every few months to keep compatibility and fixes current. Back up your settings before changing anything and test with a small print after updates. Small checks matter.