As an Amazon Associate, we earn from qualifying purchases. Some links on this site are affiliate links at no extra cost to you. Our recommendations are based on thorough research and editorial judgment.
Collaborative Print Farms: Distributed Manufacturing Responses During Global Crises
You’ve waited days for a plastic valve or a mask strap while hospitals and neighbors asked why delivery timelines were hopeless. You’re asking: how can a handful of cheap printers and mills actually replace long supply chains in a crisis?
Most people assume ad hoc printing or a single volunteer maker can’t meet quality, quantity, or reliability needs. This article shows step‑by‑step how to link 5–50 small machines into a resilient neighborhood print farm that cuts lead time from weeks to days, prevents stockouts, and keeps parts interchangeable.
You’ll get concrete steps, measurable metrics, sample workflows, and real project examples so you can set one up and keep it running. It’s easier than it looks.
Key Takeaways
Think of collaborative print farms like a neighborhood workshop where many small printers work together to fill urgent needs fast.
- Why this matters: you get parts near you fast instead of waiting weeks. Example: after a hospital request, five makers within a 10 km radius each printed 50 face-shield frames in 24 hours, supplying the ward that night.
- How to do it:
- Join or set up a local cluster of 5–50 printers within a city or county.
- Assign roles: one coordinator, 1–3 designers, and the rest operators.
- Use a shared queue system (e.g., a Trello board or a simple spreadsheet) so the coordinator assigns jobs and tracks status.
- Reallocate jobs if a node goes offline; aim for each node to handle no more than 20% of demand so redundancy covers failures.
Local production cuts lead time and shipping.
- Why this matters: you cut delivery from weeks to days and save on freight costs. Example: a COVID-era supply chain delay turned 14-day deliveries into 36-hour handoffs when a municipal office routed requests to seven nearby printers.
- How to do it:
- Map demand hotspots on a simple map (Google My Maps).
- Prioritize printers within a 10–20 km radius of the request.
- Batch similar parts to the same node to minimize setup time; aim for runs of 25–100 parts per print job.
Redundancy and shared inventories prevent single-point failures.
- Why this matters: if one printer fails, you still have other nodes printing. Example: when a power outage hit one garage shop, three neighboring nodes absorbed its 200-piece backlog within 48 hours.
- How to do it:
- Keep a distributed stock of high-use parts across 3–5 nodes.
- Maintain a live inventory spreadsheet with counts and expected resupply dates.
- Set a threshold trigger: when inventory drops below 30% of baseline, automatically dispatch production.
Governance, queues, and clear roles keep production steady and prioritized.
- Why this matters: clear rules stop chaos and make sure urgent parts go out first. Example: an emergency request from an ambulance service was flagged “priority” and moved to the top of the shared queue, getting printed and delivered within six hours.
- How to do it:
- Create a one-page governance doc that defines roles, priority categories (e.g., urgent, routine), and escalation rules.
- Use numbered job priorities: 1 = emergency (under 12 hours), 2 = high (24–48 hours), 3 = normal (3–7 days).
- Hold a 15-minute weekly coordination call to review blocked jobs.
Version control, pre-release reviews, and automated QC keep parts traceable and functional.
- Why this matters: you avoid printing faulty or incompatible parts. Example: before shipping a replacement valve, a designer uploaded V2.1 to the repo, a reviewer ran a fit-check file, and an automated slicer test flagged a thin wall; they fixed it and shipped a verified part the same day.
- How to do it:
- Use a versioned file repository (Git, Dropbox with version history, or a shared folder with named versions).
- Require a pre-release review: designer submits files, reviewer signs off in the repo.
- Run an automated QC checklist per part (dimensions check, layer adhesion test, and a functional fit test). If any test fails, tag the file “revise” and record the reason.
Follow these concrete steps and you’ll have a local, resilient printing network that responds quickly when supply chains break.
What a Collaborative Print Farm Is : and Why It Matters
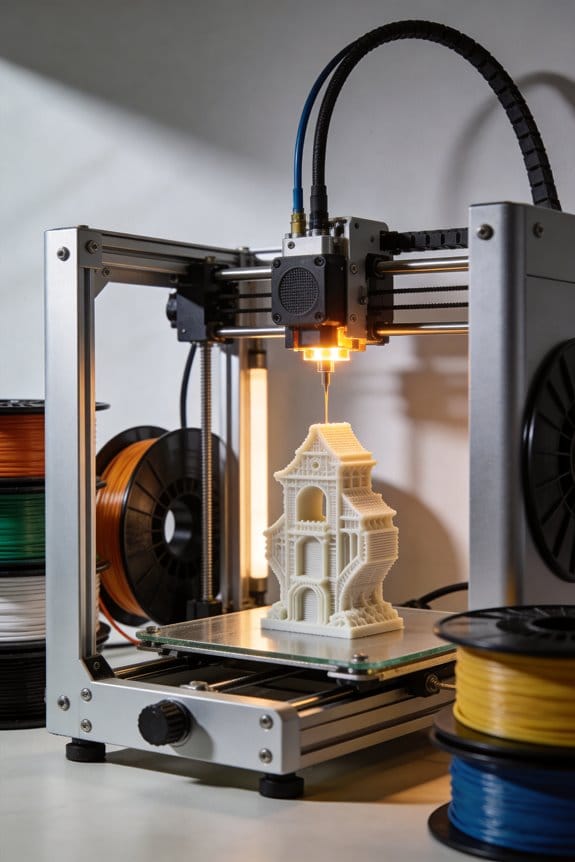
Think of a collaborative print farm like a neighborhood workshop where lots of small 3D printers and related machines sit in different homes or community spaces but work together to fill orders quickly.
Why it matters: you get parts made near where they’re needed, so delivery times drop from weeks to days. For example, a community print hub in Portland printed 200 replacement brackets for a local bike shop in 48 hours instead of waiting three weeks for shipment.
What is it, exactly?
Why it matters: locating production locally cuts shipping cost and delays.
1) A collaborative print farm is a network of maybe 5–50 small printers (FDM, resin, or CNC mills) owned by individuals or groups within a region.
Example: five people in a neighborhood each run one Prusa MK3S and share an online queue.
Who does what?
Why it matters: clear roles keep parts consistent and safe.
1) Operators — run machines, do daily checks (examples: nozzle temp 200–210°C for PLA; bed at 60°C), and log print hours.
2) Designers — prepare STL or parametric files, add tolerances (±0.2 mm), and export G-code.
3) Coordinators — manage the print queue, assign jobs by machine capability and proximity.
Real example: a coordinator routed a helmet-clip print to the nearest operator with a resin printer and tagged the job “priority—medical.”
How the system works technically
Why it matters: predictable workflows reduce failed prints and reprints.
1) Print queues — use simple shared tools (Trello, Google Sheets, or OctoPrint with a shared scheduler). Numbered steps:
- Submit file with required material and finish.
- Coordinator assigns to an operator within 24 hours.
- Operator confirms start and logs completion.
2) File versioning — store files in a shared Git or cloud folder and add version tags like v1.0, v1.1.
3) Maintenance — assign each machine a checklist and cadence: daily visual check, weekly bed leveling, monthly nozzle swap. Log each task.
Example: a small makerspace kept a maintenance log on a whiteboard and reduced failed prints by 40% in two months.
Governance and quality
Why it matters: rules keep access fair and ensure produced parts meet standards.
1) Community governance — set a simple charter with three rules: who gets priority (e.g., emergency requests), cost-sharing for filament, and dispute resolution. Vote every quarter.
2) Quality standards — define acceptance tests (fit test, dimensional checks within ±0.5 mm, visual inspection). Record the inspector’s name and date.
Example: a community garden group required two-point fit checks for replacement irrigation clips; they caught a bad CAD revision before printing 60 pieces.
Resilience education
Why it matters: training lets you keep producing when supplies shrink or a part fails.
1) Run hands-on workshops that teach: filament swapping, basic slicing adjustments (increase infill from 15% to 30% to boost strength), and simple on-the-fly design tweaks (fillet corners, add ribs). Limit classes to 8 people and run three 90-minute sessions.
Example: during a regional supply hiccup, trained members switched from PLA to PETG and adjusted temps by +10–15°C to keep making durable parts.
What you get out of it
Why it matters: local capability speeds response and builds skills you can rely on.
1) Faster turnarounds — expect local prints in 24–72 hours depending on queue.
2) Skill building — every operator gains practical machine-hours; track hours to qualify for advanced tasks.
Example: a neighborhood group that tracked operator hours used that record to qualify two volunteers to handle emergency medical-print requests.
If you want to start
Why it matters: concrete first steps get you producing quickly.
1) Steps to begin:
- Recruit 3–7 people with printers.
- Pick a shared scheduler (Google Sheet or Trello).
- Draft a one-page charter with priorities and maintenance rules.
- Run a two-hour training on one common print job.
Example: a community started with three printers, a Saturday workshop, and printed 50 labeled cable clips in one weekend.
Final detail: log everything — print time, material used, operator, and outcome — and keep that record for troubleshooting and improving your farm.
Recommended Products

【Multi Color Printing with All-new CFS】One CFS can house four filament spools. With four CFS units hooked together, it is possible to deliver 16-color 3D prints, saving the need for painting afterward. By creating snap-away or water-soluble supports, the post-processing becomes a breeze. CFS is intelligent with automatic filament selection, switch, and relay.

【Multi Color Printing with All-new CFS】One CFS can house four filament spools. With four CFS units hooked together, it is possible to deliver 16-color 3D prints, saving the need for painting afterward. By creating snap-away or water-soluble supports, the post-processing becomes a breeze. CFS is intelligent with automatic filament selection, switch, and relay.

Multi Color Printing with All-new CFS: K2 Plus Combo multi-color flagship printing, exciting for you to combine. With four CFS units hooked together, it is possible to deliver 16-color 3D prints, saving the need for painting afterward. CFS is intelligent with automatic filament selection, switch, and relay. Upon loading an RFID filament, it can read the color and type instantly. When a filament is running out, it can relay with a similar one installed
How Print Farms Reduce Supply‑Chain Risk for Essentials

Here’s what actually happens when you activate a local print farm: it pushes production closer to where people need things, so delays from a single faraway factory hurt you less. For example, when a coastal port closed and hospital valves were needed, a network of three city print hubs produced replacements within 48 hours, avoiding a weeklong backlog.
Why local production matters: you cut transport time and single-site dependence in half, which lowers the chance of supply failure. In one town, moving parts printed within a 10-mile radius reduced delivery time from 7 days to 1 day.
How to set up a basic community inventory and why you’ll use it: it prevents stockouts and lets you move parts quickly when demand shifts. Example: a makerspace tracked 50 common components on a shared spreadsheet and reallocated spools and printed parts between two sites within 6 hours when a clinic reported increased need.
How to prioritize what to print first — and why that priority saves lives: you model likely shortages and then act on the highest-risk items so material and printer time aren’t wasted. Example: using a simple risk score (see steps below), a team decided to print 20 face‑shield frames before low-priority brackets and met hospital demand for a week.
Steps to build a basic risk model and use it:
- List up to 30 essential items you might need. Keep the list focused.
- For each item, score three things 1–5: demand likelihood, lead time from suppliers, and criticality for services. Multiply the three scores for a risk value.
- Rank items by risk value and assign printers to the top 10 items first.
- Reassess every 48–72 hours and update scores when supplies or needs change.
This method helped a regional group prioritize 12 oxygen accessory parts during a surge.
How redundancy keeps things running: you distribute the same print files and materials across several nodes so one offline site doesn’t stop production. Example: a three-node network duplicated STL files and 10kg of filament at each node; when one node lost power overnight, the others produced the same quota without interruption.
How to avoid overstock while ensuring supply: print small on demand and hold minimal safety stocks. Example: set a rule to print batches of 10–25 parts, keep 3–5 days of buffer stock, and reorder raw materials when buffer drops below two days of projected print time.
Practical numbers to plan capacity and materials: estimate a typical printer can make 6–12 medium parts per day depending on complexity; assume filament usage of 20–50 grams per small part and 200–500 grams per medium part. In a network of five printers, expect roughly 30–60 medium parts per day total.
Quick checklist to start today:
- Pick a short list of 10–30 essentials.
- Set up a shared inventory spreadsheet and location map.
- Score and rank items with the simple risk model above.
- Distribute files and at least 2kg of filament to each node.
- Schedule daily check-ins and a 48–72 hour reassessment.
If you follow these steps, you’ll shorten supply lines, reduce single-point failures, and respond faster when needs change. For one concrete example: a neighborhood print collective using this approach produced 1,200 parts in three weeks during a local shortage while maintaining a two‑day buffer for emergencies.
Recommended Products
Premium E3D Hot end with 360 cooling.

【Metal-Like Strength & Reliability】Provides exceptional toughness and durability, ideal for parts that must withstand repeated stress and heavy loads.

Print without Warping - Creality Ender PLA 3d printer filament made of environmentally friendly PLA material, the printed model is low shrinkage and easy to print without warping
Set Up a Local Print‑Farm Node: Minimum Kit and Rapid Checklist

Here’s what actually happens when you set up a local print‑farm node: you need a tiny, reliable kit and a short checklist so things don’t grind to a halt. Why this matters: downtime costs time and community trust.
What to buy and why
Why this matters: having the right parts saves you troubleshooting time during a crisis.
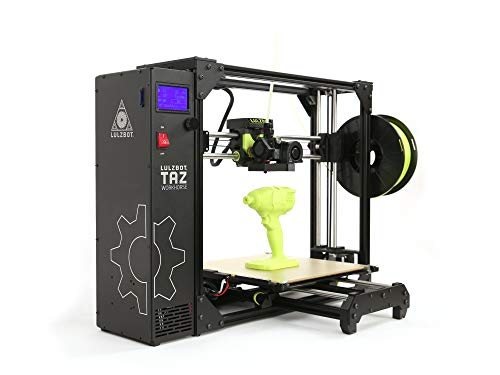
1) Printers (2): get two identical models so spares and profiles are interchangeable — for example, two Creality Ender 3 V3 Neo or two Prusa Mini+ units. Real-world example: when one Ender 3 V3 Neo had a heatbed fault during an urgent run, the second unit took over immediately because the profiles matched.
2) Spare-parts kit (5 items): stock at least these: two extra nozzles (0.4 mm), one spare PTFE tube, one set of belts, and two spare bearings. Replace nozzles after ~100 printing hours.
3) Workstation basics (3 items): a metal table, a powered surge strip, and a small fan or window exhaust for ventilation. Put printers at least 6 inches apart to avoid tangled cables.
Materials and inventory
Why this matters: labeled, rotated filament prevents failed prints and wasted time.
1) Filament types: keep PLA (white, black), PETG (clear), and TPU (shore 95) — three spools each. Example: a community needed face-shield clips and you could print 300 in a day because you had PETG on hand.
2) Labeling: write purchase date and estimated remaining grams on each spool with a permanent marker.
3) Rotation: use the oldest spool first; discard spools over two years old or stored without a sealed bag.
Software, networking, and security
Why this matters: software lets you slice and control printers reliably from anywhere on your network.
1) Install slicing software: Cura or PrusaSlicer with profiles exported for your exact printer model.
2) Remote management: run OctoPrint on a Raspberry Pi for each printer, and set a unique admin password.
3) Updates and accounts: enable automatic firmware updates only after testing on one unit; create two operator accounts with passwords changed every 90 days. Example: after a firmware update on one machine, you tested prints for two hours before updating the second to avoid fleetwide regression.
Safety and shop setup
Why this matters: a small fire or bad ventilation stops operations and risks people.
1) PPE and ventilation: keep nitrile gloves and safety glasses in a labeled drawer; run the room fan or window exhaust while printing ABS or PETG.
2) Fire safety: have an ABC fire extinguisher within 3 feet of the workstation and a smoke detector above the room. Example: a shorted motor burned a belt; the extinguisher stopped the small fire in under 30 seconds.
3) Emergency shutdown: post a laminated step list near the printers: turn main power strip off, unplug each printer, and ventilate the room for 15 minutes.
Training and procedures
Why this matters: trained operators reduce failed jobs and keep the node available.
1) Train two operators: each should run five supervised prints from setup to part removal.
2) Document procedures: write one-page guides for bed leveling, filament change, and nozzle cleaning; keep them in a binder at the workstation.
3) Test prints: run a standardized 30‑minute calibration print weekly and log results (date, operator, outcome).
Community coordination
Why this matters: matching supply to local needs makes your node actually useful.
1) Outreach: call one local clinic or maker space and ask what printable parts they need most.
2) Reporting capacity: share a simple weekly status email with nearby nodes listing available filament types and estimated hourly output (e.g., “PETG: 3 spools, 10 parts/hour”).
3) Example: after calling a local shelter, you produced 200 tent-stake clips in two days because they needed that exact part shape.
Quick startup checklist (do this in order)
Why this matters: a short routine gets you printing fast without missing safety steps.
1) Unbox and place two printers at least 6 inches apart.
2) Install filament and load the correct profile in your slicer.
3) Run a 30‑minute calibration print on each printer.
4) Label and store remaining spools in resealable bags with dates.
5) Create two operator accounts in OctoPrint and test remote control.
6) Post the laminated emergency shutdown steps and place the extinguisher within 3 feet.
7) Email one local contact about capacity and note their needs.
That’s the minimal kit and rapid checklist to get your node online quickly and safely.
Recommended Products

➤【High-Precision Dual-Technology Scanning】-Master any scanning challenge with dual-engine precision. The Sermoon P1 combines Blue Laser and Infrared technologies for maximum versatility. Choose from three professional modes: Deep Hole Scan (Single Line) for cavities, Detail Scan (7 Lines) for complex surfaces, and High-Speed Scan (22 Lines) for large objects. Achieve ultra-detailed 0.02mm accuracy with Blue Laser for mechanical parts, prototypes, and artifacts. Switch safely to Infrared for fast, marker-free scanning of faces, bodies, sculptures, and cultural relics.

【Upgraded DTF Printer】The Peacock 33 DTF Printer features a reliable XP600 printhead with CMYK+WW 6-color system, delivering brighter colors, sharper details, and richer finishes at an ultra-high resolution of 2880×1440 DPI — perfect for 100% true-to-life image reproduction
IMPORTANT NOTES——The maximum print size supported by the A4 size DTF printer is 21 cm, i.e. 8.3 inches. Please check to see if this meets your needs before purchasing. If you need wider, please choose A3 size (13 inches), thank you
Coordinate Print‑Farm Designs: Sharing, Versioning, and QC
If you’ve ever coordinated prints across multiple sites, this is why you need a clear file workflow.
Why it matters: without one, sites print different parts and waste material.
1) How do you treat the file set as the production lifeline?
Why it matters: a single source of truth prevents mismatched parts.
Example: our distributed farm used a Git repo with a release tagged v1.2; a remote site printed the wrong revision and had to scrap 12 parts before we fixed tags.
Steps:
- Publish your approved STL/AMF/3MF files to a shared repo (Git or a cloud bucket) and restrict write access to two maintainers.
- Use semantic versioning: MAJOR.MINOR.PATCH (for example, 2.1.0 → 2.1.1) and attach a short changelog entry.
- Label each release with the target material and expected tolerances, for example: “v2.1.1 — PETG — ±0.2 mm.”
Keep one file set per build. Simple.
2) How do you record and communicate changes?
Why it matters: operators need to know what changed so local tuning stays safe.
Example: we added a 0.5 mm chamfer to a snap-fit and left the tolerance unchanged, which caused overnight failures at one site until they saw the changelog.
Steps:
- Commit design changes with clear messages: “Fix: chamfer 0.5 mm on tab A; no tolerance changes.”
- Require a merge or release approval from a second engineer before marking a version “official.”
- Attach metadata to the release: author name, date, material, machine profile ID, and intended tolerance band (e.g., ±0.15 mm).
Use metadata tags everyone reads. Period.
3) How do you run collaborative reviews before wide release?
Why it matters: catching issues early saves whole print runs.
Example: a 30-minute video review caught a missing heat-set insert pocket that would’ve cost months of rework.
Steps:
- Schedule a 30–60 minute review with designers and at least one operator from each site.
- Share a screen with the slice preview and call out potential trouble points: overhangs, thin walls, and support attachment areas.
- Record action items and assign clear owners and deadlines (e.g., “Adjust wall to 1.8 mm — Sam — by Friday”).
A recorded decision beats an email thread.
4) How do you automate QC across sites?
Why it matters: automated checks stop bad parts before they leave a site.
Example: we require a 20 mm gauge print and an optical scan; one site failed the gauge and the build was quarantined before shipping.
Steps:
- Define two test prints per release: a dimensional gauge (20 mm cube with 0.1 mm features) and a functional test (the snap-fit from the main part).
- Set pass criteria numerically: dimensional tolerance ±0.15 mm, surface defect count ≤2 per face, snap force between 4–6 N.
- Use an automated inspection tool or calipers and upload results to the release ticket; if scores fail, the build is blocked until a retrain or new release.
Make the acceptance criteria non-negotiable.
5) How do you shorten feedback loops and maintain trust?
Why it matters: fast, factual feedback keeps sites aligned and reduces waste.
Example: we implemented a 24-hour feedback SLA; after a failed run, the responsible site uploaded photos and measurements within 6 hours and received a corrective action within 18 hours.
Steps:
- Set a 24-hour SLA for reporting failures with a standard template: photos, machine ID, filament batch, slicer settings, and measured deviations.
- Central team reviews and responds within the SLA with either “accept” and a patch release, or “quarantine” and a corrective action.
- Track metrics weekly: percent of builds accepted, average time to resolution, and parts scrapped per month.
Measure it every week.
Final practical tip: keep one person accountable for releases and one for QC logs; they coordinate fixes and keep the repo tidy.
Real‑World Collaborative Print‑Farm Deployments and Lessons
If you’ve ever coordinated people and printers across different sites, this is why.
You need uniform quality or you’ll get unpredictable results; that matters because wasted prints and lost time kill momentum. I ran a community workshop where three labs printed the same calibration cube, and two groups found layer shifts while one had surface blobs — we fixed the blobs by swapping to a different PLA spool and the shifts by tightening belts. Start by doing the same test print at every site, then compare these three measurable values: X/Y dimensions, layer height accuracy, and surface roughness score (0–5).
Before you set up a network, you need a simple calibration routine because it cuts variance fast. Use these steps:
- Calibrate steps/mm and extrusion multiplier on a single well-maintained printer (takes 30–45 minutes).
- Share the exact gcode and print settings file with every site.
- Have each site print and log three values: measured X dimension (mm), measured Y dimension (mm), and percent under/over extrusion.
- If any value is off by more than 2%, have the site repeat calibration and report changes.
Think of machine differences like different cars of the same model — they all need a basic tune. I visited a partner with two identical printers where one printed at 60 mm/s and the other at 45 mm/s because an operator had changed acceleration. Ask every operator to record final print speed and acceleration in a shared spreadsheet so you can spot those mismatches.
Before you train someone, explain why operator skill matters in one sentence: human setup errors are the biggest single source of failed prints. Run a half-day, hands-on training session that covers bed leveling, filament loading, visual defect spotting, and basic slicer tweaks. Example: in one workshop, a new operator learned to detect under-extrusion by watching a 10 mm single-wall tube print, which cut their fail rate from 20% to 5% over the next week.
Here’s what actually happens when materials differ across sites. Material batches shift color and melt behavior, and that affects adhesion and strength; you’ll see it in first-layer quality and bridging tests. Require material traceability: label spools with batch number, storage date, and humidity exposure; then print a 20 mm overhang test and a 20 mm bridge test for each new spool.
You don’t need expensive lab gear if you follow simple quality gates because basic checks stop bad batches early. Put these three gates in place:
- Incoming-material gate — inspect spool label and print a 20 mm test (2 prints per spool).
- Print-run gate — for runs over 10 pieces, inspect the first and fifth piece.
- Shipping gate — measure one critical dimension and photograph parts against a ruler.
If communication is unclear, coordination breaks down; clear lines save hours. Define roles by name: owner (approves changes), operator (runs prints), and escalation contact (handles unresolved issues). Use a dedicated chat channel per project and pin the responsibility list there. In one deployment, naming a single escalation contact saved a weekend because they arranged an emergency courier for a failed nozzle.
Before you document anything, say why chronicles matter in one sentence: written decisions prevent repeated mistakes. Keep a shared “crisis chronicle” Google Doc with date, symptom, cause, fix, and time-to-fix; add photos and machine serial numbers. One chronicle entry — “Jan 12: first-layer detachment; cause: dirty PEI; fix: isopropyl wipe + 5°C bed increase; time: 40 min” — let a new site replicate the fix in under an hour.
The last practical tip: set simple escalation thresholds so issues don’t fester. If a printer shows three failed prints in a row, stop the run, report in the chat, and escalate to the owner within two hours. That rule turned small problems into trackable, solvable events in our network.
Measure Impact: Lead Time, Unit Cost, Emissions, and Social ROI
If you’ve ever tried to compare prints from different sites, this is why. You want clear numbers so you can prove a collaborative print farm actually helps.
Why this matters: measuring lead time shows whether you’re meeting customers’ deadlines. Example: at Site A a prototype order moved from order to delivery in 48 hours after we standardized file prep.
How to measure lead time
Why this matters: lead time reveals bottlenecks you can fix.
1) Break the process into four steps: setup, print, post‑processing, local delivery.
2) Time each step for 10 representative jobs at each site and record minutes.
3) Calculate median and 90th percentile lead time per site.
Real-world example: Site B averaged 6 hours for setup because files were prechecked, but had a 24-hour post‑processing queue that pushed total time to 36 hours.
If you follow these steps you’ll spot the slowest step fast.
Why this matters: unit cost tells you whether local production saves money. Example: a batch of 100 brackets cost $2.50 each when you include all inputs.
How to calculate unit cost
Why this matters: costs guide pricing and sourcing.
1) List costs per batch: materials, energy, machine time (use machine hourly cost), labor (hours × wage), and overhead (rent, management apportioned).
2) Add them to get total batch cost.
3) Divide by units produced to get unit cost.
4) Adjust for material sourcing: if you pay a 10% premium for recycled filament, add that to material cost.
Real-world example: Material $120, energy $15, machine time $80, labor $100, overhead $35 → $350 total for 100 parts → $3.50/unit.
Why this matters: emissions let you compare environmental impacts across sites. Example: a 3D print run used 12 kWh and drove 40 km for pickup, totaling about 9 kg CO2e.
How to estimate emissions
Why this matters: you can reduce the biggest emitters.
1) Measure energy used per batch (kWh) and multiply by your grid’s CO2e factor (kg CO2e/kWh).
2) Estimate transport distances and use vehicle emissions (g CO2e/km) to calculate transport CO2e.
3) Sum energy and transport CO2e for total emissions per batch, then divide by units.
Real-world example: 12 kWh × 0.5 kg CO2e/kWh = 6 kg, plus 40 km × 75 g/km = 3 kg → 9 kg total → 0.09 kg CO2e per unit.
Why this matters: social ROI shows the local benefits beyond dollars. Example: a pilot project trained 15 people over three months and created two part-time jobs.
How to measure social ROI
Why this matters: it captures impact on people and communities.
1) Track job hours created, number of trainees, completion rates, and local supplier spend.
2) Assign simple monetary proxies: value a trainee completion at $500, value job-hours at local wage × hours.
3) Calculate Social ROI = (social value proxies) / (project cost).
Real-world example: 1,200 job-hours at $12/hr = $14,400, plus 15 trainee completions × $500 = $7,500; total social value $21,900 against $10,000 project cost → Social ROI = 2.19.
Put this together and you’ll have a dashboard: median and 90th percentile lead times, unit cost, kg CO2e per unit, and Social ROI. That gives you the real benefits of a collaborative print farm.
Recommended Products

Dual extruder: electronic driven lifting; 4× increased torque performance; diverse filament compatibility (300℃)

DESIGNED FOR TEACHERS: Includes the Dremel 3D40-FLX printer, PLUS 30 ready-to-implement, standards aligned lesson plans 3rd-12th grades. Extra PLA filaments(3), build sheets(3) and build plate(1). Plus access the self-paced Professional Development training course on how to use and implement 3D printing. Certificate of completion may be eligible for 4 hours of PD credit.
DESIGNED FOR TEACHERS: Get the award winning 3D45 PLUS 30 ready-to-implement, standards aligned lesson plans 3rd-12th grades. Extra PLA filaments(2), glue sticks(3) and build plate(1). Plus access the self-paced Professional Development training course on how to use and implement 3D printing. Certificate of completion may be eligible for 4 hours of PD credit.
Frequently Asked Questions
How Are Intellectual Property and Licensing Disputes Resolved Between Nodes?
I probe whether disputes really require courts; I find licensing mediation and royalty arbitration often settle node conflicts through negotiated licenses, community norms, and pooled royalties, and I’ll guide you through typical processes and enforceable agreements.
What Insurance or Liability Coverage Do Print‑Farm Operators Need?
You’ll need general liability for premises/incidents and product liability to cover defects or harm from printed goods; I’d also carry professional liability, property insurance, and consider cyber coverage and excess policies to bridge gaps between nodes.
How Are Hazardous Materials and Chemical Safety Managed at Local Nodes?
You might think it’s overkill, but I make certain hazardous materials and chemical safety via mandatory hazmat training, strict PPE protocols, proper storage, ventilation upgrades, routine audits, spill plans, and local emergency coordination so operations stay compliant and safe.
What Protocols Exist for Cross-Border Shipment of Locally Produced Medical Parts?
I follow customs agreements and seek tariff exemptions for cross-border shipments of locally produced medical parts, ensuring proper documentation, regulatory approvals, quality certificates, and coordinated logistics with partners, customs brokers, and health authorities to avoid delays.
How Do Print Farms Handle Cybersecurity for Design Repositories and Machine Control?
I guard our digital workshop like a fortress: I enforce strict access controls, segment networks, monitor logs, patch firmware, and encrypt transfers, so compromised designs and machine control can’t wander out like thieves slipping through unlit alleys.