As an Amazon Associate, we earn from qualifying purchases. Some links on this site are affiliate links at no extra cost to you. Our recommendations are based on thorough research and editorial judgment.
Water-Washable vs. Standard Resins: a Deep Dive Into Their Chemical Differences
You rinse a freshly printed part under the sink and the surface stays tacky, or you dunk it in water and it softens after a few days — which exact resin did you actually use and why is it behaving that way? You want to know whether a water-washable resin or a standard resin is responsible for cleanup ease but long-term swelling, and how that affects final part strength. Most people assume water-washable simply means “easier cleanup” without realizing the chemistry sacrifices involved. This piece will show you the chemical reason water rinses work, why that chemistry lowers crosslink density and moisture resistance, and how those changes change part performance and durability. It’s clearer than it sounds.
Key Takeaways
If you’ve ever tried cleaning a 3D print and felt confused about which resin to use, this will clear things up.
Why this matters: knowing the chemical differences helps you pick the right resin for strength, cleanup, and storage.
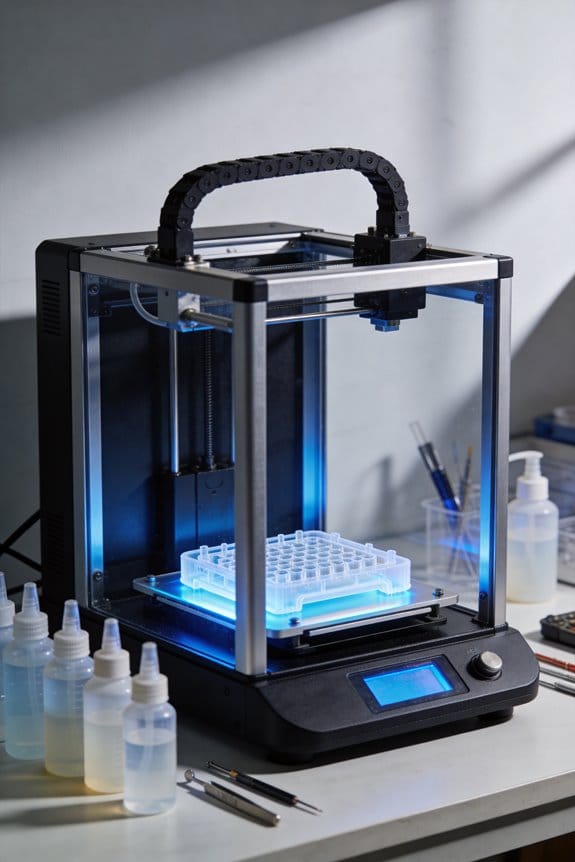
- Water‑washable resins include hydrophilic monomers or additives that let tap water wet and rinse uncured resin. For example, if you print a small phone holder, you can rinse it under running tap water for 30–60 seconds to remove most uncured material.
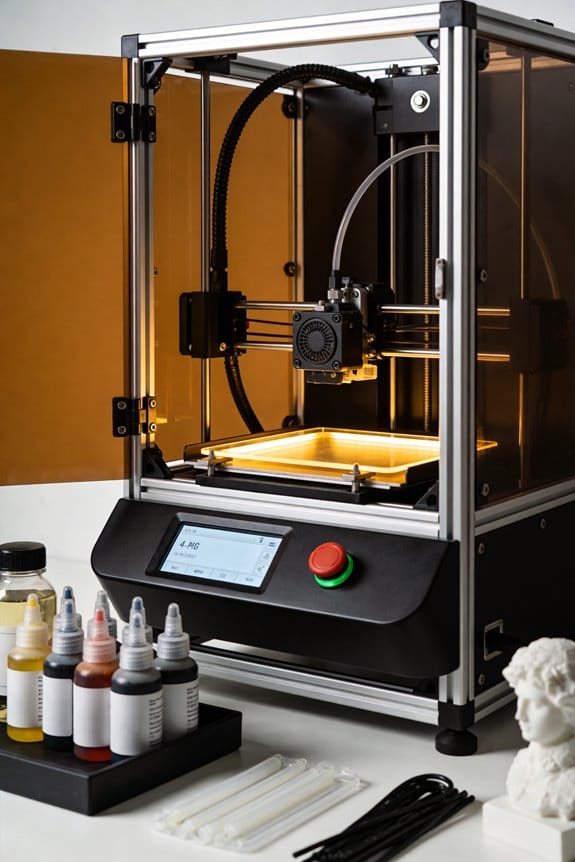
- Standard resins use nonpolar monomers, so you need organic solvents like 90%+ isopropyl alcohol (IPA) or PVA solvents to remove uncured resin effectively. For a detailed part with thin fins, soak in 90–99% IPA for 2–5 minutes, then agitate gently to clean crevices.
Why this matters: the chemistry that makes water-washable resins cleanable also changes part performance.
- Water‑compatible additives reduce crosslink density and mechanical strength, so parts can be more moisture‑sensitive and prone to swelling and microcracks. A printed hinge cleaned with water may feel slightly softer and could gain 0.5–2% in dimension after a week in high humidity.
- Polymer crosslinking chemistry is similar between types, but different formulations change final properties: standard resins generally give higher humidity resistance and better mechanical performance. For a functional gear, choose a standard resin when you need stiffness and long-term dimensional stability.
Why this matters: you can mitigate weaknesses with practical post-processing and storage.
- Post‑cure and storage improve stability: fully UV‑cure parts for the manufacturer’s recommended time (commonly 10–60 minutes at 405 nm, depending on part thickness), then store dry. Use silica gel packs (one 5–10 g pack per quart-sized container) for water‑sensitive resins to keep humidity low.
- Example: after printing and rinsing a small bracket in water, dry it with a paper towel, then UV‑cure for 20 minutes (turning it every 5 minutes), and store it in a sealed box with a silica pack to reduce warping and moisture uptake.
When to Choose Water‑Washable or Standard Resin
Think of choosing resin like picking shoes for different weather.
Why this matters: picking the wrong resin can make parts fail or make cleanup a mess. If your workspace bans solvents or you don’t want to buy IPA regularly, pick water‑washable resin because you can rinse prints with tap water and mild dish soap. Example: if you print dental models at a small home studio above a garage where fumes are a problem, water‑washable lets you clean a dozen models at the sink without flammable liquids.
1) How to clean each type and why it matters.
Why this matters: cleaning affects part safety and final strength.
- Water‑washable: rinse under running tap water for 1–3 minutes, then use a soft brush on crevices for 10–20 seconds. Pat dry with paper towels and air‑cure under a UV lamp for 5–15 minutes per side, depending on lamp power. Example: a single small figurine usually needs 2 minutes of rinsing and 10 minutes total of UV curing with a 6 W lamp.
- Standard resin: soak in 90%+ IPA or a PVA‑based solvent for 2–5 minutes, agitate, then air dry and UV‑cure as above. Example: a phone‑case print needs two 3‑minute IPA soaks to clear nooks.
2) When to choose water‑washable resin.
Why this matters: it reduces flammability and ongoing solvent costs. Choose water‑washable if you:
- Work in a shared space or apartment with limited ventilation.
- Don’t want to store flammable liquids.
- Print cosmetic or low‑stress parts like display models or prototypes.
Example: for classroom demos printing 20 small prototypes weekly, water‑washable saves buying 5 L of IPA each month.
3) When to choose standard resin.
Why this matters: standard resin resists humidity and mechanical stress better. Choose standard resin if you:
- Need parts that will be handled, loaded, or exposed to moisture.
- Store parts long term in varying humidity or outdoors.
Example: printing functional hinges for a garden tool should use standard resin because it will see wet conditions and repeated stress.
4) Storage and long‑term performance.
Why this matters: humidity can degrade some resins over time. Store unopened resin in a cool, dark place at 15–25°C and keep bottles sealed. For water‑sensitive resins, add silica gel packs to the storage container. Example: keep a 500 mL bottle in a sealed plastic bin with two 10 g silica packs to cut humidity uptake.
5) Check printer compatibility.
Why this matters: not every printer or profile works the same with every resin. Look up your printer’s resin profiles and exposure settings on the manufacturer or resin maker website before buying. Example: if your printer lists 8–10 second layer exposure for standard resins, don’t buy a resin that recommends 6 seconds without planning to reprofile.
Match the resin to part function, cleanup capacity, and storage conditions. Use the steps and examples above to decide, then test one print with the suggested cleaning and curing routine before committing to a full batch.
Resin Chemistry Explained: Hydrophilic (Water‑Washable) vs Hydrophobic (Standard)

Think of resin chemistry like two kinds of jackets: one that soaks up rain and one that sheds it.
Before I explain how to clean and handle them, know why it matters: choosing the wrong resin changes how you wash, how strong the part is, and how long it lasts.
Hydrophilic (water-washable) vs hydrophobic (standard) — the core difference
– Hydrophilic, water‑washable resins are made from molecules that *like* water and can mix with it, while hydrophobic, standard resins are built from water‑repelling chemistry that *rejects* moisture.
Example: a water-washable dental model will rinse clean with tap water in 30–60 seconds, while a standard dental model needs isopropyl alcohol (IPA) or a similar solvent for 1–3 minutes.
How that changes behavior and cleaning (why it matters: cleaning method and time affect finish and safety)
- Hydrophilic formulations contain water‑compatible monomers and additives that lower surface energy and let tap water wet and remove uncured resin.
- Real-world example: after printing a prototype gear in a water-washable resin, you can run it under a 2–3 gallon/minute faucet for 45 seconds and see most uncured resin wash away.
- Practical step: rinse for 30–90 seconds, then pat dry with a lint‑free cloth.
- Real-world example: a standard resin figurine will leave a greasy film if you try to use water; use 90–99% IPA or a resin-specific solvent and agitate for 60–180 seconds instead.
- Practical step: submerge in solvent, agitate for 1–3 minutes, then air dry.
Polymer networks and part durability (why it matters: affects strength, moisture behavior, and long-term reliability)
– Polymer crosslinking still creates the solid network in both types, but water‑soluble components can reduce crosslink density and mechanical strength, making parts more moisture‑sensitive and prone to swelling or cracking over months.
Example: a water-washable jig left in a humid shop might swell 1–3% in dimension over weeks, while the same part printed in a hydrophobic resin shows <0.5% change.
– Practical steps to reduce problems:
- Post-cure under recommended UV for the exact time on the tech sheet.
- Store parts in a sealed container with silica packets if humidity is over 50%.
- Avoid long-term outdoor exposure for water-washable parts.
Quick recap you can act on
- If you want easy cleaning with tap water, pick a water‑washable resin and rinse 30–90 seconds.
- If you need long-term strength and moisture resistance, use a hydrophobic resin and clean with solvent for 60–180 seconds.
- Always follow the manufacturer’s post‑cure and storage steps to limit swelling and cracking.
Recommended Products

【Epic Print Speed & High Precision】 Experience incredible printing speeds of up to 600mm/s with precision as fine as 0.05mm. The K2 Plus is designed for rapid prototyping without compromising on quality, bringing your ideas to life faster.
[Electrostatic Discharge Safe] Low resistivity (10^5 ~ 10^8) for electrostatic discharge safe 3D printing parts

ELEGOO Saturn 3 12K MSLA 3D Printer with 10" Monochrome LCD Screen Fresnel Collimating
Cleaning Workflows: Tap Water vs. IPA (Post‑Processing Steps and Waste)

If you’ve ever rinsed a print and wondered which method saves time and avoids damage, this will clear it up.
Why this matters: choosing water or IPA affects curing time, part swelling, and how you handle waste.
With water‑washable resin, rinse within minutes to avoid swelling. Example: a small figurine rinsed under the sink for 60 seconds often shows no soft spots afterward. Steps:
- Hold the part under gentle running tap water (about 1–2 liters per minute) for 30–90 seconds while lightly brushing with a soft toothbrush.
- Shake off excess water and blot with a lint‑free towel for 10–20 seconds.
- Air‑dry for 5–15 minutes in a ventilated area before final UV cure.
Final note: if the part still feels tacky after drying, give it another 5–10 minutes of air time.
Why this matters: standard resin demands solvent cleaning to remove uncured resin quickly.
With standard resin and IPA, solvent technique extends solvent life and reduces residue. Example: printing a 10 cm mechanical part and using a two‑bath IPA routine kept the second bath clear enough for five prints. Steps:
- First bath: submerge and agitate for 30–90 seconds to remove most uncured resin.
- Second bath: dip or rinse briefly (10–30 seconds) to remove remaining residue.
- Let IPA drip back into the second container for 10–20 seconds, then place the part on a paper towel to evaporate for 2–5 minutes before UV curing.
Tip: use 91–99% IPA and replace or distill the first bath when it becomes visibly dark.
Why this matters: improper handling of rinse waste can create hazards and extra cost.
How to handle contaminated rinse media safely. Example: a maker collected used IPA and had it distilled after three weeks to recover ~70% solvent. Steps:
- Collect used water or IPA in a sealed, labeled container.
- For water: let solids settle, decant clear water for disposal following local regulations, and dry remaining solids for hazardous‑waste pickup.
- For IPA: store for recycling or distillation; never pour it down the drain or into regular trash.
Safety note: always wear nitrile gloves and eye protection when handling contaminated media.
Why this matters: both workflows end with UV curing to harden the surface and stabilize dimensions.
Final cure steps and timing. Example: a 3 cm jewelry piece cured under a 40 W UV lamp for 5 minutes per side stayed dimensionally stable. Steps:
- After drying, place the part under a UV lamp at the manufacturer‑recommended distance.
- Cure for the time specified for your resin (typically 5–20 minutes per side).
- Inspect for tackiness; if tacky, add 3–5 minutes more.
Critical: contaminated water or IPA must be treated as described earlier.
Recommended Products

✅ 【99.9% Super-Efficient Bubble Removal】 Witness professional results with our vacuum degassing chamber! It eliminates up to 99.9% of bubbles in just 5-9 minutes using powerful 95kPa high-vacuum technology. The transparent lid allows you to watch the satisfying bubble-removal process, ensuring your epoxy resin, casting resin, or art resin mixtures become perfectly bubble-free. Achieve crystal-clear, smooth, and flawless finishes for your resin jewelry, coasters, and DIY crafts every time, transforming your creative workflow.

All-in-One Epoxy Resin Kit with Resin Bubble Remover Machine: Comes with a powerful resin vacuum bubble remover (vacuum chamber lite) to effectively eliminate bubbles before curing. This dedicated resin bubble remover machine ensures clear, professional-quality resin crafts and molds—perfect for both hobbyists and serious creators
Generous Capacity in a Compact Package: Featuring a 2L storage capacity, the vacuum chamber can hold 3 cups of resin at a time. Despite its decent capacity, it has a compact and portable design. This makes it perfect for small DIY resin projects, saving you space while still delivering powerful bubble - removing performance
Safety and Environmental Risks: Handling, PPE, and Disposal

Before you handle resin, know why this matters: uncured resin can irritate your skin, eyes, and lungs and can harm aquatic life if washed down the drain.
- If you’re sanding or wiping parts, wear nitrile gloves (at least 4 mil thickness), chemical splash goggles, and an N95 or P100 respirator; respirators are required for sanding because dust and aerosols form. Example: when I sanded a 50 mm tall print for 10 minutes, I got visible dust on the workbench within a minute—respirator on, no coughing.
- For skin contact, wash immediately with soap and water for 30 seconds; if resin got under a ring or in a cut, flush for 5 minutes and seek medical advice for deep exposure.
Because standard resin typically uses alcohol-based cleaning, you need ventilation to avoid flammable vapor buildup.
- Why this matters: flammable vapors can ignite and make you sick.
- How to do it:
- Work in a room with a window and run an exhaust fan that moves at least 100 CFM, or use a fume hood rated for solvents.
- Keep a 1.5 m (5 ft) clear zone around the cleaning area and remove open flames or hot surfaces.
- Store IPA in a sealed metal container and keep no more than a single day’s supply on the bench (example: one 1 L bottle for hobby use).
With water-washable resins, fumes are lower but the liquid still contains toxic monomers.
- Why this matters: even low-odor liquids will irritate your skin and harm waterways.
- How to do it: wear the same PPE above, change gloves after 15–30 minutes of contact, and keep unwashed rags in a sealed metal can. Example: I cleaned a resin vat and saved one liter of rinse water for curing instead of pouring it down the sink.
Never pour contaminated wash water down drains without curing the monomers first.
- Why this matters: untreated rinse water can kill fish and plants.
- How to do it:
- Collect rinse water in a clear plastic or glass container.
- Expose the container to sunlight or a 405 nm UV lamp for at least 30 minutes and stir once; the liquid should gel or clear as an indication of curing.
- Once fully cured (solidified or gelled), place the cured material in regular trash only if local rules allow; otherwise, follow hazardous-waste procedures. Example: I cured 2 L of wash water in a 5 L jar under a 405 nm LED for 45 minutes until it solidified, then disposed of the solid with household waste per my city guidance.
Follow local hazardous-waste rules for final disposal.
- Why this matters: rules vary and violating them can lead to fines.
- How to do it: call your municipal waste line or check the website for “household hazardous waste” instructions, bring cured resin solids or sealed solvent containers to the drop-off, and keep receipts. Example: my city requires drop-off appointments and accepts cured resin solids if in rigid containers.
Quick checklist before you start:
- Gloves (nitrile, 4 mil) — check.
- Splash goggles — check.
- Respirator for sanding (N95/P100) — check.
- Ventilation (100 CFM fan or fume hood) — check.
- UV source for curing wash water (sunlight or 405 nm lamp) — check.
Follow these steps and you’ll reduce irritation risk, prevent fires, and avoid contaminating waterways.
Recommended Products
HEAVY DUTY GLOVES: TitanFlex 8-mil premium nitrile gloves are 2–3 times thicker than typical disposable nitrile gloves, providing enhanced puncture resistance and excellent barrier protection against grease, gasoline, oils, automotive fluids, and many petroleum-based chemicals.

Ultra heavy duty gloves: 8 mil ultra thick and strong, when nothing but the best will do. Provides excellent protection against rips and punctures, and superior protection from grease, gas and many chemicals. Latex free nitrile makes these gloves a great alternative to latex gloves and rubber gloves.
1. HEAVY-DUTY PROTECTION: Experience uncompromising safety with our PPE equipment 8 Mil nitrile rubber heavy duty industrial black gloves offering 2-3 times thicker than standard ones. Be confidently shielded with our chemical resistant gloves against grease, gasoline, and various petroleum-based chemicals during automotive repairs, manufacturing, and industrial tasks.
Mechanical Properties, Costs, and Best Use Cases (Avoiding Moisture Damage)

The difference between water-washable and standard resins comes down to how they handle moisture and what that means for your parts.
Why this matters: moisture can shrink the life of a printed part by making it brittle or causing warping. If you leave a water-washable resin part in a humid garage, it can swell and develop tiny cracks that reduce strength within weeks.
- Water behavior and part life
- Water-washable resins absorb moisture faster than standard resins, which causes swelling and microcracks that lower tensile strength by as much as 10–30% over weeks in humid conditions. For example, a water-washable gear left near a basement dehumidifier showed visible edge crazing after two weeks.
- Standard resins resist moisture better and keep mechanical properties stable in wet or outdoor environments for months.
- Cost comparison and real-world example
- Why this matters: your recurring expenses change based on cleanup method and disposal.
- Water-washable costs about 5–15% more per liter than comparable standard resin, but you save on solvent purchases because you rinse with tap water. Expect to spend an extra $10–$30 per liter up front.
- Example: if you print 1 liter of parts per month, you’ll pay roughly $15 more per month for the resin but save $20 in solvent over the year—net depends on disposal needs.
- Don’t forget: contaminated rinse water needs to be neutralized and cured before disposal, so you’ll still spend time and maybe materials (e.g., a UV box or a plastic tub for curing).
- Best uses and a concrete rule
- Why this matters: choosing the wrong resin shortens part life and wastes money.
- Use water-washable resin when:
- You’re making dry, low-stress prototypes (cosplay props, visual concept models).
- You value easy cleanup and don’t want to handle solvents.
- Example: print a helmet prototype with water-washable resin; it’s quick to wash with a sink and fine for display-only use.
- Use standard resin when:
- Parts must bear loads, fit precisely, or go outdoors (functional brackets, enclosures, jigs).
- You expect humidity, water exposure, or long-term use.
– Example: make a mounting bracket for a greenhouse with standard resin to avoid swelling and cracking.
How to protect parts from moisture (step-by-step)
Why this matters: simple steps extend part life and keep mechanical properties reliable.
- Store resin and printed parts in airtight containers with desiccant packs (one 5–10 g pack per 1–2 liters of storage).
- Post-cure parts fully under a UV lamp for the time recommended by the resin maker (typically 10–30 minutes per side).
- Paint or coat functional parts with a thin polyurethane or epoxy topcoat if they might see humidity or water.
Example: for a small printed hinge, cure 30 minutes, then apply one thin epoxy coat and let it harden 24 hours; hinge strength stays near original tensile values.
Quick buying tip
Why this matters: you’ll avoid surprises at purchase time.
– If you’re printing visual models and want easy cleanup, choose water-washable. If you need durability, pick standard resin. For a one-off decision: buy standard resin for structural parts, water-washable for practice prints and display pieces.
Final practical takeaways
- Water-washable = easier cleanup, slightly higher resin cost, more moisture sensitivity (expect 10–30% strength loss in humid settings).
- Standard resin = better long-term durability and moisture resistance, requires solvent cleanup but fewer disposal steps for water.
- For mixed use, keep one bottle of each: use water-washable for quick prototypes and standard resin for anything that must last.
Recommended Products

ELEGOO Mercury Plus 3.0 Larger Wash and Cure Station, Resin Curing Machine for LCD/SLA/DLP 3D Printing Models, Best for Saturn, Mars 3D Printer, Washing Size of 230 * 135 * 260mmm

[Fast Printing] Printing 50um layer in 0.5 sec with monochrome LCD 3D printers, saving on time and electricity bill.

【Water Washable, No Need Alcohol】Enhanced with hydrophilic agents, you can now wash off the residual liquid resin with water, reducing post-processing duration and costs. Thanks to the water-washable formula, the cured prints exhibit minimal shrinkage rates and are less prone to cracking.
Frequently Asked Questions
Can Contaminated Wash Water Be Filtered and Reused for Multiple Prints?
Yes — I filter contaminated wash water and reuse it cautiously: filtered reuse works short-term after settling and fine filtration, but I recommend solvent recovery steps, monitoring contamination levels, and occasional full replacement to avoid print failures.
Do Water‑Washable Resins Affect Printer Vat or FEP Film Lifespan?
Yes — I’ve seen water‑washable blends shorten vat and FEP life; like a slow tide they alter surface chemistry and stress curing kinetics, so I’d inspect seals, clean more often, and replace films sooner.
Are There Specific Paints or Primers That Bond Poorly to Water‑Washable Prints?
Yes — I’ve seen primers and paints with poor surface adhesion on water‑washable prints; coating compatibility varies, so I recommend testing adhesion promoters, etching primers, or flexible paints to avoid delamination from moisture‑sensitive substrates.
Can Additives Improve Water Resistance of Cured Water‑Washable Parts?
Absolutely — you can’t make it invincible, but additives can help: I’d use polymer blending and targeted surface coatings to reduce moisture uptake, though results vary and you’ll still need testing to avoid cracking or compromised detail.
How Does Storage Humidity Impact Unopened Resin Shelf Life?
Unopened resin shelf life shortens with high humidity; I’d store at stable low storage temp and monitor humidity indicators. If humidity’s elevated, cure-sensitive water‑soluble components degrade faster, so rotate stock sooner and seal containers tightly.