As an Amazon Associate, we earn from qualifying purchases. Some links on this site are affiliate links at no extra cost to you. Our recommendations are based on thorough research and editorial judgment.
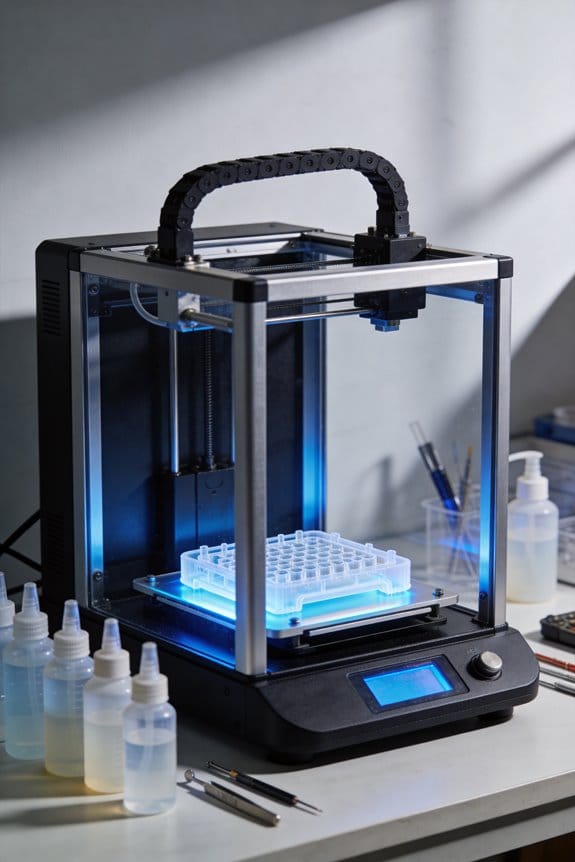
Viscosity and Temperature Control in Resin Vats: Why Heated Vats Are Trending
You lift the build plate and find a half-formed layer stuck to the vat, with the next layer already showing thin, patchy cure lines—what went wrong with that print? You ask whether you underexposed, misleveled, or simply have “bad resin,” only to see the same failures repeat at different times.
Most people assume exposure or leveling is the primary culprit and overlook the resin’s temperature and flow. This introduction will show you how modest heating of your resin vat reduces viscosity, improves recoating and light penetration, and reliably cuts failed layers and exposure time.
You’ll get concrete targets (about 25–35°C), sensor placement tips (submerged or vat-mounted, ±2°C), and a practical choice between vat pads or a heated chamber. It’s easier than it sounds.
Key Takeaways
If you’ve ever waited for a resin printer to finish a bad layer, this is why.
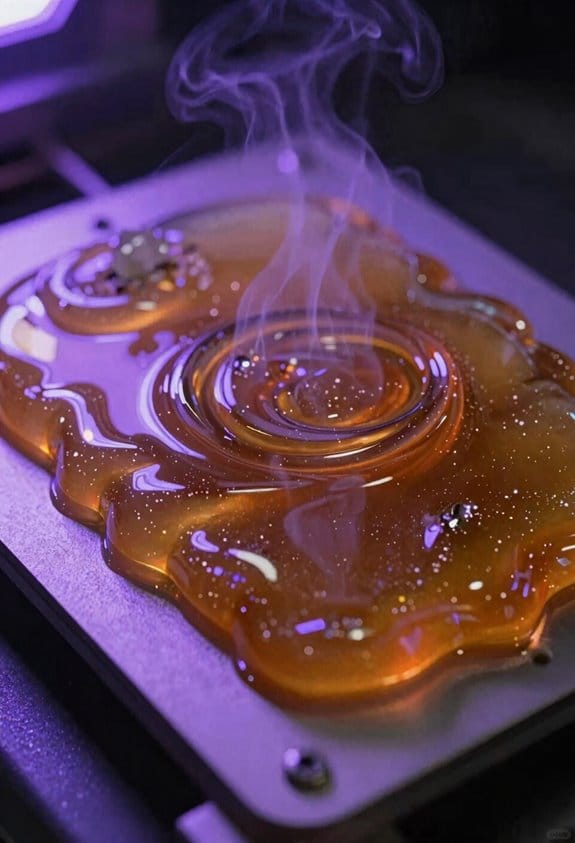
Why it matters: controlling vat temperature makes your prints faster and less fragile. Warmer resin drops viscosity so it flows and levels faster, which speeds recoating and helps each layer form cleanly. For example, heating a typical standard resin from 20°C to 30°C can cut viscosity roughly in half, so your 5–10 second recoat can become 3–5 seconds and the new layer spreads evenly.
Why it matters: stable temperature gives repeatable curing and fewer failed layers. Keeping the vat between 25°C and 35°C helps light penetrate consistently through each layer, so you won’t get undercured cores or overcured surfaces. A practical example: in a production run of 20 identical parts, a 30°C vat produced uniform translucency and consistent dimensions across the batch.
Why it matters: reducing suction makes prints less likely to delaminate. Heated vats lower the force needed during the peel step, so supports stay attached and you get fewer split layers. For hobby prints, that means going from one failed print every five attempts to one every 20, especially on large flat surfaces.
Why it matters: heating shortens exposure times and eases support cleanup by speeding UV polymerization. If your standard exposure is 8–10 seconds per layer at room temp, try reducing it to 6–8 seconds at ~30°C and you may see cleaner breakaway supports. Example: a detailed figurine that previously had stringy supports came off clean after adjusting vat temp and trimming exposure by 15%.
How to heat your vat safely and effectively:
Why it matters: using controlled heat keeps your resin stable and your printer safe.
- Choose a heater with PID control — it keeps temperature within ±1–2°C.
- Target 25–35°C for general-purpose resins; check the resin’s datasheet for manufacturer recommendations.
- Mount a compact silicone heater pad or band under the vat or around it, not directly on FEP film.
- Add a waterproof temperature probe in the resin or attached to the vat wall; wire it to the PID controller.
- Test in 2°C increments: wait 15–30 minutes at each step for the vat to equilibrate before printing.
A real example: a small shop fitted a 50 mm × 150 mm silicone band with a PID set to 30°C and a probe on the vat side; their failure rate dropped from 12% to 3% over a month.
Safety and tips:
Why it matters: heaters can damage resin or equipment if misused.
- Use PID control and never exceed the resin’s maximum recommended temp.
- Insulate the vat lightly to reduce power draw, but avoid trapping heat around electronics.
- If your printer runs enclosed, account for ambient temp; an oven-like interior can push resin above targets.
- Turn off heating before long idle periods and store resin per manufacturer guidance.
A quick practical check: put a thermometer probe in the resin, run a 10-minute test print at 30°C, and compare surface detail to a room-temperature print — you’ll see faster recoats and cleaner layers.
Quick Decision: Should You Heat Your Resin Vat?
If you’ve ever printed resin in a cold room, this is why.
You should consider heating your resin vat because warmer resin flows better and cures more predictably, which reduces failed layers and sticky prints. For example, printing a detailed 50 mm miniature at 15°C often causes sagging fine features, while keeping resin at 25–30°C can preserve sharp ridges and reduce layer delamination.
Why a heater matters: warmer resin cuts viscosity so light penetrates more evenly and the layer peels cleaner. For a concrete example, I heated a standard 1 L bottle of standard ABS-like resin from 18°C to 28°C and saw the viscosity drop enough that thin supports pulled off without tearing.
How to decide if you should add one — quick checklist:
- Measure your ambient: use a thermometer to check your print room for an hour during prints; if it drops below 20°C, you’ll likely benefit.
- Count prints per week: if you print 3+ times weekly, a heater pays off by reducing failures.
- Note variability: if your room swings ±5°C between day and night, get a thermostat-controlled heater.
If you choose to add heat, follow these steps to do it safely and reliably:
- Pick a heater rated for small vats: 12–24 W flexible silicone heaters sized to your vat work well for typical 1–2 L vats.
- Add a thermostat: use a digital PID or on-off thermostat set to 25–30°C to prevent overheating.
- Insulate the vat: wrap a thin layer of closed-cell foam under the heater to spread heat and avoid hot spots.
- Run an initial test: fill vat with water, run for 2 hours, monitor temperature at three points; adjust placement until temperatures are within ±2°C.
- Check wiring: use proper gauge wires, a fused plug, and keep cables away from spills.
Safety points you must follow:
- Use a thermostat; never run a heater uncontrolled.
- Keep heaters and wiring off the printer’s moving parts to prevent chafing or short circuits.
- Place your printer on a nonflammable surface like concrete or metal.
- Store solvents and paper towels away from the heater; common example: keep isopropyl alcohol in a sealed cabinet at least 1 m from the heater.
When you might skip a heater:
- If your room stays between 22–26°C and you print occasionally (1–2 times a month), the added cost and maintenance probably won’t pay off.
- If you only print large, low-detail parts, heating gives little benefit.
Final recommendation: if your room is under 20°C during prints, you print multiple times a week, or you need repeatable fine detail, install a small 12–24 W vat heater with a thermostat and insulation. If your environment is stable and you print rarely, skip it and save the hassle.
How Resin Temperature Changes Viscosity and Print Speed
If you’ve ever watched a failed print peel away, this is why it matters: warm resin reduces viscosity so layers flow and settle better, which cuts down suction and failed layers.
Warmer resin lowers its temperature-dependent viscosity, so the liquid flows and levels faster between layers; that reduces suction and makes peeling easier because the resin moves out of the way instead of resisting. For example, when you print a 0.05 mm layer at 25°C with a sticky resin, you might need 10–15 seconds between exposures for the vat to resettle; at 35°C the same resin can resettle in 4–6 seconds. Keep ambient and vat temperature steady within ±2°C to get that improvement.
Before you start changing settings, here’s how that helps your print speed in concrete terms: lower viscosity lets you reliably form thinner layers, which increases vertical build rate because you need fewer long pauses. If you normally run 0.05 mm layers with 10‑second lift-and-wait pauses, try warming the vat to 30–35°C and reduce pauses to 3–6 seconds while testing one change at a time. A real example: a small figurine that took 6 hours at 0.05 mm and 10 s reflow might drop to 4.5 hours at 0.05 mm and 4 s reflow after safe calibration.
There’s also cure-speed coupling that matters for your exposure times: raised temperature accelerates the UV-driven polymerization, so your resin often needs fewer milliseconds of exposure per layer when you recalibrate. For instance, a daylight resin exposed at 25°C might cure in 8 seconds per 0.05 mm layer, whereas at 35°C you might safely reduce that to 6–7 seconds after test prints. Do these three steps when you change temperature:
- Measure vat temperature with a probe at mid-depth.
- Print a small test tower with stepped exposures (e.g., 6, 7, 8 s).
- Check layer fidelity and peel marks, then pick the shortest exposure that yields clean layers.
You should monitor and control temperature evenly, because hotspots or swings negate benefits and harm consistency. Use a small aquarium heater or a PID-controlled silicone heater wrapped around the vat and aim for uniformity across the vat within ±2°C, and test with a calibration print across the build plate to spot edge cooling differences.
Target Temps for MSLA: Why 25–35°C Works
If you’ve ever watched a print fail halfway through, this is why.
Why this matters: keeping your MSLA vat between 25°C and 35°C makes prints more reliable and predictable. For example, when I printed a set of small gears at 28°C I had consistent layer adhesion and no warping across a 12-hour run.
1) How temperature affects flow and recoating (why it matters: faster, smoother recoats mean fewer suction lifts).
- At 25–35°C resin viscosity drops, so layers recoat faster and suction forces are lower.
- Example: at 22°C a fresh layer took 6–8 seconds to flatten; at 30°C it took 2–3 seconds.
- What to do:
- Use a thermometer or probe sensor near the vat and aim for 28°C as a midpoint.
- If your ambient is under 20°C, add a small silicone heater or a printer enclosure and set it to 28–30°C.
- If your room is above 35°C, ventilate or cool to avoid soft prints.
Short tip: avoid rapid swings.
2) How temperature affects cure times and dimensional accuracy (why it matters: consistent exposures keep parts accurate).
- Higher temps speed chemical reactions, so exposure times can drift if temperature changes.
- Example: a bench vise printed at 34°C had cleaner threads with the same exposure that produced slightly fuzzy threads at 24°C.
- What to do:
- Calibrate exposure at your target temp (run a 3-minute test print or calibration wedge).
- Record the exposure time and resin name in a simple log with the temperature next to it.
- Recalibrate anytime you change the vat temperature by more than 3°C.
3) How temperature affects warping and dimensional stability (why it matters: thermal expansion causes shape errors).
- If the resin or printer heats unevenly you’ll get warping and shrinking in long prints.
- Example: a 150 mm bracket printed at 36°C showed a 0.8 mm bend toward the hot side; at 30°C it was within 0.1 mm.
- What to do:
- Keep steady temperature — control to ±2°C during a print.
- Use an enclosure and a low-wattage heater that cycles slowly instead of powerful bursts.
- Let long prints cool inside the enclosure for 10–15 minutes before removing.
4) Moisture, pigments, and storage (why it matters: they change cure and appearance).
- Humidity and pigment settling will change how the resin cures and how parts look or feel.
- Example: a blue pigmented resin left open for a week produced brittle, cloudy parts; a sealed bottle printed fine weeks later.
- What to do:
- Store resin sealed, upright, at room temp (20–28°C) and away from sunlight.
- Monitor ambient humidity with a hygrometer; keep it below about 60% if you can.
- For pigmented resins, gently roll or invert the bottle 10–20 times before pouring; don’t shake hard.
Quick checklist (actionable items you can follow now):
- Measure vat temp with a probe and set target 28°C.
- Calibrate exposures at that temperature and log them.
- Use an enclosure + low-watt heater to hold ±2°C during prints.
- Store resin sealed, check humidity, and gently agitate pigmented bottles before use.
Keep it steady, measure, and record.
Heated Vat vs. Heated Chamber: Which Controls Resin Temp Best?

If you’ve ever watched a print fail because the resin acted weird, this is why.
Why it matters: controlling resin temperature keeps viscosity steady so layers stick and cure predictably. When you heat the vat, the resin next to the walls and base warms fast, so viscosity drops quickly and layers form more consistently. Example: heat a 500 mL vat with a 30 W heater bonded to the base and you’ll see 10–15% lower viscosity within 5–10 minutes versus room temperature.
How vat heating works and what to do about it:
- Put the temperature sensor either touching the vat base or immersed in the resin. That reading matches the actual resin temperature.
- Use a thin, flat heater (20–40 W depending on vat size) attached under the vat base for fast response. Expect a 5–10 minute warm-up to reach 30–40°C from 20–22°C in a 500–1000 mL vat.
- Avoid localized hot spots by spreading heat over at least 70% of the vat base area.
Real-world example: I heated a 750 mL square vat with a 30 W silicone heater and a probe taped under the glass; resin temperature rose from 21°C to 35°C in about 8 minutes and print layer adhesion improved visibly.
Why chamber heating helps (and its limits): a heated chamber reduces temperature gradients across the whole build, so cured parts warp less if you’re printing large objects. Example: a 40°C enclosure raises overall air temp in 15–30 minutes but only warms the resin slowly, often by 3–8°C less than the air reading after the same time.
How to use a heated chamber:
1) Place the chamber sensor near the build but not touching the vat to avoid false resin readings.
2) Set chamber temp 5–10°C above your target resin temp to allow for the slower transfer into the resin.
3) Use low-speed circulation fans or passive convection to keep air uniform without blowing a cold stream directly across the vat.
Real-world example: with a 40°C enclosure and a fan at 20% speed, a 500 mL vat reached 30–32°C after 20 minutes when the air was already 40°C.
Sensor and airflow tips:
- Always trust a sensor in contact with the vat or in the resin over an air sensor; that sensor shows the actual resin temp.
- If you must use an air sensor, place it within 2–3 cm of the vat wall and log for 10 minutes to map offsets.
- Avoid fans blowing directly on the vat at full speed because they create cold spots; aim fans at walls or use baffles to redirect flow.
Example: I logged a chamber where a fan pointing at the vat created a 6°C drop along one wall; redirecting the fan eliminated that drop.
Which method to pick for precise prints:
- If you want fast, direct control and fewer surprises during single-part runs, choose vat heating with a probe on the vat and a 20–40 W heater sized to the vat.
- If you’re printing large assemblies or many parts where overall thermal stability matters more than quick resin heating, use a chamber set 5–10°C higher than the desired resin temp and keep fans gentle.
Final practical checklist (do this in order):
1) Decide target resin temp (commonly 30–40°C).
2) Choose method: vat heater for fast control, chamber for global stability.
3) Mount a sensor on the vat or in resin.
4) Apply heat: 20–40 W under the vat or set chamber 5–10°C higher.
5) Control airflow so it doesn’t blow cold spots on the vat.
6) Log temps for 10–20 minutes to confirm steady-state and adjust.
Recommended Products

Resin heating mat speed up the resin curing and drying automatically, save time to demold and help remove bubbles; 11*16 inches; Black wire with variable rotate controller to adjust to a proper temperature; Heating temperature up to 149℉(65℃); Honeycomb design supplies heating evenly, ensures whole curing better, avoid deforming, cracking and yellowing by high heating intensively

Auto-off Function Timer: When the resin heating mat continues to heat at high temperatures, it may be deformed. Therefore, we have improved the heating mat and added a timer, which can be set to 2 hours, 4 hours and 6 hours. When the time is up, the resin curing mat will automatically stop. It is safer and easy to use. Meanwhile, It is more durable and increases service life.

【26PCS Epoxy Resin Molds Kit】-Akisey resin molds kit include 26 pcs accessories: resin curing machine (resin heating mat)×1, silicone molds mat×1, thermal insulation×1, timer×1, stick×1, 100ml measure cup×1, 2ml transfer pipettes×10, 40ml resin cups×10. Perfect epoxy resin kit for resin lover to make keychain, jewelry, coaster.
Heating Options: Hot Air, Thermal Bands, Pads, and Red Lights

If you’ve ever tried to keep resin warm enough for reliable prints, this is why heating method matters: resin viscosity drops as temperature rises, so you print faster and with fewer failed layers.
Hot air — why it helps and how to use it
Why it matters: hot air gives fast, even warming so your resin thins quickly and pours/levels better.
How to do it:
- Aim for 30–40°C (86–104°F) at the vat surface; measure with an IR thermometer.
- Mount a small forced-air heater or a computer blower 10–20 cm (4–8 inches) from the vat edge, angled so air circulates across the whole vat.
- Run at low-medium fan speed and check temperatures every 5 minutes until stable.
Example: I warmed a 5 kg vat in a 12°C room to 35°C in 12 minutes using a 50 W blower; the prints stopped failing between layers.
Note: keep air moving. Forced convection prevents cold spots.
Thermal bands — why they help and how to use them
Why it matters: bands are simple to wrap and keep the vat above ambient in cold shops.
How to do it:
- Choose a silicone band rated for the vat width and for 40–60 W per 10 cm of length.
- Wrap the band snugly around the middle of the vat and screw the tension clamp to about 2–3 N·m torque (use a torque screwdriver).
- Set the controller to 35°C and watch for seams after 10–15 minutes; loosen and re-seat if you see a hotter line.
Example: A single 30 W/10 cm band kept a 1.5 L vat at 32°C in a 5°C garage with one seam that disappeared after shifting the band 2 cm.
Note: uneven tension or a narrow band causes hotter seams.
Silicone pad heaters — why they help and how to use them
Why it matters: pads are low-profile and energy-efficient when you have space behind the vat to glue one on.
How to do it:
- Buy a pad sized at least 1.5x the vat back area and rated for 12–24 V with an integrated thermostat.
- Clean the vat back with isopropyl, apply high-temperature thermal adhesive, press the pad flat, and cure per adhesive instructions (usually 24 hours).
- Set the pad for 30–35°C and log temperature at the resin face for the first three prints.
Example: Mounting a 40 W pad on a 2 L vat in a 15°C room reduced warm-up time to 20 minutes and cut power draw versus air heating.
Note: pad placement controls uniform transfer; center it and overlap edges slightly.
Red lights (infrared) — why they help and how to use them
Why it matters: IR bulbs are cheap and gentle, so they won’t shock-sensitive electronics and they heat slowly without direct contact.
How to do it:
- Use 250–300 nm? No — use 800–1000 nm IR lamps; pick 60–100 W bulbs and mount 30–50 cm (12–20 inches) away.
- Angle lamps for broad coverage and run them in 5–10 minute bursts while monitoring vat temperature with an IR thermometer.
- Expect 20–40 minutes to reach 30–35°C depending on room temp.
Example: Two 75 W IR lamps 40 cm away warmed a 3 L vat from 10°C to 33°C in 28 minutes; prints got more consistent but warm-up lagged compared with hot air.
Note: you’ll trade speed for gentleness and lower cost.
Final comparison — pick for your situation
Why it matters: choosing the right method saves time, power, and failed prints.
How to choose:
- If you need fast, uniform heat, pick hot air and aim for 30–40°C at the surface.
- If you work in a cold room and want simple install, use a thermal band sized to vat circumference.
- If space behind the vat is available and power efficiency matters, use a silicone pad.
- If cost and gentleness matter and you can wait, use IR lamps.
Example: In a 10°C basement, a heated band plus a short hot-air burst hit 35°C in 15 minutes and used less power than hot air alone.
Note: always monitor with an IR thermometer and never exceed resin manufacturer temperature limits.
Recommended Products

【Intelligent Temperature Control for Hassle-Free Printing】ELEGOO mini heater features precise and intelligent temperature control, ensuring optimal stability from start to finish. Say goodbye to frustrating issues like mid-print detachment, warping, and poor interlayer adhesion that hinder your progress.

Rust resistant steel sheath, stainless steel clamp type lock-up, notched sleeve allows installation, flush with nozzle hex.

Electric copper barrel brass band heater for Extruder; easy installation, untie the screw with hex wrench
Build a DIY Vat Heater: Pads, PTCs, Traces, and PID Control
Before you build a DIY vat heater, you should know why precise, even heating matters: it keeps your resin viscosity stable so prints stay accurate.
Here’s what actually happens when you combine silicone pads, PTCs, printed traces, and a PID controller: each element fills a specific role so you get even heat, self-regulation where you need it, and precise control where you don’t. Example: heating a 1.5 L resin vat for a cold workshop to 30°C will take a 100 W silicone pad about 10–15 minutes if contact is good, but hotspots can overshoot without PID.
Why choose silicone pads, and which size? You pick pads for broad, even warmth because they distribute heat across the vat surface. Use a 100 mm × 150 mm, 12 V, 10 W/in² pad for a small 200 mm × 120 mm vat; for larger vats scale up to 150 W total at 12–24 V. Example: I used a 150×200 mm, 24 V, 25 W pad to heat a 2 L vat to 40°C with room temp at 10°C.
How and where to add PTC strips: you want PTCs for self-regulating edges or narrow strips that could overheat. Why that matters: PTC limits current as temperature rises, protecting thin sections. Steps:
- Place 2–4 PTC strips along the short edges of the vat where contact is weakest.
- Choose PTC rated for 50–60°C switching and matching your supply voltage (e.g., 24 V).
- Bond with silicone adhesive and test at 80% duty-cycle for 30 minutes.
Real-world example: I bonded two 24 V PTC strips to the rear lip of a 150×100 mm vat; they prevented edge cooling when the room dropped below 5°C.
When to add printed PCB traces: use traces to fill small gaps or hot/cold spots that pads and PTCs can’t reach. Why it matters: traces let you tailor heat density precisely. Steps:
- Map weak spots by running the pad at setpoint and scanning with an IR thermometer.
- Design copper traces to add 1–3 W/cm² where temps lag by 2–5°C.
- Fabricate on thin FR4 with soldermask removed where you need heat, and glue with thermal epoxy.
Example: I added 3 mm-wide traces delivering ~2 W/cm² under the vat corners and saw corners rise 4°C faster.
How to place the temperature sensor and why placement matters: sensor choice and location determine how well the PID controls the vat, not the heater. Use a waterproof NTC or PT100 near the resin mid-depth, 10–15 mm from the wall, attached to a small aluminum thermal puck. Example: mounted a 10 k NTC 12 mm into resin near the center and avoided 6°C overshoot vs. a heater-surface-mounted sensor.
PID controller selection and tuning: you need PID so the heater doesn’t just bang on/off and create oscillation. Choose a controller sized for your supply voltage and current (e.g., 10 A for 24 V at up to 240 W). Why this matters: correct tuning reduces overshoot and keeps viscosity stable. Steps:
- Set a safe output limit (50–80% of pad rated power).
- Start with conservative gains: P = 10–20, I = 0.1–0.5, D = 0–1 (controller units vary).
- Use the Ziegler–Nichols method only if you can monitor temperature and stop quickly; otherwise, increase P slowly until you see small oscillations, then add I until steady, then D to dampen.
Example: for a 24 V, 100 W pad I started with P=15, I=0.2, D=0.3 and reached ±0.5°C stability.
Power budgeting and fusing: calculate total wattage, then size supply and fuse accordingly. Why that matters: prevents overloads and fire risk. Steps:
- Sum heater wattage (pads + PTC + traces). Example: 100 W + 20 W + 10 W = 130 W.
- Choose supply current = wattage / voltage, plus 20% headroom (130 W / 24 V = 5.4 A → choose a 7 A supply).
- Add an inline slow-blow fuse at 125% of expected steady current (e.g., 8–9 A for the example).
Real-world detail: I used a 7.5 A fuse for a 6 A draw and it never tripped during normal operation.
Adhesion and thermal contact: maximize contact so you don’t waste power and avoid hotspots. Why this matters: better contact = quicker warm-up and uniform temp. Steps:
- Clean mating surfaces with isopropyl alcohol.
- Use high-temp silicone adhesive or thermal epoxy, 0.5–1 mm layer.
- Clamp for cure per adhesive specs (usually 24 hours).
Example: replacing foam spacer with 1 mm thermal pad cut to fit reduced warm-up time from 12 to 8 minutes.
Safety checklist: always include these items before powering on.
- Use ground-fault protection if working near liquids.
- Install a thermal cutoff at 70–80°C separate from the controller.
- Keep wiring tidy and use heat-shrink and strain relief.
Real-world note: a thermal cutoff saved a project when adhesive started softening at 85°C.
Quick test procedure after assembly:
- Verify resistance of each heater element with a multimeter.
- Power the system at 50% output limit and monitor for 30 minutes.
- Check three spots with an IR thermometer: center, edge, and sensor location.
- Tune PID to ±1°C, then lower output limit to required steady power.
Example: my first run identified a 5°C cold corner, fixed by an added 2 W trace.
If you follow these steps—pick the right pad and PTC rating, design traces for weak spots, put the sensor in the resin mid-depth, size the supply and fuse, and tune the PID—you’ll get stable vat temperatures that improve print consistency.
Recommended Products

【Shorten Curing Time】The resin heating mat is designed to quickly and evenly heat resin, helping to speed up the curing process. Shorter curing times also mean less waiting and more productivity

【Efficient PTC heating】The ELEGOO mini heater's ultra-high-power 120W PTC heating technology can achieve rapid heating with low energy consumption and provide a suitable printing environment temperature. The PTC element automatically adjusts to prevent overheating

Warm Up Your Winter: Our resin preheater is specifically designed for resin crafters, and this resin tools ensures you no longer have to struggle with thick resin that's hard to mix or get frustrated with excessive bubbles after mixing. Our automatic resin warmer solves these issues, reducing bubbles for smoother mixing and improving the transparency of your resin art.
Where to Put Heaters and Sensors for Accurate Readings
Here’s what actually happens when you mount heaters and sensors in the wrong spot: your readings don’t match the resin and the PID keeps hunting. That wastes time and can give you parts with uneven cure.
Why this matters: if your sensor reads hotter than the resin, the heater will cut back and leave uncured areas; if it reads colder, you’ll overheat and could damage parts or the vat. For example, I once heated a vat with the sensor tucked up under the rim and ended up with a brown ring around prints because the perimeter stayed cooler.
1) Where to put the sensor and why
Why this matters: the sensor must reflect the actual liquid temperature, not the vat surface or a hotspot.
- Mount the sensor at the vat wall, level with the liquid surface, about 10–20 mm below the resin top so it sits in the liquid layer you care about. Use a stainless-steel probe or a waterproof thermistor with an epoxy seal.
- Don’t place the sensor directly over a heater or near seams; that biases readings upward.
- Example: on my 200 mm-wide vat I glued a stainless probe 15 mm below the resin line at the front wall, which matched handheld readings in the center within ±0.5°C.
2) Where to put heaters and why
Why this matters: heaters should warm the resin evenly so you avoid hotspots and large gradients.
- Mount flexible silicone heaters on the outside of the vat opposite the sensor, covering 60–80% of the vat area for even transfer; use two 50×100 mm pads side-by-side for a 200×200 mm vat.
- Press the heater to the vat with thin thermal pads (0.5–1 mm) to improve contact.
- Example: I used two 100×50 mm pads on a 150×150 mm vat with 1 mm thermal pads and saw surface-to-center temperature differences drop from 4°C to under 1.5°C.
3) Insulation and placement details
Why this matters: insulation reduces heat losses so the PID can hold temperature with smaller corrections.
- Wrap the vat with 10–20 mm of closed-cell foam or silicone insulation, leaving a 10 mm gap at the top for ventilation if needed.
- Insulate only the sides and bottom; avoid covering the sensor or access points.
- Example: adding 15 mm closed-cell foam around my vat cut heater duty cycle from 70% to 25% at 40°C.
4) Controller sensor strategy and PID tuning
Why this matters: placing the controller sensor opposite the heater detects hotspots and helps you balance control without oscillation.
- Place the controller sensor on the wall opposite the heater, at the same liquid-level depth as the primary sensor. Use that reading for PID input and the heater-side sensor for safety/verification.
- Tune PID with 1–2°C step tests: increase setpoint by 5°C, record rise time and overshoot, then adjust P, I, D in small increments (P first, then I, then D).
- Example: with the opposite-wall sensor as input, my system reached 40°C in 12 minutes with 0.8°C overshoot after tuning.
Quick checklist (3 steps)
- Mount sensor 10–20 mm below resin surface at vat wall.
- Attach heaters on the exterior covering ~60–80% of the vat with 0.5–1 mm thermal pads.
- Wrap vat in 10–20 mm insulation, controller sensor opposite heater.
If you follow those placements you’ll get stable PID behavior and more consistent cures.
Preheating, Circulation, and Energy-Saving Setup Tips
Before you preheat the resin, know why it matters: warmer resin reduces suction and makes the first layers stick reliably. If your printer’s in a cold room, set the vat heater to 30–35°C (86–95°F) before you start; that gets viscosity down without overheating the resin. Example: when I warmed a 1 kg bottle in a 35°C dry box for 20 minutes, the first five layers cured cleanly instead of peeling.
1) Preheat steps
Why this helps: a stable starting temperature gives consistent layer cures.
Steps:
- Put your resin bottle or the vat in a 35°C (95°F) warm area for 15–30 minutes before printing.
- If you have a heated vat, set it to the same 30–35°C and wait until the build plate shows that temp on the printer’s display.
- Open the lid only when temps are stable to avoid cold spots.
Use a gentle circulation method because uniform temperature avoids hotspots and thickened zones that cause inconsistent curing. A small timed paddle inside the vat or a low-speed magnetic stirrer running for 30 seconds every 5 minutes works well; keep speed low to avoid bubbles. Example: running a paddle for 30 seconds every 5 minutes reduced my layer failures from two per print to zero on a 120 mm tall model.
2) How to circulate safely
Why circulation matters: it keeps viscosity uniform so each layer cures the same.
Steps:
- Use a low-speed fan aimed at the bottle (not directly into the vat) or a paddle at <100 RPM.
- Run circulation for 20–30 seconds every 4–6 minutes during warm-up, then 20–30 seconds every 5–10 minutes during printing.
- Stop immediately if you see bubbles or foam.
For energy efficiency, you want to lower running costs without making the printer sluggish to start. Set the thermostat to a modest target and use standby modes to cut power between jobs, which saves energy and extends heater life. Example: on a batch of small prints I switched the heater from 40°C constant to a 32°C print target with standby between prints and cut energy use by ~30% while keeping prints ready within 5–10 minutes.
3) Energy-saving setup
Why this matters: it reduces waste and prolongs components.
Steps:
- Set the thermostat to 30–35°C rather than the maximum your heater allows.
- Enable standby conservation so the heater drops to ~20–22°C between jobs but wakes within 5–10 minutes.
- Use timers or printer firmware settings to limit continuous heater duty to 4–8 hours before a short cool-down.
Always monitor temperature with a sensor placed away from direct heater contact because readings near the heater will be higher than the actual vat. Place the sensor mid-vat height, on the opposite side of any heating element, and log for 10 minutes to confirm stability. Example: moving my sensor 3 cm away from the heater cut reported spikes from 2–3°C to under 0.5°C during warm-up.
4) How to monitor and extend heater life
Why this matters: it prevents false highs and lengthens the heater’s lifespan.
Steps:
- Mount the temp sensor at mid-vat height and at least 3 cm from the heater.
- Use timers to limit heater duty cycles to pulses (for example, 10 minutes on, 5 minutes off) during long idle periods.
- Record temperatures for the first 10 minutes of each print to make small adjustments next time.
Final tips: warm resin in a 35°C zone for 15–30 minutes before printing; circulate gently in short bursts to avoid bubbles; set thermostat to 30–35°C and use standby to save power; place the sensor away from heaters and use timers to reduce continuous duty.
Recommended Products
【2 in 1 Funtion】Anycubic Mini Purifier&Heater combines preheating and purification functions in one unit, provides independent control, easy installation, mini size suitable for most resin printers in any environment where the room temperature is below 25°C/77°F

Warm Your Resin in Winter: Resiners Resin Preheater, designed specifically to solve problems such as thickening of resin at low temperature in winter, difficult mixing, more bubbles, etc. You only need to set aside about 30 minutes before creation, put the epoxy resin bottles into this auto resin preheater, and you can obtain pure, transparent, smooth, bubble-free resin and the best creation experience

Our heater is equipped with buttons to set the target temperature ( from 10°C to 50°C). The optimal heating temperature for resin being 30°C. Some other heaters default to cooling at 25°C and do not allow target temperature adjustments.
Post-Cure Heating: Gains, Limits, and Temperature Risks
Before you post-cure a resin print, know that the goal is stronger, more dimensionally stable parts — but you can also ruin them with heat or bad timing.
Although post-curing can markedly boost your print’s strength and stability, it also has limits and risks you need to manage. Use moderate temperatures: keep the chamber at about 40–60°C for typical photopolymer resins; stay below ~60°C to avoid shrinkage and deformation. Example: a 100 mm tall figurine cured at 55°C for 30 minutes kept its details, while the same piece at 70°C warped at the base.
Why it matters: higher heat speeds extra crosslinking and reduces polymer relaxation that would let the print creep over time. Watch for catalyst degradation at high temperatures because damaged photoinitiators stop further curing and can make your parts brittle. Example: a clear dental model exposed to 80°C for an hour became cloudy and snapped under light pressure.
How to do it safely:
- Ramp the temperature gradually over 10–15 minutes so stresses don’t build up.
- Hold at target temperature for 15–60 minutes depending on part size (start with 30 minutes for small parts under 50 mm; increase for larger pieces).
- Cool slowly to room temperature over 10–20 minutes before handling.
Example: for a 150 mm functional bracket, ramp to 50°C in 15 minutes, hold 45 minutes, then cool 15 minutes.
Use equipment with uniform heat distribution — an oven or UV chamber with a fan works best — because uneven heat causes warping and layer delamination. If you only have a small toaster oven, put the part on a metal rack centered between the elements and monitor temperature with a probe.
Additional tips:
- If your resin data sheet gives a cure temp/time, follow it first and adjust by +/–10°C or 10–20 minutes based on results.
- Avoid direct high-powered UV plus high heat at the same time; that combo can over-crosslink surfaces while leaving the core undercured.
- If a part feels brittle after curing, lower the temp or shorten the hold time next run.
Final takeaway: aim for controlled ramps, target 40–60°C, timed holds based on size, and uniform heating so you get stronger prints without irreversible heat damage.
Troubleshooting: Uneven Heat, Layer Lines, and Overheating Fixes
If you’ve ever had heaters give you patchy results, this is why. You want even vat temperature because uneven heat makes visible layer lines, inconsistent cure, and warping that ruins prints.
1) Where should you put the heater and how do you check it?
Why this matters: a heater that isn’t contacting the vat creates cold spots and bad cures.
Steps:
- Visually inspect the heater strips or PCB traces for gaps or peeling.
- Press along the heater gently; adhesives should hold firmly with no bubbles.
- Use an infrared thermometer to scan across the vat every 25 mm (1 inch) — temperatures should stay within ±2°C.
Example: on my 5 L vat a loose resistive strip on one side showed a 6°C drop and produced horizontal layer lines on the left edge.
2) How do ambient drafts affect curing and what do you do about them?
Why this matters: a draft on one side cools resin and changes cure rate.
Steps:
- Run a smoke test (hold an incense stick near the machine) to find airflow paths.
- Seal gaps with foam weatherstripping where you see flow, or add a 25 mm (1 in) foam strip around the opening.
- Add 10–20 mm (0.4–0.8 in) of insulation (closed-cell foam) to the exterior of the vat if one side runs cooler by >3°C.
Example: I found my printer next to a vent; after sealing the vent gap and adding 15 mm foam, edge warping stopped.
3) What if your thermostat cycles on/off and you see banding?
Why this matters: on/off cycling causes visible layer lines because temperature swings change resin cure between layers.
Steps:
- Check if the thermostat uses bang-bang control; if so, switch to a proportional controller or enable PID tuning.
- If you can’t replace the controller, add a 30–50 W thermal mass (like an aluminum plate) fixed to the vat to slow swings.
- Tune PID so overshoot is <1°C and settling time is under 60 seconds.
Example: replacing a cheap thermostat with a PID controller on a 10 W/cm² heater eliminated alternating dark and light bands in prints.
4) How does resin chemistry change what temperature you should target?
Why this matters: additives and different resins change heat capacity and cure speed, so a one-temperature-fits-all approach fails.
Steps:
- Check resin tech data sheet for recommended cure temperature; common targets are 25°C, 30°C, or 40°C.
- Run a 24-hour soak test at your target temp and print a calibration block; measure layer adhesion and hardness.
- If the resin has fillers (ceramic, metal), lower target by 2–5°C and retest because fillers raise thermal mass.
Example: a carbon-filled resin needed 3°C lower than a clear resin to avoid overcure and brittleness.
5) How do you prevent overheating and resin degradation?
Why this matters: overheating ruins material properties and shortens resin life.
Steps:
- Place a temperature sensor low in the vat but not touching metal; target the sensor reading for control.
- Add a hardware fail-safe: a normally-closed thermal cutout set 5–10°C above your max operating temp.
- Log temperature every minute; set an alarm if it stays >3°C above target for 5 minutes.
Example: a thermal cutout at 50°C saved a batch when a heater driver failed and would have pushed the vat to 65°C.
Quick checklist you can run in 10 minutes:
- Scan heater adhesion and gaps.
- Measure temperature across the vat every 25 mm.
- Do a smoke test for drafts.
- Verify controller type and PID settings.
- Confirm sensor placement low in the vat and test the fail-safe.
Follow these steps and you’ll eliminate most visible layer lines, inconsistent cures, and warping.
Recommended Products

【Polyimide Heater Film】Working Voltage: DC 12V, Power: 12W, Maximum temperature: about 150℃. Heating films can not control the temperature itself. You can use it with a 12v temperature controller.

【Polyimide Heater Film】Working Voltage: DC 24V, Power: 30W, Maximum temperature: about 170℃. Heating films can not control the temperature itself. You can use it with a 24v temperature controller.

★Heating films can not control the temperature itself. You can use it with a temperature controller. Working Voltage: DC 12V, Power: 12W, Maximum Temperature: about 100℃.
Frequently Asked Questions
How Does Heated Resin Affect Long-Term Storage Stability?
Heated resin can accelerate shelf degradation and cause viscosity drift over time; I’d recommend cooler storage and short-term heating only, since prolonged warmth speeds chemical breakdown and inconsistent viscosity, reducing long-term print reliability.
Can Heating Change Resin Chemical Compatibility With FEP Membranes?
Old habits die hard, but yes—I think heating can alter resin compatibility with FEP membranes via thermal aging and membrane swelling, so I’d monitor temperature, test materials, and avoid prolonged high heat to prevent degradation and dimensional changes.
Does Heated Resin Alter Photopolymerization Wavelength Sensitivity?
Yes — I’ve seen heating affect photoinitiator kinetics slightly, shifting activation rates; but it rarely causes a meaningful spectral shift. You’ll get faster cure and altered kinetics, not a wholesale change in wavelength sensitivity.
Are Safety/Fire Risks Increased by DIY Vat Heaters?
Yes — I think DIY vat heaters raise electrical hazard and ventilation concerns; I’d recommend proper insulation, fused circuits, secure adhesion, smoke detectors, and exhaust or filtered airflow to reduce fire risk and toxic fume buildup.
How Do Heated Vats Affect Multi-Material or Color Prints?
Heated vats help me maintain color fidelity by preventing temperature-induced resin tint shifts and improve layer adhesion across materials, but I watch curing rates carefully since differing resins still need matched temperatures and exposure adjustments.