As an Amazon Associate, we earn from qualifying purchases. Some links on this site are affiliate links at no extra cost to you. Our recommendations are based on thorough research and editorial judgment.
10 Best Bambu Lab A1 Mini Finds That Upgrade Your Desktop Setup
You’re in the middle of a late-night print, watching the bed wobble and listening to a rattling frame while the part’s first layer refuses to stick — and you can’t afford to waste another spool. Or you’ve had a print warp mid-run because the room dropped 10°C, leaving a curled corner and a pile of failed hours.
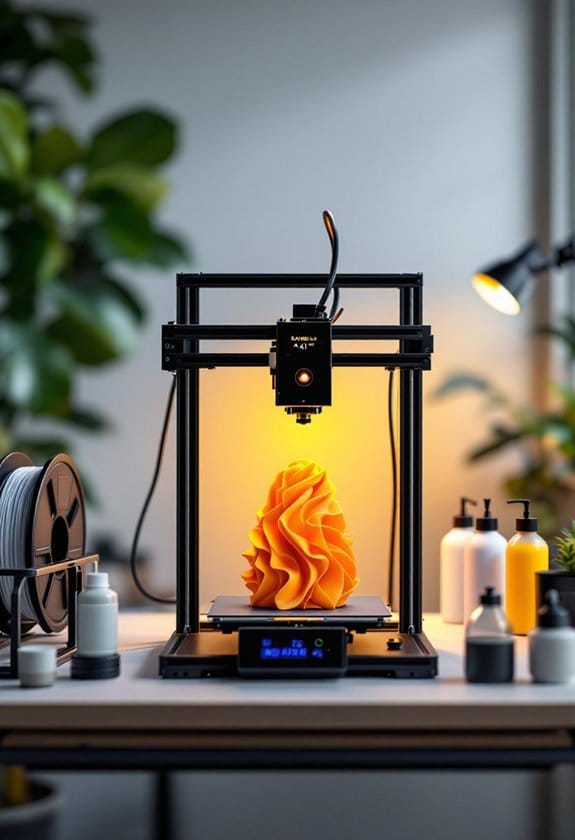
What separates a reliable desktop 3D printer from one that fights you are practical details: stable chamber temperatures and low electronics heat, consistent bed adhesion and lighting for monitoring, and vibration control to stop ghosting. Buyers often underinvest in enclosures, lighting, and proper build surfaces.
This article gives you ten compact upgrades chosen for real-world impact: picks focused on thermal stability, adhesion, durability, and monitoring. Read on and you’ll know which specific mods to buy and why they improve prints on an A1 Mini.
Key Takeaways
If you’re fighting warped corners and brittle prints, add a sealed enclosure with temperature and humidity monitoring so your parts stay flat and strong by keeping moisture out and temps steady; keep internal temps under about 40°C so the A1 Mini’s electronics stay safe. Short and simple.
For anyone who prints late at night or in a shared workspace, install vibration-damping feet and tighten loose panels to cut noise by roughly 20 dB and to stop layer shifts and annoying rattles, which makes your prints cleaner and your room calmer. It really helps.
What makes this lighting tweak stand out for monitoring prints is a 24V 6500K LED bar or a large-window light setup that spots layer issues clearly so you don’t have to open the enclosure and risk warping. Easy visibility.
You get dryer, more reliable filament without constant guesswork when you use vacuum-sealed storage with desiccant and make a habit of using opened spools within three months to avoid moisture defects like bubbles and poor layer adhesion. Short reminder.
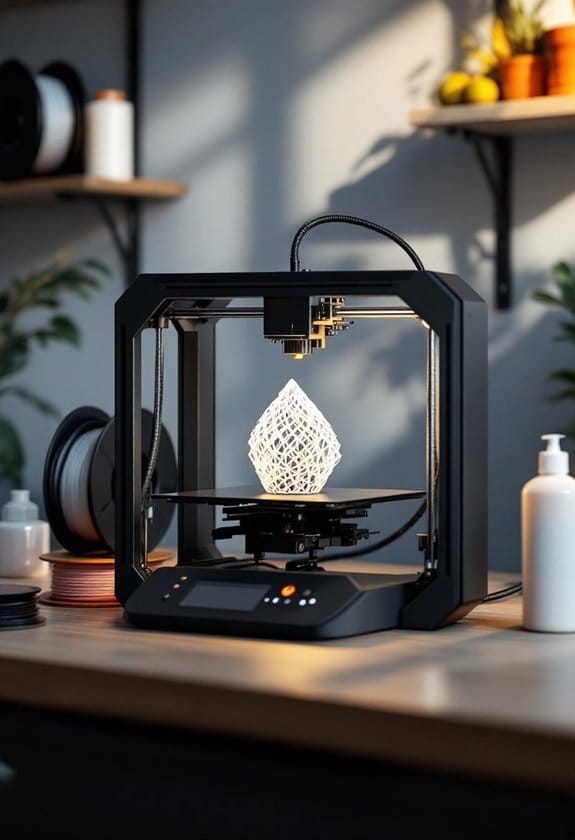
The A1 Mini solves first-layer frustration by upgrading to a textured spring-steel build plate (CryoGrip-style), which uses recommended bed temps to give stronger adhesion and makes part removal painless. You’ll save time and headaches.
| 3D Printer Enclosure for Bambu Lab A1 Mini |  | Temperature Stabilizer | Compatibility Target: Specifically for Bambu Lab A1 Mini | Primary Purpose: Enclosure / temperature & noise control | Material / Construction Type: Fiberglass tube + Oxford cloth (fabric + frame) | VIEW LATEST PRICE | Read Our Analysis |
| 3D Printer LED Light Strip Kit for Bambu Lab A1 Mini |  | Brightness Booster | Compatibility Target: Bambu Lab A1 Mini only | Primary Purpose: LED illumination for print area | Material / Construction Type: Electronic LED light bar (metal/plastic components) | VIEW LATEST PRICE | Read Our Analysis |
| BIGTREETECH Panda Knomi Screen Upgrade Kit for Bambu-Lab | Display Upgrade | Compatibility Target: Designed for Bambu-Lab A1 and A1 Mini toolheads | Primary Purpose: Toolhead display / status UI upgrade | Material / Construction Type: Display electronics + plastic matte shell | VIEW LATEST PRICE | Read Our Analysis | |
| Bambu Lab A1 Mini Heatbed Nozzle Brush Kit | 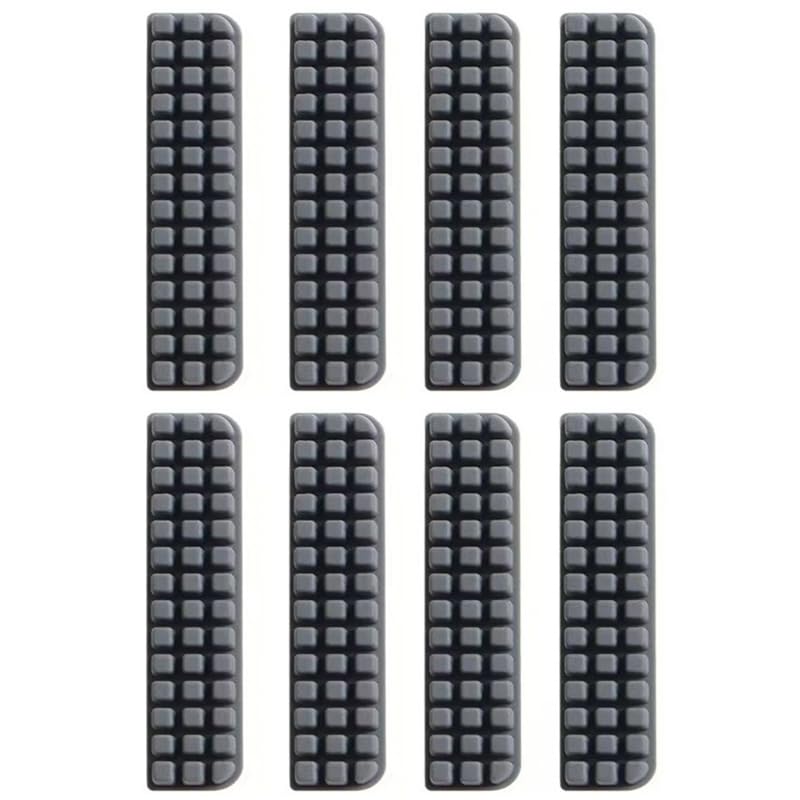 | Maintenance Essential | Compatibility Target: Bambu Lab A1 Mini only | Primary Purpose: Nozzle/heatbed wiper (cleaning) | Material / Construction Type: Premium silicone | VIEW LATEST PRICE | Read Our Analysis |
| Creality 2kg PLA 1.75mm Filament Bundle (Black/White) |  | Filament Bundle | Compatibility Target: Compatible with most FDM/FFF printers (works with A1 Mini) | Primary Purpose: 3D printing filament supply (PLA) | Material / Construction Type: PLA polymer filament (plastic) | VIEW LATEST PRICE | Read Our Analysis |
| BIQU CryoGrip Pro Glacier Panda Build Plate for Bambu-Lab A1 Mini | 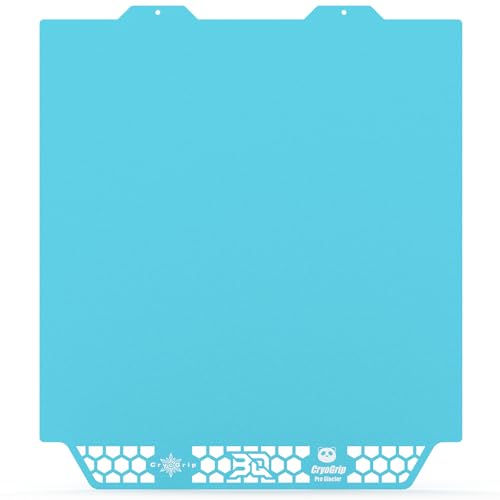 | Superior Adhesion | Compatibility Target: Bambu-Lab A1 Mini specific | Primary Purpose: Build plate (spring steel textured) | Material / Construction Type: 7-layer textured spring steel sheet (polymer coating) | VIEW LATEST PRICE | Read Our Analysis |
| Bambu Lab Glue Stick Adhesion for 3D Printer Build Plate | 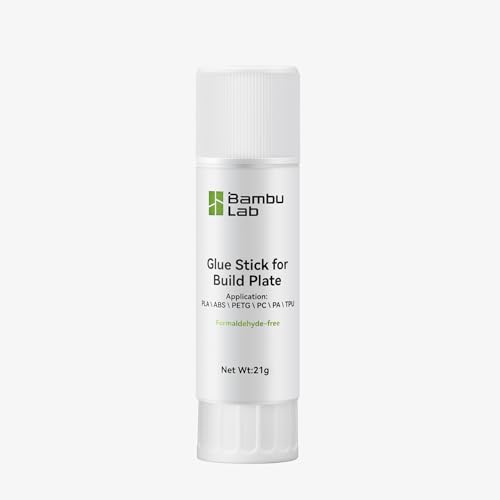 | Reliable Adhesive | Compatibility Target: Compatible with A1, Mini, P1, X1 (includes A1 Mini) | Primary Purpose: Build plate adhesion aid (glue stick) | Material / Construction Type: Glue stick formulation (adhesive compound) | VIEW LATEST PRICE | Read Our Analysis |
| Bamboo Lab A1 Mini Extruder Unit Replacement Assembly | 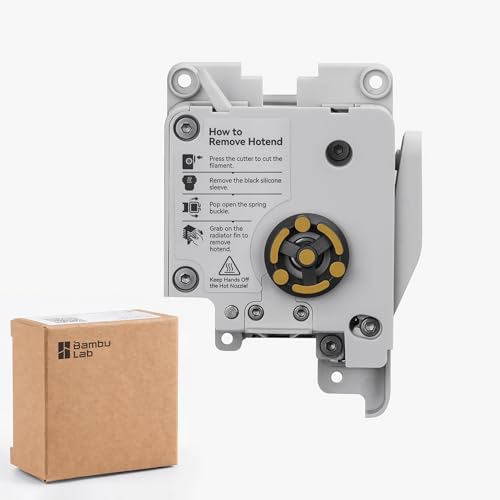 | Extrusion Powerhouse | Compatibility Target: ENOMAKER extruder for Bambu Lab A1 and A1 Mini | Primary Purpose: Extruder assembly / filament drive | Material / Construction Type: Hardened steel dual-gear + motor assembly (metal/plastic) | VIEW LATEST PRICE | Read Our Analysis |
| Dynta 1.75mm PLA Filament 250g Spool (Multicolor) | 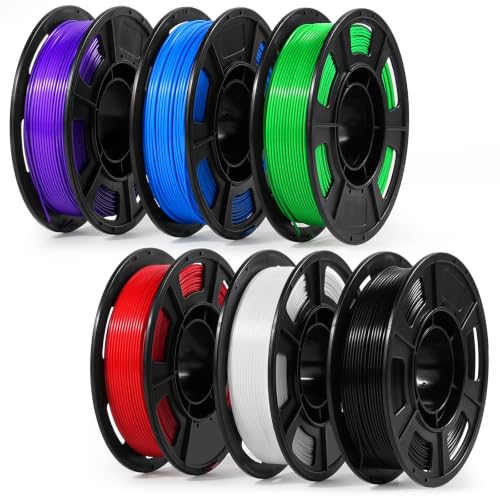 | Color Variety Pack | Compatibility Target: Fits Bambu Lab A1 Mini (spool diameter 53 mm) | Primary Purpose: 3D printing filament supply (PLA, multicolor) | Material / Construction Type: PLA polymer filament (plastic) | VIEW LATEST PRICE | Read Our Analysis |
| Chitu PlateCycler C1M Build Plate Changer for Bambu Lab |  | Automated Workflow | Compatibility Target: PlateCycler C1M for Bambu Lab A1 Mini | Primary Purpose: Automatic build-plate changer | Material / Construction Type: Plastic mechanical unit + textured PEI plates | VIEW LATEST PRICE | Read Our Analysis |
More Details on Our Top Picks
3D Printer Enclosure for Bambu Lab A1 Mini
If you want steadier prints and fewer failed parts, the enclosure creates a controlled build environment that reduces warping and improves layer adhesion. It keeps temperature and humidity steady so cooled plastic doesn’t pull apart, and long-term tests show the interior stays below 40°C, which protects the motherboard. Works well.
For anyone who runs prints near quiet spaces, the enclosure cuts noise from about 60 dB to 40 dB and limits vibration so your fine details stay sharp. It also keeps dust off your prints and contains fumes and particles for cleaner air around your workspace. You’ll notice the difference.
What makes this enclosure stand out for ease-of-use is the large window with LED lighting that helps you watch prints without opening the door. Setup takes about five minutes, so you can get back to printing fast. It fits the A1 Mini.
- Compatibility Target:Specifically for Bambu Lab A1 Mini
- Primary Purpose:Enclosure / temperature & noise control
- Material / Construction Type:Fiberglass tube + Oxford cloth (fabric + frame)
- Installation / Setup:Easy 5-minute installation; quick disassembly
- Heat / Temperature Tolerance or Guidance:Keeps internal temp under 40°C (protects electronics)
- Manufacturer / Brand:TopCube
- Additional Feature:Noise reduction (60→40 dB)
- Additional Feature:Large transparent window
- Additional Feature:Integrated LED strip
3D Printer LED Light Strip Kit for Bambu Lab A1 Mini
If you want clearer visibility on every print so you can spot layer shifts and stringing early, the 6500K LED light gives bright, daylight-style illumination that makes defects easier to see. It’s a 190 mm light bar that sticks under the X-axis with peel-and-stick mounting, and you’ll plug it into your printer’s 24V supply for power. Small and light.
For anyone who worries about yellowing or dimming from heat, this kit resists heat-related discoloration so your brightness stays consistent during high-temperature prints. Clean any grease off the carriage before you stick it down so the adhesive grabs properly. It fits only the A1 Mini, not the A1, and weighs under an ounce.
- Compatibility Target:Bambu Lab A1 Mini only
- Primary Purpose:LED illumination for print area
- Material / Construction Type:Electronic LED light bar (metal/plastic components)
- Installation / Setup:Peel-and-stick mounting; connect to printer (simple)
- Heat / Temperature Tolerance or Guidance:6500K color temp; 24V; high temp resistance (resists yellowing)
- Manufacturer / Brand:UniTak3D
- Additional Feature:6500K daylight color
- Additional Feature:Peel-and-stick mount
- Additional Feature:High temp resistant
BIGTREETECH Panda Knomi Screen Upgrade Kit for Bambu-Lab
If you want quick visual status without fiddling with your printer, this tiny screen drops into the Bambu-Lab A1 or A1 Mini toolhead and gives you live feedback. It shows network status, animations, and percent progress so you can see prints at a glance, and you configure it from your phone via a web UI. Small and simple.
For anyone who likes customizing hardware, the kit includes the Panda Knomi display, a matte shell that resists fingerprints, and three open-source STL shells you can 3D print if you want different looks. You can swap shells to match your setup or style. It’s flexible.
What makes this screen stand out for makers is support for OTA firmware updates and its open-source friendliness, which keeps tweaks and improvements easy for tinkers. Power needs can be a snag if you keep the AMS installed, since you may need the Panda Branch board to supply juice. Plan for that.
- Compatibility Target:Designed for Bambu-Lab A1 and A1 Mini toolheads
- Primary Purpose:Toolhead display / status UI upgrade
- Material / Construction Type:Display electronics + plastic matte shell
- Installation / Setup:Drop-in display; instruction guide; may need mounting shell or Panda Branch
- Heat / Temperature Tolerance or Guidance:Display electronics tolerant of printer environment (no direct heating spec)
- Manufacturer / Brand:BIGTREETECH (BTT) Direct
- Additional Feature:Custom GIF animations
- Additional Feature:Web-based UI config
- Additional Feature:OTA firmware updates
Bambu Lab A1 Mini Heatbed Nozzle Brush Kit
If you want a quick way to keep your A1 Mini’s nozzle clean between prints, the kit gives you exactly that and fits the bed perfectly. You get eight heat-resistant silicone wipers that resist wear and scrub off fresh residue before it hardens, and they’re non-scratch so your build plate stays intact. They’re reusable after a rinse.
For anyone who prints small, frequent jobs and hates scraping stuck-on filament, the thin adhesive-backed pieces peel and stick right where you need them, so the nozzle can wipe its tip without dragging across the whole bed. Installation is simple and fast.
What makes this cleaning accessory stand out is that it’s tailored to the A1 Mini’s layout, so you don’t get misaligned wipes that cause missed cleanings or extra maintenance. Use it with the A1 Mini only.
You get reliable nozzle wiping without worrying about abrasive materials damaging your surface, and the silicone tolerates the heat from typical printing cycles. It won’t work with A1, X1, or P-series models, so buy this only if you own an A1 Mini.
- Compatibility Target:Bambu Lab A1 Mini only
- Primary Purpose:Nozzle/heatbed wiper (cleaning)
- Material / Construction Type:Premium silicone
- Installation / Setup:Peel-off backing and apply to build plate
- Heat / Temperature Tolerance or Guidance:Heat-resistant silicone
- Manufacturer / Brand:3DMkspaceu
- Additional Feature:Peel-on installation
- Additional Feature:Reusable silicone brushes
- Additional Feature:Non-scratch heat-resistant
Creality 2kg PLA 1.75mm Filament Bundle (Black/White)
If you want reliable prints without fiddling with settings, the two 1 kg spools in this Creality PLA bundle give you steady material for daily use and fewer mid-print surprises. For anyone who needs both black and white filament on hand for prototypes or display pieces, each spool is 1.75 mm with ±0.02 mm tolerance so your printer feeds smoothly and you see fewer tangles. What makes this filament stand out for casual makers is PLA’s low-temperature printing and good layer bonding, which works well if you use a small printer like the A1 Mini. You get plant-based polyester that warps less than some materials. The Creality no-tangle spool helps you swap colors fast during a session, and the supplier says the material runs tougher for functional parts. Perfect for hobbyists who don’t want frequent jams, this fits most FDM/FFF printers with heated beds.
- Compatibility Target:Compatible with most FDM/FFF printers (works with A1 Mini)
- Primary Purpose:3D printing filament supply (PLA)
- Material / Construction Type:PLA polymer filament (plastic)
- Installation / Setup:Use as standard filament spool (load into printer)
- Heat / Temperature Tolerance or Guidance:PLA printing temps recommended per filament (general PLA temps implied)
- Manufacturer / Brand:Creality
- Additional Feature:Two 1kg spools
- Additional Feature:±0.02 mm accuracy
- Additional Feature:Renewable plant-based PLA
BIQU CryoGrip Pro Glacier Panda Build Plate for Bambu-Lab A1 Mini
If you struggle with parts sticking too little or too much on your A1 Mini, the BIQU CryoGrip Pro Glacier Panda’s seven-layer polymer construction improves first-layer adhesion for PLA and PETG while letting you remove parts without scraping. It’s a 184 x 184 mm double-sided spring steel sheet made specifically for the Bambu-Lab A1 Mini, and it handles nozzle temperatures up to 300°C. Quick removal is simple.
For anyone who wants a surface that lasts through many prints, the self-recovering coating comes back to life after cleaning with soap or alcohol, so you can keep your bed working well longer. You’ll still want to follow the recommended bed temps: PLA 45–55°C and PETG 60–75°C to get the best results. This sheet is flexible enough to pop parts off by bending.
What makes this build plate stand out for hobbyists and small shops is that it replaces standard PEI feel with better initial grip for common filaments, helping you get cleaner first layers and fewer failed prints. You get firmer adhesion without having to change your nozzle or dial in exotic settings. It’s great if you print lots of parts and hate scraping.
- Compatibility Target:Bambu-Lab A1 Mini specific
- Primary Purpose:Build plate (spring steel textured)
- Material / Construction Type:7-layer textured spring steel sheet (polymer coating)
- Installation / Setup:Install as replaceable spring steel build plate (magnetic)
- Heat / Temperature Tolerance or Guidance:Compatible with nozzle temps up to 300°C; recommended bed temps PLA 45–55°C
- Manufacturer / Brand:BIGTREETECH
- Additional Feature:Double-sided spring steel
- Additional Feature:Self-recovering coating
- Additional Feature:Touch-safe honeycomb handle
Bambu Lab Glue Stick Adhesion for 3D Printer Build Plate
If you struggle with prints peeling off the bed, the glue stick gives you better first-layer adhesion on A1, Mini, P1, and X1 printers so your prints stick where they should. It spreads smoothly from a clear stick once you apply it to a cleaned plate, and that tack helps PLA, ABS, PETG, PC, PA, and TPU hold during the job. It’s handy for weekend makers who don’t want to modify their build plates.
For anyone who wants a simple, repeatable adhesion method, this stick works without complicated setup or extra tools. The moderate-to-high viscosity spreads evenly across the print area and helps parts stay put during long prints. It’s not water resistant.
What makes this glue-stick solution stand out for hobbyists is that cleanup is straightforward—wipe the board after printing and the parts usually pop off cleanly. You get reliable sticking power for a range of filaments without changing your printer hardware. Store it cool and dry and keep small parts away from kids.
You get convenience without a big learning curve: apply, print, clean, repeat. It’s a practical pick if you want consistent first layers and fewer failed prints. Small and portable, it’s easy to toss in your printer drawer.
- Compatibility Target:Compatible with A1, Mini, P1, X1 (includes A1 Mini)
- Primary Purpose:Build plate adhesion aid (glue stick)
- Material / Construction Type:Glue stick formulation (adhesive compound)
- Installation / Setup:Apply by spreading on cleaned bed before print
- Heat / Temperature Tolerance or Guidance:Formulated for hot beds; used on heated print surfaces
- Manufacturer / Brand:3DTOOLS / BambuLab
- Additional Feature:Clear, moderate viscosity
- Additional Feature:Works with many filaments
- Additional Feature:Easy apply/clean removal
Bamboo Lab A1 Mini Extruder Unit Replacement Assembly
If you print abrasive filaments like carbon- or glass-fiber nylon and your stock feed keeps stripping, this extruder’s hardened steel dual-gear gives the high extrusion force you need to push tough materials. It resists wear more than standard plastic or soft metal gears.
For anyone who wants a simple swap for the Bamboo Lab A1 or A1 Mini, the ENOMAKER all-in-one kit replaces the stock unit directly and comes with mounting screws so installation is straightforward. You won’t need extra parts.
What makes this extruder assembly stand out is the integrated filament cutter and the included motor, which make unloading cleaner and reduce fiddly steps during filament changes. That saves you time and frustration.
You get compact packaging and a light weight without sacrificing the strength of the feed system, so the printer stays balanced and easy to handle. It fits neatly and doesn’t add bulk.
The Bamboo Lab A1 Mini Extruder Unit Replacement Assembly solves filament-wear problems by using hardened steel gears and a high-force motor, which helps if you print engineering plastics frequently. It’s built for repeatable feeding under demanding conditions.
- Compatibility Target:ENOMAKER extruder for Bambu Lab A1 and A1 Mini
- Primary Purpose:Extruder assembly / filament drive
- Material / Construction Type:Hardened steel dual-gear + motor assembly (metal/plastic)
- Installation / Setup:Direct replacement extruder; includes mounting screws for installation
- Heat / Temperature Tolerance or Guidance:Mechanical extruder designed for high-temperature filaments (handles engineering filaments)
- Manufacturer / Brand:ENOMAKER
- Additional Feature:Hardened steel dual-gear
- Additional Feature:Integrated filament cutter
- Additional Feature:Includes motor & screws
Dynta 1.75mm PLA Filament 250g Spool (Multicolor)
If you want fuss-free filament for a small printer like the Bambu Lab A1 Mini, the multicolor 1.75 mm PLA spools give you consistent diameter that keeps prints smooth and predictable. They come as six 250 g spools in common colors, so you get 1.5 kg of filament without buying large spools that won’t fit compact machines. Short sentence.
For anyone who worries about moisture and tangled filament, each spool is vacuum-sealed with desiccant so your PLA stays dry until you open it, and the narrow 53 mm spool fits the A1 Mini and similar printers. The filament is plant-based PLA specified at 1.75 mm ±0.02 mm to reduce extrusion hiccups during long prints. Short sentence.
What makes this filament stand out for casual makers is the easy fit and ready-to-print approach: small spools mean less storage hassle and quick swaps between colors when you’re prototyping or printing gifts. You should print it between 190–230°C with a 45–60°C bed, and plan to use opened spools within three months for best results. Short sentence.
- Compatibility Target:Fits Bambu Lab A1 Mini (spool diameter 53 mm)
- Primary Purpose:3D printing filament supply (PLA, multicolor)
- Material / Construction Type:PLA polymer filament (plastic)
- Installation / Setup:Vacuum-sealed spools; load into printer (standard)
- Heat / Temperature Tolerance or Guidance:Recommended nozzle 190–230°C; bed 45–60°C
- Manufacturer / Brand:Dynta
- Additional Feature:Six-color multicolor pack
- Additional Feature:Vacuum-sealed with desiccant
- Additional Feature:53 mm narrow spool
Chitu PlateCycler C1M Build Plate Changer for Bambu Lab
If you want hands-free batch printing for small runs or classroom demos, the Chitu PlateCycler C1M swaps plates automatically so your Bambu Lab A1 Mini can run prints one after another. It clamps a white plastic unit onto your printer and uses a clever lever to eject and load one of four hook-style textured PEI plates as each print finishes; the mechanism works without changing firmware or needing extra power. Works well with PLA, PETG, and TPU.
For anyone who dislikes fiddling with files on the printer itself, the web tool accepts STL or OBJ files and makes a drag-and-drop playlist you can run from your laptop or phone. You put your models in order, drop the playlist onto the device, and the printer keeps going while you do other things. No coding required.
What makes this plate changer stand out for workshops and schools is its simplicity: you load four plates, set up the playlist, and you can supervise multiple jobs without constant plate swaps. The textured PEI hooks give good adhesion for common filaments so parts stay put during printing and pop off when finished. It’s a practical way to scale small production or run repeatable classroom projects.
- Compatibility Target:PlateCycler C1M for Bambu Lab A1 Mini
- Primary Purpose:Automatic build-plate changer
- Material / Construction Type:Plastic mechanical unit + textured PEI plates
- Installation / Setup:Mechanical kit with included plates; lever installs on printer (no wiring)
- Heat / Temperature Tolerance or Guidance:Plates engineered for auto-ejection and reliable adhesion at typical print temperatures (PLA/PETG/TPU)
- Manufacturer / Brand:chitu systems
- Additional Feature:Passive mechanical swapping
- Additional Feature:Includes four PEI plates
- Additional Feature:No wiring or firmware
Factors to Consider When Choosing Bambu Lab a1 Mini
If you want to print models without slicing them into awkward pieces, check the A1 Mini’s build volume so your projects fit the bed and don’t need extra seams or multiple prints. The print surface and filament compatibility matter next, because different surfaces and materials like PLA, ABS, or flexible filaments need the right adhesion and temperature to stick and peel cleanly. Temperature stability affects long prints and large parts since steady bed and nozzle temps cut down warping and layer issues, which makes your prints come out truer to the design. Noise and vibration control help if you plan to run prints overnight or in shared spaces; a quieter, low-vibration machine disturbs you less and keeps fine details sharper.
Build Volume Compatibility
If you want replacement plates that won’t foul up prints, check the A1 Mini’s usable build volume before you buy, because matching X/Y/Z keeps the nozzle from clipping the edges and helps your prints stay aligned. For anyone who swaps in third-party plates, match them to the A1 Mini’s 184 × 184 mm bed or your specific model so auto-eject alignment and bed coverage stay correct. What makes this compatibility checklist stand out is the reminder to measure gantry travel and total height, so your nozzle can reach every corner without hitting an enclosure or plate changer. You get safer removable or stacked plate setups without surprises by confirming plate thickness and edge profile match your clamps and auto-loading mechanism. The A1 Mini solves batch-print headaches by having you check combined stack height against filament paths, nozzle clearance, and sensor locations so feeds and sensors stay reliable. Perfect for builders and small-batch producers, this approach keeps parts from shifting mid-run and saves you time and wasted filament.
Print Surface Options
If you want prints that stick without warping, pick a strong-bed surface like textured spring steel or PEI because that grip tames PLA and PETG during the first layer and cuts curling. These surfaces help you get reliable first-layer adhesion so fewer failed prints ruin a weekend project.
For anyone who likes popping parts off quickly, use removable flexible sheets since you can bend the plate to lift parts without scraping or damaging them. They make post-print cleanup painless.
What makes this print surface choice practical for different filaments is matching bed temperature to the material; PLA likes about 45–55°C while PETG prefers roughly 60–75°C so you get better adhesion and less curl. Small temp tweaks save you a lot of fiddling.
You get tolerance for higher-temperature engineering filaments without sacrificing durability if you choose heat- and abrasion-resistant surfaces that hold up to nozzle temps near 300°C, letting you try tougher materials. That way your surface won’t wear out the moment you step up to specialty filaments.
The A1 Mini works best when you care for the surface, so clean it with soap and water or isopropyl alcohol and refresh any worn coatings to bring adhesion back. A little maintenance keeps your prints consistent.
Filament Compatibility Range
If you want hassle-free prints that stick and resist warping, pick filaments that match the A1 Mini’s capabilities and bed surface. For everyday projects use 1.75 mm filament with about ±0.02 mm diameter tolerance so your extruder feeds evenly and you avoid ugly blobs or gaps. PLA and TPU are your easiest bets for quick, reliable parts that don’t need special gear. For stronger, longer-lasting pieces choose PETG; it’s tougher and still pretty friendly to print. If you need heat- or wear-resistant parts, consider ABS, nylon, or fiber-filled nylons, but know they require hardened nozzles and heavier-duty extrusion hardware. Match nozzle temperatures to each material’s recommended range so layers bond right and prints don’t delaminate. Store hygroscopic filaments vacuum-sealed with desiccant and limit their air exposure to keep them printing like new. Finally, check your spool diameter and weight limits so the spool fits the mount or so you can set up a simple external holder.
Temperature Stability Needs
If you struggle with warped prints when your workshop gets drafty, keep the A1 Mini in a steady space so parts come out flat and strong. Using an enclosure or a controlled area helps limit outside temperature swings that make plastic cool unevenly. It also keeps the internal chamber comfortably below about 40°C during long runs so sensitive electronics stay safe. Short runs are less demanding.
For anyone who prints ABS, TPU, or other long-print materials, a steady build-chamber temperature reduces warping and improves layer adhesion. Match your bed and nozzle temps to the filament guidelines so the first layer sticks well, for example PLA beds around 45–55°C and PETG at 60–75°C. Check bed and nozzle temps during a print so you catch problems early. That simple habit saves reprints.
What makes this mini printer stand out for home users is how small environmental changes can affect results, so controlling humidity matters too. Keep filament dry because moist air can make prints weak and cause stringing or bubbles. Put spools in sealed containers with desiccant if your room gets humid. It’s an easy step that helps your prints look better.
Noise And Vibration Control
If you want quieter, cleaner prints because noise and blur bother you, enclosing the A1 Mini cuts audible noise and vibration transmission and gives smoother results when you look closely. That enclosure drops sound by about 20 dB versus an open frame in tests, and the rigid shell also steadies the chassis so fine details come out sharper. Nice upgrade.
For anyone who keeps a printer on a desk and hates that thudding or ringing, put vibration-damping mounts or pads under the machine to decouple it from your surface so you get less resonant noise without changing how it moves. You can feel the difference in prints and hear it immediately. Try different pad materials to match your desk.
What makes this kit truly helpful for hobbyists and pros who tinker is that tightening loose panels, securing fasteners, and routing cables snugly prevents those intermittent rattles that ruin quiet sessions. Do that before blaming firmware or slicer settings. It’s an easy fix.
You get better surface quality without swapping parts by isolating or damping stepper motors and checking belt tension, since loose belts or motor vibration cause ringing and layer shifts that harm prints. Small rubber motor mounts or felt strips work well for this. Recheck belts regularly.
Accessories And Upgrades
If you fight warping and inconsistent prints because your parts cool too quickly, add an enclosure to stabilize chamber temperature and humidity; it keeps internal temps under about 40°C to protect electronics and makes prints more consistent. It reduces layer separation and helps larger prints stick. It also cuts down on drafts that lead to failed corners.
For anyone who wants to catch print issues fast, install dedicated 6500K, 24V LED lighting near the X-axis so you can spot defects and failed layers during a run. You’ll see issues sooner and fix them faster. Good lighting makes monitoring painless.
What makes this build-surface upgrade stand out for beginners and pros alike is a textured spring-steel plate with a durable adhesion coating that improves first-layer grip and lets you remove parts by bending. It holds parts reliably without gluing and makes cleanup simple. Swapping plates is quick.
You get quick job status without hacking firmware when you add a customizable secondary display, so you can check progress at a glance from across the room. It’s handy if you don’t want to mess with the main screen. Setup is usually plug-and-play.
The right consumables stop small problems from turning into big headaches, so keep adhesion sticks, silicone wipers, and tight-tolerance PLA spools on hand to maintain nozzle cleanliness and steady extrusion. You’ll have fewer clogs and more predictable results. Replace them before they cause a bad print.
Ease Of Maintenance
If you struggle with prying prints off a sticky bed, removable build plates and the right bed temps like 45–55°C for PLA make part removal and cleaning much easier. For anyone who swaps filaments often, a compact toolhead with an accessible nozzle area helps you change filament, wipe the nozzle, and brush off ooze without taking things apart. What makes this printer type stand out for hobbyists is tidy wiring and reachable cable inlets so you can trace a wire or swap a connector without wrestling the frame. You get fast repairs without long downtime by favoring modular, drop-in upgrade paths that let you swap a board or part with minimal tools. The board and electronics should be easy to reach if you ever need to replace a component, and keeping internal temps under about 40°C helps protect sensitive parts. Perfect for casual makers who don’t want maintenance to become a chore, look for designs that pair simple accessibility with sensible defaults and thoughtful layout.
Safety And Filtration
If you worry about fumes or sparks near your desk, plan safety and filtration before you set up a Bambu Lab A1 Mini so your workspace stays safer and cleaner. Use a fire-resistant, sturdy enclosure and pick materials that help contain heat and electrical faults while giving you peace of mind. Keep access points sealed and dustproof to prevent dust on prints and electronics; this reduces failures and keeps parts working longer.
For anyone who prints PLA, TPU, or ABS and cares about indoor air, add filtration or containment to capture particles and odors and protect your breathing space. Choose a filter that handles both particles and VOCs so you cut smells and tiny debris that settle on prints. Monitor internal temps and avoid sustained readings above about 40°C to protect motherboards and electronics from heat-related damage.
What makes this setup stand out for home users is that vibration and noise isolation aren’t just comfort features — they limit mechanical stress and print defects and make the printer easier to live with. Mount the printer on a stable, vibration-damping surface and use pads or isolation feet for quieter operation. You get safer prints and a calmer room without turning your setup into a workshop; small changes go a long way.
Frequently Asked Questions
Can I Use Third-Party Filament Sensors With the A1 Mini?
If you want clearer filament-out alerts and fewer failed prints, match the sensor’s electrical specs and connector type to the A1 Mini so you don’t fry the board. For anyone who loves tinkering, you can also use a safe adapter when the connector doesn’t match, but double-check the voltage first. What makes this upgrade useful is that the printer’s firmware may or may not recognize a third-party sensor, so you might need to update settings or remap inputs. You get reliable detection without guessing if you test the setup with low-risk prints before trusting it on larger jobs. The A1 Mini solves compatibility headaches by letting you install third-party sensors, provided you confirm voltage, wiring, and firmware support. Perfect for hobbyists and makers, this approach saves prints and headaches when done carefully.
Are There Recommended Slicer Profiles for Multi-Material Prints?
If you want clean multi-color prints without mystery blobs, use slicer profiles made for multi-material printing since they handle purge towers, toolpaths, and filament change timing for you. For anyone who wants a ready starting point, grab the manufacturer’s or community’s profile for your printer and filament mix so you won’t be tweaking blind. What makes this setup even more useful is that you can then fine-tune retraction, temperature, and wipe settings to cut down on oozing. You’ll see improvement fast. You get better purge volumes and different adhesion settings for each material so parts stick where they should and you waste less filament. The next step is to print small test specimens and record each change so you can roll back or iterate more easily. Perfect for hobbyists and makers, this approach helps you get reliable multi-material results without endless guesswork.
How Do I Safely Transport the A1 Mini Between Locations?
If you need to move your A1 Mini between rooms without risking damage, pack it upright in a rigid case so the printer stays stable and the spool doesn’t shift. For anyone who often swaps workspaces, secure loose parts and the spool with tape or a small bag so nothing rattles around, and turn off and unplug the machine before you lift it. What makes this printer stand out for casual movers is that locking or padding the build plate stops the bed from sliding during transport, which keeps prints and the mechanism safe. You get gentle cushioning by surrounding the chassis with foam around the axes and fragile bits while keeping vents clear if you plan a short storage period. The A1 Mini solves risky carries by asking you to move it slowly and avoid excessive tilting, and having one person steady the frame and another guide stairs or long carries cuts impact chances. Perfect for hobbyists who transport between rooms, use two people on stairs or long moves so you reduce jolts and bumps.
Can the A1 Mini Be Used in High-Humidity Environments?
If you keep prints and parts in a damp garage or basement, keep humidity under about 60% so your A1 Mini and filaments don’t suffer; 30–50% is even better for reliable results. For anyone who stores filament long-term, put it in a sealed box with desiccant packs and check the packs every few months. What makes this small printer stand out for hobbyists is that it’s compact but still vulnerable to moisture, so run a room dehumidifier if your space stays muggy. You get drier electronics and fewer brittle or bubbly prints when you ventilate during prints and monitor humidity with a cheap hygrometer. The A1 Mini solves moisture problems by only needing basic care: keep it dry, store filament right, and you’ll avoid corrosion and ruined spools. Perfect for casual makers, this advice keeps maintenance simple and protects your prints.
What Warranty Coverage Applies to Aftermarket Upgrades?
If you’re worried that a new part will void your device warranty, check your warranty terms first so you know what’s allowed and what isn’t. For anyone who wants upgrades but also wants to keep manufacturer’s support, look for explicit language that permits third-party parts and for requirements like authorized installation; those often matter more than the part itself. What makes this situation tricky is that some manufacturers keep coverage only if an authorized installer fits the part, and other makers will cut coverage the moment they see an aftermarket component. You get peace of mind without guessing. The seller might offer a separate warranty on the part that covers defects for a set time, but that won’t cover damage caused by a bad installation. Perfect for shoppers who like tinkering, save receipts and installation records so you can back up any claim quickly. If you want someone else to handle upgrades, use an authorized installer; your claim will be simpler that way. For anyone who must DIY, document the installation with photos and keep every receipt. The choice is yours.