As an Amazon Associate, we earn from qualifying purchases. Some links on this site are affiliate links at no extra cost to you. Our recommendations are based on thorough research and editorial judgment.
DLP vs. LCD: Understanding the Optical Differences in Resin Light Engines
You’ve just sliced a detailed miniature, hit print, and watched the first layer blur into soft, fuzzy edges—now you’re stuck asking why your fine details vanish. The exact problem is whether that loss of sharpness comes from your printer’s light engine—DLP micromirrors vs LCD LED panels—or from exposure, resin, or wavelength choices. Most people blame settings or resin alone and miss how the projector optics and light collimation actually shape edge crispness and exposure time. This article shows, in plain language, how DLP optics, LCD masking, and UV wavelength each affect sharpness, exposure length, and small-feature fidelity, and how to tune settings to get true sub‑100 µm detail.
You’ll end up knowing which engine to buy or how to tune what you own for the sharpest prints. It’s simpler than it looks.
Key Takeaways
The difference between DLP and LCD comes down to how they make each pixel visible to your resin.
– DLP uses a micromirror projector that bounces collimated, high-intensity light into each pixel; that gives you sharper edges and typically 20–50% shorter layer exposure times versus common LCD setups. Example: a 50 µm wall printed on a 385 nm DLP engine often needs 2–4 seconds per layer, whereas the same wall on a 405 nm LCD might need 3–6 seconds. The micromirrors control light precisely.
If you’ve ever seen fuzzy small parts, this is why.
– LCD systems mask LED light through an LCD panel and a diffuser, which softens edges and causes pixel bleeding; expect longer exposures and visible banding if you don’t tune things. Real-world example: a tiny hinge printed near the edge of an LCD screen can show 100–150 µm of extra resin cure from bleeding, making it stick or fuse. The diffuser spreads the light.
Before you tune exposures, you should know why wavelength and resin choice matter.
– Using a 385 nm light source with DLP often reduces needed exposure and preserves fine features better than 405 nm systems because many resins cure faster at shorter wavelengths; for example, a detailed gear with 100 µm teeth may keep its shape at 2–3 s/layer on 385 nm DLP but blur at 405 nm unless you slow down. The wavelength affects cure speed and resolution.
If you want reliable prints across a whole build plate, pay attention to uniformity.
– DLP gives better intensity uniformity and dimensional fidelity across the plate, especially for sub-100 µm features; you’ll see consistent results whether the part is centered or near the corner. Example: printing 0.5 mm pins across the plate on DLP usually yields <50 µm variance in diameter. The uniformity stays tighter.
You don’t need expensive gear if you’re printing occasional small parts.
– LCD can be cost-effective for hobbyists, but you’ll need to take specific steps: 1) lower LCD brightness by 10–20% and increase exposure 10–30% in small increments, 2) add a 5–10 second base layer soak for adhesion, and 3) rotate parts 15–30° to reduce banding lines. Practical example: reducing brightness helped a user stop corner blooms on a miniature’s cloak. The tuning matters.
Before you change resins, do this check.
– Test each resin at both 385 nm and 405 nm if you can, using a 10 mm×10 mm test square and 50 µm layers; measure XY dimensions and surface detail. If the 385 nm square cures in 2–3 seconds and matches CAD within 50 µm, keep it. The test square tells you what to expect.
Which to Choose: DLP vs LCD – Quick Decision Guide
Before you pick a resin light engine, you need to know how the choice will affect your daily workflow and costs.
DLP vs LCD: which is faster and more detailed?
Why it matters: faster cure times and finer detail cut your print time and sanding work.
DLP gives more precise, uniform projection, so you’ll often see cleaner fine features and shorter layer exposures. Example: printing a set of 10 dental models, a DLP printer might cure each layer in 1.5–2.5 seconds versus 3–6 seconds on a comparable LCD unit, shaving hours off a multi-model job. Think about the parts you make: very small dental crowns or jewelry will benefit from DLP’s sharper pixels.
Cost comparison: how much will you really pay?
Why it matters: upfront savings can be eaten by replacements and resin use.
1) Add purchase price, replacement parts, and resin over 3 years.
2) Estimate consumables: FEP sheets, replacement panels, and resin volumes per month.
3) Compare total cost per printed part.
Example: an entry-level LCD printer might be $300 and need a replacement screen every 1–2 years; a small DLP unit might be $2,000 but keep its light engine longer, so over 3 years the LCD can become equal or more expensive if you print weekly. Use that simple spreadsheet to compare.
Noise and workspace placement: where to put the printer?
Why it matters: fans and optics can be distracting or limit where the machine can go.
Measure noise in your workspace with a phone app: if a model reads above 50 dB at your desk, move it to a garage or dedicated room. Example: a hobbyist placed an LCD printer on their kitchen counter and found constant fan noise at 55 dB while cooking; relocating it to a closed cabinet with ventilation cut perceived noise to 40 dB.
Throughput and print frequency: what fits your schedule?
Why it matters: throughput determines how often you can run jobs without backlog.
- If you print daily large batches, favor DLP for faster exposures and consistent output.
- If you print occasionally or produce many small parts at once, an LCD can be fine when you optimize layout and cure settings.
Example: a small business printing 50 miniatures weekly will finish faster on DLP, while a weekend hobbyist printing a few minis once a month will save money with LCD.
Practical checklist to choose right now
Why it matters: a checklist turns abstract tradeoffs into a decision.
1) List the typical part size and feature detail you need.
2) Estimate prints per week and expected lifespan (years).
3) Price out: printer, spare screens/FEP, resin usage per month.
4) Measure acceptable noise (dB) and decide location.
Example: if you need sub-100-micron detail, print daily, and can budget $1,500, DLP is likely the better fit.
Final takeaway: match tech to use
Why it matters: matching saves you money and frustration.
If you want speed and the finest detail and will print often, choose DLP; if you want lower upfront cost and print occasionally as a hobby, choose LCD.
Recommended Products
【High Strength and Toughness】ELEGOO ABS-like resin 3.0 is engineered for high strength, impact resistance, and toughness. The printed models can withstand drilling holes and certain impacts, maintaining their structural integrity and resisting deformation, ideal for functional prototypes, mechanical parts, and industrial parts.

【Low Shrinkage and High Precision】ELEGOO photopolymer resin is specially designed for reducing volume shrinkage during the Photocuring process ,which ensures the high precision of the print model with smooth finish.

①【Easy to Use】- SUNLU standard resin has strong fluidity and is compatible with different printers and printing speeds. The printed products are easy to form and are suitable for novices.
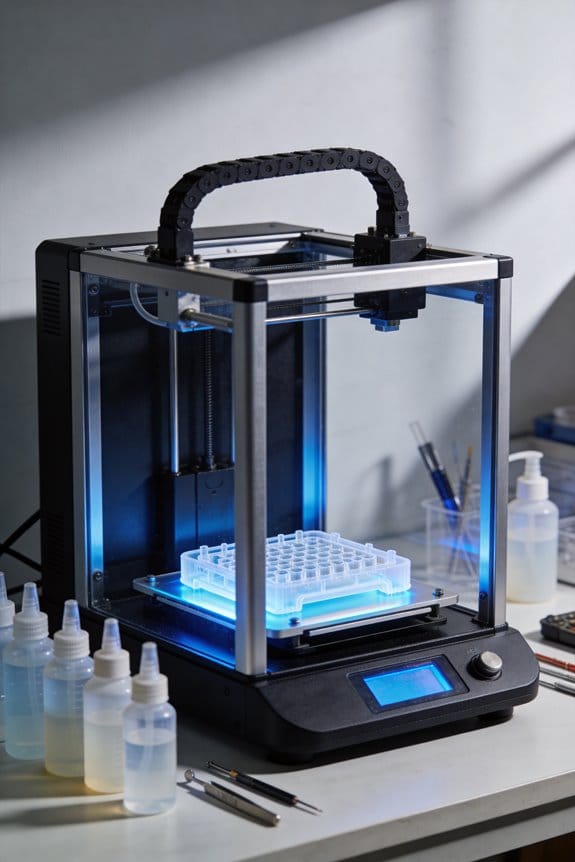
How DLP and LCD Project Light
Here’s what actually happens when you look at how DLP and LCD project light, and why that matters for how your prints cure.
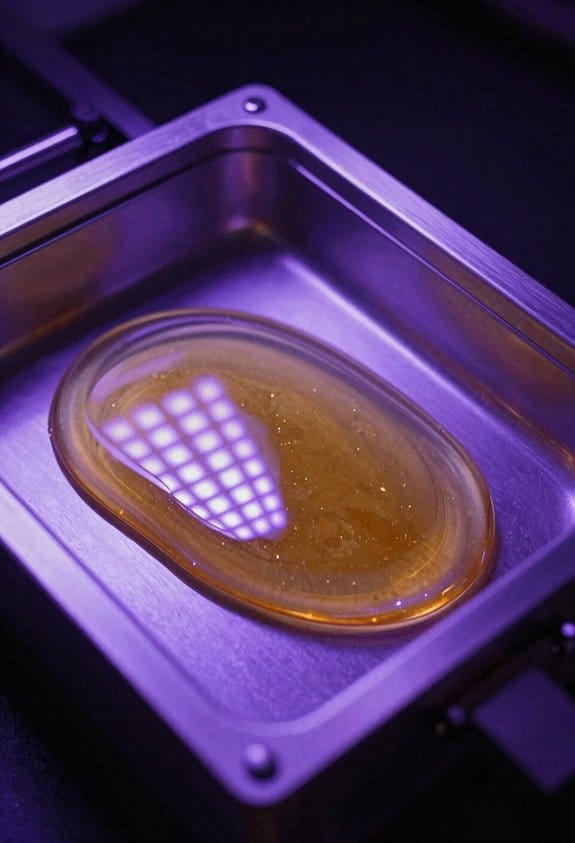
DLP uses a digital micromirror device (DMD) made of thousands to millions of tiny mirrors that tilt to reflect a high‑intensity beam. Because each mirror directs light precisely, you get highly collimated rays with minimal diffusion, so your layers cure uniformly across the build plate. Example: when you print a 2 cm fine‑detail pendant at 50 µm layer height with a 405 nm DLP projector, edges stay sharp and small holes under 0.5 mm hold their shape.
If you’ve ever wondered how LCD masking screens affect exposure, this shows why you might see uneven results. LCD systems place UV LEDs behind a masking screen that absorbs and scatters a lot of energy; the screen and diffuser cause pixel bleeding and uneven irradiance, so some areas get more UV than others. For example, printing a 5 cm hollow vase at 100 µm on an LCD printer often produces slightly softer edges and occasional banding where the LED array lines overlap.
Before you choose a printer, follow these simple steps to predict performance:
- Check light source: DLP = mirror projector, LCD = LED backlight.
- Measure irradiance if you can: aim for 5–15 mW/cm² at 405 nm for standard resins.
- Test a 10 mm calibration cube: look for edge sharpness and uniform cure across corners.
DLP gives focused, consistent projection for accuracy because beam shaping is controlled by mirror angles, while LCD’s simpler light path trades uniformity for lower cost; expect DLP for crisp small features and LCD for cheaper, acceptable bulk prints.
Recommended Products
【Low Shrinkage and High Precision】ELEGOO photopolymer resin is specially designed for reducing volume shrinkage during the Photocuring process ,which ensures the high precision of the print model with smooth finish.
【High-Saturation Fluorescent Effect】 ELEGOO ABS-Like Ultra 3d printer resin stimulates bright fluorescent colors under blue light, purple light, and near-ultraviolet light, creating dazzling luminous artworks. The high-saturation fluorescent effect transforms ordinary designs into stunning exhibits, bringing unparalleled visual impact.

High Temperature Resistance - Siraya Tech Sculpt 3D Printer Resin withstands temperatures as high as 180°C without significant softening. This extraordinary temperature resilience makes it perfect for high-temperature production processes like prototype parts printing and vulcanized rubber molding. Withstand the heat without compromising the quality of your prints.
Wavelength & Resin Compatibility (385 Nm Vs 405 Nm)
The difference between 385 nm and 405 nm comes down to how your resin’s photoinitiator absorbs light.
Why this matters: absorption controls how fast and how cleanly a layer cures. For example, when you use a 385 nm LED on a dental-model resin, you’ll often cut exposure time by 20–40% compared with 405 nm for the same layer thickness.
385 nm hits the absorption peaks of many high‑performance photoinitiators, so you get more cure per millijoule. That means you can:
- Reduce exposure times (typical drop: 20–40%).
- Use lower total energy to reach target conversion.
- Sharpen fine features because side‑scatter and lateral bleed are reduced.
Real example: a 50 µm feature printed at 385 nm kept crisp edges on a Grey ABS‑like resin, where the 405 nm print showed 50–100 µm extra rounding.
405 nm is slightly less absorbed by those initiators, so you’ll need higher doses or different chemistry to match cure. That often produces:
- Longer exposures (often 1.2–2× the energy).
- More through‑cure, which can harm small cavities or thin walls.
- Potentially different photoinitiator packages for the same resin.
Real example: a thin-walled lattice printed at 405 nm required swapping to a TPO‑based initiator and raising exposure by 50% to avoid undercure in internal struts.
How to pick for your use case (why it matters, then how):
Why it matters: your goal is either crisp small features or easier, cheaper resin formulation. Follow these steps.
- If you need fine detail (features <0.5 mm): choose 385 nm or a resin formulated for 405 nm with strong short‑wavelength absorption.
- If you want broad material compatibility and cheaper lamps: 405 nm is fine, but expect to adjust exposure +50% as a starting point.
- If you’re formulating resin: start photoinitiator screening at 385 nm for fast cure; test shelf stability under ambient light for 1–3 months.
Real example: switching a jewelry resin from 405 nm to 385 nm reduced support scarring on tiny prongs during post‑wash.
A few practical numbers to try:
- Start exposures at 385 nm: reduce published 405 nm exposure by 25–40% and test adhesion/cure.
- If switching to 405 nm, increase energy by 20–100% and watch for overcure on edges.
- Measure feature fidelity on a 0.5 mm cone and a 50 µm wall; iterate exposures in 10–20% steps.
Final note: wavelength choice affects both immediate print control and how you must formulate or pick resins, so test with a small calibration print and record exposures, feature sizes, and any post‑cure behavior.
Recommended Products

【High Strength and Toughness】ELEGOO ABS-like resin 3.0 is engineered for high strength, impact resistance, and toughness. The printed models can withstand drilling holes and certain impacts, maintaining their structural integrity and resisting deformation, ideal for functional prototypes, mechanical parts, and industrial parts.

Low Shrinkage & High Precision: ANYCUBIC UV resin prints the models with low shrinkage during the photocuring process, which ensures the high precision and smooth surface.

①【Less Brittle & More Strength】- Compared to other types of 3D Printer Resin, SUNLU ABS-Like Photopolymer Resin has better toughness, Non-brittle and has excellent abrasion resistance. If you need to print miniature or tiny objects, SUNLU ABS-Like 3D Printer Resin is your first choice.
Projection Quality and Print Accuracy: Uniformity, Collimation, Pixel Bleeding
Here’s what actually happens when projection quality affects your print accuracy.
Why it matters: if light isn’t uniform or well-collimated, small features won’t match the digital model and you’ll lose dimensional fidelity. I check three linked factors—uniformity, collimation, and pixel bleeding—because each one directly changes how your resin print turns out.
1) How do you check and fix illumination uniformity?
Why it matters: uneven illumination causes some areas to overcure and others to undercure, changing part dimensions by tenths of a millimeter.
Example: on a 100 x 60 mm build plate, a 10% brightness drop at the edges can make thin fins warp by 0.2–0.5 mm after 5 mm of height.
Steps:
- Print a 100 x 60 mm checkerboard test at 0.05–0.1 mm layer height with 1 mm squares.
- Measure cured thickness in at least nine grid points (center and the eight corners/edges). Record percent variation.
- If variation > 5%, clean optics, reseat the light source, and run the printer’s flat-field or uniformity calibration routine.
If the printer still shows > 5% variation, consider swapping to a light engine with a diffuser or using a smaller build area for critical parts.
2) What is collimation and how do you judge it?
Why it matters: collimated light keeps rays parallel so edges stay sharp and dimensional accuracy holds across layers.
Example: a DLP projector with a well-collimated optic will reproduce a 0.5 mm sharp corner across a 50 mm span, while poorly collimated LCD light can blur that corner into a 0.8 mm radius.
Steps:
- Print a starburst target (thin radial spokes down to 0.3–0.5 mm).
- Inspect spoke ends at different radial distances from center with a loupe or calipers.
- If outer spokes thicken or feather by more than 0.2 mm, check optical alignment and tighten any adjustable mounts; if nothing moves, swap the LED array or projector optics.
A thermal-stable light source matters: run a 6–8 hour print and measure a repeated target at start and finish; if registration or brightness shifts by >2%, thermal drift is present.
3) How do you detect and reduce pixel bleeding?
Why it matters: pixel bleeding merges adjacent features, changing hole diameters and thin walls by tenths of a millimeter.
Example: a 0.6 mm hole designed in CAD might cure to 0.9 mm on an LCD with high bleed, while DLP can keep it near 0.62–0.65 mm.
Steps:
- Print a pattern of holes and single-pixel lines at your printer’s native XY resolution.
- Measure the smallest hole and line that printed cleanly; note the difference from the designed dimension.
- To reduce bleeding: lower exposure by 5–10% increments until edges stop growing, improve mask calibration if available, add a software anti-aliasing setting, or choose hardware with a tighter pixel aperture (DLP or higher-contrast LCD).
Also test with different resins—some chemistries scatter UV more and worsen bleed.
Quick checklist you can run in one afternoon:
- Print uniformity checker and report ±% variation.
- Print spoke target for collimation and inspect with a loupe.
- Print hole/line matrix for pixel bleeding and adjust exposures in 5% steps.
Final practical tip: prioritize a stable, collimated light engine first, then tune exposures and resin choice; that order gives you the biggest gains in dimensional fidelity.
Recommended Products

① 【Enhanced Toughness & Durability】Superior to standard resins, SUNLU ABS-Like Resin offers exceptional toughness, reducing brittleness for durable prints that resist wear. Ideal for printing detailed miniatures and functional parts that require extra strength.

Easy to use: Mix the buffer powder with 250ML distilled water, put the pH meter into the solution, stir gently, and wait for a few seconds to get the result.
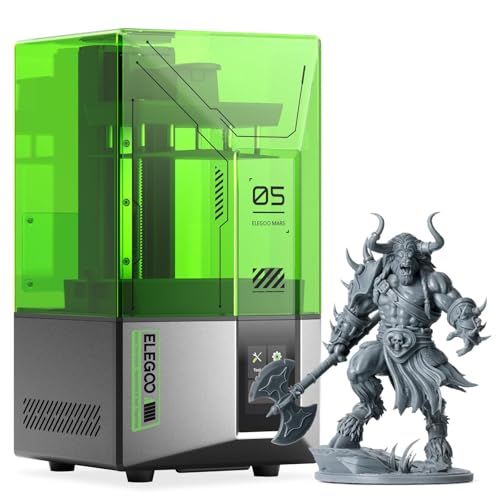
【Effortless Magic with One-Click Automatic Leveling】Effortless precision is just a click away. ELEGOO Mars 5 resin 3d printer offers advanced automatic leveling function with a simple click, allowing all skill levels to dive straight into the creative process. Say goodbye to tedious calibrations - simply unbox, power on, and print.
Curing Performance, Use Cases, and Buying Checklist
The difference between DLP and LCD comes down to how the light hits the resin.
Why this matters: curing behavior affects part strength and print speed, which changes what you can actually make. For example, on a DLP printer I used for jewelry, tiny filigree features came out crisp after 8–10 second exposures per 50 µm layer; the same parts on an LCD needed 20–30 seconds and still bloomed a bit. DLP uses a focused projector that delivers high-intensity, collimated light, so layers cure faster and edges stay sharp. LCD stacks an LED array behind an LCD panel that dims and shapes the light, so intensity is lower and exposures must be longer, which can cause slight overcure into thin gaps.
How this affects your prints:
- DLP: shorter exposures (typically 5–15 s per 50 µm layer), cleaner edges, less risk of through-cure on small gaps. Real example: a 2 mm lattice printed on DLP needed 10 s/50 µm and maintained 0.2 mm gap clearance.
- LCD: longer exposures (typically 15–40 s per 50 µm layer), may require orienting parts so thin features don’t face the light directly. Real example: same 2 mm lattice on an LCD used 25 s/50 µm and needed a 15° tilt to avoid bridging.
Before you buy, decide which use case fits you.
Why this matters: matching the tech to the job saves time and money. If you plan to run short production batches of small, highly detailed parts—say, 50 dental models or 200 jewelry pieces—DLP will give you faster throughput and more consistent fine detail. If you’re prototyping dozens of larger, less-detailed parts or are on a tight budget, an LCD machine will keep costs down while still delivering acceptable results.
Practical buying checklist — concrete items to check before you commit.
Why this matters: these specs determine compatibility and long-term running costs. Example: a small manufacturing run I planned failed initially because the printer’s LED peak wavelength didn’t match the resin, so half the batch undercured.
- Wavelength compatibility
- Check the LED peak wavelength (e.g., 385 nm vs 405 nm).
- Match it to the resin’s recommended wavelength on the datasheet.
- If you mix resins, choose a printer at the resin’s common peak (385 nm works for many high-detail resins).
- Ask for typical exposure per 50 µm layer for standard resins.
- Prefer DLP if you need ≤15 s/50 µm. Expect LCD to be 15–40 s/50 µm.
- Request a sample print or exposure chart from the seller.
- For LCD, check rated hours for the masking LCD (e.g., 2,000–5,000 hours).
- For DLP, ask about bulb or LED module service interval.
- Factor replacement cost into your operating budget.
- Verify if the machine lets you tilt or nest parts to reduce overexposure.
- If you’ll print many small features, plan for 10–20° tilts or support patterns that minimize direct face-on exposure.
- Plan a post-cure step with known time and intensity; write this down.
- Example: cure at 405 nm, 10–20 mW/cm² for 10 minutes per side for typical engineering resin.
- Include chemical wash and PPE in your workflow; list solvents and disposal method.
- Calculate total job time: (layer exposure + lift/retract time) × number of layers + post-cure.
- Example: 200 layers at 10 s exposure and 5 s lift = 5,000 s (83 min) plus 15 min post-cure.
- Confirm local support or spare parts availability.
- Ask for firmware and slicing updates cadence.
- Buy DLP if you need high-detail final parts and can justify slightly higher hardware cost for faster cures.
- Buy LCD if you want lower upfront cost and are happy to tweak orientations and exposures.
- Always match printer wavelength to your resin and write down your final exposure + post-cure recipe.
Quick recommendations
If you follow these checks, you’ll avoid most common fit and finish failures and get the results you expect.
Recommended Products

【Higher Scratch-Resistance】 The models printed with ELEGOO Abs-like 3.0 Pro Resin are not easily damaged by the friction and impact of daily use, providing more stable aesthetics.

【Easy to clean, easy to use】 Compared to other kinds of resins, ELEGOO water washable resins are easy to use, do not need alcohol or IPA to clean, just need to clean with tap water, saving you the cost of alcohol or IPA,and save your time.

【Low Shrinkage and High Precision】ELEGOO photopolymer resin is specially designed for reducing volume shrinkage during the Photocuring process ,which ensures the high precision of the print model with smooth finish.
Frequently Asked Questions
How Does UV Exposure Affect Long-Term LCD Screen Lifespan?
UV exposure steadily causes UV degradation in LCD screens, so I warn you it darkens and weakens layers over time, increasing pixel burnout risk and reducing uniformity and lifespan unless you shield, filter, or replace the screen periodically.
Can DLP Handle Large-Format Prints Without Loss of Detail?
Yes — I can handle large-format prints without major detail loss, though pixel scaling and projector tiling matter; I’ll manage precision by optimizing DMD resolution, overlap calibration, and optics to minimize seams and maintain consistent surface fidelity.
Are There Safety Differences in Eye/Skin Exposure Between 385 Nm and 405 Nm?
Yes — I believe 385 nm poses higher UV safety concerns: shorter wavelengths raise phototoxicity risk and deeper tissue absorption, so I’d recommend stricter PPE, reduced exposure times, and enclosed shielding compared to 405 nm.
How Do Maintenance and Replacement Costs Compare Over Five Years?
I once replaced a screen like swapping smartphone glass; over five years I’ve found DLP’s consumables cost higher but fewer replacements, LCD’s cheaper parts yet more frequent labor hours and screen swaps, so total cost evens out.
Can Hybrid Printers Switch Between DLP and LCD Modules?
Yes — I can swap modules, but module swapping between DLP and LCD needs precise optical alignment, firmware support, and compatible mounts; I’d budget for calibration time, optics adapters, and possible control-board updates for reliable operation.