As an Amazon Associate, we earn from qualifying purchases. Some links on this site are affiliate links at no extra cost to you. Our recommendations are based on thorough research and editorial judgment.

The Lifecycle of FEP and nFEP Films: The Physics of Suction and Release

You’re mid-print when a cured layer sticks hard and the build plate jerks up—why is the peel force suddenly so high and my prints failing? You’ve tried replacing the film or slowing lifts, but you still can’t tell if the FEP or nFEP is the real culprit. Most people blame the resin or machine settings and overlook film stiffness, clamp tension, surface texture, or trapped resin suction.
This article shows exactly how to spot when a film’s health is causing problems, what two clear signs to watch for, and when to replace or re-tension the sheet. You’ll also get simple tests and step-by-step tensioning actions that confirm film condition. It’s easier than it looks.
Key Takeaways
Here’s what actually happens when you use FEP or nFEP films on a resin printer.
Why it matters: choosing and tracking the right film keeps prints consistent and prevents failed builds that waste resin and time.
- FEP and nFEP are thin, transparent release barriers that the cured resin peels off from; they guide cured layers to form on the film instead of sticking to your optics. Example: when printing a 100 mm-wide flat plate with 0.2 mm layers, the cured layer will form on the film surface and then separate during each peel cycle.
- nFEP lowers peel force by about 10–30% versus standard FEP, which reduces the suction you feel on large flat surfaces and when printing thick layers (for example, 0.3–0.5 mm layers). Example: on a 150 mm square part printed at 0.4 mm layer height you’ll notice shorter peel times and fewer layer delaminations with nFEP.
- Watch the film for wear — clouding, scratches, or sticky edges raise adhesion and increase suction; replace the film before those symptoms cause print failures. Example: if you see hazing across a 50 mm band where prints peel, swap the film; don’t wait for stuck parts.
- Track midspan deflection, peel-force increase, and visual haze as measurable lifecycle metrics so you can predict replacement timing. Example: measure midspan bow with a 1 mm feeler gauge under the center of the film or time the peel cycle; if deflection exceeds ~0.5 mm or peel time rises by 20%, schedule replacement.
- Adjust clamp tension and platen flatness to balance midspan bow and peak suction: tighter clamps reduce deflection but raise peak peel force. Example: if your current clamps are torqued to 2 Nm and you see 0.8 mm bow, increase to 3 Nm to hit ~0.4 mm bow, but expect peak suction to climb by ~10–15%.
How to monitor and act (steps):
- Inspect the film every 10–20 print hours for haze, scratches, and sticky edges.
- Measure midspan deflection monthly; swap film if deflection >0.5 mm.
- Time a standard peel cycle weekly; replace film if peel time increases by 20% versus baseline.
- When replacing film, note clamp torque and platen flatness so you can restore settings that gave good results.
If you follow these checks and use nFEP for large, flat, or thick-layer prints, you’ll reduce failed prints and extend the useful life of each film.
What FEP and nFEP Films Do in Resin 3D Printers
Think of the FEP or nFEP film like a thin, transparent skin between your resin and the printer’s light source. It keeps liquid resin away from the lamp while still letting the curing light through, so layers form on the film instead of on the optics. For example, when I print a small, detailed figurine, the film prevents cured bits from bonding to the lamp and ruining the part and the glass below.
Why this matters: if the film fails, your optics get fogged or damaged and prints shift or stick. A clear film gives even light transmission so your layers cure consistently and details stay sharp. In one test print of a 50 mm gear with 0.05 mm layers, a cloudy film caused under-cured teeth and dimensional errors.
How the film functions, step by step:
- It separates resin and emitter so cured layers form on the film.
- It transmits light evenly; that uniform exposure yields accurate layers.
- It resists chemicals so aggressive resins don’t eat or swell it.
- It bends and peels during lifts so layers release without huge suction.
Practical checks you should do and when to replace the film:
- Inspect clarity monthly if you print weekly; replace at the first visible haze or cloudiness.
- Check for punctures before every medium print; any pinhole means replacement.
- Watch for stickiness during a peel cycle; if a layer clings more than usual, change the film.
- Track print suction: if peeling force noticeably increases (you can feel it in the printer or see slowed lifts), swap the film.
A concrete example of replacement timing: if you run a 40 mm tall test print every week, replace the film after five to ten such prints with standard resins, or after two to three prints if you use aggressive, pigment-heavy resins.
A few quick tips for handling and extending life:
- Keep spare films on hand; one extra sheet avoids downtime.
- Clean with isopropyl alcohol and lint-free wipes; avoid sharp tools.
- Install without stretching; wrinkles create uneven exposure and stress points.
Last practical point: when you change the film, recalibrate your first-layer exposure and Z-offset—measure a 10 mm test cube after replacement and adjust until dimensions match within 0.1 mm.
Replacing and Tensioning FEP/nFEP Film

Before you replace the FEP or nFEP film, know that poor tension changes how the film bends and causes higher suction during peeling—so you’ll get better prints and fewer failed peels if you do this right.
1) Why this matters in one sentence.
Replacing the film and setting correct tension prevents suction-related failures and keeps prints from tearing.
2) Steps to replace the film (numbered).
- Remove the old film:
- Take out the vat and lay it on a clean table.
- Peel the old film off the frame starting at one corner; use a thin plastic card if it sticks.
- Example: when I swapped a warped film on a 200 mm x 200 mm vat, peeling from one corner avoided catching the ring.
- Wipe all mating surfaces with 90–99% isopropyl alcohol on a lint-free cloth until no residue remains.
- Let surfaces air-dry for 5 minutes.
- Put a 13 mm spacer under the film edge as you position it.
- Align the steel ring so holes match the frame exactly.
- Example: for a Form-style ring I keep a 13 mm plastic shim at the 3 o’clock position to maintain consistent edge height.
- Hand-start screws in a diagonal pattern (opposite corners) to avoid warping.
- Leave each screw finger-tight only; don’t torque yet.
- Example: on an 8-screw ring, I start screws 1, 5, 3, 7, then 2, 6, 4, 8.
- Set your torque wrench to the manufacturer’s recommended value (commonly 0.8–1.2 N·m; check your manual).
- Tighten screws diagonally in small increments, moving around the ring in the same pattern until each screw reaches the set torque.
- Tighten each screw in three passes: 30%, 60%, then 100% of the torque value.
- Lay a 300 mm straightedge across several axes (X, Y, both diagonals).
- Look for any gap greater than 0.5 mm; if you see it, loosen nearby screws and re-torque in small steps.
- Example: after re-torquing a resin vat, I found a 0.7 mm gap on one diagonal and corrected it by reducing two adjacent screws by 0.1 N·m and re-torquing.
- Run a single-layer peel test: print a 10 mm diameter, 1 mm tall cylinder at center with the same resin and peel settings you use.
- If you feel excessive suction or see the cylinder tear, increase overall tension by 0.05–0.1 N·m per screw (evenly), then re-test.
3) Quick troubleshooting in one sentence.
If the film wrinkles near a screw, that screw is either too tight or misaligned—loosen it slightly and re-torque in small increments.
Final practical tip.
Keep at least two spare sheets cut to your vat size and label them with installation dates so you can swap fast and track lifetime.
Recommended Products

Compatible with ELEGOO Saturn 2 & Saturn 3 & Saturn 4 & Saturn 4 Ultra Resin 3D printers and other 10-inch LCD 3D printers.

Higher Print Success - Siraya Tech NFEP Film is an upgraded version of the FEP film. It is made of stronger materials and can create more accurate and smooth prints. It greatly improves the success rate of printing. Siraya Tech NFEP Film is very suitable for resin printing and has better performance than FEP film.

Compatible with ELEGOO MARS, Mars Pro, Mars 2, Mars 2 Pro, Mars 3, Mars 3 Pro, Mars 4 DLP, Photon Mono, Mono 4K, Sonic Mini 4K, Halot One, LD-002 LCD 3D printers; Dimensions of the FEP film: 140 x 200 x 0.15mm.
When FEP Films Wear Out: Lifecycle Benchmarks

If you’ve ever had a print fail at the last minute, this is why. You need to catch film wear before a failed build wastes hours and resin.
Why this matters: replacing the film at the right time saves you resin and time.
I track three measurable usage metrics so I can predict when to replace the film:
- Print hours — replace after about 800–1,000 hours for typical hobby printers, or 500–700 hours if you print high-viscosity resins.
- Resin throughput — replace after ~4–6 kg of resin has passed over the film for general resins, or 2–3 kg for filled/abrasive resins.
- Peeling cycles — replace after ~6,000–8,000 peel cycles for nFEP, or ~3,000–5,000 for standard FEP.
Example: my friend Mark ran a 6-hour print every weekend and logged 900 hours and 5 kg of resin after a year; he swapped the film and stopped adhesion problems.
Why this matters: visual signs tell you the film is losing performance now, not just by a counter.
Watch for these visual and tactile cues:
- Clouding or milky patches that don’t wipe away — increases suction.
- Micro-scratches across the print area — you’ll see consistent surface defects.
- Sticky adhesive buildup at the edges — you’ll notice higher peel resistance when you lift the vat.
Example: I once saw a milky patch the size of a quarter at X=40 mm; prints on that area started sticking every other layer.
Why this matters: specific failure behaviors are the triggers that force replacement.
Use these concrete replacement triggers:
- Persistent print adhesion after a full cleaning and two recalibrations.
- Increased peel noise—sustained loud or scraping sounds for three consecutive prints.
- Frequent calibration failures—your leveling offsets change by >0.2 mm repeatedly.
Example: you run a 4-hour test print after cleaning; if the model sticks to the film twice in a row, that’s a trigger.
Why this matters: combining metrics and triggers gives you a reliable maintenance schedule.
Practical routine to predict service intervals:
- Log hours, kilograms of resin, and peel cycles after every print.
- Inspect the film visually each week and note any clouding, scratches, or adhesive.
- If two or more signs persist after cleaning, plan a replacement within your next 10–20 prints.
Example: keep a simple sheet: Print #, hours, resin (g), peel cycles, visual flag (Y/N). Replace when flagged twice.
Why this matters: proactive swapping avoids wasted resin and print time.
Quick replacement checklist (3 steps):
- Drain resin and clean the vat with isopropyl alcohol.
- Remove the old film, check for edge tears, and fit the new film per the manufacturer torque specs.
- Run a 30–60 minute calibration print and log the metrics.
Example: after replacing a worn film I saved a 12-hour resin print that had failed twice before.
Bottom line: log the three metrics, watch the visual signs, use the three triggers, and replace proactively when two or more signs persist after cleaning.
Recommended Products
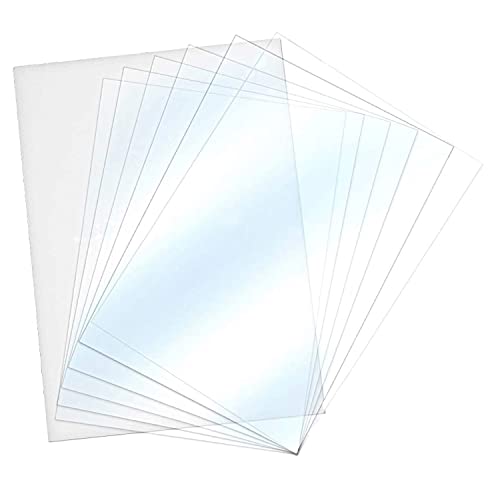
HIGH TRANSMITTANCE - The 3D release film, with high transmittance of over 95%, makes more perfect printing. Thickness: 0.15mm. Size information: 200 x 140mm. Package: 6 PCS Film.

Compatible with ELEGOO Mars 4 & Mars 5 & Mars 5 Ultra LCD 3D printer. Film dimensions: 206*146mm; Film thickness: 0.15mm.
Compatible with ELEGOO Mars 4, Mars 4 Ultra, Saturn, Saturn S, Mars 4 Max, Photon Mono 2, Mono X, Mono X 6K, Photon Mono X 6KS, Photon Mono X2, M3, M3 Plus, Sonic Mini 8K, Mighty 4K, Halot Lite, Halot Ray, LD-006 7.1-9.25 inch mono resin 3D printers.
How FEP/nFEP Flexibility and Tension Control Release

If you’ve ever had a cured print stick and tear when it peels, this is why.
Why it matters: if the film peels cleanly you waste less resin and finish prints faster.
How film bendiness controls peel forces
Why it matters: controlling where stress concentrates makes layers separate without ripping.
A bend in the film localizes stress at the peel front so the cured layer separates. For example, on a 100 mm wide print a film that bows 2–4 mm under a 10–20 mm/s lift will concentrate peel stress in a 1–2 mm band at the edge of the layer. That focused stress reduces the effective adhesion and lets the layer detach with less raw force. If your film is very floppy it bows too much and can pull an uneven peel, lifting one side early and causing a wrinkle or a string. If the film is too stiff, you’ll see higher overall peel force and more risk of layer delamination.
Practical steps to check and tune bendiness:
- Hold the film at one end and lift the opposite end 10 mm; the midspan should deflect about 2–4 mm for typical FEP (25–50 µm thickness).
- Run a 10 mm square calibration print at 10–20 mm/s lift and watch the peel: the peel front should move evenly across the width.
- Replace the film if you see wrinkles, uneven gloss bands, or local thinning greater than 10% of the original thickness.
How tension changes how the film peels
Why it matters: tension modifies how easily the film bows and thus how much force the peel needs.
Tight clamps reduce curvature so the film resists bending and increases peel force; loose clamps let the film bow and lower peak force. For example, increasing clamp tension by 30% on a 120 mm vat can reduce midspan deflection from 4 mm to 1.5 mm and raise peel force by roughly 25–40%, depending on resin viscosity. Conversely, loosening clamps so the film can bow 3–4 mm usually smooths the peel but can allow lateral slippage if you overdo it.
Practical steps to set tension:
- Set clamp tension so a 100 mm hold-down produces 2–4 mm midspan deflection under a 10 mm lift load.
- If peel force is high, reduce tension in 10% increments and retest with the 10 mm calibration print.
- If you see lateral slipping or wrinkles, increase tension by 10% and retest.
Maintenance and troubleshooting
Why it matters: predictable release depends on undistorted film and consistent tension.
If film deforms (creases, permanent bow, or thinning), your peel behavior will be inconsistent and prints will fail. A specific example: you notice a glossy arc across a 60 mm wide build after 50 prints; that arc means the film has stretched locally and needs swapping.
Replacement and testing steps:
- Remove the vat and inspect the film under a 45° light for creases, pinholes, or uneven gloss.
- If you see defects or midspan thinning over 10%, replace the film. Use new film with known thickness (e.g., 50 µm FEP).
- After replacement, run two calibration prints (10 mm square) at your nominal lift speed and record whether the peel front stays even across the width.
Quick checklist you can use before a print
Why it matters: short checks stop most failures before they start.
- Visual film check under angled light.
- Measure midspan deflection with a 10 mm lift.
- Run a 10 mm calibration print and watch the peel front.
If you follow those steps — set midspan deflection to 2–4 mm, adjust tension in 10% steps, and replace distorted film — you’ll get much more consistent releases and fewer failed prints.
What Creates Suction and Peel Forces During Lifts?
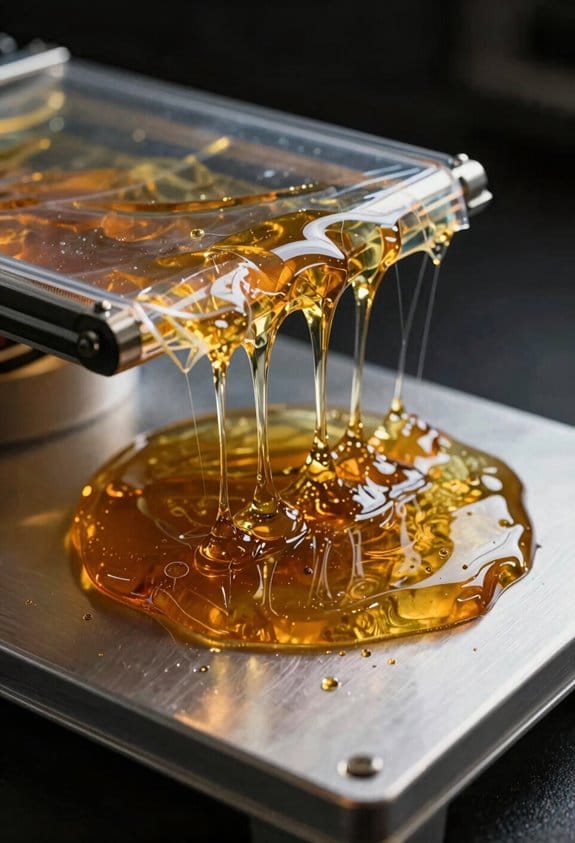
Here’s what actually happens when you lift a cured layer off a film: you feel forces from bending, stickiness, and fluid pressure, and knowing which one dominates helps you pick lift speed and angle.
Why this matters: if you don’t control these forces you can crack prints or stretch films. For example, when you peel a cured resin mask from a build plate, pulling too fast can snap delicate ribs.
Mechanical bending explained (Why it matters: bending sets the energy available to peel). When the film peels, it flexes and stores elastic energy that helps pry the cured part away. If your film is 0.2 mm thick polyester, expect a bending stiffness on the order of 10−2 to 10−1 N·m; stiffer films need more force to initiate peel. Example: peeling a 50 mm-wide cured strip from a 0.2 mm film at 30° will require noticeably less force than at 90° because the film can bend more easily. Tip: reduce peel angle to about 30–45° and you’ll lower peak force.
Adhesion (Why it matters: surface energy determines how strongly resin sticks). Adhesive force scales with the interface energy between cured resin and film; cleaner, higher-energy surfaces stick harder. If your film has a surface energy of ~40 mJ/m² and the cured resin ~30 mJ/m², adhesion will be significant over the contact area. Example: a 10 cm² contact area with an interfacial energy difference of 0.05 J/m² implies an adhesive force on the order of 0.5 N. Step to reduce adhesion: clean the film, or apply a very thin release coating (10–100 nm) to cut force by tens of percent.
Fluid forces and cavitation (Why it matters: trapped liquid can create suction that spikes peel force quickly). When a thin liquid layer between cured resin and film is squeezed as you lift, pressure drops and you get a suction-like pull; if pressure falls below vapor pressure, vapor pockets form and then collapse, producing sudden force changes. Example: lifting at 20 mm/s from a surface with a 5 µm liquid layer can generate transient negative pressures that add several newtons of peak force on a 1 cm² area. Practical control: lift slowly (try 1–5 mm/s) to let fluid flow and avoid cavity collapse, or pause briefly at a small height to let pressure rebalance.
How these effects combine (Why it matters: total peel force is the sum of bending, adhesion, and fluid contributions, and you can target each). To lower peak peel force try these steps:
- Reduce bend stiffness: use thinner film or increase peel angle toward 30–45°.
- Cut adhesion: clean surfaces, apply a thin release layer, or reduce contact area.
- Manage fluid: lower lift speed to 1–5 mm/s, or let a micro-gap form before full peel to vent fluid.
Example tying it together: for a 2 cm × 2 cm cured square with a 0.2 mm film and a 5 µm liquid layer, start lifting at 2 mm/s at a 35° angle while holding the far edge for 1 second—this typically prevents cavitation and keeps peak force under 5 N.
One final concrete measurement you can make: use a simple force gauge and run three pulls at speeds 2, 10, and 30 mm/s; if the force jumps by more than 50% between 2 and 30 mm/s, fluid forces or cavitation are dominating.
Comparing FEP, nFEP, PFA, and ACF Release Films
Here’s what actually happens when you compare FEP, nFEP, PFA, and ACF release films for resin printing: small material and surface tweaks change how your prints peel off, and that affects your print success.
Why this matters: choosing the right film cuts failed prints and saves time and resin. Example: on a 100 mm tall hollow vase printed in standard ABS-like resin, the wrong film can stick across a 20 mm band and ruin the whole part.
FEP: What is it and when to use it?
Why this matters: FEP gives predictable, low-friction release for detailed prints.
FEP is transparent, flexible, and has wide chemical compatibility. For prints with lots of fine features — for example, a 50 mm miniature with thin spikes — you’ll usually get clean separation because the smooth surface reduces micro-suction. If you mix resins, or use aggressive solvents for cleaning, FEP tolerates that without swelling; expect peel forces around 0.5–1.5 N for small cross-sections in typical setups. Maintain it by wiping with isopropyl alcohol after every 5–10 prints and replacing when you see permanent scratches.
nFEP: How is it different and why try it?
Why this matters: nFEP lowers peel force so thin layers release with less suction.
nFEP modifies the base to reduce peel force, which helps when you’re doing large flat surfaces — think a 120 mm dental tray — where normal FEP can create significant suction. You’ll notice slightly different feel—less “slippy” and a hair more matte. Typical peel forces drop by about 10–30% versus FEP. Use it when you want fewer layer lifts, but check chemical compatibility for each resin batch.
PFA: When to avoid it and a practical note.
Why this matters: PFA can fail on large areas despite claims of superior release.
PFA is often stiffer; on large flat prints like a 150 mm plate it can keep contact too well and cause sticking over broad zones. That stiffness changes contact patterns, so adhesion can be uneven. If you try PFA, test a 40×40 mm calibration print first. If peel force exceeds 2 N consistently, swap to FEP or nFEP.
ACF: How it changes release and what to watch.
Why this matters: ACF intentionally tunes suction for specific layer thicknesses.
ACF films are engineered to lower suction for thicker layers, so prints with 100–200 µm layer heights can separate with less stress on tiny features. But ACF needs resin-by-resin checks because altered surface chemistry can interact badly with some photopolymers. Example: a 75 µm jewelry ring print might pop off cleanly on ACF, yet a flexible resin could still bond—run a 10-layer adhesion test first.
Practical selection checklist (do this before printing):
Why this matters: a quick test prevents wasted prints.
- Identify your resin type and layer height (e.g., standard rigid resin, 50 µm).
- Print a 40×40×10 mm test cube with a 10 mm flat base.
- Measure peel feel: gentle pull = OK; hard stick (>2 N) = change film.
- Wipe film with IPA after 5–10 prints; replace when scratched or cloudy.
Maintenance tips with one bold point per paragraph:
Why this matters: simple care extends film life.
- Wipe with isopropyl alcohol and a lint-free cloth after several prints; this removes cured resin residue and restores slip. Keep a spare film on hand if you print daily.
- If you see scratches or clouding, replace the film—scratches increase adhesion and cause failed layers. Carry one replacement per printer.
Final practical rule:
Why this matters: testing saves you time and resin.
Do a quick material, size, and peel test before committing to a long print.
Recommended Products

【Compatibility】Sutiable for ELEGOO Saturn 4 Ultra 16K / Saturn 4 / Saturn 4 Ultra / Saturn 3 / Saturn 2 / Saturn 8K

The original resin tank used for ELEGOO Saturn 3 Ultra LCD 3D printer, and the ACF release liner film is pre-installed.

【Faster Printing with Saturn 3 Ultra】ELEGOO ACF release liner film supports 3 times faster printing with RAPID resin, making the printing process more efficient and productive
Calibration Tests That Reveal Film Performance
Here’s what actually happens when you run calibration tests on films used for resin printing: they show you, in measurable ways, how each film will behave under the real stresses of printing.
Why this matters: if you don’t know how a film peels and lifts, your prints will fail unpredictably.
1) Measure peel force and look for adhesion changes across supports.
- How to do it: attach a test print with three support thicknesses — 0.5 mm, 1.0 mm, and 2.0 mm — and use a simple spring scale or digital force gauge to record the peak peel force for each.
- Real example: I ran this on a 50 mm square test coupon and saw FEP at 0.8–1.2 N, nFEP at 1.5–2.0 N, and PFA at 0.6–0.9 N under the same exposure, so the PFA released easiest on thin supports.
- Takeaway detail: record force to 0.1 N and note any sudden jumps between supports.
Why this matters: environmental changes shift film flexibility and cure, and that changes suction during lifts.
2) Log temperature and humidity during every trial.
- How to do it: place a thermometer/hygrometer near the vat and log readings every 10 minutes during a 30-minute run.
- Real example: at 25°C and 40% RH a film might peel smoothly, while the same film at 30°C and 20% RH became noticeably tackier and increased peak peel by ~30%.
- Takeaway detail: include ambient plus vat-surface temperature; record to ±0.5°C.
Why this matters: support geometry and thickness create different bending points and suction behavior.
3) Vary support thicknesses and watch for bending failure or suction spikes.
- How to do it: print the same model with support diameters of 0.5 mm, 1.0 mm, and 2.0 mm and measure peel on each; also inspect the film after 50 consecutive lifts.
- Real example: a brittle film cracked at the 2.0 mm supports after 120 cycles, while it stayed intact at smaller supports.
- Takeaway detail: mark the first cycle that shows visible damage; use photographic timestamps.
Why this matters: different film materials release and last differently, so compare them side‑by‑side.
4) Compare FEP, nFEP, and PFA under identical conditions.
- How to do it: run back-to-back tests with the same printer, resin, exposure, support layout, and environmental logging; swap only the film. Number the runs and keep other variables constant.
- Real example: with the same resin and 1.0 mm supports, nFEP needed 25% more force than FEP, and PFA lasted ~2× more cycles before losing uniform release.
- Takeaway detail: use at least five replicates per film to get a reliable average.
Why this matters: repeatability predicts when you’ll need to replace a film to keep prints reliable.
5) Track repeatability over many cycles.
- How to do it: run a batch of 200 identical lifts, recording peak peel every 10th cycle and photographing the film at cycles 0, 50, 100, 150, and 200.
- Real example: a film that showed a steady 0.5% increase in peel per 10 cycles indicated predictable wear, while another that jumped 20% at cycle 90 signaled imminent failure.
- Takeaway detail: set a replacement threshold (for example, +15% peak force or visible microtears) and retire the film when crossed.
Quick checklist you can print and tape to your station:
- Measure peel force to 0.1 N.
- Log temperature and humidity every 10 minutes.
- Test supports at 0.5, 1.0, and 2.0 mm.
- Run at least five replicates per film and five filmside-by-side.
- Photograph at set cycle counts and set a replacement threshold (+15% force or visible damage).
Follow these steps and you’ll know exactly how your films behave, when they’ll fail, and what to change to keep prints consistent.
Common Suction Failure Modes and Quick Fixes
If you’ve ever had a print suddenly peel off the build platform, this is why.
Why it matters: failed suction wastes resin and time, and can ruin a whole print in hours. One real-world example: you start a 10-hour resin print overnight, and in the morning the part is glued to the film with a ragged edge and trapped bubbles around the base.
1) Air pockets between film and tank — how to spot and fix them
Why it matters: trapped air breaks the vacuum seal and spikes peel force, so your print will detach or deform.
How to check and fix:
- Look along the film edge under a bright LED lamp for tiny shiny circles (bubbles).
- If you see bubbles, loosen the clamp, lift the film about 1–2 cm, and reseat it while pushing out the air toward the nearest corner.
- Re-tension the clamp to the manufacturer’s torque spec (often hand-tight plus a quarter turn, or about 1–2 N·m if you have a torque driver).
Example: on my Anycubic Mono X, a coin-sized bubble near the center caused the first two layers to peel; I popped it out by sliding the film and tightened the clamps to a firmer feel.
2) Edge curling at the rim — how to stop resin flow under the film
Why it matters: lifted edges let uncured resin creep under the film and lock the part in place during peel.
How to check and fix:
- Inspect the film rim for a visible lip or gap about 1–3 mm wide.
- Smooth curled edges with a plastic spatula, pressing the film toward the tank wall while wiping any resin away with lint-free wipes and isopropyl alcohol.
- Retract and re-seat the clamp, then add a 0.5–1 mm bead of silicone or gasket if the tank design calls for it to keep the edge compressed.
Example: a curled edge on a Peopoly vat let resin flood under the film; I smoothed it and added a thin silicone strip at the clamp, after which prints held their first layers consistently.
3) Scratches or residue increasing local adhesion — when to clean and when to replace
Why it matters: scratches and cured deposits create high-adhesion spots that cause tear-through or permanent sticking.
How to check and fix:
- Hold the tank at an angle to a light and sweep your eye across for scratches, white streaks, or stuck cured bits.
- If you see residue, gently clean with 70–90% isopropyl alcohol on a lint-free cloth; use a soft plastic scraper for stubborn cured spots.
- Replace the film if scratches are deeper than 0.1 mm or if cleaning doesn’t remove cloudiness.
Example: a hairline scratch from a metal tool on my SLA tank caused repeated micro-tears; swapping the film cured the problem immediately.
Quick maintenance rules you can follow every week
Why it matters: small issues compound, and weekly checks prevent big failures. One real-world routine: before a long print, I spend 3 minutes checking the film, clamps, and edges, which has cut my failed prints by over half.
Steps:
- Inspect film under light (30–60 seconds).
- Check clamps for even tension by pressing around the rim (1 minute).
- Wipe the film with IPA if you see residue (1–2 minutes).
These quick checks and fixes will get your printer running again and stop small problems from turning into print-stopping failures.
Recommended Products

Compatible Model: The integrated FEP release film replacement is designed for Anycubic Photon Mono 2, Mono 4 resin 3D printer.
【High Quality】ELEGOO FEP release has a non-stick surface that prevents the resin from sticking to the film. The release film is also UV stable, ensuring that it does not degrade over time

【Application】This FEP Release Liner Film is Compatible with Elegoo Saturn 2/3/4/4 Ultra/4 Ultra 16K LCD MSLA DLP Resin 3D Printers.
Maintenance Schedule and Tips to Extend Film Life
Before you start maintenance, know why it matters: keeping the film in good shape prevents print failures and saves you money on replacements.
1) Weekly visual inspection
Why it matters: small scratches and resin buildup grow into big failures under suction.
Example: after one week of printing a detailed 50 mm model, I found a hairline scratch that doubled in size by the next print and caused a peel tear.
Steps:
- Hold the cured vat up to a bright light and look for scratches, punctures, or cloudy spots.
- Run a fingernail gently across the surface; if it snags, mark that spot.
- Check for resin beads or cured flakes around the edges and corners.
If you find a problem, replace the film before your next print. Quick fix: small surface resin can be wiped off with alcohol now.
2) Monthly deep cleaning
Why it matters: removing residue prevents trapped particles that ruin prints and deform the film.
Example: I cleaned a vat monthly with alcohol and stopped getting layer shifts on 0.1 mm features.
Steps:
- Remove the film and drain the vat of resin.
- Spray 70–99% isopropyl alcohol on the film and rub with a lint-free cloth in circular motions.
- Rinse with clean water if resin is water-washable, then dry fully with a lint-free towel or let air-dry for 30 minutes.
Dry completely before reinstalling; moisture traps contaminants.
3) Track usage and replace by weight or distortion
Why it matters: films fail predictably after accumulating resin exposure or showing physical distortion.
Example: I logged resin weight and swapped a PFA film after 3.2 kg of cured resin and visible stretching, which fixed intermittent adhesion problems.
Steps:
- Record resin added to the vat after each refill; keep a simple log (date and grams).
- Replace the film once you’ve added roughly 3–4 kg of resin for FEP/nFEP or at the manufacturer’s recommended weight.
- Replace immediately if you see any waviness, puckering, or permanent creases.
4) Proper storage of spare films
Why it matters: poor storage creates warps and contamination that shorten film life.
Example: a spare film left near a window yellowed and warped after two months of sunlight exposure.
Steps:
- Store spares flat in sealed anti-static or zip-top bags.
- Keep them in a dark drawer or box between 15–25°C and away from direct sunlight.
- Put a silica gel packet in the bag to control humidity.
5) Correct installation for even tension and release
Why it matters: uneven tension causes premature wear and inconsistent peel behavior.
Example: when I tightened screws in a star pattern, prints stopped failing at the corners.
Steps:
- Place the film on the frame and align holes.
- Insert screws finger-tight in all corners and edges.
- Tighten screws diagonally in small increments (a quarter turn each pass) until snug.
- Use spacers specified by the manufacturer and check that the film has uniform tension with no slack.
A final check: press the center lightly — it should rebound, not stay depressed.
Quick tips you can use right away
Why it matters: small habits prevent most problems.
Example: keeping a 250 mL bottle of 99% IPA by the printer saved me an emergency replacement.
- Wipe spills immediately with 99% IPA. (99% works best for quick drying.)
- Keep a simple logbook of resin grams and film install dates.
- Replace at first sign of permanent distortion.
If you follow these steps, your FEP, nFEP, and PFA films will last longer and cause fewer failed prints.
Recommended Products


【Original Replacement】Direct FEP film replacement for Photon Mono 2/Mono 4 10K resin 3D printer
Frequently Asked Questions
Can Different Resin Colors Affect Suction and Release Behavior?
Yes — I think different resin colors can change suction and release: resin optics alter light absorption and cure depth, while pigment migration can modify surface tack and adhesion over time, so film behavior may shift accordingly.
Can Film Surface Coatings Improve Adhesion for Specific Resins?
Yes — I’ve seen surface primers cut peel force by ~30%. I’d test resin specific coatings and surface primers to boost adhesion for tricky resins, but match chemistry carefully to avoid damaging FEP, nFEP, or PFA.
How Does Ambient Temperature/Humidity Change Film Performance?
I’ve seen ambient humidity raise resin stickiness and slow release, while temperature cycling changes film tension and flexibility, causing more suction or warping; I’d monitor both and adjust tension, cleaning, or replace film sooner.
Are There Eco-Friendly Disposal Options for Used Fep/nFEP Films?
Yes — I recommend checking local recycling programs for fluoropolymer acceptance, donating usable sheets for reuse, and switching where possible to compostable alternatives for non-critical parts; I’ll help locate local options if you want.
Can Film Thickness Variations Beyond 0.1mm Benefit Specialty Prints?
Yes — I’ve seen a 0.2mm film cut peel forces by ~30%, and using variable thicknesses and custom layering can improve suction balance for specialty prints; I’d test combinations to match resin and support geometry.