As an Amazon Associate, we earn from qualifying purchases. Some links on this site are affiliate links at no extra cost to you. Our recommendations are based on thorough research and editorial judgment.

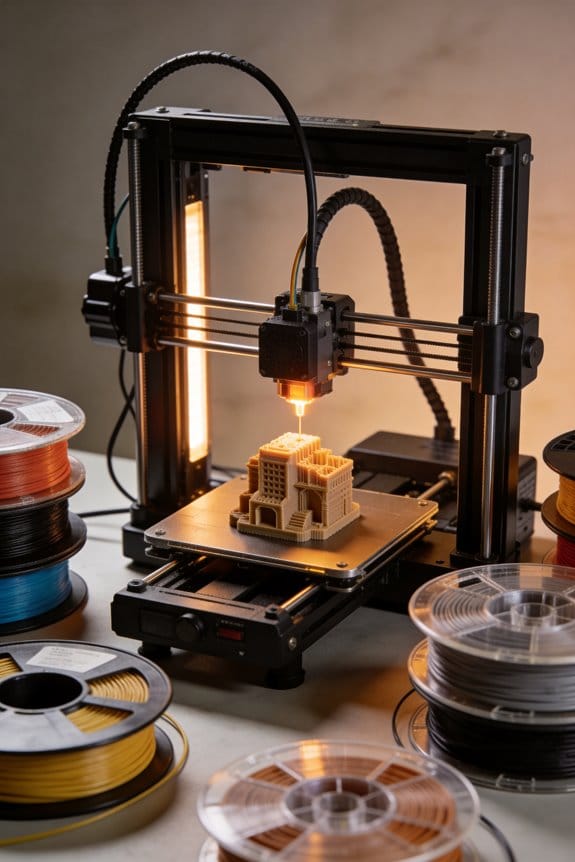
Understanding Chamber Heating: Why Ambient Temperature Matters for ABS and ASA

You’ve just sliced a strong ABS print only to find corners curled and layers separating, and you can’t figure out why the part split after a smooth first few layers.
You ask: why do ABS and ASA prints crack or warp even when layer adhesion looked fine during printing? Most people blame extrusion or speed, but they underestimate the role of chamber temperature and sudden cooling.
This article will show you exactly how keeping the chamber at a steady 50–70°C reduces thermal gradients, slows cooling, and prevents shrinkage that lifts edges and separates layers.
You’ll get practical steps—preheat time, acceptable temperature swing, and cooling and adhesion tweaks—to stop cracks and warped corners.
It’s easier than it sounds.
Key Takeaways
If you’ve ever watched a print lift at the corners, this is why.
- Set your chamber to 50–70°C to cut down thermal gradients that make ABS/ASA layers shrink and warp. For example, when printing a 150 mm ABS box, a 60°C chamber kept the top layers flat instead of cupping.
- Keep layers warm so they bond: maintain the chamber so previously printed layers stay around their glass transition temperature (about 100–110°C for ABS filament surfaces feel soft near that range); this improves interlayer adhesion and reduces visible layer lines.
- Hold chamber temperature steady within ±3–5°C during the print; that level of control gives consistent bonding and dimensional accuracy. On a 200 mm long part, fluctuations bigger than ±5°C produced measurable bowing at the ends.
- Preheat the enclosure for 10–20 minutes before starting a print and seal any drafts with foam or tape around doors and fans to prevent uneven cooling that causes corner lift and delamination. For example, tape a small gap at the back fan and you’ll stop cold air from hitting the first few layers.
- Avoid leaving filament spools in a very hot enclosure for long periods and keep them dry; excessive chamber heat or prolonged storage around 60–70°C can accelerate degradation. Store spools in a dry box at room temperature and only put them in the enclosure while printing.
Quick Chamber Settings for ABS and ASA (At-a-Glance)
Before you start printing, know that chamber temperature helps layers bond and reduces warping — getting it right saves you time and failed parts.
ABS: set your chamber to 50–65°C. For example, when I printed a 200 mm ABS box, 60°C stopped the corners from lifting and kept layer lines tight. Use these settings:
- Nozzle: 230–250°C.
- Bed: 90–110°C.
- Cooling fan: off or very low (0–20%).
Store spools in a dry box or sealed bags with desiccant; dry filament at 70°C for 4–6 hours if you see bubbles.
If you’ve ever had printed parts crack after a week, that’s usually delamination from uneven heat — ASA needs steadier warmth.
ASA: set your chamber to 60–70°C. For example, printing a motorcycle fairing outdoors, I used 65°C in the chamber so the long panels stayed flat and the layers didn’t separate. Use these settings:
- Nozzle: 250–270°C.
- Bed: 90–110°C.
- Cooling fan: keep minimal (0–20%).
Because ASA handles UV better, you can use those parts outside, but keep the chamber stable to avoid layer separation.
Before you change temperatures, calibrate your printer so adjustments actually help. Do this:
- Level the bed and set a 0.1 mm first layer gap.
- Print a 20 mm calibration cube at the target temps.
- Inspect first layer adhesion and corners; if corners lift, raise chamber 5°C or increase bed by 5°C and retest.
Quick troubleshooting steps:
- If you get warping on big parts: raise chamber 5–10°C and reduce cooling, then print a 100 mm square test.
- If you see bubbles or popping: dry the filament at 70°C for 4–6 hours and reseal the spool.
- If layers separate over time: increase chamber 5°C and slow print speed by 10–20%.
A final tip: change one variable at a time — temperature, then nozzle or bed — and record results. Small adjustments, like 5°C increments, are the fastest way to dial in reliable ABS and ASA prints.
Recommended Products

[Filament Drying for Perfect Prints] Continuous drying of filaments during the printing process prevents moisture-induced problems such as drawing, clogging, and layer shifting and minimizes the impact of external environmental factors on 3D filament printing.

70℃ High-temperature Hot Air Circulation: Equipped with a 400W PTC heater and dual axial fans,it heats up quickly to reduce warping,shrinkage,and layer lines

Efficient Chamber Heating:70°C high-temperature hot air circulation. Equipped with a 400W PTC heater and dual axis fans, it heats up quickly to reduce warping, shrinkage , and layer lines.
Why Chamber Temperature Matters
If you’ve ever had a print that warped or split, this is why.
Why chamber temperature matters
Why it matters: keeping the chamber warm prevents layers from cooling unevenly and reduces internal stress so your parts stay accurate and strong. For example, printing a 200 mm ABS phone bracket on a printer without a heated chamber often produces a curled corner 2–3 mm high after cooling.
How warm chambers reduce warping and weak bonds
Why it matters: a stable warm chamber cuts thermal gradients that pull layers apart. When the chamber is around 40–60°C for ABS or ASA, each new layer stays closer to the extrusion temperature (200–250°C), so the molten filament bonds better and shrinkage is lower. Picture a 300 mm long ABS cover cooling in a 50°C chamber versus open air — the one in the chamber will have almost no edge lift.
How material crystallinity and cooling rate interact
Why it matters: cooling speed changes how semi-crystalline plastics set, which affects strength. For semi-crystalline polymers like nylon or some PET variants, aim for slower cooling — keep the chamber 50–70°C and let the part cool inside for 30–60 minutes after the print finishes; that reduces internal stresses and makes the part stronger. Example: a nylon gear printed in a warm chamber will resist cracking under load better than the same gear printed with rapid cooling.
Practical steps to control your chamber temperature
Why it matters: following clear steps gets you predictable results instead of guessing.
- Set your chamber target: 40–60°C for ABS/ASA, 50–70°C for nylon and some PETs.
- Preheat the chamber for 10–20 minutes before starting large prints.
- Keep vents and doors closed during printing to avoid drafts.
- After the print, leave the chamber closed and let it cool slowly for 30–60 minutes.
Concrete example: printing a 150 mm ABS enclosure — preheat to 50°C, print at 230°C nozzle, close the door, cool 45 minutes inside.
What to expect in results
Why it matters: knowing likely outcomes helps you judge success. Expect fewer delaminations and cracks, layer bonds that tolerate more load, and dimensional deviations reduced from millimeters to fractions of a millimeter on large parts. For instance, a 250 mm ABS panel that warped 3 mm without a chamber often warps less than 0.5 mm with proper chamber control.
Quick troubleshooting tips
Why it matters: fixing small issues keeps prints usable.
- If edges still lift, raise chamber temp 5°C and try a slower cooling hold.
- If layers look glossy but brittle, lower chamber temp slightly or reduce cooling time after print.
- If electronics overheat, add a small controlled fan or use duty-cycled heating to keep temps steady.
Example: if your 200 mm ASA bracket shows tiny cracks after printing at 45°C chamber, increase to 50°C and reprint.
End detail: aim for stable chamber temps within ±3°C during a print for consistent results.
Recommended Chamber Ranges and Expected Print Outcomes
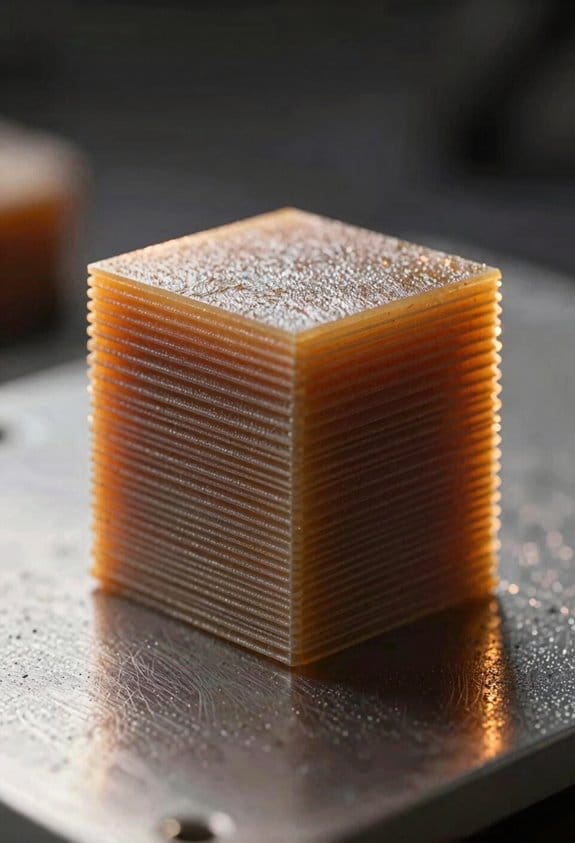
If you’ve ever watched a print crack halfway through, this is why.
Why this matters: keeping the chamber in a specific range reduces warping and improves layer bonding so your part survives handling.
For ABS set the chamber to 50–65°C. That range cuts thermal gradients on larger parts and lowers warping. Example: a 200 mm tall ABS phone stand printed at 55°C stayed flat and had no layer separation after filing and sanding. Steps to try:
- Preheat the chamber to 55°C.
- Print a 10 mm calibration tower and watch for corner lifting.
- If corners lift, raise in 2°C increments up to 65°C.
- If surface details soften, lower by 2°C and retest.
For ASA aim for 60–70°C. That keeps outer layers from cooling too fast and reduces surface stress. Example: a 150 mm garden hinge in ASA printed at 65°C opened and closed smoothly with no microcracks. Steps to try:
- Start at 65°C.
- Print a functional hinge test (three interlocking links).
- If links bind, drop 2°C; if you see surface crazing, raise 2°C.
- Run a full-print ambient check on long jobs.
Watch ambient temperature because room swings change outcomes. You should:
- Note room temp before long prints.
- Keep it within ±3°C if possible.
- If the room drops overnight, increase chamber by 2–3°C for the last 10% of a long print.
Balance heat with material aging; prolonged high heat can degrade filament over months. Example: a filament spool left at 70°C for a week showed brittle prints later. Practical rule:
- Don’t store spools in the heated chamber.
- Give the printer a cool-down day after a continuous 48-hour run.
- Rotate spool storage between cool and warm spots.
Recommended Products

Our heater is equipped with buttons to set the target temperature ( from 10°C to 50°C). The optimal heating temperature for resin being 30°C. Some other heaters default to cooling at 25°C and do not allow target temperature adjustments.
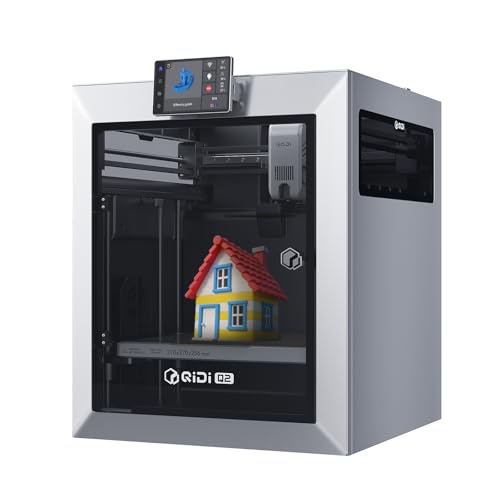
[Why Choose QIDI Q2?] QIDI Q2 redefines your first 3D printer—easy to use yet truly professional. For beginners, makers, educators, and engineers. One printer covers entry-to-expert projects so you create faster with reliable results.

🌟 Compact & Versatile: Our Mini Heating Module easily fits most LCD 3D printers, providing a convenient solution for resin-based 3D printing enthusiasts.Now Compatible with Both LCD Resin and FDM 3D Printers. Quickly raises enclosure temperature for better print quality.
Nozzle, Bed, and Fan Settings for Heated Chambers
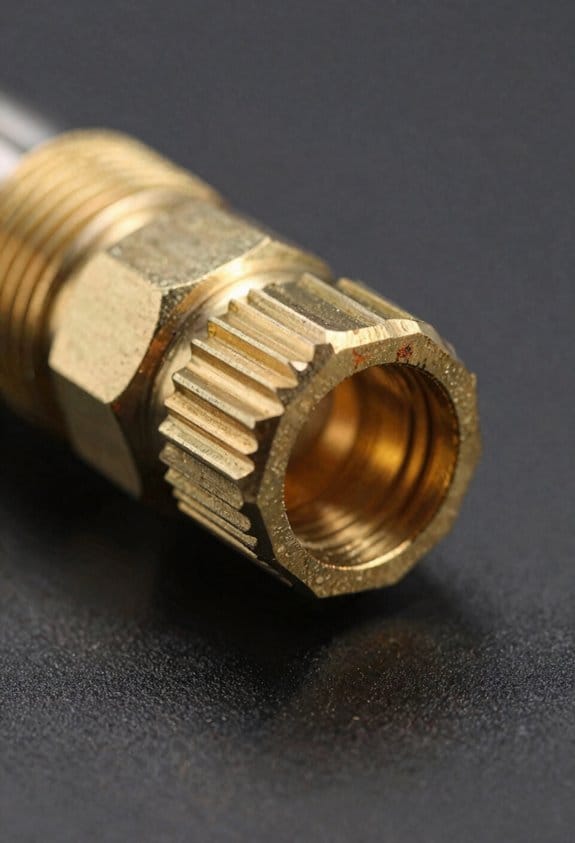
Think of nozzle, bed, and fan settings like a kitchen stove, oven, and cooling rack working together to cook a cake evenly.
Why this matters: getting these three right controls melt flow, adhesion, and cooling so your print doesn’t warp or fail.
Nozzle calibration — how to get extrusion correct
Why this matters: correct extrusion makes your layers even and prevents under- or over-extrusion that creates warping.
Example: when I printed a 20 mm calibration cube at 0.2 mm layer height, a 5% extrusion multiplier error left visible gaps on one side.
Steps:
- Set filament diameter in your slicer to the measured value (measure the filament with calipers at three points and average).
- Heat the nozzle to your filament’s print temp (PLA 200°C, PETG 240°C, ABS 250°C) and do a 100 mm extrusion test; measure actual extruded length and adjust the E-steps or extrusion multiplier to match.
- Print a single-wall 10 mm cube and inspect the wall thickness; if it’s too thin, increase flow by 1–3% and reprint.
Tip: if you see stringing after calibration, lower nozzle temp by 5°C.
Bed temperature — how to keep the first layers stuck without softening
Why this matters: the right bed temp prevents parts from lifting while avoiding filament softening that causes sag.
Example: a 120 mm wide ABS bracket I printed stuck well at 110°C but started deforming at 120°C on the first layer.
Steps:
- Set an initial bed temp: PLA 60°C, PETG 75–85°C, ABS 100–110°C.
- For the first layer add +5–10°C for better adhesion, then drop to the normal bed temp after 1–3 layers if your printer supports it.
- Use a brim (5–10 mm) for large flat parts and a glue stick or PEI sheet for smaller pieces.
Tip: if the filament softens on the bed (blobby edges), lower bed temp by 5°C increments.
Fan modulation — how to cool where and when
Why this matters: controlling cooling balances part strength and detail so you don’t crack big sections or lose fine features.
Example: printing a small, detailed fan shroud required 100% part cooling for crisp fins, but the same setting made a large flat panel crack.
Steps:
- Start first 2 layers with fan at 0–20% to improve adhesion.
- Ramp fan to 30–50% for general prints; use 100% for bridges and tiny details.
- For large solid areas, reduce fan to 20–30% and increase print temperature by 5–10°C to slow cooling and prevent layer delamination.
Tip: enable a minimum layer time (e.g., 15–20 seconds) so the fan doesn’t overcool thin layers.
Putting it together — quick checklist
Why this matters: small coordinated changes produce big improvements in quality.
Example: for a PETG vase (200 mm tall), I set nozzle 240°C, bed 80°C, first-layer fan 0%, then 40% after layer 3; the vase had no warping and smooth overhangs.
Steps:
- Calibrate nozzle extrusion first.
- Set bed temp for the material and add +5–10°C for the first layer.
- Use fan modulation: low on the first layers, higher for bridges/details, lower again on large areas.
Final practical values: PLA — nozzle 200°C, bed 60°C, fan 100% after layer 2; PETG — nozzle 240°C, bed 80°C, fan 0–40%; ABS — nozzle 250°C, bed 110°C, fan 0–20%.
Recommended Products
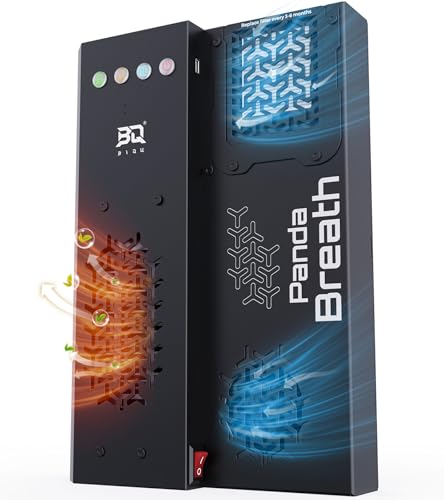
【Smart Chamber Heater】With 300W PTC heater, BIQU Panda Breath delivers fast, uniform chamber heating to prevent warping, strengthen layer adhesion in engineering materials like ABS, ASA, PC, and PA. As a smart chamber heater, the heating and filtration function of Panda Breath can automatically start/stop based on filament type. Just set your desired trigger thresholds wirelessly via the Web UI, and let it run automatically. No manual intervention needed.

【Intelligent Temperature Control for Hassle-Free Printing】ELEGOO mini heater features precise and intelligent temperature control, ensuring optimal stability from start to finish. Say goodbye to frustrating issues like mid-print detachment, warping, and poor interlayer adhesion that hinder your progress.

DESIGNED FOR 3D PRINTING APPLICATIONS – Specially built for 3D printer enclosures, protective covers, and filament storage systems. A practical heating solution for improving chamber conditions and supporting filament care in your printing setup
Set Chamber Temp for ABS & ASA on Creality, Prusa, Bambu
Before you set a chamber temperature, know why it matters: keeping the air warm reduces thermal stress so layers stick and big parts don’t warp.
If you’re printing ABS:
1) Set chamber to 50–65°C.
2) Use slower first-layer speed: 15–20 mm/s.
3) Reduce fan to 0–20% for the first few layers, then 10–30% afterward.
Real example: I printed a 200 mm ABS enclosure at 60°C, 15 mm/s first layer, and saw corners stay flat instead of curling.
On ASA:
1) Set chamber to 60–70°C.
2) Keep part cooling low, around 10–25%.
3) Use 240–255°C nozzle temperature (adjust for your filament brand).
I printed a solar-housing prototype at 65°C and 250°C; the fit tolerances stayed within 0.2 mm across a 150 mm panel.
Why this differs by machine: Creality, Prusa, and Bambu handle heat and airflow differently.
Creality machines — what to do and why:
Why it matters: Creality enclosures heat slower and leak more, so you must help the chamber reach target before tall features print.
1) Load a tuned Creality profile (or set chamber to target 10–15°C below your final target during initial layers).
2) Use slower first-layer speeds (15–20 mm/s) and lower cooling as above.
3) If the chamber struggles, print a 20 mm tall sacrificial tower first so the chamber stabilizes.
Example: On a CR-10S with an aftermarket enclosure I preheated to 55°C and printed a 20 mm tower; the 250 mm ABS case that followed had no corner lift.
Prusa machines — what to do and why:
Why it matters: Prusa enclosures heat efficiently but thermal soak can shift offsets, so you need to check hardware after warming.
1) Ramp enclosure heating gradually: increase 5°C every 5–10 minutes until you hit target.
2) After the chamber reaches target and soaks for 10–15 minutes, recheck bed and nozzle offsets and re-level if offsets moved.
3) Use 50–65°C for ABS and 60–70°C for ASA as above.
Example: On a MK3S+ with an enclosure I raised temp in 5°C steps to 60°C and re-leveled; a 180 mm ABS gear box printed with no layer separation.
Bambu machines — what to do and why:
Why it matters: Bambu enclosures actively hold temperature, so you can safely use the higher end of ranges if you validate first.
1) Start at the lower end (60°C for ABS, 65°C for ASA) for your first run.
2) If the enclosure holds steady within ±2°C, you can move up to 65°C for ABS or 70°C for ASA on subsequent prints.
3) Always run a 50–100 mm calibration print to confirm dimensional stability before printing large parts.
Example: On an X1 with the factory enclosure I tested at 70°C and printed a 220 mm ASA bracket that remained within ±0.15 mm of intended dimensions.
Quick checklist before a big ABS/ASA print:
1) Set chamber temp (ABS 50–65°C, ASA 60–70°C).
2) Set nozzle temp (ABS ~230–250°C, ASA ~245–255°C depending on filament).
3) Slow first layer (15–20 mm/s).
4) Reduce cooling (0–25% for first layers, then 10–30%).
5) Run a small calibration tower and measure after soak.
If you follow those steps, you’ll cut warping and get stronger layer bonds on larger parts.
Recommended Products

Storage Size:18.89*23.62*28.34(480*600*720mm). Compatible for Creality Ender 3V2/Ender 3S1/Ender 3Pro/Ender 3/Ender 3V2 Neo?Ender 3Neo/Ender 5/Ender 5S1/Anycubic Kobra/ELEGOO Naptune 3 3D Printer.Importantly: The Creality and Ender Enclosure have passed Flame Resistance Test.

UV sheet Block Window: The enclosure is designed with a UV block window, which protects the resin prints from harmful UV rays while allowing you to monitor the printing progress and quality

【Improve Print Quality with Constant Temperature】Provides a stable and controlled environment for your prints, maintaining a consistent temperature during printing ensures that you produce high-quality prints while avoiding print failures and material wastage. Constant temperature reduces the risk of material clogs and jams, enhancing your printing speed and efficiency.
Fixes for Warping, Layer Separation, and Uneven Heat
If you’ve ever had a print curl up at the corners, this is why.
Why it matters: warping, layer separation, and uneven layers ruin parts and waste filament. For example, I fixed a cracked ABS box by spotting a cold draft from a nearby vent and sealing it with foam, after which the box printed cleanly.
1) Check and stop drafts
Why it matters: moving air cools layers unevenly and causes lifting.
Steps:
- Walk around the printer while it’s printing a small object and feel for airflow with your hand near the build area.
- Seal gaps in the enclosure or frame with foam tape (5–10 mm wide) or high-temp silicone.
- Redirect or slow case fans: set part-cooling fan to 0–30% for ABS/ASA, 30–50% for PETG.
Example: in my garage, a side window blew across the printer at 0.5–1 m/s; closing the window removed layer delamination.
2) Stabilize chamber temperature
Why it matters: big thermal gradients create internal stresses that warp parts.
Steps:
- Add insulation: wrap the outside with 10–20 mm of foam board or use aluminium-covered ceramic insulation.
- Add an enclosure if you don’t have one: a cardboard box works for PLA, a polycarbonate or metal enclosure for ABS/ASA with a door.
- Consider a chamber heater or heated build chamber controller and aim for ±5°C stability around the print temperature (for ABS, keep chamber at 45–60°C; for PLA, 30–40°C).
Example: I raised chamber temp to 50°C for ABS prints and dropped corner warping from 6 mm to under 1 mm on a 100 mm cube.
3) Control filament moisture
Why it matters: wet filament bubbles and weak interlayer bonds cause separation.
Steps:
- Dry filament at 50–60°C for PLA for 4–6 hours, and 70–80°C for ABS/PETG for 4–8 hours in a food dehydrator or filament dryer.
- Store spools in airtight bins with silica gel packs (5–10 g per spool) after drying.
- Run a 10–20 mm test cube after drying to check surface finish and layer adhesion.
Example: a PETG spool that printed gaps stopped failing after an 8-hour 65°C dry and storage in a sealed tote with two silica packs.
4) Adjust cooling and temperatures
Why it matters: too much cooling or too-low temps weaken layer bonds and cause separation.
Steps:
- Increase nozzle temperature by 5–10°C within the filament’s limit (e.g., PLA 200→210°C, ABS 230→240°C) to improve layer fusion.
- Raise bed temperature by 5–10°C (PLA 60→70°C, ABS 100→110°C) if adhesion or first-layer stress is an issue.
- Reduce part-cooling fan for ABS/ASA to off or 10–30%; for PLA keep 20–60% depending on overhangs.
Example: increasing ABS nozzle temp from 235°C to 245°C fixed weak layer lines on a functional bracket after one test print.
5) Improve first-layer adhesion and test
Why it matters: a poorly bonded base lets the whole part shift and warp.
Steps:
- Level the bed or use mesh bed leveling; set first-layer height so a single sheet of paper has slight drag under the nozzle.
- Use adhesion aids: glue stick, PEI sheet, or a 3–5 mm brim for large flat parts.
- Print a 20–40 mm calibration cube or a 50 mm circular brim test after adjustments to confirm the fix.
Example: adding a 3 mm brim to a 120 mm flat part eliminated edge lift after two trial prints.
Quick checklist to run after changes:
- Feel for drafts while printing.
- Verify chamber stays within ±5°C of target.
- Dry filament and reseal spools with silica.
- Raise nozzle/bed temps by 5–10°C if layers look weak.
- Use a brim and test print a small cube.
If problems persist after these steps, note the exact temperatures, filament brand, and a photo of the failed print so you can diagnose the next cause.
Recommended Products

【Material】Insulation Lightweight Foam Foil,heat-resistant, fire preven

Creality 3d printer enclosure 100% official and original packaging of the products! compitable with 99% FDM 3d printers such as Ender 3 V3 KE enclosure, Ender 3 V3 SE enclosure, Ender 3, Ender3 V2, Ender 3S, Ender 3S1, Ender 3 S1 Pro, Ender 3 Pro, Ender 3 Neo, Ender 3 V2 Neo, Ender 2, Ender 2 Pro, CP 01, and other 3D printers
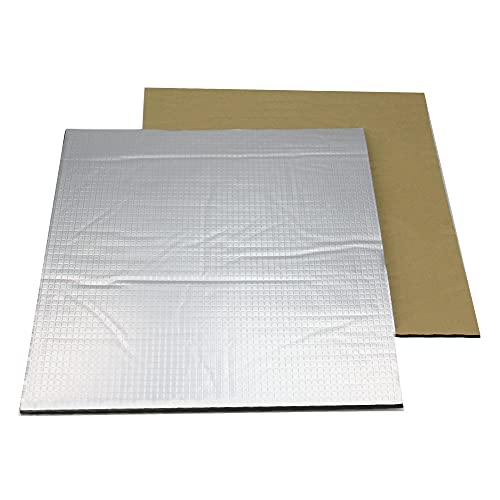
Material:Insulation black closed-cell elastic foam and foil,make hot bed heats up faster and retains more heat
When to Anneal ABS/ASA Instead of Raising Chamber Temp
Here’s what actually happens when you anneal instead of just turning up the chamber heat: annealing relieves internal stresses after a part is printed, which directly reduces warping and can improve heat resistance without risking printer electronics or material sagging.
Why this matters: if your large ABS box or a snapped-together ASA housing is mildly warped, annealing can fix shape and strength while a hotter chamber often won’t.
Real-world example: you printed a 200 x 200 x 150 mm ABS enclosure that cups at the corners despite a 60°C chamber; after annealing, the corners flattened and bolt holes aligned.
How to anneal ABS/ASA safely (step-by-step):
- Why do this first: annealing lets polymer chains relax and can increase crystallinity, so your part resists heat and holds dimensions better.
- Prepare a test piece: print a small coupon (40 x 40 x 5 mm) using the same settings.
- Heat source and container: use an oven that holds ±2°C or a temperature-controlled toaster oven, and put the part on a ceramic tile or stainless tray.
- Temperature and time: set the oven to 80–95°C for ASA or 90–115°C for ABS; hold 30–90 minutes depending on thickness (use 30 minutes per 3–5 mm of thickness).
- Ramp rates: heat up at about 10°C every 5–10 minutes until target; cool down at roughly the same rate, leaving the oven closed for 1–2 hours.
- Check results: measure critical dimensions and test-fit mating parts; if warping persists, repeat one cycle at +5–10°C but never exceed 120°C for ABS.
Practical tips and cautions:
- Use thermometer: put a separate oven thermometer next to the part to confirm actual temperature.
- For assembled parts: disassemble anything that could fuse, or anneal individual pieces.
- Avoid deformation: if a thin fin or thin wall starts to droop, lower the temperature by 5–10°C or reduce hold time.
- Safety: anneal in a well-ventilated area because heated ABS/ASA can emit odors.
Real-world example: a 12-piece ASA drone frame printed in parts warped slightly; annealing each arm at 85°C for 45 minutes removed internal twist and made the arms interchangeable again.
When not to anneal and instead tweak chamber or print settings:
- If fresh prints immediately warp during the first layers, fix bed adhesion, first-layer temperature, or increase chamber to 40–50°C before annealing.
- If you need dimensional accuracy right off the printer for very tight tolerances (±0.1 mm), tune the printer rather than relying on post-print anneal.
One final practical test: print two identical brackets, anneal only one using the above cycle, then compare fit and stiffness—this gives you a direct, visual check of whether annealing helps your specific filament and geometry.
Frequently Asked Questions
How Does Chamber Humidity Affect ABS and ASA Printing Quality?
High humidity harms ABS and ASA printing by promoting moisture migration into filaments, causing bubbles, poor layer adhesion and stringing; I control condensation with dry boxes, silica desiccants and active condensation control in the chamber to prevent defects.
Can Additives Change Optimal Chamber Temperatures for Abs/Asa?
Yes — I think additives can change ideal chamber temperatures: additive compatibility matters, since thermal modifiers (plasticizers, nucleating agents) alter crystallization and thermal behavior, so I’d test settings per formulation and monitor warping.
Do Different Abs/Asa Brands Require Unique Chamber Ramp-Up Profiles?
Yes — I think brand specific profiles matter: I treat each filament like a different sun, adjusting chamber ramp-up to manufacturer tolerances and formulation quirks so heating curves match that filament’s temperament for consistent results.
How Does Chamber Heating Impact Long-Term Filament Storage?
Chamber heating reduces ambient humidity I’ve seen, so I store filament in sealed containers to prevent moisture migration; I recommend drying before printing and keeping temps stable to avoid long-term quality loss and brittle, noisy prints.
Are Mixed-Material Prints With Abs/Asa Affected by Chamber Gradients?
Yes — 80% of mixed ABS/ASA failures trace to thermal gradients; I’ve seen Layer adhesion suffer and Warping hotspots form where temperatures vary, so I’ll stabilize chamber zones and tweak prints to prevent delamination.