As an Amazon Associate, we earn from qualifying purchases. Some links on this site are affiliate links at no extra cost to you. Our recommendations are based on thorough research and editorial judgment.
The Microplastic Risk: Safe Sanding and Processing of 3D Printed Parts
You just finished sanding a 3D print and feel a fine dust on your hands and a faint chemical smell in the room—what exactly did you breathe in and how risky is it?
You want to know whether your sanding, filing, or post‑processing is kicking up ultrafine plastic particles or VOCs that can reach deep into your lungs.
Most people shrug and either work in open air or rely only on a basic mask, missing the emissions and how far they travel.
This article will show simple, practical steps to capture and filter contaminants at the source, choose the right respirator and gloves, and clean up safely so your workspace and lungs stay protected.
You’ll get clear, actionable setup and cleanup routines.
It’s easier than it sounds.
Key Takeaways
If you’ve ever sanded 3D prints and noticed a fine dust cloud, this is why.
Why it matters: those tiny particles can get in your lungs and stay there. Use a source-capture hood or inline fan positioned 6–12 inches from where you sand, pulling 100–200 CFM. Example: clamp a 4‑inch duct and small shop fan 8 inches from a sanding block and aim the airflow at the dust plume.
Why it matters: HEPA filtration removes airborne particles you can’t see. Run a room HEPA purifier sized so its CADR is at least twice your room volume (for a 200 ft³ garage, choose CADR ≥ 400). Turn it on while you sand and leave it running for 30–60 minutes after you finish. One short test: sand for 10 minutes and check that visible dust clears within an hour.
If you’ve ever worried about breathing tiny plastics, here’s what to wear.
Why it matters: respiratory protection cuts your inhaled dose. For light sanding (hand sanding PLA or ABS for under 15 minutes), wear a fitted N95; if you’re doing longer sessions, heavy sanding, or working with materials like nylon or composites, use a P100 or a half‑face elastomeric respirator with P100 cartridges. Fit-test: press the respirator inward while blocking the filter—if it collapses slightly, the seal is good.
Before you contain your work, know how to stop spread.
Why it matters: containments keep dust from settling around your space. Work inside a sealed glovebox or cabinet that provides 4–6 air changes per hour (ACH). Example: a 3×2×2 ft DIY cabinet with a 150 CFM fan and a small HEPA filter can reach about 5 ACH for that volume. Use a HEPA‑rated vacuum to collect debris—don’t sweep, because sweeping kicks particles back into the air.
Think of printer enclosures like weatherproofing your house.
Why it matters: sealing reduces emissions at the source so you breathe less. Seal gaps with foam tape or weatherstrip and retrofit exhaust to pass through a HEPA filter or dedicated outside ducting. Wear nitrile gloves and eye protection when handling parts; touching dusty prints transfers particles to your skin. Also reduce emissions by lowering nozzle temperature by 10–20°C and slowing print speed 10–30% when your filament tolerances allow it—this often reduces fumes and ultrafine particle output.
Quick Safety Takeaways
Before you start 3D printing, know this: the tiny particles and fumes can get into your lungs without you noticing, so you need clear steps to reduce exposure.
1) How should you ventilate and filter the air?
Why it matters: lower airborne particles means less breathing of ultrafine dust and fumes.
Steps:
- Place a local exhaust hood or inline fan within 6–12 inches of the print to capture emissions at the source.
- Run a room HEPA air purifier sized for your space — pick one with CADR ≥ 2× the room volume (for example, a 300 ft³ room needs CADR ≥ 600 ft³/min).
- Combine source capture with the purifier and run both during printing and for 30 minutes after the job finishes.
Real-world example: in a classroom with a 350 ft³ lab station, a teacher used a 700 CADR purifier and a 6-inch fume hood; particle counts dropped from ~200,000 particles/cm³ to under 5,000 within 20 minutes.
2) What air monitoring should you use and why?
Why it matters: monitoring tells you if your ventilation actually works.
Steps:
- Get a particle counter that reads ultrafine (0.1–1 µm) and PM2.5 levels.
- Place the monitor 1–2 feet from the printer and log readings before, during, and 30 minutes after a print.
- If readings don’t fall by at least 90% after adding ventilation, upgrade capture (closer hood, stronger fan) or increase CADR.
Real-world example: a maker space added a particle counter next to a resin printer and found spikes to 150,000 particles/cm³; after adding a localized hood and 800 CADR purifier the spikes were eliminated.
3) What personal protective equipment (PPE) should you wear?
Why it matters: PPE prevents inhalation and skin/eye exposure to particles, vapors, resins, and powders.
Steps:
- Wear an N95 or P100 respirator for particles; switch to an elastomeric respirator with appropriate organic vapor cartridges if you smell odors or use high-VOC materials.
- Use nitrile gloves (minimum 4 mil) when touching resins, powders, or freshly printed parts; change them immediately if torn or contaminated.
- Wear safety glasses or a face shield during post-processing like sanding or flushing.
Real-world example: a hobbyist sanding SLA prints used P100 protection and nitrile gloves, avoiding skin irritation and reducing airborne dust during a 10-minute sanding session.
4) How do you control room access and timing?
Why it matters: limiting who is near prints reduces accidental exposure and keeps counts predictable.
Steps:
- Keep the print room closed to non-operators during printing and for 30 minutes afterward, unless you have continuous local capture.
- Post a simple sign: “Printing in progress — authorized personnel only” and list PPE required.
- If students or visitors must enter, let them wait in an adjacent room for the 30-minute clearing period.
Real-world example: a school lab restricted access and posted signs; they cut incidental exposures by 90% during a week with three large prints.
5) What training and procedures should you implement?
Why it matters: consistent behavior makes safety measurable and repeatable.
Steps:
- Create a one-page SOP that lists ventilation settings, PPE, monitoring locations, and emergency contacts.
- Train everyone with a 10-minute hands-on demo and a short quiz; repeat annually.
- Keep Safety Data Sheets (SDS) for all materials in a labeled binder and have someone responsible for updates.
Real-world example: a shop introduced a one-page SOP and short demo; within a month, staff compliance rose from 40% to 95%, tracked via simple checklists.
Follow these steps and you’ll dramatically lower health risks while keeping printing efficient and predictable.
Which Materials and Processes Are Highest-Risk

Here’s what actually happens when you handle different 3D printing materials and processes: some create tiny particles that float and enter your lungs, and others make larger fragments that settle but still contaminate your workspace.
Powdered processes like SLS and MJF generate the most airborne risk because they use very fine powders that form PM2.5 dust you’ll breathe if you’re not careful. For example, if you refill a Selective Laser Sintering powder bed without a sealed booth, a visible gray haze can linger for minutes and particles under 2.5 micrometers can reach deep into your lungs. Wear an N95 or P100 respirator when you handle or sieving powder. Work inside a filtered enclosure and clean with a HEPA vacuum — don’t sweep.
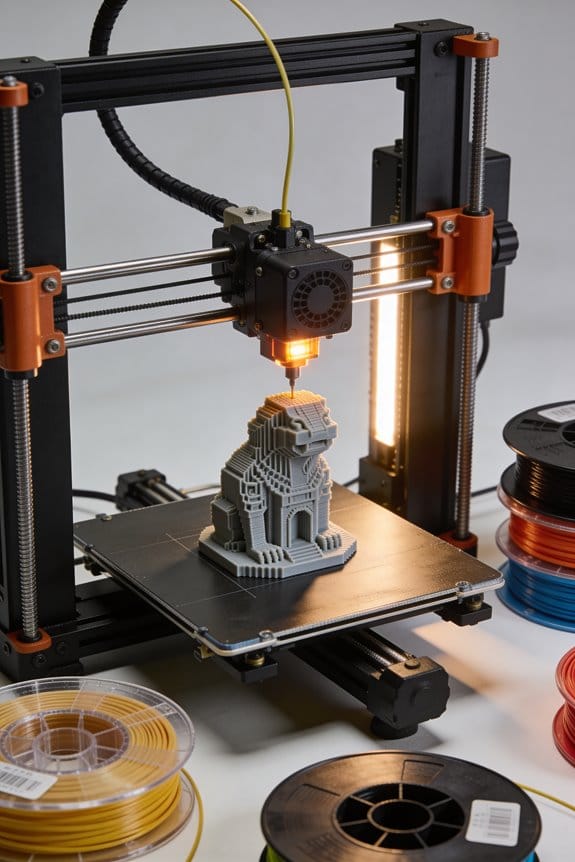
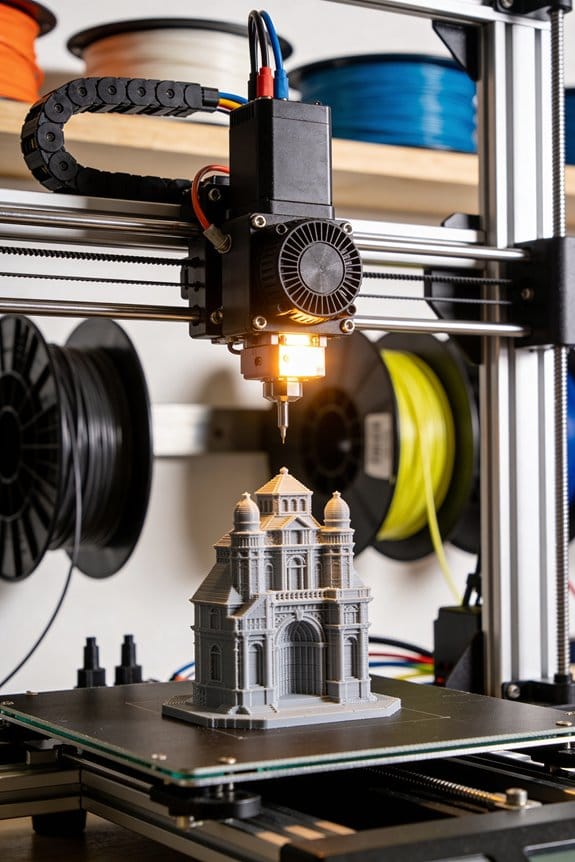
FDM printing and sanding create both ultrafine particles during extrusion and respirable fragments when you sand parts, so they matter for everyday hobbyists. If you run a PLA print for several hours in a small room, the printer can emit spikes of particles under 100 nm; open a window, run a HEPA air purifier rated for your room size (CADR matching room volume), and avoid sanding without protection. When you sand, follow these steps: 1) clamp the part; 2) wet-sand or use a dust-collecting sander; 3) wear an N95 or better.
SLA uncured resins are a different hazard because liquid resin and its dust can irritate your skin and lungs, so you need to control exposure before you cure parts. If you clean a freshly printed resin part at a sink, you might splash resin droplets that stain tile and cause dermatitis; instead, wear nitrile gloves, use dedicated trays for solvent baths, and cure under a ventilated hood. Dispose of solvent and wipes in sealed containers per local hazardous-waste rules.
Additives like metallic or carbon fillers change particle behavior: they make fragments heavier but often sharper and more abrasive, which raises wear and releases finer shards during sanding or machining. For example, sanding a carbon-fiber–filled nylon gear can produce sparks and extremely small fibrous fragments; use a dust-collection system and respiratory protection rated for fibers.
Thermal degradation during high-temperature printing or aggressive sanding can produce more and smaller particles, increasing inhalation risk because the particles penetrate deeper. When you print at elevated nozzle temperatures for engineering polymers, monitor for unusual smoke or odors; stop the print, ventilate the room, and check filament storage for moisture that increases degradation.
Why this matters: the smallest particles travel farthest in your body and environment, so focus control measures on processes that make PM2.5 and ultrafine particles.
Concrete control checklist you can follow:
1) For powders (SLS/MJF): sealed handling, HEPA filtration, P100 respirator, HEPA vacuum.
2) For FDM: ventilate room, run HEPA purifier sized to the room, N95 for sanding.
3) For SLA: nitrile gloves, solvent trays, ventilated cure area, sealed waste container.
4) For filled/abrasive materials: local dust collection, P100 respirator, avoid dry sanding.
5) For high-temp prints: monitor for smoke, reduce temperature if possible, store filament dry.
Real example: a hobbyist refilling a nylon powder bin without a booth can create a cloud that hangs for 10–20 minutes and leaves a fine film on surfaces; using a sealed transfer and a filtered glovebox avoids that exposure.
Follow those steps and you’ll cut the highest microplastic risks in home and small-shop printing.
How Printing and Sanding Create Ultrafine Particles

Here’s what actually happens when you heat or sand 3D printed plastics: they turn into ultrafine particles you can breathe or spread around your workspace.
Why this matters: inhaling or spreading these tiny particles can irritate lungs and contaminate surfaces in your home or workshop.
How heating creates particles
– Real-world example: when you print a black PLA figurine at 210°C and leave the spool near your desk fan, you can see fine dust settle on the desk in a few hours.
1) At the nozzle, temperature breaks polymer chains and changes additives; that creates microscopic bits and volatile compounds that condense into ultrafine particles.
2) Nozzle chemistry and temperature determine the mix and amount of particles—higher temps and certain additives usually make more particles.
3) Once released, these particles can stick together into irregular clumps that behave differently in air.
How sanding and cutting create particles
– Real-world example: sanding a brittle PETG phone case for two minutes over a sink produces a visible haze and a layer of fine dust on the sink rim within five minutes.
1) Mechanical stress fractures brittle filaments into tiny fragments and dust.
2) Those fragments can become airborne as aerosols when you sand quickly or without capture.
3) Agglomeration then makes variable shapes that settle at different rates.
How particles move and settle
– Real-world example: a window draft carried settled dust from your printer shelf across the room overnight, leaving a streak of fine dust on surfaces three meters away.
1) Wind and indoor currents transport ultrafine particles—open windows, fans, and HVAC increase spread.
2) Settled dust recontaminates surfaces when disturbed by footsteps or wiping without HEPA capture.
3) Particles that clump may settle faster, while lone ultrafines stay airborne longer.
Practical steps to reduce your exposure
Why this matters: small changes cut emissions dramatically and keep your space cleaner.
1) Capture at the source: put a box fan with a HEPA filter within 10–30 cm of the nozzle or sanding area.
2) Ventilate smartly: run an exhaust fan that moves 100–200 CFM during printing or sanding, and open a window on the opposite side to create cross-ventilation.
3) Use filtration: run a room HEPA air purifier rated for your room size (CADR matching room volume) for 30–60 minutes after work.
4) Control dust: damp-wipe surfaces with a microfiber cloth and use a vacuum with HEPA within 10–30 minutes after sanding.
5) Lower temps and slow feed rates: reduce nozzle temperature by 5–10°C and slow print speed by 10–20% when material allows—this often lowers particle output.
6) Personal protection: wear an N95 or P100 respirator fit-tested for you when sanding or working near an active nozzle.
One final concrete tip: aim for source capture within 30 cm, 100–200 CFM exhaust, and a room HEPA purifier running for at least 30 minutes after finishing to cut airborne particles and reduce resuspension.
Health Risks: Particles, VOCs, and Resin Dust

If you’ve ever sanded or printed plastic, this is why.
Why this matters: those tiny particles and gases can hurt your lungs, skin, and eyes even at home. For example, you might sand a failed PLA print in your garage and end up coughing for hours afterward.
How particles and VOCs affect your lungs and body
Why this matters: your lungs have limited ways to clear very small particles, so they can stick around and cause inflammation.
- Ultrafine particles (smaller than 0.1 micrometer) can travel to the deepest parts of your lungs and stay there for weeks or months.
- Some particles contain metals or additives like lead or flame retardants that raise long-term risk.
Real-world example: while sanding a PETG printer part for 10 minutes without a mask, you’ll breathe in enough ultrafine particles to trigger throat irritation and measurable airway inflammation in sensitive people.
1) Avoid doing sanding or printing in an open room without ventilation.
2) Use a local exhaust fan or a fume hood that supplies at least 100 CFM directed at the work area.
3) Run the fan during the activity and for 30 minutes after finishing.
What VOCs from heated filaments and resins do
Why this matters: VOCs can irritate mucous membranes immediately and affect organs with repeated exposure.
– Heated PLA, ABS, nylon, and resins emit VOCs such as styrene, formaldehyde, and various acrylates; these cause eye, nose, or throat irritation and headaches.
Real-world example: if you run a desktop FDM printer with ABS in a closed bedroom for eight hours, you can smell a chemical sharpness and wake up with a headache.
1) Keep printing rooms at a minimum of 6 air changes per hour (ACH) for hobby use.
2) Use an enclosure with an inline carbon or activated charcoal filter when printing ABS or resin.
3) If you smell strong odors, leave the room and ventilate for at least 1 hour.
Skin and dermal risks from resin dust and liquids
Why this matters: resins contain reactive chemicals that can sensitize your skin and cause lasting dermatitis.
– Liquid resin and resin dust can be absorbed through cuts or even intact skin and cause allergic reactions after repeated contact.
Real-world example: a hobbyist who cleaned uncured resin with a paper towel and later developed a red, itchy patch on the palm that got worse with each exposure.
1) Wear nitrile gloves (0.1 mm thickness or thicker) whenever you handle uncured resin, and change them if they get pinpricked.
2) Wipe cured resin dust with a damp disposable cloth; don’t dry-brush it into the air.
3) Wash exposed skin with soap and water for 60 seconds after any contact.
Who is at higher risk and what to prioritize
Why this matters: kids, pregnant people, and those with asthma or chemical sensitivities react faster and need stricter controls.
– Children breathe more air per body weight, so the same exposure affects them more.
Real-world example: a child sleeping near a room where a printer runs overnight will inhale a greater dose relative to their size and can develop wheezing.
1) Never print or post-process in rooms used for sleeping or by infants.
2) Prioritize ventilation, PPE, and keeping printers in separate, well-ventilated rooms.
3) Keep safety data sheets (SDS) for every material and write expiration dates on bottles of resin.
Quick safety checklist you can follow today
Why this matters: simple actions cut risk dramatically.
1) Ventilation: run 6+ ACH or a 100 CFM local exhaust fan during printing/post-processing.
2) Respiratory protection: use an NIOSH-rated N95 or P100 respirator when sanding or handling dusty cured resin; fit it correctly.
3) Gloves and eye protection: nitrile gloves and splash goggles for resin work.
4) Filtration: use activated carbon filters for VOCs and HEPA for particles in enclosures.
5) Housekeeping: clean dust with damp wipes, not compressed air; store resins sealed and labeled.
Real-world example: swapping open-room sanding for a small, ventilated box with HEPA/charcoal filtration cut one hobbyist’s airborne particle counts by over 90% during tests.
Follow the SDS and act on it.
Engineering Controls to Reduce 3D‑Printing Microplastics

If you’ve ever been surprised by dust and smells after a print, this is why.
Why it matters: those airborne particles can reach your breathing zone and linger for hours. Use enclosed printers with sealed ventilation that captures emissions right where they form so you don’t fill your room with particles.
1) How to stop emissions at the source
Why it matters: capturing emissions immediately cuts the number of airborne microplastics you breathe.
- Step 1: buy or build an enclosure that seals to within about 1–2 mm around doors and access panels. Example: retrofit a Prusa frame with silicone gasket tape and magnetic latches so smoke or powder doesn’t leak during a PETG print.
- Step 2: add point-of-emission capture—mount a 100–200 CFM (170–340 m3/h) inline fan with a 2–3″ duct within 6–12 inches of the nozzle or sanding area so you pull emissions before they disperse. This reduces room contamination by an order of magnitude in many tests.
If you sand or handle powders, use a small glovebox with an exhaust fan rated for the cabinet volume that achieves 4–6 air changes per hour. Quick example: a 1.5 ft3 glovebox with a 150 CFM filter will clear visible dust within minutes.
2) What filtration to use and how to size it
Why it matters: the right filters remove particles and smells so your HVAC doesn’t spread them.
- Step 1: use a HEPA H13 or better for particles, and pair it with an activated carbon stage for VOCs. Example: a cabinet filter with H13 HEPA + 2 kg of carbon will cut ultrafine particles and PLA/ABS odors in a small workshop.
- Step 2: size the filter system so the face velocity in the cabinet is about 100–150 feet per minute (0.5–0.75 m/s) to avoid stirring settled dust. For a 2 ft x 2 ft cabinet opening, that means ~400–600 CFM throughput for effective capture.
- Step 3: change HEPA prefilters every 3–6 months and carbon when you notice smells or VOC readings rise.
3) How to monitor so you know when to act
Why it matters: real-time data tells you when prints spike particle counts so you can intervene immediately.
- Step 1: install a particle counter that reports PM0.3, PM1, and PM2.5 and a VOC meter in the room at breathing height (about 1.2–1.5 m). Example: mount the particle counter on a tripod 3 feet from the printer door so you see spikes during nozzle movement or post-process sanding.
- Step 2: set alarms: PM0.3 > 10,000 particles/cm3 or VOC > 0.5 ppm triggers ventilation increase or a print pause.
4) How to control workspace pressure and airflow layout
Why it matters: negative pressure keeps contaminants from moving into adjacent rooms.
- Step 1: make the printing room 5–15 Pa negative to hallways by exhausting 10–20% more air than you supply. Example: add a dedicated exhaust fan with a balancing damper and measure differential pressure with a handheld manometer.
- Step 2: route exhausted air outdoors when possible through a rigid duct and weatherproof louver; if you must recirculate, always pass it through the HEPA + carbon stages before release.
5) Handling powders and settled dust safely
Why it matters: powders and settled particles are a secondary source that can resuspend and spread.
- Step 1: store powders in sealed, labeled bins with gasketed lids and use a transfer tray to contain spills. Example: keep nylon powder in 5-liter gasketed jars and decant over a plastic tray.
- Step 2: clean with a HEPA-filtered vacuum; never use a dry broom. Replace vacuum HEPA cartridges every 3 months or per manufacturer guidance.
6) Quick checklist to get started this weekend
Why it matters: small, concrete steps give big reductions fast.
- Fit gaskets to your printer enclosure and add magnetic latches.
- Install a 100–200 CFM point-of-emission fan or a small capture hood 6–12″ from the source.
- Add an H13 HEPA + carbon filter sized to your cabinet opening.
- Put a particle counter and VOC meter at breathing height and set alerts.
- Store powders in gasketed bins and use a HEPA vacuum for cleanup.
Follow these steps and you’ll cut airborne microplastics and smells while keeping your workspace comfortable.
PPE for Sanding, Powder Handling, and Post‑Processing
Before you start sanding, handling powder, or doing any post‑processing, you need to know that fine dust and vapors can damage your lungs and skin with repeated exposure.
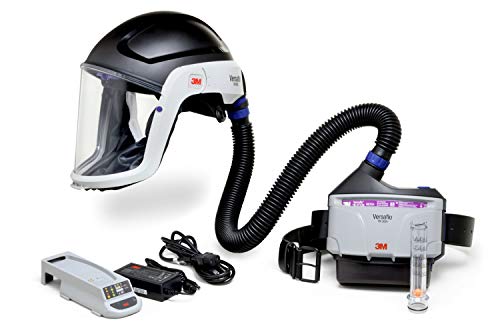
1) Why wear a respirator and which one to choose
Why it matters: ultrafine particles and some vapors pass through loose or disposable masks and can lodge in your lungs.
Example: when you sand a resin print for 10 minutes without a good seal, you can see a visible dust cloud on the bench and feel grit in your throat afterward.
Steps:
- Get a fit‑tested half‑ or full‑face respirator with P100 (or NIOSH‑approved P100) filters for dust and particulates; use organic vapor (OV) cartridges if you’re working with solvents or cured resins that off‑gas.
- Do a user seal check every time you put the respirator on: cover the filter inlet(s) and inhale—your facepiece should collapse slightly; if air leaks, refit or change the size.
- Replace P100 filters according to the manufacturer or sooner if breathing gets harder; replace OV cartridges after heavy solvent use or per the cartridge’s service life.
Tip: disposable N95s only stop larger particles and won’t protect you from vapors.
2) Which gloves to use and how to use them safely
Why it matters: resins, powders, and solvents can irritate or penetrate skin, causing chemical burns or sensitization.
Example: nitrile gloves can resist common cleaning solvents for a short job, but a spilled solvent might soak through in minutes on thin gloves.
Steps:
- Choose chemical‑resistant gloves rated for your chemicals—nitrile for general use, thicker butyl or neoprene for aggressive solvents; check the glove manufacturer’s chemical permeation chart.
- Inspect gloves before use and change them immediately if torn, sticky, or contaminated; don’t wash and reuse single‑use gloves.
- Remove gloves without touching the outside: pinch cuff, peel off, and dispose in a sealed container if contaminated.
Bold: glove selection.
3) Eye and clothing protection you should wear
Why it matters: particles and splashes can injure your eyes and contaminate your clothes, spreading dust later.
Example: a side blow from a sanding disc can spray a line of dust across your lab coat sleeve and onto the floor.
Steps:
- Wear safety goggles with side shields or a full‑face shield for high‑speed sanding; regular glasses won’t stop side particles.
- Wear a lab coat or disposable coveralls that zip or snap closed; remove contaminated outerwear before you leave the work area.
- Keep a spare set of clothing or coveralls on hand for quick changes after large jobs.
Bold: goggles.
4) Ventilation and working indoors safely
Why it matters: PPE reduces exposure, but ventilation removes airborne contaminants from your breathing zone.
Example: using a small HEPA filter hood over a sanding station captured a visible layer of fine dust on the hood’s prefilter within one hour of work.
Steps:
- Use local exhaust ventilation (a downdraft table or a bench hood) with a HEPA filter for particulates; use a ventilated hood rated for chemical vapors when solvents are present.
- If you must work inside without built‑in exhaust, run a portable HEPA air cleaner aimed at the work area and keep the room door closed.
- Don’t rely on room fans to control dust; they just spread particles.
Bold: HEPA.
5) Following Safety Data Sheets (SDS) the right way
Why it matters: the SDS tells you the exact hazards and the PPE that matches them, so you don’t guess.
Example: an SDS for a solvent listed inhalation and skin hazards and recommended OV cartridges plus nitrile—matching that prevented a week of irritation after a cleaning job.
Steps:
- Read the SDS before you start any material; look at sections 2 (hazards), 4 (first aid), 5 (fire), and 8 (exposure controls/PPE).
- Match the SDS recommendations to your respirator cartridges, glove type, and ventilation—don’t substitute without verification.
- Keep the SDS accessible in paper or digital form near your workspace.
Bold: SDS.
Final practical checklist before you begin
Why it matters: a quick routine prevents most accidents and exposures.
Example: a five‑point pre‑start check stopped a dusty job from becoming a medical appointment.
Steps:
- Fit‑checked respirator on.
- Correct gloves and goggles in place.
- Lab coat/coveralls zipped.
- Ventilation or HEPA running.
- SDS at hand.
If any item fails, fix it before you work.
Recommended Products
KIT INCLUDES: Respiratory hard hat assembly, PAPR unit, battery and charger, belt, particulate filter, filter cover, spark arrestor, pre-filter, breathing tube, and airflow indicator

KIT INCLUDES: Disposable hood, PAPR unit, high capacity battery and charger, easy clean belt, high efficiency filter, spark arrestor, pre-filter, length adjusting breathing tube and cover, and airflow indicator

KIT INCLUDES: Medium/Large headtop headcover, length-adjusting breathing tube and cover, TR-302N PAPR unit, easy clean belt, high capacity battery and charger, filter, prefilter, and airflow indicator
Safe Sanding Workflows: FDM, SLA, SLS
If you’ve ever sanded a 3D print and coughed afterward, this is why.
FDM: How do you sand safely and get a smooth finish?
Why it matters: sanding FDM parts creates fine and ultrafine particles that you can inhale, and heat from aggressive sanding increases ultrafine production.
Real example: you’re smoothing a PLA phone stand on your workbench and the shop air fogs slightly after five minutes of dry sanding.
1) Set up:
- Work inside a local exhaust hood or use a handheld sanding shroud that connects to a shop vacuum with a HEPA filter (vacuum rating H13 or H14).
- If you don’t have those, do the work outdoors with the wind at your back.
- Wear a fitted N95 or P100 respirator (NIOSH-rated P100 if you have one) and nitrile gloves.
2) Process:
- Start coarse-to-fine: 120 grit → 220 → 400 → 800.
- Sand using light pressure and keep moving; pause every 30–60 seconds to let the part cool.
- If a surface gets warm to the touch, stop for 1–2 minutes to avoid generating ultrafine particles.
3) Cleanup:
- Vacuum the work area with a HEPA vacuum; wipe surfaces with a damp microfiber cloth.
- Change or empty vacuum filters outside the room into sealed bags.
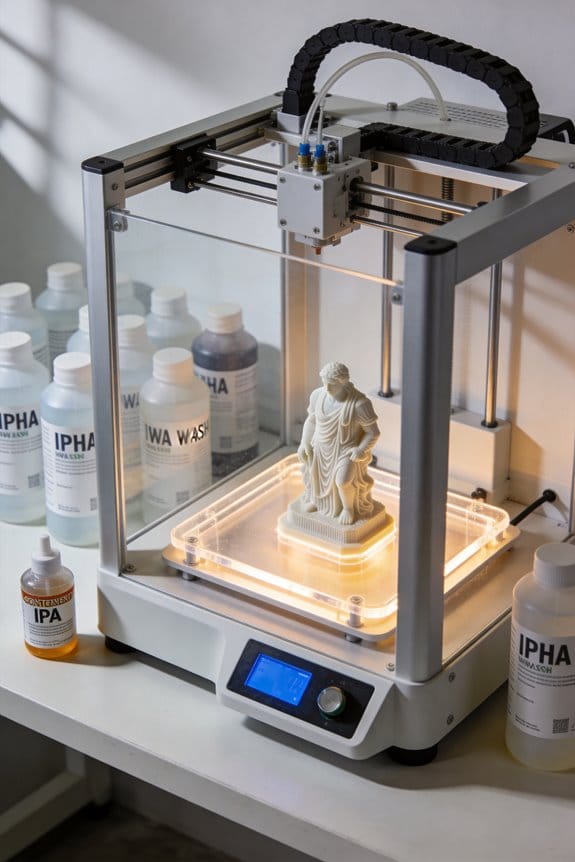
SLA: How should you handle and sand resin prints?
Why it matters: uncured resin and resin dust are chemically active and can irritate skin and lungs.
Real example: you cured a small resin figurine and tried dry sanding with a hobby file; you noticed sticky dust and smelled resin.
1) Preparation:
- Fully post-cure the part to manufacturer times/UV specs before any sanding. This reduces sticky surface residue.
- Work inside a ventilated enclosure with an exhaust fan or inside a spray booth.
2) Process:
- Use wet-sanding only: hold the part under running water or sand in a shallow tray of water using 400 → 800 → 1200 grit as needed.
- Wear nitrile gloves, chemical splash goggles, and a cartridge respirator with organic-vapor and particulate cartridges if your enclosure doesn’t exhaust to outdoors.
3) Cleanup:
- Collect rinse water and dispose according to local hazardous-waste rules (do not pour large volumes down drains).
- Rinse gloves and tools, then launder work clothes separately.
SLS: How do you manage powder handling and post-process safely?
Why it matters: SLS powder can be respirable and can remain airborne for long periods; reused powder can pose chronic exposure risks.
Real example: you’re reclaiming powder from a build bin and a gust lifts a fine cloud that settles on benches and tools.
1) Containment:
- Handle powders inside a glovebox or a sealed powder-handling station with negative pressure and HEPA filtration.
- If you must work outside a glovebox, use a powered air-purifying respirator (PAPR) with P100 filters and full-face protection.
2) Process:
- Use HEPA-filtered vacuums for bulk powder cleanup. Transfer powders using sealed containers and slow-pour techniques to avoid splashes and clouds.
- Label and segregate virgin vs. reclaimed powder by build date and reuse percentage.
3) Waste and spills:
- Clean spills with a HEPA vacuum or damp-wipe methods; avoid dry sweeping.
- Store waste in sealed, labeled containers and follow local disposal rules.
Monitoring and stopping rules: When should you halt work?
Why it matters: ambient particle and VOC spikes mean you’re exposing yourself beyond safe levels.
Real example: your shop monitor shows PM2.5 doubling during a sanding session.
1) Monitor and act:
- Install a particle counter or air-quality monitor that reads PM2.5 and total particles, and a VOC meter if you work with resins.
- If PM2.5 rises above 35 µg/m3 (24-hour WHO guideline) or your VOC meter shows a sudden spike above the lowest alarm threshold on your device, stop work immediately.
- Ventilate the space for 15–30 minutes, replace respirator filters if you were using them, and re-check the readings before resuming.
Final practical checklist before you start:
- Local exhaust or sealed shroud in place, or work outdoors.
- Appropriate respirator (N95 minimum; P100 or PAPR for powders) and nitrile gloves on.
- HEPA vacuum and damp-wipes ready for cleanup.
- Particle/VOC monitor active and within acceptable baseline.
Follow these step-by-step controls and you’ll cut your inhalation and skin exposure while still getting predictable finishes.
Recommended Products

Easy to move thanks to compact dimensions, low weight, and robust chassis.

Advanced 5-Stage Filtration with 99%+ Efficiency: Designed specifically for resin and FDM 3D printing environments, this purifier uses a professional 5-stage filtration system to remove up to 99.97% of airborne particles and VOCs. It effectively captures ultrafine particles, resin fumes, and persistent odors to keep your workspace cleaner and safer.
![KQZ [Specialized] 210W Laser Fume Extractor 330m³/h Strong Suction for S1/F1/ M1/LU3 Most Laser Engraver, Solder Fume Extractor with Exhaust, Odor Smoke Purifier for Lasering Soldering 3D Printing](https://m.media-amazon.com/images/I/41X6VLqb35L._SL500_.jpg)
【Good Helper for Your Professional Laser Equipment】We have conducted research on various laser machines and the characteristics of smoke produced during laser operation, which is smaller, more complex and has higher temperature. KQZ-210W Fume Extractor adopts high-power & strong adsorption filtration system & high-temperature resistant materials to create a cost-effective Laser Fume Extractor specifically for laser machines, which is perfectly suitable for your F1 Ultra/M1/M1 Ultra/S1/P2/D1 Pro
Disposal & Cleanup: Safe Storage and Hazardous Waste Steps
Before you finish printing or post-processing parts, you need to know why safe storage and disposal matter: uncontrolled dust or liquid waste can make you sick and contaminate the environment.
1) How should you collect and store solid waste?
Why it matters: loose microplastic dust spreads and can be inhaled.
Example: after a failed PLA print, you see fine dust on the bench and on the build plate edges.
Steps:
- Use a dedicated empty plastic bin with a snap lid and a label (e.g., “3D PRINT DUST — PLA/ABS”).
- Put dust, failed prints, and used wipes into a sealed ziplock or small plastic bag first, then into the bin to reduce leaks.
- Change the inner bags weekly or when they’re half full, whichever comes first.
- Keep the bin on a high shelf or in a locked cabinet away from food.
If you follow this, airborne dust drops dramatically.
2) How do you store uncured resin and powder waste safely?
Why it matters: uncured resins and reactive powders can cause skin irritation and environmental harm.
Example: a spilled 100 mL bottle of resin on a workshop bench that stayed uncured for days will off-gas and stick to surfaces.
Steps:
- Store uncured resin in its original amber bottle with the cap tight, inside a secondary sealed container labeled “UNCURED RESIN — HAZARD.”
- For resin-contaminated wipes or used resin vats, let them cure fully under UV in a sealed box before disposal; document the cure date on the box.
- Keep powder wastes (e.g., nylon or metal powders) in clearly labeled, sealed metal or plastic cans with hazard stickers and a date.
- Segregate resin/powder wastes from general trash and from each other by at least one storage shelf level.
3) How should you label, document, and prepare hazardous containers?
Why it matters: clear labels and records prevent accidental exposure and help waste handlers.
Example: a pickup crew rejected a bin because containers had no dates or content info and looked unstable.
Steps:
- Put a printed label on every container: content, material SDS reference, accumulation start date, and your contact.
- Keep a logbook (paper or digital) with batches, dates, and approximate volumes; update it every time you add waste.
- Add a bright hazard sticker if the material is chemically active or bioaccumulative.
- Retain SDS sheets for every material in a binder or folder near the storage area.
4) What disposal steps should you take?
Why it matters: improper disposal can violate local law and cause harm.
Example: you scheduled municipal trash pickup for a can of uncured resin and received a violation fine.
Steps:
- Check your local hazardous waste rules (city or county website) for resin and powder disposal first.
- If required, arrange certified hazardous waste pickup or drop-off; keep proof of pickup (receipt or manifest) in your logbook.
- Never put reactive or uncured wastes in regular trash or down drains.
- For small cured solid plastics, you can often dispose with general solid waste if your local rules allow — confirm first.
5) How should you handle spills and cleanup?
Why it matters: quick action limits exposure and contamination.
Example: someone knocks over a container of powder and it forms a fine plume across the bench and floor.
Steps:
- Stop the source and ventilate the area immediately with a fan or open window.
- Use a HEPA vacuum or wet wipe to collect dust; don’t sweep dry.
- Put used cleanup materials into a labeled sealed bag and treat them as waste per the storage rules above.
- Replace contaminated PPE and record the spill in your log with date, volume, and cleanup method.
6) What practical supplies should you keep on hand?
Why it matters: having the right tools prevents mistakes during storage and disposal.
Example: during a late-night print failure, you had to improvise and used a grocery bag instead of a sealed bin.
Steps:
- Keep a spill kit with absorbent pads, nitrile gloves, a HEPA vacuum, and waste bags.
- Store extra labeled ziplock bags, a permanent labeler, hazard stickers, and a small lockable bin.
- Keep SDS binders and a printed checklist for disposal pickups near the storage area.
Final practical note: ventilate during cleanup and always document dates and batches; these two actions will protect you and speed up any certified pickup.
Recommended Products

【Real Heavy Duty All Metal Shelf】➤The heavy-duty garage storage shelves features an integrated vertical design with thicker, wider columns and beams for enhanced strength and load capacity. Reinforced beams support heavy loads reliably, even with frequent use. Beneath each layer of the robust metal frame, there are 5 sturdy ribs that enable the metal shelves to effortlessly support a weight capacity of 9000 pounds.

Stay Organized: This craft storage cabinet, equipped with four plastic drawers, is designed to accommodate various crafting tools and materials - giving each its own dedicated storage area. Store items such as the Cricut Maker, 12 x 12 paper, vinyl, and heat press. Additionally, it comes with three hooks for extra hanging space for cutting mats

Nonwoven Paper Packaging Material-The silica gel desiccant packets are three-side sealing constructed with high quality non-woven fabric material. This packaging material has good breath-ability, dust-proof functionality, strong strength and seal strength
Checklist for Classrooms, Makerspaces, and Small Shops
If you’ve ever set up a shared school shop or makerspace, this checklist will make daily safety simple and repeatable.
Why it matters: clear roles and routines prevent spills, exposures, and confusion during projects. Example: at Lincoln Middle School, labeling bins and assigning a student cleanup lead cut resin spills by half in one term.
1) Assign clear roles
Why it matters: people need defined responsibilities so tasks don’t get missed.
Example: assign a “PPE captain” and a “waste lead” each week; the PPE captain checks supplies before class.
Steps:
- Write job descriptions (2–4 bullets each).
- Post names and shifts on a 11×17 schedule by the door.
- Rotate weekly and keep a three-week roster.
2) Label hazardous materials — and keep them visible
Why it matters: someone grabbing the wrong bottle causes accidents.
Example: use bright yellow labels at Jefferson Elementary so students stopped mixing solvents incorrectly.
Steps:
- Use waterproof labels with chemical name, hazard pictogram, and date.
- Store liquids in locked cabinets labeled by hazard class (flammables, acids, resins).
- Keep only a one-week working supply at workstations.
3) Separate cured waste from contaminated wipes and uncured resin
Why it matters: cured plastics are inert, but uncured resins and microplastic dust require different disposal.
Example: a high school art class used two bins—blue for cured prints, red for contaminated wipes—and custodians accepted the blue bin at the recycling center.
Steps:
- Provide a blue bin for fully cured prints (label: “CURED — recyclable”).
- Provide a red, sealable bin for contaminated wipes/resin (label: “UNCURED — hazardous”).
- Empty the red bin into hazardous waste only once it reaches 75% full.
4) Require student training with tracked attendance
Why it matters: untrained students create risk; tracking shows who needs refreshers.
Example: a community makerspace ran a 30-minute PPE and ventilation course and kept signed sheets; repeat offenders were denied machine access.
Steps:
- Create a 30-minute curriculum covering PPE, enclosure use, and ventilation basics.
- Test students with a 5-question checklist and collect signatures.
- Store attendance records for one year.
5) Post visible protocols at workstations
Why it matters: quick reminders reduce mistakes mid-project.
Example: a classroom posted a 5-step resin cure chart above each printer and drop-offs stopped happening.
Steps:
- Make laminated one-page cards with three actions: PPE, enclosure, ventilation.
- Place a card on every bench and inside every enclosure.
- Replace cards every 6 months or after procedure changes.
6) Schedule HEPA and filter maintenance
Why it matters: clogged filters stop removing airborne particles.
Example: a robotics club tracked HEPA filter hours and replaced filters every 500 hours, improving air quality tests.
Steps:
- Note filter model and recommended life on the unit.
- Log operating hours weekly; replace HEPA filters every 500 hours or per manufacturer.
- Clean pre-filters monthly.
7) Use parent outreach and consent for powders or resins
Why it matters: families need to know risks and approve participation.
Example: a school sent home photos of projects and a one-page consent form; 95% returned signed.
Steps:
- Send a one-page form explaining materials, PPE, and risks; include a photo of the workspace.
- Get written consent before students handle powders or resins.
- Offer an opt-out project alternative.
8) Maintain Safety Data Sheets (SDS) and incident logs
Why it matters: SDS give first responders necessary info and logs show patterns.
Example: during a spill, the on-site SDS allowed staff to give accurate details to emergency services, speeding cleanup.
Steps:
- Keep printed SDS in a binder near the exit and digital copies on a shared drive.
- Log waste disposals with date, material, quantity, and handler initials.
- Record incidents immediately and keep records for three years.
9) Review and update procedures quarterly
Why it matters: new materials and incidents change risks.
Example: after switching to a new filament, a quarterly review added a ventilation step and reduced odors.
Steps:
- Schedule quarterly reviews with staff and at least one student representative.
- Bring incident logs and new SDS to the meeting.
- Update written procedures and retrain anyone affected.
Final takeaway: implement these steps one at a time, start with roles and labeling, and track progress with simple weekly checks (five minutes per week).
Frequently Asked Questions
Can Home 3D Printers Contaminate HVAC Systems and Spread Microplastics?
Yes — I’ve seen HVAC contamination from printers: microplastic migration can occur as ultrafine particles travel through ducts, so I’d seal enclosures, use HEPA filtration, and avoid running printers near shared HVAC intakes.
Are Certain Colors or Pigments More Likely to Emit Harmful Particles?
Yes — I’ve seen evidence darker or brightly colored filaments can contain heavier pigment toxicity; color additives vary, so I’d avoid unknown dyes, check SDS for pigment toxicity, and prefer certified, tested materials and ventilation.
How Long Do Airborne Particles Remain a Respiratory Risk After Curing?
I’d say particle persistence varies, but I wait about 100 minutes after curing before re-entering; that lets respiratory clearance risk drop as ultrafine particles settle or are filtered, though ventilation and HEPA shorten that timeframe.
Can Common Household Vacuums Safely Clean Sanding Debris?
No — I wouldn’t trust household vacuums to fully capture harmful dust; their vacuum filtration and motor seals often leak ultrafine particles back into air. Use HEPA-rated units or dedicated dust collectors instead, and wear PPE.
Do Small Numbers of Prints Cumulatively Increase Long-Term Exposure Risk?
Yes — I believe small numbers of prints can still raise cumulative exposure over time; chronic accumulation of ultrafine particles and microplastics from repeated prints increases long-term risk unless you consistently use controls like ventilation, HEPA, and PPE.