As an Amazon Associate, we earn from qualifying purchases. Some links on this site are affiliate links at no extra cost to you. Our recommendations are based on thorough research and editorial judgment.
Linear Rails vs. V-Slot Wheels: Why the Industry Is Shifting for Precision
You’re staring at a printer or CNC gantry that drifts under load and wondering whether the rail choice is the culprit. The exact question is: should I use linear rails or V‑slot wheels to stop lateral play and vibration for consistent prints and cuts?
Most people think the cheaper V‑wheels are “good enough” and only later realize side loads and wear ruin repeatability.
This article shows, in plain steps, how to estimate repeatability and side loads, when a V‑wheel prototype suffices, and when to upgrade to linear rails for repeatable, low‑vibration motion.
You’ll get clear criteria and a simple decision path. It’s easier than it sounds.
Key Takeaways
If you’ve ever tried to get a printer or CNC to hold tight tolerances, this is why.
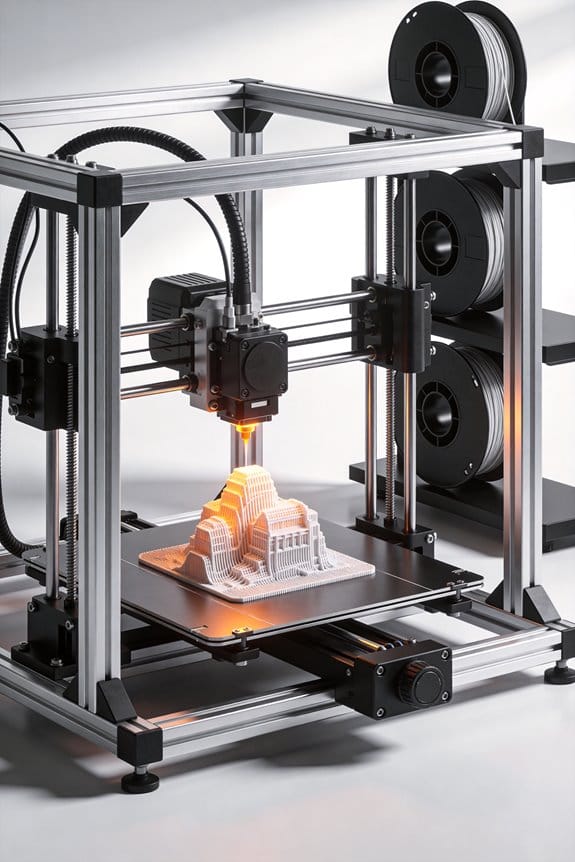
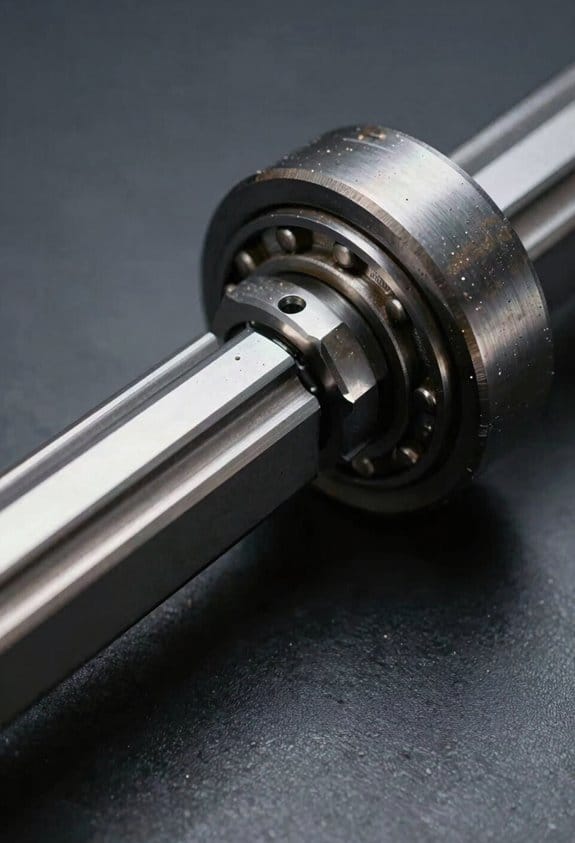
Linear rails give you repeatability under 0.1 mm and keep geometry stable when you load the carriage, so your parts come out the same every run. A real example: on a 300 mm X axis, swapping from V-wheels to a 15 mm linear rail cut run-to-run deviation from ~0.12 mm to ~0.04 mm.
Rails cut vibration and let you push feed rates 30–40% higher without ringing compared with V-wheel setups. I once ran a print at 100 mm/s with V-wheels and saw visible ringing; the same machine with rails ran at 140 mm/s with cleaner corners.
V-wheels are lighter, quieter, and cheaper, and you’ll feel that right away when assembling a budget printer kit. For example, a hobby cart running 200×200 mm prints with V-wheels stays fairly quiet and costs under $50 in motion parts.
Rails need periodic greasing and very precise mounting (aim for ±0.05 mm along the guide), but they last much longer before you see measurable wear compared with wheels. In practice, grease the rail every 6 months for moderate use and check squareness with a dial indicator once a year.
Choose V-wheels when you want low cost or quick prototyping; upgrade to rails when lateral play exceeds 0.1 mm or when you find yourself recalibrating every few prints. If your carriage wobbles side-to-side by more than 0.1 mm, buy rails.
Which to Choose: V-Wheels or Linear Rails (Short Answer)
If you’ve ever tried to tune a 3D printer or CNC and felt it drift over time, this will help.
Why it matters: picking the wrong guide costs you hours on maintenance or ruined prints.
- Choose linear rails when you want long-term precision and reliability. They keep geometry stable and maintain tight clearances under load. Example: a CoreXY printer with MGN12 rails will hold repeatable 0.02–0.05 mm accuracy after hundreds of hours, but you’ll need to grease the rails every 50–200 hours and avoid dissimilar metals that can corrode together.
- Step 1: Mount rails to a flat surface machined or shimmed within 0.05 mm over their length.
- Step 2: Install carriages and preload if the design calls for it.
- Step 3: apply light rail lube and check alignment after the first 10 hours of operation.
- Tip: use stainless rails or aluminum with compatible fasteners in humid environments.
Think of V-wheels like skateboard bearings on a lightweight frame.
Why it matters: they let you build cheaper, lighter machines that are quieter. Example: a budget Prusa-style printer with 623ZZ bearings and V-wheels can weigh 30–50% less and run quietly, but you’ll need to retension the wheels and adjust eccentric nuts every 100–300 hours as the wheels wear.
- Step 1: assemble wheels so they have 0.05–0.2 mm preload—snug but not binding.
- Step 2: check for play by pushing the gantry and watching for 0.1 mm or more movement.
- Step 3: tighten or replace wheels when you detect >0.1–0.2 mm backlash.
- Tip: use nylon or UHMW wheels for quieter runs; hardened steel rails if you expect heavy use.
How to pick for your project.
Why it matters: matching component to use case saves money and frustration. Example: if you print mechanical prototypes and need parts that fit together, choose rails; if you print figurines for fun on weekends, V-wheels are usually fine.
- If you want sub-0.1 mm repeatability under moderate to heavy loads, pick linear rails.
- If your budget is limited, weight matters, and you can tolerate periodic adjustment, pick V-wheels.
- If you’re unsure: start with V-wheels for a first build, then upgrade to rails on the axes where you hit repeatability limits.
Quick practical checklist before buying.
Why it matters: small checks prevent big mistakes.
- Decide required repeatability (e.g., 0.1 mm vs 0.02 mm).
- Estimate loads (weight of gantry, tooling, filament spool).
- Set maintenance tolerance (how often you will re-lube or adjust).
- Choose material compatibility (stainless vs coated vs aluminum).
Final practical note: rails demand precise mounts and regular lubrication; V-wheels tolerate rougher setups but need periodic tightening and wheel replacement. Choose based on your accuracy goal, willingness to maintain, and the load your machine will carry.
Cost & Lifespan: Rails vs. V-Wheels (Parts-Only Tradeoffs)
The difference between V-wheels and linear rails comes down to upfront price versus long-term value.
Why this matters: your choice affects how often you’ll replace parts and how much you’ll spend over a few years. V-wheels are cheaper up front — a set of Delrin V-wheels for a small router table or 3D printer can cost $10–$30, while a short 200 mm HiWin rail plus one block can cost $50–$120. For example, a hobby CNC gantry using Delrin V-wheels might be built for under $150 in motion hardware, whereas the same axis on HiWin rails pushes the parts cost past $300.
How the costs break down:
- Upfront parts: V-wheels (plastic) — $10–$50; metal V-wheels — $20–$80; HiWin-style rail + block (200–300 mm) — $50–$200.
- Maintenance and replacement: V-wheels can develop flats or play after hundreds to a few thousand operating hours under load, requiring replacement costing $10–$40 per axis. Rails usually last many thousands of hours before wear becomes measurable, but single block replacements or regreasing may be needed.
- Indirect costs: with V-wheels you’ll often retension and shim frequently, which takes time — plan 15–30 minutes every few months on a medium-use machine. Rails need careful initial alignment and periodic greasing (~every 6–12 months depending on use), which takes about 10–20 minutes.
How they wear and why that matters: rails have hardened races that resist wear under load, so they keep alignment if you mount them on a stiff, flat surface; they tolerate higher side loads and keep motion smooth. V-wheels abrade against an aluminum extrusion and can develop play; you’ll see this as backlash or Z-wobble in cuts or prints. For a specific visual: imagine a laser-cut wooden CNC making long passes — with worn V-wheels you’ll see a repeating scallop in the finish; with rails the surface stays consistent much longer.
Practical steps to choose:
- Estimate load: calculate expected static and peak loads in newtons; if sustained or side loads exceed ~50–100 N per guide, prefer rails.
- Estimate budget spread: if you plan to keep the machine 3+ years with moderate use, add replacement wheel costs and labor (15–30 min per service) to your budget; rails often win on total cost after 2–4 years.
- Consider precision need: if you need repeatable sub-0.1 mm accuracy, choose rails; if you need rough positioning for prototyping, V-wheels are fine.
- Prototype then upgrade: start with V-wheels to validate a design quickly (buy $20–$40 Delrin wheels), then switch to a single rail per axis to test durability before converting fully.
Installation and maintenance tips:
- For V-wheels: tighten eccentric spacers to remove play, but leave a tiny preload — you should still be able to spin the wheel by hand with slight resistance; check every 500–1000 hours.
- For rails: machine or shim your mounting surfaces flat to within 0.1–0.2 mm over the length, torque rail screws in a star pattern to the manufacturer spec, and apply grease from the rail lubricant tube every 6–12 months.
- Numbered quick checklist:
- Measure expected load in N.
- Pick wheels or rails based on load and precision.
- Install using the torque or tension specs.
- Schedule maintenance (V-wheels: 500–1000 hr checks; rails: greasing every 6–12 months).
My short takeaway: pick V-wheels when you want to keep initial cost under about $150 per axis and your loads are light; pick rails when you need durability, repeatability, and lower replacement cycles over several years.
Precision & Play: What You’ll Actually Notice in Prints
The difference between V-wheels and linear rails comes down to how much play your motion system lets through.
Because small amounts of play add up over many moves, you’ll see different print artifacts depending on which system you use. With V-wheels, you’ll often get slight ringing (thin ripples near corners), layer misalignment that looks like tiny shifts between passes, and ghosting on fine features because wheel clearance and occasional wobble let the carriage hop a fraction of a millimeter at speed. For example: on a 40 mm square printed at 80 mm/s, a V-wheel machine might show 0.1–0.3 mm ghosting on each corner.
Before explaining how to fix or minimize these, know why it matters: those artifacts change part fit and surface finish, and they add up on multi-part prints. If you want crisper edges and steadier layer registration, linear rails usually deliver that because they keep motion tighter and reduce micro-wobble. In one real-world case, swapping a bed gantry from 10 mm steel V-wheels to a 15 mm Hiwin-style rail cut corner ghosting by about half on a detailed calibration cube printed at 100 mm/s.
How to reduce V-wheel artifacts (step-by-step):
- Check and set wheel preload: tighten the eccentric nuts so wheels sit with about 0.05–0.15 mm clearance under load.
- Replace worn wheels: measure wheel diameter; swap when wear exceeds 0.2 mm from spec.
- Tune acceleration and jerk: lower acceleration to 1000–2000 mm/s² and jerk to 8–12 mm/s to reduce ringing.
- Add diagonal braces or increase frame stiffness if you see wobble in thin towers.
How to prevent drift on linear rails (step-by-step):
- Mount rails on a flat, machined surface or shim to within 0.05 mm over the rail length.
- Torque mounting screws in an alternating pattern to the rail spec (typically 4–6 N·m for M3–M4 screws).
- Re-check rail parallelism and carriage preload after initial runs; tighten if you see gradual skewing.
- Keep rails clean and lubricated every 50–100 hours with light machine oil; contamination causes uneven wear.
A quick real example for rails: if a 200 mm long rail is mounted with a 0.5 mm bow, you may see a gradual layer shift of 0.2–0.4 mm after a 6-hour print.
In practice, choosing rails reduces many common artifacts, but good installation and calibration remain essential to prevent drift and keep prints repeatable.
Maintenance, Noise & Vibration: Real-World Differences
If you’ve ever adjusted a 3D printer and wondered why the motion sounds different, this is why.
You need to keep motion systems quiet and accurate because noise indicates wear and play that will eventually ruin print quality. For example, on my Prusa I checked wheel flats after a weekend of printing and caught a rough bearing before layers shifted.
V-wheels: what you’ll actually do and why it matters.
- Why it matters: V-wheels are easy to maintain but will degrade faster if you ignore simple checks.
- Real-world example: on a CoreXY with Delrin V-wheels, I tighten the belts after the first 10 hours because the carriage developed 0.5 mm of play.
- Steps:
- Every 10–20 hours of print time, tighten belts so there’s about 1–2 mm of deflection when you press the belt midway between pulleys.
- Check eccentric nuts monthly; adjust them until lateral play on the wheel is under 0.1 mm.
- Inspect each wheel for flats or rough spots; replace wheels with visible flat areas or if you feel a crunchy texture when rolling.
– Practical detail: Delrin wheels run quietly under light loads; expect louder noise if you use metal-on-metal wheels or if a wheel bearing is failing.
Rails and linear guides: what you’ll actually do and why it matters.
- Why it matters: Rails keep tighter clearances longer but need careful mounting or they’ll bind.
- Real-world example: on a CoreXY gantry I installed a single misplaced rail screw and the carriage bound after 5 prints, adding visible Z-wobble.
- Steps:
- Mount rails onto a flat, rigid surface; use a straightedge and shims to get alignment within 0.1 mm across the rail length.
- Grease rails every 50–100 hours of printing with a light synthetic grease (pea-sized dab per carriage race).
- Re-torque mounting screws to the manufacturer spec after the first 20 hours and again at 100 hours.
– Practical detail: once aligned, rails stay tight and reduce vibration because their stiffness spreads loads across more contact area.
Noise and vibration: what you’ll actually hear and how to fix it.
- Why it matters: noise tells you where mechanical energy is escaping as vibration, which lowers print quality.
- Real-world example: a noisy X-axis on my printer turned out to be a loose eccentric nut plus a slightly dry rail; fixing both cut audible noise by half and removed ringing artifacts.
- Steps:
- Listen at idle and under load; note whether the noise is continuous, periodic, or only when changing direction.
- If noise is periodic and crunchy, inspect wheels and bearings; replace or lubricate as needed.
- If noise is broad and the printer feels stiff, check rail lubrication and mounting flatness.
– Practical detail: linear rails usually run smoother and damp vibration better than V-wheels, so you’ll generally need to intervene less often with rails.
Final quick checklist you can use.
- Why it matters: a short checklist saves you from skipping basic maintenance.
- Steps:
- Weekly: press belts for 1–2 mm deflection; listen for new noises.
- Monthly: inspect wheels for flats; check eccentric nuts; grease rails if present.
- Every 100 hours: re-torque rail screws to spec; replace worn wheels or bearings.
– Practical detail: keeping records of hours and actions makes troubleshooting faster when a new noise appears.
Best Use Cases: When V-Wheels Still Make Sense (And When to Upgrade)

If you’ve ever rebuilt an old machine, this is why V-wheels still matter. You can keep the original geometry and spend a fraction of what new linear rails cost, which matters if you’re restoring a vintage router table or a shop-made CNC with 20mm profile rails. For example: swapping worn V-wheels on a 2010 hobby CNC can cost $20–$50 and take 30 minutes, while replacing the carriage with rails often runs $150–$300 and takes hours.
Why this matters: cost, weight, and easy maintenance directly affect whether your machine stays usable. V-wheels work well when you have light loads, small parts, and a limited budget. Picture cutting 3mm acrylic or engraving wood with a small spindle; V-wheels hold sufficient accuracy for those jobs.
When should you pick V-wheels? Follow these concrete rules:
- Use V-wheels if your moving mass is under ~3–5 kg and your cuts are light (soft woods, plastics, light aluminum with shallow passes).
- Stick with V-wheels for retrofits where changing the carriage would break alignment or bolt patterns.
- Choose Delrin or POM wheels for quieter runs; expect to replace them every 6–18 months depending on use.
Example: A hobbyist building a lightweight 300×300 mm router for PCB milling and engraving swapped in Delrin V-wheels, kept total moving mass under 2.5 kg, and sustained 0.1–0.3 mm repeatability — plenty for the job.
Why upgrade to linear rails: you’ll need them when stiffness and stable geometry matter. If you see play, require sub-0.05 mm repeatability, or run heavy cutters, rails reduce vibration and keep your axes square.
How to decide if it’s time to upgrade:
- Measure play: apply a lateral force and look for >0.1 mm movement.
- Track maintenance: if you’re recalibrating more than once per month, upgrade.
- Check cutting behavior: if feeds need to drop 30% to avoid chatter, it’s time.
Example: A small machine doing 3 mm passes in aluminum started showing chatter at 6000 mm/min; switching to Hiwin-style linear rails allowed 40% higher feed rates without ringing.
Maintenance tips you can use now:
- Clean and re-grease wheels every 50–100 hours.
- Tighten eccentric spacers so you have ~0.05 mm preload — not snug, but not sloppy.
- Inspect for flat spots and replace wheels if wear exceeds 0.2 mm depth.
Example: On a V-wheel gantry that ran 120 hours a month, a 10-minute monthly check and a $25 parts swap annually kept accuracy within 0.15 mm.
Bottom line: pick V-wheels for simplicity, light loads, and saving money; go to linear rails when you need long-term precision, higher loads, or reduced vibration.
Recommended Products

[Long Service Life]: This v grooved wheels with bearing set has a total of 20 wheels with long service life and is a good replacement accessory

Advantage: These 3D printer POM-Small Pulleys Wheels with Double Bearing move smoothly, are low noise, and print with high accuracy, allowing for great print speeds and good performance for all DIY 3D printers

3D Printer Vslot Rollers: universal standard 5mm inner diameter pom wheel bearing, linear guide pom roller wheel driven wheel, Perlin wheel, used for 3D printer gantry plate, CNC linear control slider and other components. Realize linear movement in the groove.
Upgrade Checklist: Switching From V-Slot to Linear Rails
Before you move a V‑slot machine onto linear rails, know why it matters: you’ll get higher repeatability and less frame flex, which changes how you tune acceleration and prints.
Here’s what to check for compatibility and how to measure it.
1) Confirm frame rigidity. Measure corner-to-corner diagonals; they should match within 0.5 mm on a 500 mm frame. Example: on my 450×450 bed, the diagonals were 0.4 mm off, so I doubled the cross‑bracing before fitting rails.
2) Verify rail length and carriage travel. Measure the exact travel your carriage needs and add 20–30 mm for end stops and end caps. For a 300 mm travel axis, buy 340–360 mm rails.
3) Check motor mounts and belt paths. Measure center‑to‑center distance between motor and idler; belts need 2–5 mm extra length when you change pulley positions. I swapped to an MXL pulley and added 10 mm of belt to keep proper tension.
Why marking and alignment matter: poorly drilled holes or crooked rails will ruin the benefit of linear rails.
Design and drill using templates.
1) Make or buy a mounting template sized to your rail. Tape it to the rail and frame, then mark holes with a center punch. Example: I printed a 1:1 template, taped it to the rail, and used a transfer punch to mark every hole before drilling.
2) Use an alignment jig to keep rails parallel while fastening. If you don’t have one, clamp two square blocks 100 mm apart and use them as a guide.
3) Drill pilot holes first, then final holes. Use a countersink for flat‑head screws if required.
What to source before you start: matched parts speed the job and reduce surprises.
Buy these specific items.
- Matched rails and carriages sized to your travel + 20–30 mm.
- End caps and support blocks for rails at least every 500 mm.
- Grade 8.8 or 10.9 M5 or M4 bolts depending on your rail’s thread spec; bring extra.
- Tools: torque wrench (0.5–6 Nm range for M3/M4, 10–25 Nm for frame bolts), shim stock (0.05–0.2 mm), feeler gauges, and a square.
Example: I ordered two 350 mm rails with 4 carriages and used M5 10.9 bolts for the frame.
Before you install, prepare the workspace so alignment is easy.
1) Clean mating surfaces and degrease rails with isopropyl alcohol.
2) Lay out parts in order of installation on a clean table.
3) Mark orientation on each carriage with a permanent marker so none get reversed.
How to install and align, step by step — do these in order and don’t skip shimming.
1) Bolt one rail loosely to the frame at three points (start at the center).
2) Use an alignment jig or two parallel blocks to position the second rail so it’s parallel within 0.05 mm over the length.
3) Tighten bolts in a star pattern to the torque spec for your fasteners; check parallelism after each bolt.
4) Slide carriages gently to detect binding; stop if you feel resistance and loosen the nearest bolt.
Example: while tightening, I checked parallel every 50 mm with a feeler gauge and added a 0.1 mm shim at one end to eliminate a 0.08 mm twist.
Why lubrication and initial tuning matter: linear rails need proper grease and lower motion settings to avoid damage and ringing.
Break‑in and testing steps.
1) Grease the rails with the manufacturer’s rail grease or NLGI‑2 grease; apply 5–10 g per carriage area and cycle the axis 50 times at low speed (50 mm/s).
2) Run slow calibration moves: set acceleration to 300–500 mm/s² and jerk (or junction deviation) low until you confirm smooth motion.
3) Increase acceleration in 100 mm/s² increments while watching for vibration, layer shifts, or skipped steps.
Example: I started at 350 mm/s² and could safely reach 1,200 mm/s² on a small gantry before tuning further.
Final checklist before you call it done.
- Frame diagonals within 0.5 mm.
- Rails parallel within 0.05 mm.
- No binding across full travel.
- Correct torque on all rail bolts.
- Grease applied and 50 cycles completed.
- Acceleration tuned gradually to desired speed.
If something still feels off, measure again and try shims of 0.05 mm increments; usually one small shim fixes parallel issues quickly.
Frequently Asked Questions
Can I Mix V-Wheels and Linear Rails on One Axis?
Yes — I can mix v-wheels and linear rails on one axis, but mixed systems demand meticulous mounting alignment, matched stiffness, and careful preload tuning to avoid binding, uneven wear, and compromised precision over time.
How Do Temperature Changes Affect Wheel vs. Rail Accuracy?
Temperature changes shift accuracy: I see thermal expansion cause rails to bind or gap and V-wheels to loosen; friction variation rises with cold and dust on wheels, while rails need greasing to stabilize performance.
Are Specialized Lubricants Required for Different Rail Brands?
Like oiling a piano, yes—I’ve found some brands recommend brand specific lubrication for optimal lifespan, but many compatible greases work; I’ll tailor maintenance schedules per manufacturer to guarantee warranties and peak performance.
Will Switching Affect My Printer’s Electronic Tuning or Firmware?
Yes — I’ll likely need firmware adjustments and stepper tuning after switching; I’ll recalibrate motor currents, acceleration, and junction deviation to match new friction and inertia, then test prints and tweak until motion is smooth and accurate.
Do Rails Impact Print Bed Leveling or Z-Wobble Differently?
About 70% fewer micro-adjustments with rails — I’ve found they improve bed stability and reduce Z-wobble by damping motion harmonics, so you’ll need less releveling and get cleaner vertical surfaces over time.