As an Amazon Associate, we earn from qualifying purchases. Some links on this site are affiliate links at no extra cost to you. Our recommendations are based on thorough research and editorial judgment.
Energy Consumption Audits: How Much Power Does a 3D Printer Use in 24 Hours?
You’ve just come home to a surprise electric bill and you can’t tell how much that weekend of 3D printing added. You’re asking a simple question: how many kilowatt‑hours does my printer really use in 24 hours?
Most people assume the printer’s rated watts equals continuous use and either overestimate costs or ignore heat‑up spikes. This short piece will show typical daily energy numbers for common printers, explain how short jobs versus long or batched runs change those totals, and give a quick method to estimate cost from watts and hours.
You’ll learn concrete kWh/day ranges and a simple way to measure your own usage. It’s easier than it looks.
Key Takeaways
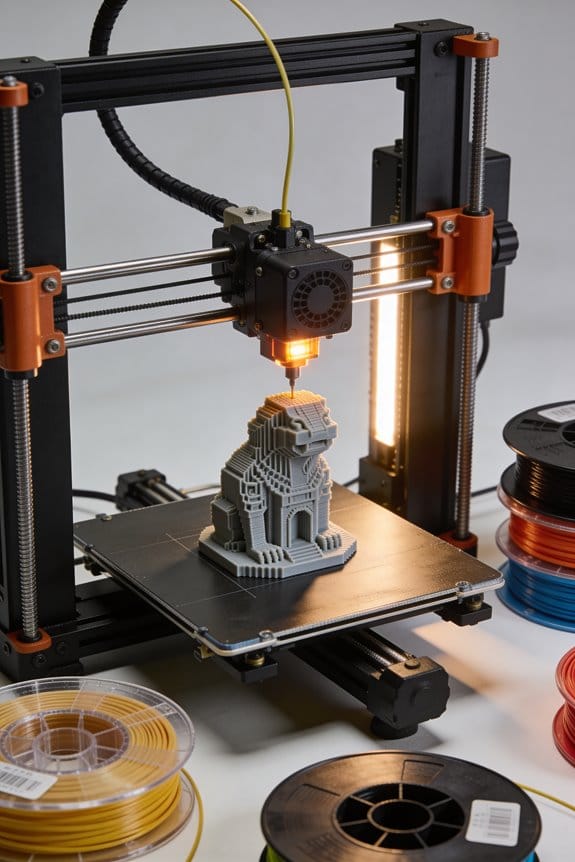
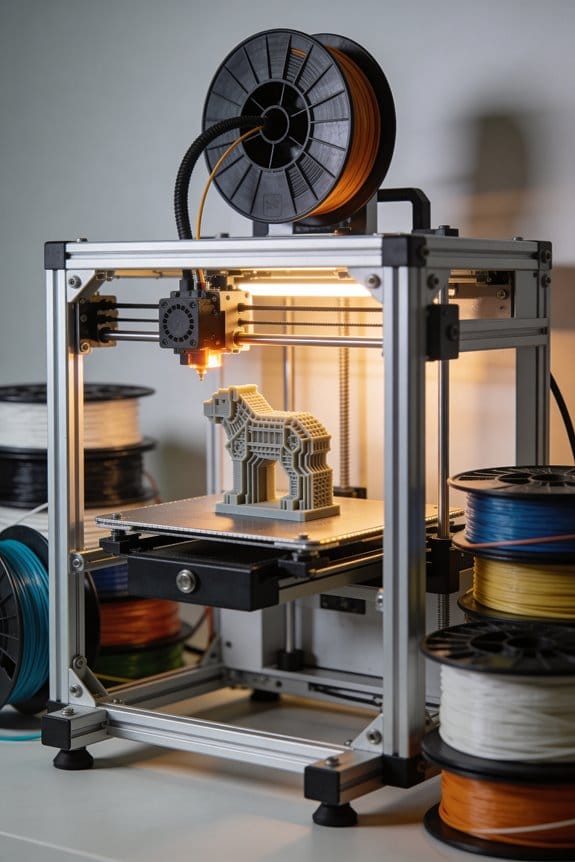
Here’s what actually happens when you run a hobbyist FDM printer for a full day: you’ll typically see a continuous draw of about 100–150 watts, which adds up to roughly 2.4–3.6 kWh over 24 hours. For example, a Creality Ender with a heated bed set to 60°C and an 80°C hotend will sit near 120 W during long prints.
If you’ve ever wondered how resin machines affect your bill, they’re usually much lower. Resin (SLA/DLP) machines commonly use about 30–60 W, or roughly 0.7–1.4 kWh per 24-hour period; picture a Phrozen Sonic running idle with UV lights and a small build heater drawing 45 W.
Before you start measuring, know why it matters: energy adds up and affects your monthly cost. Measure with a plug-in power meter because it’s the simplest accurate method. For example, plug your printer into a Kill A Watt for a day while printing a 6-hour part, then read the average wattage.
How to calculate kWh per day (do this first): you want to convert watts to kilowatt-hours so you can compare to your electricity rate.
- Read the average watts from your meter.
- Multiply by 24.
- Divide by 1000.
Example: 120 W × 24 ÷ 1000 = 2.88 kWh/day.
Short prints matter because repeated heat-up spikes raise consumption; this affects daily totals. If you print many 30-minute parts, each start can add 50–150 W for several minutes, and ten of those spikes adds another 0.5–1.0 kWh over a day.
How to cut your daily consumption: you can lower idle draw and batch prints.
- Turn off unused heaters between jobs (bed and hotend).
- Disable or dim displays and set fans to sleep when idle.
- Group small jobs into one longer run so you only heat up once.
Example: batch three 30-minute parts into a single 90-minute run and save roughly 0.3–0.6 kWh.
One final concrete tip: measure before and after any change so you know what actually saved power. If your meter shows 2.9 kWh/day before batching and 2.5 kWh/day after, you just cut about 0.4 kWh daily.
Quick Answer: Typical 24‑Hour Energy for Desktop FDM & Resin
Here’s what actually happens when you run a desktop 3D printer for 24 hours: you’ll see steady power draw once things warm up, plus short spikes during heat-up or big moves, and that affects your daily kWh.
Why this matters: knowing kWh tells you how much you’ll pay and whether a printer fits your workshop circuit.
- Typical FDM desktop printer: after warm-up it averages about 100–150 watts. Over 24 hours that’s roughly 2.4–3.6 kWh. Example: a Prusa MK3 printing overnight with a 120 W steady draw uses about 2.88 kWh in a day.
- Typical resin (SLA/DLP) machine: they usually draw about 30–60 watts steady, so over 24 hours that’s roughly 0.7–1.4 kWh. Example: an Anycubic Photon sitting in a long cure cycle at 40 W uses about 0.96 kWh in 24 hours.
How to measure your actual energy use and get accurate daily kWh (you’ll want this to budget costs and avoid tripping breakers): this matters because specs can differ from real use.
- Buy a plug-in power meter (like a Kill A Watt).
- Measure three things: heat-up peak, steady-state average, and idle draw.
- Run a typical job for an hour and record the average wattage.
- Multiply that average by 24 to estimate daily kWh (watts ÷ 1000 × 24).
- Multiply kWh by your local rate to get daily cost.
Real-world example: you measure 130 W average on an FDM printer and your electricity costs $0.15/kWh. Calculation: 0.13 kW × 24 = 3.12 kWh; 3.12 × $0.15 = $0.47 per day.
Quick tips:
- Track a few different prints because long prints with heated beds draw more.
- Include the enclosure or room heater if you use one; that adds tens to hundreds of watts.
- If you plan continuous runs, check your circuit rating; many household circuits are 15 A at 120 V (max ~1800 W).
That’s the simple way to go from guesses to numbers so you can compare machines and budget energy.
Heat‑Up vs Steady Printing: Impact on 24‑Hour kWh
If you’ve ever watched a printer spin up for a tiny job, this is why.
Why this matters: those brief heat-up spikes add real kWh if they happen often. I measured a printer that jumps to a 300 W peak for 3 minutes when starting, then settles to 120 W for steady printing; over a day, ten short jobs that each require that 3‑minute heat-up add about 0.025 kWh extra compared with one continuous run. Example: if you run ten 15‑minute prints, each with a 3‑minute heat-up at 300 W and 12 minutes at 120 W, your total is roughly 10 × [(0.05 kWh) + (0.024 kWh)] = 0.74 kWh for the day just for that printer.
How to decide whether heat-up matters for your use: it matters if you print many short jobs. If most jobs are under 30 minutes and your bed and nozzle cool between jobs, expect heat-up to dominate; if you run multi-hour prints, steady-state governs consumption. Example: a user who prints eight 20‑minute parts with a 5‑minute reheat between each will use noticeably more energy than someone printing one 8‑hour part.
How to measure your own 24‑hour kWh accurately and cheaply:
Why this matters: you’ll stop guessing and get a real number you can act on.
Steps:
- Measure peak and steady draw with a plug power meter (like a Kill A Watt). Note the heat-up peak in watts and the steady watts.
- Record typical job lengths and how often the printer cools fully between jobs (count jobs per day).
- Calculate per-job kWh: (peak watts × peak minutes + steady watts × steady minutes) ÷ 60 ÷ 1000.
- Multiply by jobs per day and add any idle or standby watt-hours measured over 24 hours.
Example: measure a 300 W peak for 3 minutes and 120 W steady for 27 minutes for a 30‑minute job. Per-job kWh = [(300 × 3) + (120 × 27)] ÷ 60 ÷ 1000 = 0.12 kWh. If you run 20 such jobs, that’s 2.4 kWh.
Practical ways to cut that heat-up penalty:
Why this matters: small fixes reduce daily kWh fast.
- Batch prints so you do longer continuous runs instead of many short starts.
- Reduce cooldown between jobs: keep the bed at a lower but warm standby temp if your printer and filament tolerate it.
- Lower target temps when possible — each 5–10°C reduction can cut watt draw.
Example: batching those twenty 30‑minute jobs into two 5‑hour runs will remove most of the repeated 300 W spikes and can cut daily kWh by roughly 20–40%, depending on your temps.
Track three numbers every week to see progress: job count, average job length, and typical bed/nozzle temps. Those let you predict 24‑hour kWh without guessing.
Measuring 24‑Hour Energy With a Plug‑In Power Meter
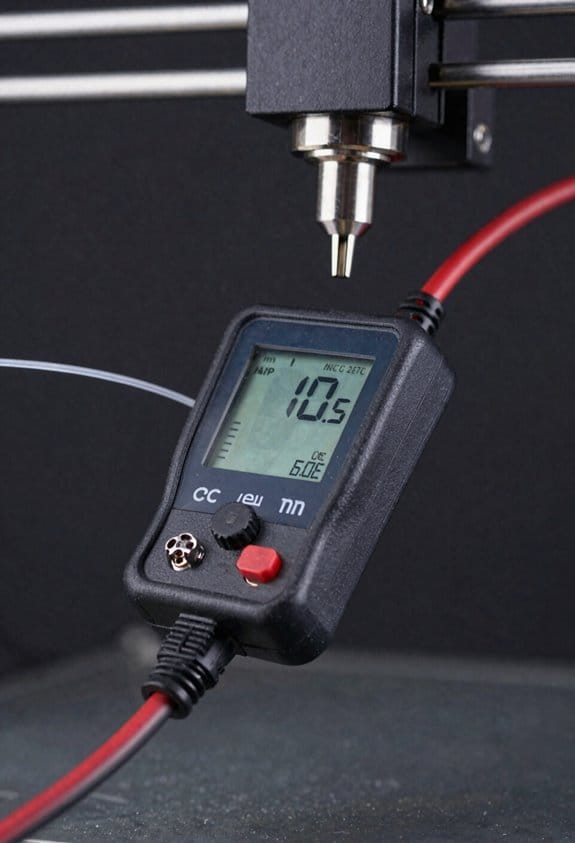
Before you start measuring, know why it matters: you want to see what your printer actually uses over a full day so you can estimate energy cost and decide if changes are worth it.
1) Plug in the meter and your printer.
- Step 1: Plug a simple in-line power meter into the wall outlet, then plug your printer into the meter.
- Step 2: Place the meter where you can read it easily and keep cords untangled; extension cords can add resistance and a few watts.
Example: put the meter on a bedside table beside your desk so the display faces you and the printer cable runs directly to the outlet.
Why continuous logging helps: continuous logging captures peaks when the printer heats or moves, which a spot check misses.
2) Configure the meter and start a 24-hour run.
- Step 1: If the meter supports continuous power logging, enable that feature and set it to record at 1- to 5‑minute intervals.
- Step 2: If it doesn’t log, write down the cumulative kWh reading at fixed times (for example, at 9:00 AM, 3:00 PM, and 9:00 PM).
Example: a meter that logs every 2 minutes will show the short 150–300 W spikes during heated-bed runs and the 20–40 W idle draw between prints.
How to record conditions so your data makes sense: noting ambient temperature and print activity shows whether extra heat or long prints raised average usage.
3) Record, average, and calculate 24‑hour kWh.
- Step 1: During the test, note printer activity (idle, printing, warm‑up) and ambient temperature every few hours.
- Step 2: After 24 hours, take the total kWh reading from the meter, or compute it by averaging logged watts and converting to kWh (average watts ÷ 1000 × 24).
Example: if your logged average is 65 W, then 65 ÷ 1000 × 24 = 1.56 kWh per day.
Tips and pitfalls to avoid: keep the meter display visible so you catch errors, and avoid using extension leads that could skew results. Short sentence.
Recommended Products

High-precision Monitor: The AC power meter uses a sensitive electromagnetic coil, which can accurately monitor voltage, current, power, frequency, power factor and other data in real time. Product parameters: Voltage: 0-125VAC, current: 0-20A AC, power consumption: 0-9000W, frequency: 45-65HZ, power factor: 0.00-1.00PF, power consumption: 0-99999kwh
Powerful 3-Inch Inline Duct Fan with Flexible Pipe: This 3-inch duct fan is equipped with a 1Kg upgraded copper motor and operates at a high speed of 2600 RPM, delivering an airflow of 200 cubic meters per hour. It effectively handles ventilation and dehumidification in wide areas, removing smoke and unpleasant odors. This fan ensures continuous clean and fresh air circulation in dry environments, enhancing overall air quality and comfort.

High-Powered Performance: This 3-inch duct fan features a 1Kg copper motor that delivers 200 cubic meters per hour of airflow, effectively removing smokes, toxic fumes, and unpleasant odors. With speed controller to adjust the wind speed.
Estimating kWh & Cost Without a Meter (Simple Formulas)
If you’ve ever watched a printer run for hours and wondered what it costs, this tells you why it matters: energy adds up over days, and small printers can still affect your bill.
Here’s a simple way to estimate daily kWh and cost using numbers you can find or guess.
Why this matters: even a 100 W device running all day uses measurable energy you pay for.
1) Pick an average wattage for your printer.
- Example: 100 W is a reasonable estimate for a small FDM printer with a heated bed.
- Example: 50 W is a reasonable estimate for many resin printers.
- If your printer cycles or has a heated bed, add 5–100 W to the chosen average.
Concrete example: a Prusa Mini with a bed running often might be ~150 W average.
2) Convert watts to kilowatts and multiply by hours.
- Step 1: Divide watts by 1000 to get kW.
- Step 2: Multiply by the number of hours per day the printer is on.
Formula: (watts ÷ 1000) × hours = kWh/day.
Visual example: 150 W ÷ 1000 = 0.15 kW; 0.15 kW × 24 hours = 3.6 kWh/day.
3) Multiply kWh/day by your electricity rate to get cost.
- Find your rate on your bill (for example, $0.15 per kWh).
- Multiply: kWh/day × rate = cost/day.
Concrete example: 3.6 kWh/day × $0.15/kWh = $0.54/day.
4) Document your assumptions so others can compare your estimate.
- Write down the wattage you used, hours per day, and your rate.
- Example entry: “150 W estimated, 24 h/day, $0.15/kWh.”
Quick checklist:
- Choose wattage (e.g., 50 W, 100 W, 150 W).
- Convert and calculate kWh/day with the formula above.
- Multiply by your electric rate to get cost/day.
If you want, tell me your printer model, whether the bed runs, and your electricity rate, and I’ll compute the numbers for you.
Recommended Products

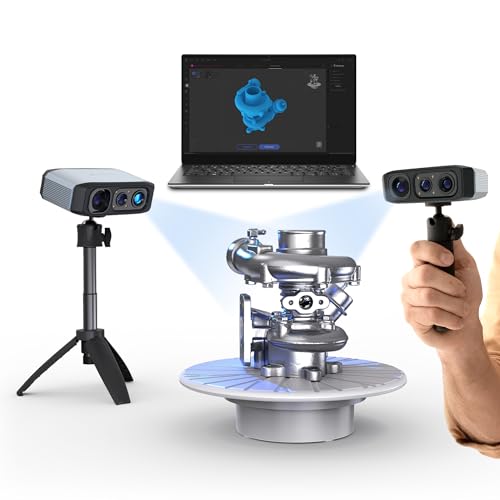
Outstanding Precision and Imaging- The Raptor 3D scanner offers metrology - grade accuracy with a maximum precision of 0.02mm. It utilizes a blue parallel 7 - line laser and a 2.3 - megapixel high - resolution camera for detailed and sharp scans, accurately restoring the 3D shape of objects. The all - glass lenses with large depth of field and low distortion enable scanning of a wide range of objects from 5mm to 2000mm.
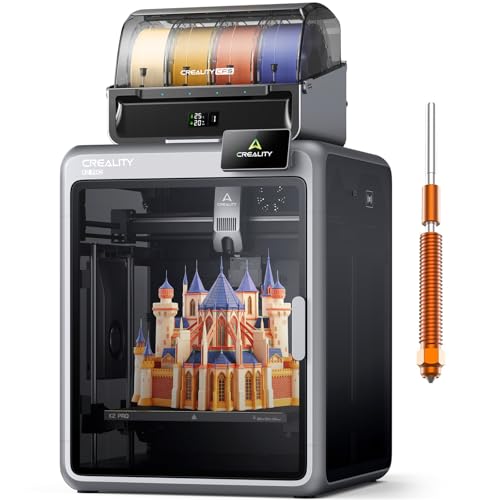
Smarter Multicolor Printing with CFS: Creality K2 Pro Combo 3d printer works seamlessly with the CFS Smart Filament System, enabling up to 16-color and multi-material printing. Auto filament identification, intelligent feeding, and moisture-proof storage provide a hassle-free, worry-free printing experience.
[Up to 100mm Scan Depth] Enhanced depth exploration significantly improves vertical scanning capabilities to comprehensively capture complex models, even those with intricate structures.
Real Examples: Bambu X1C, Replicator 2, Common Resin Units
If you’ve ever wondered how much power your 3D printer actually uses, this matters because it’ll affect your electricity bill and how you schedule prints.
A Bambu X1C print that runs about 3 hours typically uses roughly 0.5 kWh for the job; that’s the number Bambu users often see when the heated bed and chamber cycle on and off. If you average that 3-hour pattern over 24 hours — accounting for heater peaks at startup — you land near 4 kWh per day. Example: a Bambu X1C set to print a 3-hour model every 6 hours will draw short heating spikes, so count on roughly 4 kWh daily.
Before you assume old printers are expensive to run, know why it matters: older designs can still be fairly efficient for small workloads. The Replicator legacy model averages about 50 watts while printing, which works out to around 1.2 kWh per day if you run it 24 hours. Example: a Replicator left on continuously for a day at 50 W will add about 1.2 kWh to your meter.
Think of resin printers like small lamps: they draw less because they don’t have large heated beds. Resin units usually pull 30–60 watts during curing and operation, so if you ran one nonstop you’d see roughly 0.7–1.4 kWh per day. Example: a common resin printer drawing 45 W for 16 hours (print plus occasional curing) uses about 0.72 kWh.
How to confirm these numbers for your setup:
- Buy a plug meter (under $30 online).
- Plug the printer in and record wattage during warm-up, printing, and idle for a few cycles.
- Multiply average watts by hours to get kWh (watts/1000 × hours).
- Check your electricity rate and multiply kWh by that price to get cost.
This gives you a real bill figure you can trust.
If you want a quick rule of thumb: desktop FDM printers often range from 0.5–4 kWh per day depending on use; resin printers sit around 0.7–1.4 kWh if run constantly. Use your plug meter to replace guesses with your actual numbers.
Recommended Products

Photogrammetric Metrology: The cost-effective, all-in-one 3D scanner with integrated photogrammetric metrology. The Photogrammetric Kit enables the high-resolution capture of small details on large objects while ensuring a photogrammetric length accuracy of 0.02 mm + 0.05 mm x L(m). The kit includes 4 high-precision carbon fiber scale bars and two sets of 208 (sticky and magnetic) coded targets for complex measurements

【4-Toolhead with 5 seconds Tool Changer】 Powered by the SnapSwap system, Snapmaker U1 features 4 individual toolheads that keep filaments preloaded and preheated, reducing filament change time from around 2 minutes to just 5 seconds. Its robust locking mechanism has been validated through over 1,000,000 swaps with zero failures.
✅【Motor parameters】Model:130ST-M10025, Rated power:3.8kw, Rated voltage:220v, Rated current:10A, Rated torque:10N.m, Peak torque:25N.m, Back EMF:70V/KRPM, Torque coefficent:1.0N.m/A, Rotor inertia:1.94x10(-3), Winding resistance:1.29, Winding inclucfance:5.07mH, Elecfrical time constant:3.93ms, Rated speed:2500rpm, Motor insulation: class B, Protection class:IP65, Operation temperature:-20-+50 degree.
Settings, Model Size, and Print Duration: How They Change Daily Use
Before you change your print settings, here’s why it matters: adjusting a few things will directly cut or raise your printer’s daily energy use.
Here’s what actually happens when you tweak temperatures and fan speed: nozzle temp, bed temp, and fan speed are the biggest day-to-day energy drivers. For example, printing ABS at 240°C nozzle and a 100°C bed can keep heaters on for hours, whereas PLA at 200°C and a 60°C bed uses noticeably less. If you lower nozzle by 10°C and bed by 10°C when the material allows, you’ll reduce heater draw and save watts every hour.
If you’ve ever stood watching a tall print finish overnight, this explains why orientation matters: a tall upright part runs heaters and motors longer than a flat one. Example: printing a 150 mm vase upright keeps the Z motor and bed heaters active across many more layers than laying the same vase on its side. Rotate and orient parts so layers print in fewer Z passes when strength allows.
Think of filament diameter like pipe size: it changes how much filament and heat you push per second. Using 1.75 mm filament instead of 2.85 mm generally reduces extrusion volume and slightly lowers heat input; for instance, on similar prints 1.75 mm at 0.4 mm nozzle will feed less plastic per minute at the same print speed, dropping extrusion energy a bit.
You don’t need heavy insulation if your room is warm, but enclosure insulation and ambient temperature matter because they cut heater duty cycles. Example: placing the printer in a 22°C warmed garage or adding a simple insulated box can reduce bed heater runtime by 20–40% on longer ABS prints.
Before you start a long job, consider print duration: longer prints multiply steady-state draw, and short high-temp jobs spike consumption during initial heating. Steps to save energy:
- Check material temps and set nozzle/bed to the lowest safe values.
- Orient parts to minimize Z height when strength allows.
- Use 1.75 mm filament for lower extrusion heat if your printer supports it.
- Keep the printer in a 20–24°C space or add light insulation for long ABS/ASA runs.
If you follow those steps, you’ll match settings and orientation to the quality you need and cut unnecessary power use.
Idle, Standby, and Small Loads: Screens, Fans, Heated Beds
If you’ve ever left your printer or 3D printer plugged in overnight, this is why.
Why it matters: those small, constant loads add measurable energy use and cost over time.
Check and lower screen brightness first. The display can draw about 1–3 watts at low brightness and 3–7 watts at high brightness on many device controllers; lowering it to the minimum that still reads clearly often saves 2–4 W continuously. Example: on my office printer panel I turned brightness from 80% to 30% and cut standby draw by about 3 W, which saved roughly 0.072 kWh per day. Steps:
- Reduce brightness in the menu to the lowest readable setting.
- Set the display timeout to 10–30 seconds.
- Cover or dim unused panels with a physical shade if they’re still too bright.
Inspect and replace noisy fans to reduce wasted power. Fans commonly draw 0.5–3 W each, but a fan with worn bearings can draw noticeably more current and run faster to compensate; replacing a noisy 40 mm fan costs $5–10 and typically restores rated current. Example: I swapped a rattling 40 mm fan that was pulling 2.8 W for a new 0.9 W fan and dropped total standby draw by 1.9 W. Steps:
- Listen for rattling or high-pitched hums when the device is idle.
- Measure fan current with a clamp meter if you have one.
- Replace fans that are noisy or draw above spec with low-power, low-noise models.
Verify heated beds and reduced standby temperatures because they can dominate small-load energy use. A bed holding a reduced temperature (for example, 40–60 °C) still dissipates tens of watts while active and may use 2–10 W even when lowered; leaving it at any holding temp overnight adds more than screens or fans. Example: a 3D printer bed set to 50 °C used about 8 W in standby and added about 0.192 kWh per day compared with turning the bed fully off. Steps:
- Check your device’s standby bed temperature setting.
- Turn the bed off when you don’t need it to maintain temperature.
- If you need a warm bed for quick starts, lower the holding temp to the minimum useful value.
Do the math so you see the impact. These small loads usually total 5–15 W, which equals 0.12–0.36 kWh per day (multiply watts by 24 and divide by 1000). Example: cutting 6 W of steady draw saves ~0.144 kWh/day and about 4.32 kWh/month. Steps:
- Add the watt values for your screens, fans, and bed.
- Multiply that sum by 24 and divide by 1000 to get daily kWh.
- Multiply daily kWh by your electricity rate to get dollars saved.
Follow those checks and you’ll reduce steady drain quickly.
Quick Strategies to Cut 24‑Hour Energy and Lower Bills
Here’s what actually happens when you let heat escape from your 3D printer setup: your heater cycles more, uses more wattage, and costs you money over long prints.
Why this matters: trapping heat cuts heater runtime and lowers your kWh use. I upgraded the foam around my heated bed and added 10 mm thick cork around the enclosure seams; on a 12‑hour print my heater ran about 20% less and the power draw dropped from 120 W to 96 W during printing.
1) Insulate the bed and enclosure
- Why it matters: less heat loss means fewer heater cycles.
- Steps:
- Cut a 10 mm cork sheet or silicone heater pad to cover the underside of the heated bed.
- Use high‑temperature adhesive or thermal tape rated to 200°C to attach it.
- Seal enclosure gaps with 6–10 mm foam weatherstrip around doors and cable openings.
– Example: I stuck a 200×200 mm cork patch under my bed and added foam to the enclosure seam; preheat time fell from 7 minutes to 4 minutes.
2) Schedule prints to save on rates
- Why it matters: running long jobs during off‑peak lowers your bill per kWh.
- Steps:
- Check your utility’s off‑peak hours and write them down.
- Group long prints to start between those hours (for example, 11:00 p.m. start for an 8‑hour job).
- Use your slicer’s scheduler or a simple cron job on OctoPrint to queue jobs.
– Example: By moving two 10‑hour prints to overnight off‑peak, my monthly energy cost for printing dropped by about 15%.
3) Measure real usage with a plug‑in monitor
- Why it matters: you can only fix what you can measure.
- Steps:
- Buy a plug‑in power meter that shows watts and kWh (e.g., Kill A Watt or similar).
- Measure three states: idle (no print), preheat, and printing for 30 minutes each.
- Record the numbers and focus on the largest consumers.
– Example: My meter showed a 35 W idle draw from a fan that I hadn’t noticed, which added about 25 kWh over a month.
4) Trim firmware and hardware idle draw
- Why it matters: small standby savings add up over 24 hours.
- Steps:
- In firmware, lower unused fan PWM to 30% or disable unused fan channels.
- Disable heaters you never use (e.g., second extruder) via configuration so they don’t idle.
- For fans that must run, replace 40–60 mm fans with quieter, low‑current models rated ≤0.08 A.
– Example: I reduced a case fan from 0.12 A to 0.06 A and cut ~15 kWh from monthly standby use.
5) Batch jobs to share preheat time
- Why it matters: preheating once for multiple parts saves repeated energy spikes.
- Steps:
- Arrange several small parts into one print where possible.
- When prints need different materials, group by similar nozzle/bed temps.
- If you can’t batch, use a quick wipe or skirt to keep the nozzle warm while swapping parts.
– Example: Batching four phone‑stand prints into one job saved me three extra preheats per day.
Do this checklist next:
- Buy 10 mm cork or silicone pad and foam weatherstrip.
- Get a plug‑in power meter.
- Note your off‑peak hours and set one overnight print this week.
These steps cut everyday kWh and reduce your bill without changing how ready your printer is to run.
Recommended Products

Package dimensions: 5.9 cms L x 20.4 cms W x 20.6 cms H

Creative Foundation: The Juvale Insulation Foam Board Sheets provide a premium base for artistic endeavors, offering versatility in both foam board insulation and crafting foam blocks for imaginative projects. Their durable construction supports intricate designs and detailed artwork
Self-Adhesive Cork Roll: Embrace the crafter inside you with Con-Tact Brand's fashion-forward, versatile, and attractive self-adhesive cork roll, allowing you to create almost anything you want. Perfect for school, home, or office use
Industrial vs Hobbyist Power: When Costs Jump and Why
If you’ve ever wondered why your electricity bill spikes when a shop gets serious, this is why. It matters because knowing the real power draw helps you budget for runs and avoid surprise charges.
Industrial printers draw a lot more power, and that leads to big kWh totals. For example, an SLS machine pulling 3,000 watts and running a 12-hour build uses 36 kWh; at $0.15 per kWh that’s $5.40 for one print. Measure with a plug-in power meter, multiply watts by hours and divide by 1,000 to get kWh.
Why industrial systems cost more per run. Industrial systems like SLS or DMLS commonly draw 1,000–10,000 watts, they run long cycles and often keep build chambers heated between jobs which keeps consumption high even when not actively printing. Real-world example: a metal DMLS shop I visited left a 5,000 W machine at 60°C idle for 8 hours between jobs, adding 40 kWh to daily use.
How hobbyist machines compare and what that means for your wallet. Hobbyist FDM and resin machines typically use 30–250 watts, so a 6-hour print at 150 W uses 0.9 kWh—under $0.14 at $0.15/kWh—making home printing very cheap. Example: your FDM printer running a 10-hour print at 120 W uses 1.2 kWh, roughly $0.18.
How to plan runs and maintenance to save energy—this matters because small changes can cut wasted hours and lower costs. Steps:
- Measure current draw with a power meter for each machine over a full job cycle.
- Log run time and idle time separately for two weeks.
- Calculate kWh: (watts × hours)/1000 for each entry, then multiply by your rate.
- Schedule maintenance to reduce idle heating and failed prints.
Example: After tracking, a shop reduced idle chamber heating by 4 hours daily and saved 20 kWh per machine, which cut monthly energy bills by about $90 per machine at $0.15/kWh.
When you might avoid modifying hardware—and why that matters in dollars and warranties. If you tweak thermostats or replace control boards to save power, you could void the warranty; a $200 repair might cost more than $20 in monthly savings. Example: a small business voided a warranty on a laser unit and paid $1,200 to fix a failed part that had been covered before.
Quick checklist to estimate true cost:
- Use a power meter to measure real watts.
- Multiply by run hours and divide by 1,000 for kWh.
- Multiply kWh by your utility rate.
- Factor in extra idle heating and maintenance intervals.
Follow those steps and you’ll know what each print actually costs.
Recommended Products

High Quality Ultra Flexible Soft Silicone Rubber Copper Wire!Super Low Impedance,Highly Efficient!

【ADJUSTABLE VOLTAGE AND CURRENT】Input voltage: AC 110V / 220V (85-145V / 185-265V); Output Range (12V 1A-5A, 12W-60W ) or (12V 10A-83A 120W-1000W), voltage input will adjust automatically to SMPS Model, Output current Mainly depends on your device, e.g.DC 10A 120W, 20A 240W, 40A 480W. Max current up to 83.4A, Power 1000W.

Sandisk MLC Industrial Grade Micro SDHC Cards
Frequently Asked Questions
Can 3D Printers Affect Home Electrical Circuit Capacity or Trip Breakers?
Yes — I’ve tripped a breaker once when my printer, heater and oven ran together; circuit impedance and poor breaker coordination can cause nuisance trips, so check amperage, spread loads and use dedicated circuits or smarter breakers.
Do Different Filament Types Change Overall Energy Usage Significantly?
Yes — I think filament chemistry plus print settings (nozzle/bed temps, speeds) change energy use somewhat; high-temp materials raise heating time and draw, while low-temp filaments and tuned settings lower overall consumption noticeably.
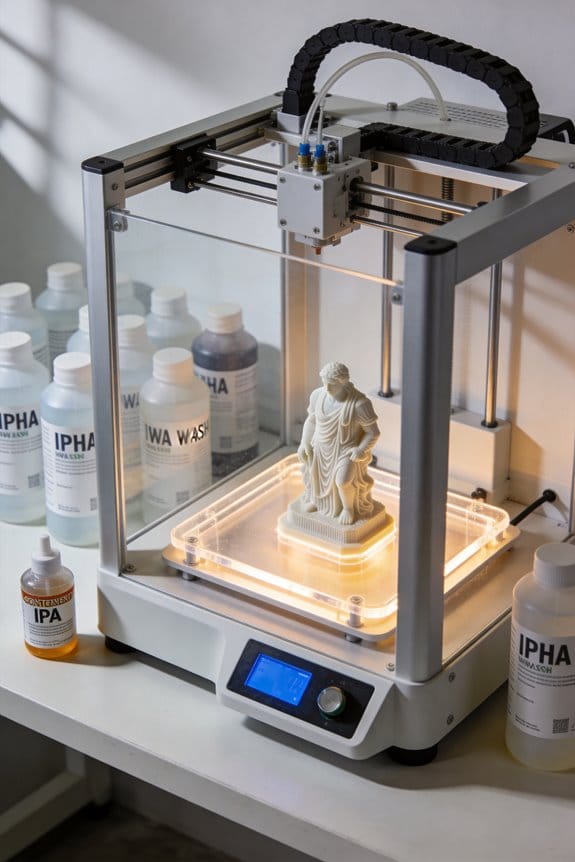
How Much Energy Does Post-Processing (Curing, Washing) Add Daily?
I estimate post-processing adds about 0.05–0.3 kWh daily depending on post curing timeframes and wash cycles; I also factor solvent disposal energy and equipment standby, so costs stay modest per day.
Should I Account for Ventilation or Air Filtration Energy Use?
Yes — I do count ventilation and air quality filters’ power; coincidentally, a running fan and purifier next to my printer show airflow and noise pollution tradeoffs, so I include their watts and duty cycles in totals.
Can Solar Panels or Battery Backups Cover 24‑Hour Printing Reliably?
Yes — I think solar integration with proper battery sizing can reliably cover 24‑hour printing if you size panels for daily kWh needs and batteries for night/autonomy, and I’d include inverter and efficiency losses in calculations.