As an Amazon Associate, we earn from qualifying purchases. Some links on this site are affiliate links at no extra cost to you. Our recommendations are based on thorough research and editorial judgment.
Desktop Filament Extruders: Closing the Plastic Loop for Hobbyists
You stare at a half-empty spool and a pile of failed prints and ask: can I turn these scraps into reliable 1.75 mm filament? Or why do locally recycled spools jam my printer or produce inconsistent diameters? Most people think a single-pass melt or a cheap single-zone extruder will fix everything, but they skip drying, diameter control, and proper puller tension.
This article shows step-by-step how to process sorted plastic flakes into consistent 1.75 mm filament using a shredder, multi‑zone extruder with PID control, a puller/winder, and a diameter gauge; you’ll learn the exact drying schedule, energy use, and calibration sequence to produce printable spools.
You’ll get consistent, printable filament. It’s easier than it looks.
Key Takeaways
Before you start turning your scrap into filament, know why it matters: you’ll save money and reduce waste while learning useful machine skills.
Here’s what actually happens when you make filament from shredded plastic: the flakes melt, get pushed through a die, cool, and wind onto a spool, and if any step is off the diameter or roundness will vary.
1) Sort, clean, and dry by polymer — why this matters: mixing polymers or wet flakes causes weak, inconsistent filament that jams your extruder.
Example: I once fed damp PETG flakes and got foamy, brittle filament that snapped while printing.
Steps:
- Sort by type: PLA, PETG, ABS.
- Wash in soapy water, rinse, and air-dry.
- Final dry at 60–80°C for 2–4 hours in a dehydrator or oven with the door cracked.
Tip: label each bin with polymer and color.
If you’ve ever struggled with melt flow, here’s the basic machine setup and why it matters: a stable temperature profile and controlled screw speed keep the melt homogeneous so diameter stays steady.
Example: A friend ran a single-zone heater and had wide diameter swings that ruined an entire spool.
Steps:
- Use a hopper-fed extruder with PID-controlled, multi-zone heaters (3 zones is common).
- Adjust the screw speed slowly; start at 3–6 RPM for 1.75 mm filament and tweak in 0.5 RPM steps.
- Target melt temperatures: PLA 175–200°C, PETG 220–250°C, ABS 230–260°C.
- Watch motor load and upstream temperature; if load spikes, reduce feed and raise temperature a few degrees.
Bold the heater zone that’s hottest.
Think of diameter control like steering a car; small corrections keep you centered and prevent disasters. You need closed-loop feedback because manual adjustment misses fast variations.
Example: Using a cheap laser micrometer and puller, someone reduced diameter variance from ±0.25 mm to ±0.02 mm on 1.75 mm filament.
Steps:
- Install a laser micrometer after the cooling zone.
- Hook the micrometer to a puller/winder that can change speed in real time.
- Set diameter tolerance target ±0.02–0.05 mm and tune PID on the puller to respond smoothly.
Make sure the cooling is consistent: use a laminar fan or water bath sized to your output rate.
The energy and cost payoff — short answer: you’ll use modest energy and can cut material costs substantially once dialed in.
Example: Running a small extruder for a 4-hour batch produced enough filament for 2–3 medium prints and used about what a big oven would in the same time.
Steps:
- Expect energy use roughly 0.8–1.2 kWh for a 4-hour run on a small machine.
- Track your scrap collection and weigh finished filament; typical material cost savings after setup can be 30–70% depending on scrap quality and scale.
- Keep a log for three runs to estimate your true per-spool cost.
Quick checklist before your first run:
- Polymer-sorted, washed, and dried flakes.
- Hopper loaded and screw speed set to 3–6 RPM.
- Multi-zone PID temps set for your polymer.
- Laser micrometer and puller connected and tuned.
- Cooling configured (fan or bath) and spool ready.
You’ll learn faster by doing short 15–30 minute test runs, measuring diameter every 5–10 minutes, and recording settings.
Can Hobbyists Really Recycle Filament at Home? Quick Verdict + Checklist
Here’s what actually happens when you recycle 3D prints at home: you can turn failed prints and scraps back into usable filament, but only if you set up a reliable, repeatable process.
Why this matters: recycling cuts waste and can save you money on filament if you get the workflow right. Example: I turned a box of PLA supports into a 500 g spool that fed a successful Benchy after two tries.
What you need (hardware and why)
- Shredder or grinder: makes flakes small and consistent so the extruder melts evenly. Aim for flakes about 3–6 mm across; a handheld plastic shredder or a dedicated plastic granulator works.
- Hopper-fed extruder with temp control: maintains stable melt and lets you tune flow. You want ±2 °C stability around the target temp.
- Winder with tension control: prevents springy or uneven filament. A simple repurposed spooler with a stepper motor works.
Why this matters: inconsistent particle size, temperature swings, or poor winding cause clogs, diameter drift, and failed prints. Example: a 4 mm clump from a poor shredder caused my extruder to jam after 10 minutes.
Steps to recycle filament at home (numbered)
- Sort plastics by type (PLA, ABS, PETG). Do not mix.
- Clean the parts: remove stickers, metal inserts, and glue; rinse and dry.
- Shred into 3–6 mm flakes.
- Dry the flakes: 4 hours at 60 °C for PLA, 2 hours at 80 °C for PETG and ABS.
- Feed into the extruder; set temp based on material (PLA 180–200 °C, PETG 220–240 °C, ABS 230–250 °C).
- Calibrate extrusion speed and puller so diameter steadies at 1.75 mm or 2.85 mm ±0.05 mm.
- Wind onto a spool under ~100–200 g tension; weigh the first spool to record yield.
- Print a test part (20 mm calibration cube + 40 mm bridge test) and inspect for strength and surface finish.
Why this matters: following steps prevents common failures and gives you a reproducible result. Example: after drying PLA for 4 hours and calibrating temp at 190 °C, my reprinted calibration cube matched original dimensions within 0.2 mm.
Material limits and contamination
- PLA: easiest to recycle, low temp, but hygroscopic. Dry before extrusion.
- PETG: tougher and needs higher temp; tolerates one re-melt well.
- ABS: warps more and emits stronger fumes; you need ventilation.
- Contaminants (paints, glues, metal): cause weak spots and clogs—remove them.
Example: a scrap with a tiny metal filament core ruined a whole run by scoring the extruder screw.
Safety and environmental tradeoffs
Before you start, know that recycling uses electricity and can emit fumes; proper venting and energy-efficient gear reduce both. Example: running a small extruder (200–300 W) for 4 hours uses about 0.8–1.2 kWh, versus manufacturing replacement filament which has a higher upstream energy cost.
Quick checklist (do these)
- Sort by polymer.
- Remove contaminants.
- Shred to 3–6 mm.
- Dry: PLA 60 °C x4 h; PETG/ABS 80 °C x2 h.
- Set extruder temps: PLA 180–200 °C; PETG 220–240 °C; ABS 230–250 °C.
- Calibrate diameter to ±0.05 mm.
- Run a test print (20 mm cube + 40 mm bridge).
- Vent your workspace.
Final verdict
You can recycle at home if you commit to consistent steps, the right small machines, and safety measures; you’ll likely need a few iterations to dial in settings before you get spool-quality filament. Example: after three test spools I consistently produced 1.75 mm filament within tolerance and saved roughly one spool every five recycling runs.
Recommended Products

Multi-Functional Crushing: This plastic shredder crusher features a 3HP (2.2KW) pure copper motor, 1740 RPM high motor speed, and 6mm mesh size, delivering 100-150 kg/h powerful crushing capacity. Efficiently shreds PC, PVC, ABS, PET, EPS, PU, HDPE, rubber, leaves, wood, and nylon. (NOTE: Not Suitable for Crushing Bottles )

Automatic shredding feature for optimal efficiency, maximum 150-sheet automatic shredding and 10-sheet manual shredding capacity.
Auto & Manual Shredding: 120 sheets automatic shredding (Shredded paper only), and 12 sheets manual shredding capacity (can shred mail, cards, and staples).
Must-Have Extruder Features for Recycling Filament

If you’ve ever tried turning mixed plastic scraps into usable filament, this is why certain features matter.
Why it matters: reliability means you’ll get consistent filament diameter so your prints don’t fail. Use a hopper that’s at least 4 liters and a controlled feed mechanism like a motorized auger or a vibrating gate to handle pieces from bottle caps to broken prints. Example: feed 10 mm chunks of PET bottles through a 4 L hopper with a slow auger at 10–30 RPM and you’ll avoid jams that a gravity-fed chute would cause.
Why it matters: stable temperatures prevent under- or over-melting that ruins filament strength. Get a multi-zone heater with accurate thermistors in each zone; aim for ±1°C accuracy across 3 zones (feed, melt, metering). Example: when recycling HDPE, set zones to 180°C, 200°C, and 190°C so the melt zone holds steady while the metering zone smooths flow.
Why it matters: screw shape controls shear and flow so your filament stays round. Use a screw with a transition section and adjustable compression ratio (1.5:1 to 3:1 range) so you can tune shear for different plastics. Example: switch to a higher compression setting when reprocessing ABS flakes to increase backpressure and reduce voids.
Why it matters: real-time correction keeps diameter within tolerance so you don’t waste spools. Install a laser micrometer or contact gauge and pair it with closed-loop speed control that adjusts puller RPM automatically to hold ±0.05 mm. Example: if diameter drifts from 1.75 to 1.80 mm, the controller should reduce puller speed by a calculated percent within 2–3 seconds.
Why it matters: insulation and power control cut energy use and reduce thermal cycling that degrades plastics. Insulate the barrel and use staged power with PID control; aim to drop standby power by 30–50%. Example: wrap the barrel with 25 mm ceramic blanket and use PID tuning to keep heaters off during idle periods.
Why it matters: clear controls and safety reduce mistakes and prevent burns or fires. Have an intuitive interface with preset material profiles and safety interlocks for hopper lid, over-temp, and motor stall. Example: a touchscreen with buttons labeled PET, PLA, ABS that auto-loads temperatures and screw speeds.
Steps to set up for your first recycle run:
- Clean and chop material into ~8–12 mm pieces.
- Load hopper (≥4 L) and set auger to 10–30 RPM.
- Select material profile (or set zones manually to target temperatures).
- Start heaters and wait for each zone to reach ±1°C of setpoint.
- Engage screw at low speed, then ramp while monitoring diameter.
- Let system run for 10 minutes, then take a test spool and measure diameter at five points.
Follow those steps, use the specific numbers above, and you’ll get consistent filament without firefighting during your first runs.
Recommended Products


【Wide Compatibility】: The universal auger drive motor replacement is suitable for all Traeger, Pit Boss (except PTG) and Camp Chef, Oklahoma Joe, Cuisinart WoodCreek and Cabelas pellet grills. Suitable for Camp Chef smoker grills. Including but not limited to Traeger 070, 075, Texas Elite Series, Pro 22, Pro 34, Lil Tex Elite Series.

【IDEAL AUGER MOTOR REPLACEMENT PARTS】: 2.0 RPM, 120V 60Hz 2 Pole Heavy Duty Auger Motor Compatible with Traeger(EXCEPT PTG), Pit Boss, Camp Chef wood pellet grill smokers.
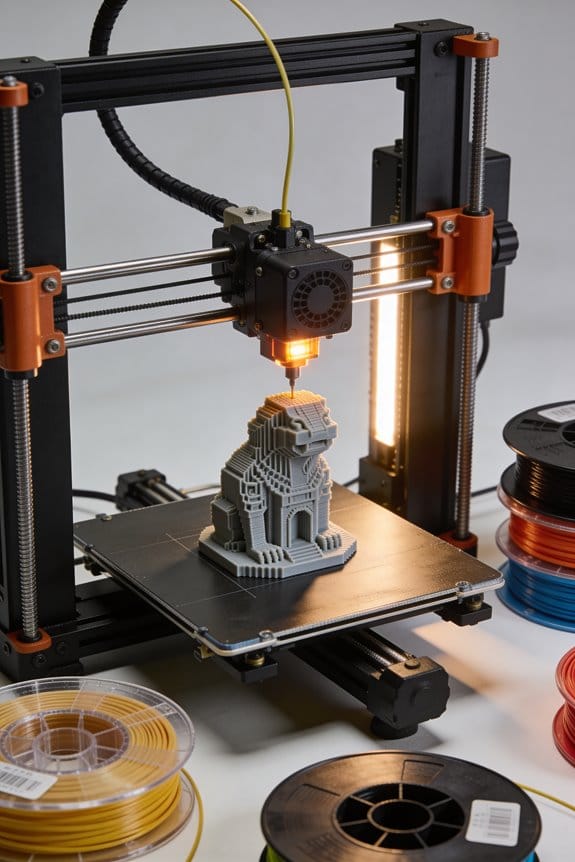
Turn Waste Into Usable Filament With a Desktop Extruder: Step-By-Step

Before you turn shredded plastic into filament, know why consistency matters: inconsistent feedstock makes melting unpredictable and ruins your spool.
1) Check and clean your feedstock.
Why it matters: contaminants like paper, metal, or mixed polymers will clog the extruder or weaken filament.
Steps:
- Sort by polymer type and color—keep PLA with PLA, PET with PET.
- Remove labels, tape, and metal bits with a magnet and tweezers.
- Aim for particles about 3–5 mm across; use a 4 mm sieve to check.
Example: I once salvaged a batch of PET bottles by cutting them into 4 mm flakes and removing all labels; the extruder ran smoothly for hours.
Before you run the shredder, understand why maintenance prevents jams: dull blades and loose hoppers create irregular particle sizes and metal debris.
2) Inspect and maintain your shredder.
Why it matters: a well-maintained shredder gives uniform pieces that melt evenly.
Steps:
- Check blades for nicks; if you see more than two noticeable chips, sharpen or replace them.
- Tighten hopper seals and fasteners to finger-tight plus a quarter turn.
- Clean out housings and look for metal shavings after 5 hours of use.
Example: After replacing a chipped blade on my countertop shredder, the output shifted from mixed-size chunks to uniform flakes and my next spool had no weak spots.
Before you dry plastic, remember why moisture ruins filament: trapped water vapor causes bubbles and weak prints.
3) Dry your plastic correctly.
Why it matters: dry feedstock prevents steam pockets in the melt, which create holes and layer adhesion failure.
Steps:
- Preheat a convection oven to the polymer’s recommended drying temp—PLA 45–50°C, PET 65–70°C, ABS 80–90°C.
- Spread flakes in a single 2–3 cm layer on a baking tray and dry for 3–6 hours.
- Alternatively use desiccant in a sealed container after oven drying for 24 hours.
Example: I dried a tray of PET flakes at 68°C for 4 hours and the resulting filament had no visible bubbles in a 20 m test print.
Before you start the extruder, know why gentle startup saves filament: slow ramp and low screw speed let you dial in temperature and flow without wasting material.
4) Set up and run the extruder.
Why it matters: controlled heating and screw speed give steady diameter and avoid burn or under-melt.
Steps:
- Preheat zones to a low starting point: feed zone 160°C for PLA, 170°C for PET; middle zone +10°C; die zone +20°C.
- Start screw at 5–10 RPM and pump a small amount through while watching flow.
- Increase temperatures in 5°C steps if the output is grainy; raise screw to 15–20 RPM for steady output once melt is uniform.
Example: With PLA, I started at 160/170/180°C and 7 RPM, then increased to 175/185/195°C and 15 RPM—filament diameter stabilized after 10 minutes.
Before you spool, know why cooling and tension affect roundness and diameter: uneven cooling or slack winding gives oval or tapered filament.
5) Cool and spool your filament properly.
Why it matters: uniform cooling and controlled tension lock in the filament diameter and mechanical strength.
Steps:
- Pull filament through a water bath at room temperature or use forced air at a steady 2–3 m/s for polymers that don’t absorb water.
- Measure diameter every 10 m with calipers or a laser gauge; aim for ±0.05 mm tolerance.
- Wind onto spools at a consistent tension—use a 0.5–1 kg brake or spring-loaded tensioner. Seal spools in zip bags with desiccant.
Example: I cooled PET through a short water bath and wound at medium tension; the final 1 kg spool stayed within 1.75–1.80 mm for over 100 meters.
Follow safety basics: wear gloves, eye protection, and ventilate the room to avoid fumes. Keep a fire extinguisher rated for electrical and plastic fires nearby.
If you do these steps—clean and size your flakes, maintain the shredder, dry the plastic, ramp heat slowly, and control cooling and tension—you’ll turn waste into reliable filament with minimal failed spools.
Recommended Products
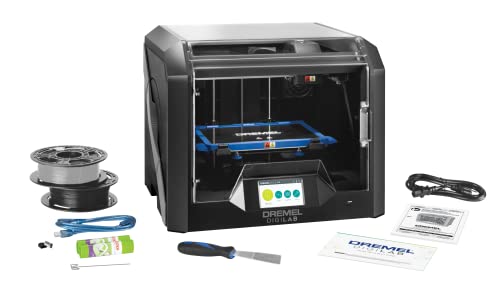
Pcmag 2018 Editors' Choice Award And Google For Education Partner – Dremel 3D45 3D Printer Kit

Print Bigger and Bolder: The MakerBot Sketch Large 3D Printer allows you to explore 3D printing on a bigger stage, enable students to design bigger and unhindered on an easy-to-use printer

Dependable Performance: MakerBot Smart Extruder Plus ensures consistent, reliable 3D printing with MakerBot PLA filament, backed by over 160000 hours of rigorous testing
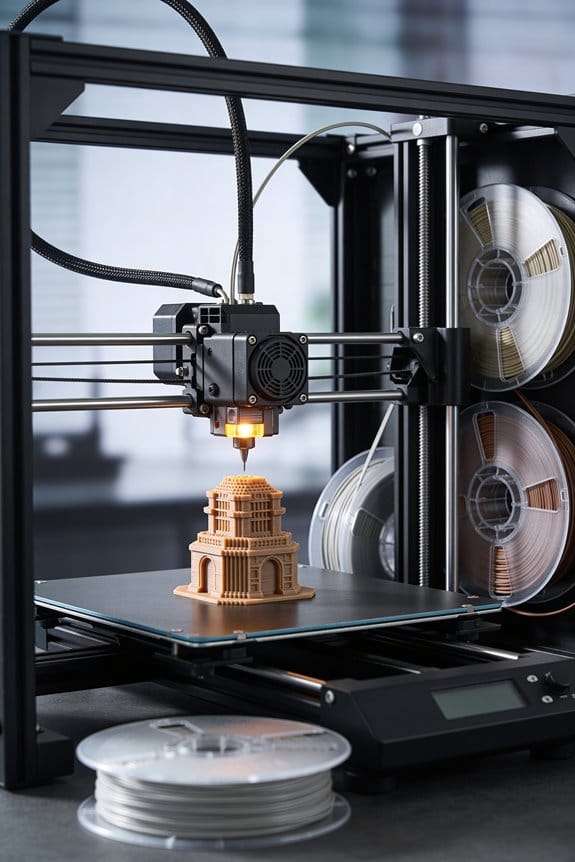
Calibrate Diameter, Temperature, and Spool Winding for Reliable Prints

Here’s what actually happens when you tune filament before a print: if the diameter, temperature, or spool tension is off, your layers won’t bond and prints will fail.
Why this matters: a consistent melt and feed mean fewer clogs, cleaner surfaces, and less wasted filament.
1) How do you calibrate filament diameter?
- Why this matters: the printer uses filament diameter to calculate extrusion; a small error changes flow percentage.
- Steps:
- Measure: run the extruder at printing speed and pull about 3–5 meters of filament through the drive gear while the printer feeds it. Use digital calipers and take at least 10 readings spaced over that length.
- Average: discard outliers, then average the rest. Aim for 1.75 mm or 2.85 mm ±0.05 mm; for example, if your average is 1.72 mm, you’re under-diameter.
- Adjust: if your average is off by more than ±0.02 mm, change the slicer filament diameter setting to the measured average; if readings vary wildly along the length, check the spool winding (see section 3).
- Real-world example: I measured a PLA roll, got 1.70, 1.68, 1.72, and 1.71 mm — average 1.702 mm — and set my slicer to 1.702 mm, which fixed over-extrusion on thin walls.
- Takeaway: measure multiple spots and use the averaged number in your slicer.
2) How do you find the right nozzle temperature?
- Why this matters: too cool and you get poor layer adhesion; too hot and you get stringing and blobs.
- Steps:
- Print a 20 mm single-wall calibration cube or a 10 mm tall temperature tower section for 10 mm of height.
- Start at the filament manufacturer’s recommended temperature, then change in 5 °C steps upward if flow is poor or downward if you see excessive stringing.
- Watch for two things: smooth extrusion without under-extrusion gaps, and good layer bonding where you can’t snap layers apart by hand. Choose the lowest temperature that meets both.
- Real-world example: PETG from Brand X listed 230–250 °C; my tower showed best surface and no gaps at 240 °C, so I set that as my print temp.
- Takeaway: pick the lowest stable temperature that gives solid bonding.
3) How do you manage spool winding and tension?
- Why this matters: uneven winding stretches or compresses filament, causing diameter variation and print defects.
- Steps:
- Inspect: spin the spool by hand; look for loose loops or tight overlapping that pinch filament.
- Tension: keep rewind firm but not tight — the spool should resist turning gently, not lock up. If the filament stretches when you pull a meter by hand, the tension is too high.
- Rewind or replace: if winding is uneven and causing repeated diameter spikes, rewind the spool onto a clean core at moderate tension or get a new spool.
- Real-world example: a cheap PLA spool had a section that overlapped tightly and caused a 0.10 mm jump in diameter; after rewinding evenly at light tension, diameter readings matched across the length.
- Takeaway: smooth, slightly resistant winding prevents sudden diameter changes.
Record the final diameter, temperature, and any spool notes in a simple log (filament brand, color, measured diameter, chosen temp, spool comments). Do that once per new spool and you’ll save hours of troubleshooting.
What to Expect: Output Rates, Costs, Common Pitfalls, and Realistic Results

Before you use a desktop filament extruder, you need to know how output, cost, and quality affect your prints.
Expect output rates and costs to vary a lot depending on machine size, screw design, and heating system, so I’ll give you realistic numbers and the common issues you’ll run into. Why this matters: if you guess wrong you’ll run out of filament mid-print or waste time and material. Example: I fed a tuned hobbyist extruder a 2 kg bag of PLA and got steady 500 g/hour for eight hours straight.
1) What output rates can you expect?
Why it matters: knowing the output sets your run time and how many spools you can make per day.
- Hobbyist desktop machines (small screws, limited heaters): expect 300–700 g/hour for PLA when dialed in.
- Compact/entry units: expect 100–300 g/hour.
- Higher-end bench models: exceed 1,000 g/hour.
Real-world example: a compact unit took three hours to refill a 1 kg spool at 200 g/hour.
2) How do costs break down?
Why it matters: understanding costs tells you whether recycling saves money.
- Material: recycled scrap reduces raw material cost by roughly 30–70% depending on feedstock quality.
- Electricity: budget ~0.1–0.3 kWh per hour for small units; that’s about $0.02–$0.09/hour at typical residential rates.
- Maintenance: plan $10–$30/year for scrapers and seals on hobby machines, more for higher-throughput units.
Real-world example: I recycled support material and cut filament cost by half, saving about $120 over six months.
3) What tolerances and print impact should you expect?
Why it matters: filament diameter variance directly changes print speed and surface finish.
- Realistic diameter tolerance after calibration: about ±0.04–0.06 mm (for 1.75 mm filament). Tolerance affects your slicer settings and must be compensated.
- If your filament swings that much, reduce print speed by 10–30% or increase extrusion multiplier tuning.
Real-world example: a spool at ±0.05 mm caused necking on fine details until I slowed prints 20% and re-calibrated the E-step.
4) What common pitfalls will trip you up?
Why it matters: avoiding these fixes saves time and filament.
- Inconsistent feed: always pre-shred or pre-cut your scrap into uniform pieces; use a small funnel or feed tube to prevent bridging.
- Poor cooling: install a dedicated cooling fan on the die and keep the part-cooling setup at 20–30°C lower than the melt zone.
- Under-calibrated sensors: calibrate diameter sensor against a caliper and zero the encoder; check once per spool.
Real-world example: a hopper bridge made the feed pulsing; adding a simple agitator solved it and removed pulse lines from prints.
5) Practical setup and maintenance steps
Why it matters: routine steps keep output steady and quality high.
- Clean the hopper and feed path before each run.
- Replace scrapers every 50–200 hours (check visually).
- Wind spools at a controlled tension; aim for 0.5–1 N of torque on the winder to avoid tangles.
- Calibrate diameter by measuring 10 samples along a 10 m length and averaging.
Real-world example: I lost 30 minutes to a tangled spool until I set the winder torque to 0.8 N.
Quick takeaways you can act on right now: measure your scrap, pick a machine based on grams/hour you need, set spool tension, and check diameter every spool.
Recommended Products

Multi Color Printing with All-new CFS: K2 Plus Combo multi-color flagship printing, exciting for you to combine. With four CFS units hooked together, it is possible to deliver 16-color 3D prints, saving the need for painting afterward. CFS is intelligent with automatic filament selection, switch, and relay. Upon loading an RFID filament, it can read the color and type instantly. When a filament is running out, it can relay with a similar one installed

AI Turns Portraits into 3D Models: Say goodbye to complex modeling software. With Creality's CubeMe AI, sparkx i7 combo 3d printer simply upload a portrait and generate a unique 3D model in seconds. Whether creating a custom figurine of yourself or a heartfelt personalized gift, AI power unleashes your creativity instantly.

【Desktop Filament Maker】: Directly convert waste plastic bottles into 3D printing consumables without complicated pretreatment. Reducing the cost of consumables.
Frequently Asked Questions
Can I Mix Different Filament Brands or Colors When Recycling?
Yes — I do mix brands/colors, but I check color compatibility and avoid material contamination: different polymers or additives can ruin prints, so I blend like-for-like (PLA with PLA), test small batches, and adjust extrusion settings carefully.
How Do I Safely Dispose of Fumes From Melted Plastic?
I use ventilation strategies and fume filtration: I vent outdoors, run a HEPA+activated carbon filter, keep windows open, use an enclosed extractor hood and monitor air quality, and I never work unmasked with unknown plastics.
Will Recycled Filament Clog My Printer Nozzle More Often?
Yes — recycled filament can raise clogging frequency, but I imagine gentle rivers of molten plastic smoothing through the hotend; with diligent nozzle maintenance and proper filtering/drying, I’ll keep flow steady and clogs rare.
Can I Turn Failed Resin Prints Into FDM Filament?
No, I can’t directly turn failed resin prints into FDM filament; resin pulverization is hazardous and resin needs filament compatibilization with thermoplastics, extensive cleaning, and additives before safe extrusion and consistent diameter for printer use.
Do Desktop Extruders Void Manufacturer Warranties on Filaments?
No, I can’t guarantee it; warranty implications depend on manufacturer policies—many void damage caused by third-party or recycled filament, so I’d check specific terms and contact the maker before using self-extruded or reclaimed filament.