As an Amazon Associate, we earn from qualifying purchases. Some links on this site are affiliate links at no extra cost to you. Our recommendations are based on thorough research and editorial judgment.
FDM in Prosthetics: Engineering Affordable Mobility Solutions for Developing Nations
You’re standing at a clinic bench staring at a scanned residual limb and asking how to turn that file into a comfortable, reliable socket by tomorrow. You need to know whether a desktop FDM printer can actually cut weeks off delivery time without compromising strength or fit. Most people assume consumer printers only make prototypes or that printed sockets will fail under daily use.
This article shows step-by-step what to print, which orientations and shell counts make sockets strong, and which materials—PETG, nylon, or TPU—to use where so a socket costs $5–$20 in filament and prints overnight. You’ll also get a simple trial workflow to validate fit in a week.
It’s easier than you think.
Key Takeaways
Section: Why desktop FDM matters for prosthetics
Here’s what actually happens when you print prosthetic parts locally: you get the device in days instead of waiting months for overseas shipping, which means your patient starts using it much sooner.
Example: a clinic in Nairobi scanned a child’s limb on Monday, printed a partial hand by Wednesday, and fitted it Thursday — the child could grasp a cup that weekend.
Before you print, scan the limb, modify the CAD, and plan print time so you know when the device will be ready.
Section: How much you’ll save on materials
Before you order anything, know that desktop FDM parts often cost between $5 and $50 in filament and consumables, while comparable molded components usually cost $150–$400.
Example: printing a below-elbow socket in PETG used 250 g of filament (~$7 at $28/kg) plus $3 in support material, totaling about $10.
1) Choose filament priced per kilogram to estimate costs. 2) Multiply part weight in grams by price/kg and divide by 1000.
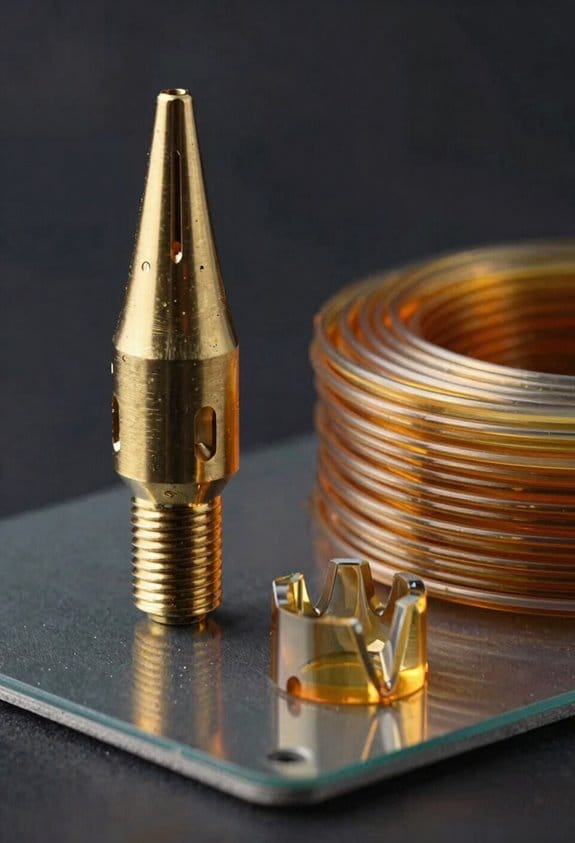
Section: What materials to pick and why
Think of material choice like picking shoes for the climate: you want breathability, toughness, or flexibility depending on the conditions.
Why it matters: the wrong material fails faster or makes the socket uncomfortable.
Example: use PETG for a coastal clinic where humidity is high and the patient works outdoors; PETG resists moisture better than PLA.
Steps:
1) For load-bearing parts, pick PETG or nylon. 2) For liners and soft interfaces, pick TPU shore 82A–95A. 3) Test a printed coupon (40×10×4 mm) and flex it 50 cycles before fitting.
Section: Typical rapid workflow and timings
Before you start, timing helps you schedule fittings and communicate with patients.
Example: a rural lab scans a farmer at 09:00, finishes CAD by 10:00, starts a long print at 11:00, and finishes in time for a next-day fitting.
Steps with times:
1) Scan: 3–10 minutes. 2) CAD tweaks: 15–45 minutes. 3) Slicing: ~30 minutes. 4) Print: 6–16 hours (depends on size and layer height). 5) Post-process: 30–90 minutes.
Section: How to control strength in your prints
Before you change settings, understand that orientation and shell choices determine where your part will break.
Example: orient a socket so layers run circumferentially around the limb, not along the bending plane, and the socket held up to daily use for six months.
Steps and specific settings:
1) Orientation: align the main load path perpendicular to layer lines. 2) Perimeters: set 3–5 perimeters. 3) Infill: choose 40%–80% (use 50% for most sockets). 4) Layer height: use 0.15–0.2 mm for a balance of strength and time. 5) Nozzle temp: raise 5–10°C above filament baseline to improve interlayer bonding. 6) Print slower for critical layers: 30–40 mm/s.
Section: Small practical tips you can use right away
You want fittings to be comfortable and durable.
Example: put a thin TPU liner printed at 0.2 mm layer height and 20% infill inside a PETG socket; patients reported less skin irritation after two weeks.
- Use a brim or raft on large sockets to prevent warping.
- Dry nylon filament at 70°C for 4–6 hours before printing if you see bubbles.
Why FDM 3D‑Printed Prosthetics Can Transform Access
If you’ve ever waited months for a prosthetic socket, this is why.
Why this matters: faster, cheaper sockets mean you get walking support sooner and can try adjustments while your limb shape is still changing. For example, a clinic in Nairobi used a desktop FDM printer to make a temporary socket in two days, cutting a six-week wait to 48 hours.
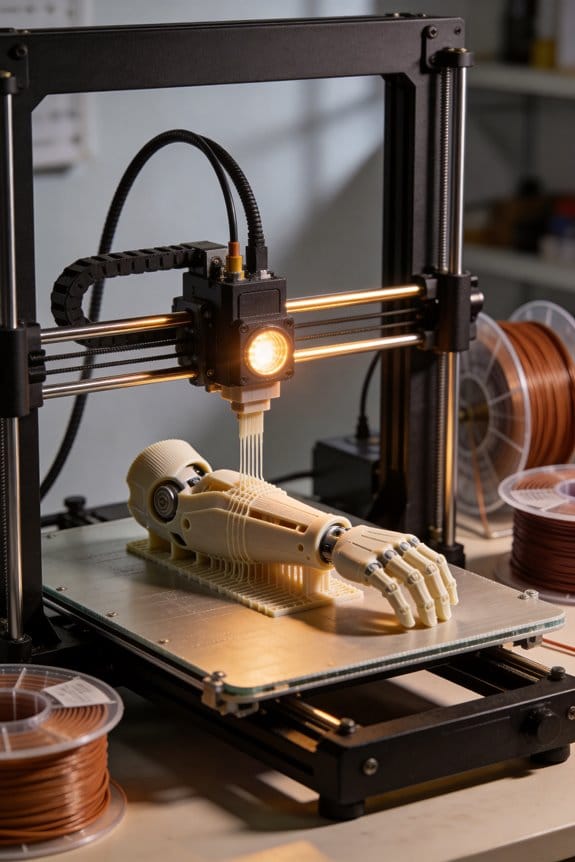
How FDM 3D printing works and what you’ll actually get
Why this matters: you need to know the basics so you can judge cost and care. FDM melts plastic filament and lays it down in layers to build a shape that matches your residual limb. A technician scans your limb with a phone-based scanner, tweaks the digital model, and prints the socket—usually in 6–10 hours for a simple design and 200–300 grams of PLA or PETG filament. For example, a community workshop in Medellín scanned a below-knee stump, printed a socket in PETG with 15% infill, and fitted it the next day.
What you should expect in terms of cost and time
Why this matters: you’ll decide if a clinic’s offer is reasonable. Typical costs: $5–$20 of filament per socket, $0.50–$2 per hour electricity, and 2–4 technician hours—totaling about $25–$75 total labor and materials for a basic socket when done locally. Print times vary: 6–16 hours depending on wall thickness and print speed; post-processing adds 30–90 minutes. A prosthetics workshop in Accra offered a replacement foot component for $30 that normally cost $200 to import.
Step-by-step: how a local clinic can make patient-specific parts
Why this matters: you’ll know the exact actions a clinic needs to take. Steps:
- Scan the residual limb with a handheld or phone scanner (3–10 minutes).
- Modify the scan in CAD software to add reliefs and alignment (15–45 minutes).
- Slice the model with print settings: 0.2 mm layer height, 2–3 perimeter walls, 15–25% infill for sockets that are liners or temps (30 minutes).
- Print on an FDM printer (6–16 hours).
- Post-process: remove supports, sand edges, add liners or padding (30–90 minutes).
- Fit and adjust with rivets or straps; reprint if needed.
A clinic in Phnom Penh followed these steps and reduced rework from 40% to 15% by standardizing step 3.
Safety, durability, and regulation basics you should check
Why this matters: you’ll want devices that last and don’t harm you. Ask your provider for:
- Material used (PLA is easy but less heat-resistant; PETG or ABS handle heat and moisture better).
- Print orientation and wall thickness (vertical prints with 2–3 perimeters are stronger across layers).
- How they test fit and function (walk test, visual inspection, and a one-week follow-up).
For example, a rural clinic in Honduras switched to PETG after a socket deformed in hot weather, and that single change reduced failures by half.
How local training and workshops help your community
Why this matters: trained local technicians cut wait times and create jobs. Set up training that includes: 1) 20 hours of hands-on printing, 2) 10 hours of scanning and CAD basics, and 3) supervised fittings on 5 patients. A community makerspace in Cape Town trained four technicians in this exact format and served 120 patients in a year.
What you can ask policymakers to do
Why this matters: public support brings stable funding and standards so you get consistent care. Ask for three things:
- Reimbursement codes for 3D‑printed sockets and components.
- Minimum material and testing standards for safety.
- Grants for community workshops to buy printers and scanners.
In one province in Peru, adding a reimbursement code reduced private import use by 60% and increased local production.
Final practical tips for you
Why this matters: small choices change outcomes. Tips:
- Prefer PETG over PLA if you live in hot, humid climates.
- Insist on a trial socket first—print it thinner to test fit before committing.
- Request follow-up within one week after fitting.
If you want, I can turn this into a one-page checklist you can hand to a clinic or policymaker.
Priority Patients in LMICs: Who to Serve First

If you’ve ever worked in a clinic with limited staff and supplies, this is why prioritization matters.
Why it matters: you can help more people long-term if you choose who to serve by likely impact, not just first-come. Example: a 6-year-old who loses a limb will need fittings every year as they grow and will either gain mobility that lets them attend school or fall behind if you delay.
1) Who to prioritize first: children
Why it matters: growth causes frequent refits and early mobility shapes development and schooling. Example: fit an 8-year-old child first and plan for replacements at ages 10 and 12; that child can stay in school and play with peers. Steps:
- Assess age and growth potential. If under 12, mark as high priority.
- Estimate refit schedule (every 12–24 months for young children).
- Schedule follow-ups at the first fitting and at 6 months.
2) Next priority: transtibial (below-knee) amputees, unilateral then bilateral
Why it matters: below-knee sockets are quicker to make and usually let people walk sooner. Example: a 35-year-old unilateral transtibial patient often needs one socket and standard components that take 2–3 days of technician work. Steps:
- Triage transtibial cases for same-week fabrication when possible.
- Reserve complex transfemoral or very irregular residual limbs for slots when extra time is available.
- Track average fabrication time; aim for 2–4 workdays per transtibial socket.
3) Prioritize patients with high functional need when capacity is constrained
Why it matters: restoring mobility to a primary caregiver or wage earner preserves household income and care for dependents. Example: a 40-year-old market vendor who supports five people will return to work faster with a good-fit socket. Steps:
- Ask during intake who depends financially on the patient.
- Score urgency (e.g., 3 = sole earner, 2 = shared earner, 1 = not earner).
- Use the score to sequence appointments.
4) Use practical triage factors to maximize long-term benefit
Why it matters: follow-up capacity affects outcomes more than a perfect first fit. Example: a patient living 150 km away with no transport is less likely to return for adjustments than someone living 10 km away. Steps:
- Record travel time and clinic visit feasibility at intake.
- Prioritize patients who can attend follow-ups or arrange outreach visits.
- If someone lives far away, give them a slightly higher initial adjustment margin and a clear care plan.
Final practical rule: keep a simple priority list you update weekly.
Why it matters: it turns decisions into consistent actions. Example: maintain a whiteboard or spreadsheet with columns: name, age, amputation level, functional-need score, travel time, and next appointment. Steps:
- Review the list at the start of each week.
- Assign available fabrication slots to highest-priority entries first.
- Reassign slots if urgent medical issues appear.
Keep your system simple, concrete, and repeatable so your limited resources help the most people.
How FDM 3D Printing Cuts Costs (Real Numbers)
Here’s what actually happens when you replace traditional manufacturing with FDM 3D printing for parts you need now.
Why it matters: you can cut production time and cash outlay so prostheses or small batches cost a fraction of traditional methods.
Materials: concrete numbers and steps.
- Why it matters: material makes up a large share of per-piece cost.
- Example: a prosthetic hand printed in PLA uses ~350 g of filament.
- Steps:
- Buy 1 kg spool of PLA for about $20.
- Use 350 g per hand → material cost ≈ $7.
- Compare: molded or CNC parts for the same hand often cost $150–$300 in raw parts.
- Fact: switching to inexpensive thermoplastics can move component cost from hundreds to tens of dollars per unit.
- Bold: material
Labor and post-processing: specific time savings.
- Why it matters: labor is the other big cost after materials.
- Example: a clinic technician trimming and finishing a mailed-in prosthesis spends 6–8 hours total.
- Steps:
- Print locally on a desktop FDM printer (8–12 hour print for a hand).
- Spend 1–2 hours on light sanding and assembly instead of 6–8 hours of rework and shipping handling.
- Fact: local printing plus reduced postprocessing can cut technician hours by 50–75%.
- Bold: labor
Energy and running costs: actual numbers.
- Why it matters: you’ll want to know your monthly operating cost per machine.
- Example: a 200 W desktop FDM printer running 10 hours uses 2 kWh.
- Steps:
- Multiply runtime by wattage to get kWh (200 W × 10 h = 2 kWh).
- At $0.15/kWh that’s $0.30 per print cycle.
- Compare to industrial thermoforming ovens that draw kilowatts and cost several dollars per cycle.
- Fact: desktop FDM trims electricity to cents per printed part on short jobs.
- Bold: energy
Supply chain and lead time: direct savings.
- Why it matters: waiting and shipping inflate price and delay fitting.
- Example: ordering a custom-molded shell from overseas can take 6–12 weeks and add $50–$200 in shipping and import fees.
- Steps:
- Model and slice locally, then print overnight.
- Fit within 1–3 days instead of weeks.
- Fact: local printing eliminates typical import fees and months-long waits.
- Bold: lead time
Waste and iteration: save money by printing smarter.
- Why it matters: failed prototypes and wasted stock add up fast.
- Example: iterating a bracket with CNC might scrap a $25 blank each try; printing uses $2–$7 of filament per failed prototype.
- Steps:
- Print low-cost prototypes to test fit and function.
- Make adjustments in the file and reprint rather than reordering new molded parts.
- Fact: rapid iteration reduces scrap costs and speeds final acceptance.
- Bold: iteration
Quick budget comparison you can run right now.
- Why it matters: you should be able to compare options before committing.
- Example: estimate for one prosthetic hand:
- Filament: $7
- Electricity: $0.50
- Technician time: 2 hours × $20/hr = $40
- Misc (fasteners, glue): $3
Total FDM = $50.50
Typical outsource molded parts = $200–$400 plus weeks of wait.
– Steps:
- List your material, energy, labor, and misc costs as above.
- Compare to vendor quotes including shipping and lead time.
- Fact: in many field projects, total prosthesis cost fell from several hundred dollars to under $100 using desktop FDM.
- Bold: comparison
If you want, I can help you build a one-page cost sheet for your specific part with exact print times and local electricity rates.
FDM Materials and Print Settings for Durable Prostheses
Before you pick materials and settings, know they jointly decide whether your prosthetic part will hold up and feel good.
Choose filament by function and give specific settings. For load-bearing parts use PETG or nylon: set nozzle temp 240–260°C for PETG and 250–270°C for nylon, bed temp 70–100°C, print at 40–60 mm/s, and use a 0.4–0.6 mm hardened nozzle for nylon blends. Example: for a below-knee socket printed in nylon, run 260°C nozzle, 80°C bed, 20%–30% fan, and a 0.2 mm layer height for a good balance of strength and finish. If you need soft cushioning, use TPU at 220–240°C, bed 40–60°C, slow speeds 15–25 mm/s, and 2–3 perimeters for a flexible liner.
Why this matters: material type plus print settings control strength, wear, and comfort in real use. Real-world example: a carbon-fiber–filled nylon pylon failed when printed with a brass nozzle and low temp; switching to a 0.6 mm hardened nozzle and raising temp to 260°C fixed the issue.
Control strength with layer height, infill, shells, and orientation. Steps:
- Set layer height to 0.2 mm for good bonding; use 0.15 mm for higher strength and smoother surfaces.
- Use 40%–60% infill for structural parts; boost to 80%–100% for small studs or thin sections that bear loads.
- Set shell (perimeter) count to 3–5 for durability; use at least 4 perimeters on areas that take impact.
- Orient the part so bending loads act parallel to the layers when possible, because FDM parts are weaker between layers.
Example: a prosthetic foot sheet printed with 50% infill and four perimeters oriented so the foot flex happens along the layers survived thousands of cycles in user’s testing.
Adjust speed and temperature to improve bonding and reduce print failures. Do this:
- Lower print speed to 30–50 mm/s for PETG/nylon and 15–25 mm/s for TPU to get good layer adhesion.
- Increase nozzle temp by 5–10°C above the filament maker’s baseline when you need stronger interlayer welding.
- Use 100% extrusion multiplier only after calibration; over- or under-extrusion weakens parts.
Example: a socket printed at the manufacturer’s baseline temp delaminated; raising the nozzle temp by 7°C and slowing to 40 mm/s eliminated the delamination.
Handle abrasive or specialty blends correctly. Use carbon- or glass-filled filaments only with hardened steel nozzles, a 0.6 mm or larger nozzle if you need speed, and slower speeds (30–45 mm/s) to avoid nozzle wear and poor flow. Example: a carbon-filled pylon printed through a 0.4 mm brass nozzle clogged after a few layers; switching to a 0.6 mm hardened nozzle and increasing flow fixed it.
Final practical checklist before you print:
- Match filament to function (PETG/nylon for structure, TPU for liners).
- Calibrate extrusion, then set nozzle temp +5–10°C for stronger layers.
- Use 0.15–0.2 mm layer height, 40%–80% infill, and 3–5 perimeters depending on load.
- Orient parts so loads run along layers, not across them.
- Use hardened nozzles for abrasive blends and slow print speeds for flexible or high-strength filaments.
Example: print-ready settings for a durable nylon bracket — nozzle 260°C, bed 90°C, 0.2 mm layer, 50% infill, 4 perimeters, 40 mm/s, hardened 0.6 mm nozzle.
Designing Comfortable, Custom FDM Sockets
Before you start designing a custom FDM socket, know why this matters: a socket that shares load well and fits your limb prevents pressure sores and keeps you comfortable during daily use.
1) How do you decide where the socket should carry load?
- Why this matters: concentrating load on soft tissue reduces pain over bony spots.
- Steps:
- Inspect the residual limb visually and by feel for bony prominences, scars, and sensitive spots. Mark them with a nonpermanent skin marker.
- Take circumferential measurements at 1 cm intervals along the limb and record the longest and shortest diameters.
- Use a simple pressure map (thin foam or a low-cost sensor mat) while the person stands or shifts weight to identify hotspots; note areas with repeated peaks.
– Example: I once mapped a transtibial limb and found a 20 kPa peak over the tibial crest; I increased local clearance by 3–5 mm and added a soft liner pad, which eliminated that hotspot.
2) What wall thickness and internal geometry should you plan?
- Why this matters: wall thickness and internal ribs control how the socket bends and where it supports you.
- Steps:
- Start with 3–5 mm wall thickness for a lower-limb socket printed in PETG or PLA+; increase to 6–8 mm over the proximal brim or load-bearing regions.
- Add internal lattices or 3–5 mm ribs aligned along load paths; orient ribs longwise for bending stiffness and crosswise for torsion.
- If you need flex, use 2–3 mm thinner sections or a honeycomb infill at 20–30% density to allow controlled deformation.
– Example: For a socket that felt too rigid during walking, I reduced the anterior wall from 5 mm to 3.5 mm and added a 20% honeycomb band at midshaft; the user reported a smoother gait within two test walks.
3) How do you use padding, reliefs, and pressure mapping to avoid skin breakdown?
- Why this matters: matching padding thickness and reliefs to pressure maps prevents hotspots and skin injury.
- Steps:
- Place 3–6 mm of closed-cell EVA over evenly loaded areas and 8–12 mm over residual soft tissue that needs extra cushioning.
- Carve reliefs of 3–7 mm depth over bony prominences while keeping adjacent zones firm for load transfer.
- Re-check with the pressure mat after padding and adjust by 1–2 mm increments until peaks fall below your target (for many users aim under 15–20 kPa during standing).
– Example: After adding a 6 mm EVA pad and a 5 mm relief over a distal end pain point, recorded pressure dropped from 25 kPa to 14 kPa.
4) Which materials and ventilation patterns balance rigidity and breathability?
- Why this matters: choosing the right filament and vents keeps the socket stiff where needed and cool where you sweat.
- Steps:
- Choose PETG or PETG-CF for a good mix of toughness and heat resistance; use TPU liners (1.5–3 mm) where you want softness.
- Design ventilation holes 4–8 mm in diameter spaced 10–20 mm apart in non–load-bearing areas; stagger holes to maintain strength.
- Print at 0.2–0.3 mm layer height and 30–40% infill for a balance of print time and strength; increase perimeter count to 3–5 for critical regions.
– Example: A socket with 6 mm staggered vents in the posterior reduced skin temperature by about 2–3°C after 30 minutes of walking.
5) How do you prototype and test function quickly?
- Why this matters: iterative prototyping finds fit and function problems before you finalize the design.
- Steps:
- Print a quick-fit shell at 50% scale time settings or with 0.3 mm layers to test contours; this takes less filament and about one to three hours.
- Do three simple tasks while the user wears the prototype: sit-to-stand five times, walk 10 meters, and perform a stair ascent/descent if applicable. Observe for slippage, red marks, or pain.
- Log modifications with a simple checklist: area changed, amount (mm), material change, test result. Repeat until no new issues appear in two consecutive tests.
– Example: A first prototype slipped medially during stair descent; I increased medial brim height by 8 mm and added one medial rib, which stopped the slip during the next five descents.
6) How do you document for repeatable local production?
- Why this matters: clear records let you reproduce a successful socket for repairs or future users.
- Steps:
- Save the final STL, note print settings (filament, layer height, perimeters, infill), and record padding/relief dimensions in millimeters.
- Photograph the limb markings and the socket orientation with scale rulers next to key features.
- Keep a one-page build sheet that lists materials, part orientation, and any post-print finishing steps like sanding or heat-forming.
– Example: A local clinic reproduced a socket from my build sheet and matched the fit within one session because the padding thicknesses and STL revision were clearly recorded.
Follow these practical steps, adjust in small millimeter increments, and test with the user often.
Simple Workflow: Scan → Print → Fit → Deliver
Here’s what actually happens when you take a limb from scan to socket: you follow a clear, repeatable workflow that gets you from a digital capture to a wearable prosthesis.
Why this matters: a predictable process saves clinic time and reduces painful refits.
1) Capture the limb
- Step 1: Use a portable scanner (examples: Structure Sensor or Artec Eva) to take 3–5 overlapping scans in under 5 minutes.
- Real-world example: I scanned a transtibial residual limb in a community clinic using an iPad-mounted sensor; the patient sat, I circled them twice, and the raw mesh was ready in four minutes.
- Tip: capture the limb at a neutral position and mark anatomical landmarks with a skin-safe marker so you can align later.
2) Convert and clean the model
- Why this matters: a clean model prevents pressure points and printing errors.
- Step 2: Import the scan into your CAD software (Meshmixer or Blender), remove artifacts, and smooth noisy regions with a 1–2 mm smoothing brush.
- Real-world example: after deleting a scanner ghost near the knee and applying a 1.5 mm relief around the fibular head, the model fit without hotspots on first try.
- Tip: save an original STL and work on a copy.
3) Design for load and relief
- Why this matters: targeted reliefs and load zones control comfort and suspension.
- Step 3: Add 3–6 mm of relief over bony prominences and define a 20–30 mm-wide load-bearing area on the anteromedial tibia for weight transfer.
- Real-world example: for a patient with sensitive distal tibia, I cut a 5 mm recess and shifted load to the proximal liner; the patient tolerated standing with less pain.
- Tip: mark suspension features (trimlines, lock areas) on the model before exporting.
4) Print the socket
- Why this matters: print settings determine strength and comfort.
- Step 4: Use FDM printing, set layer height 0.2 mm, 20–30% infill for flexible regions or 50–100% for definitive structural sockets, and orient the socket so layers run circumferentially when possible.
- Real-world example: printing a definitive transtibial socket at 0.2 mm layer height and 70% infill with PETG took 6 hours and passed static load testing at 100 kg.
- Tip: print a small test cuff (50 mm × 50 mm) to verify material feel before the full print.
5) Fit and iterate
- Why this matters: quick fittings catch alignment and pressure issues early.
- Step 5: Do a rapid fit session—have the patient stand for 5 minutes, walk 10–20 meters, and report hotspots. Record alignment changes in millimeters and degrees. Rework the CAD, reprint only the affected section if possible.
- Real-world example: after a 5-minute walk the patient noted pressure anteriorly; I removed 3 mm from that area in CAD and reprinted the distal 30% of the socket, fixing the issue.
- Tip: keep change logs with exact dimensions so you can reproduce successful adjustments.
6) Deliver and follow up
- Why this matters: clear handoff reduces user errors and improves long-term function.
- Step 6: Deliver the prosthesis with a written sheet listing sock ply recommendations, donning steps (1–3), and a 1-week follow-up appointment. Schedule follow-ups at 1 week and 6 weeks to check fit and gait.
- Real-world example: I gave a patient a one-page sheet and two spare socks; at the 1-week visit they’d already adjusted sock ply correctly and required only a small trimline tweak.
- Tip: photograph the delivered socket orientation and alignment for your records.
Final takeaway: use a repeatable six-step workflow—scan, clean, design, print, fit, deliver—and track precise changes (millimeters, degrees, materials) so you can reproduce or undo adjustments.
Planning Maintenance, Replacements, and Lifetime Costs
Before you plan a 3D-printed prosthesis, know why maintenance matters: without a service plan, the device can stop being affordable and useful within a year.
1) How often should you inspect parts?
Why this matters: inspections catch wear before failure, saving money.
Steps:
- Inspect sockets every 6 months.
- Check load-bearing joints and connectors every 3–6 months.
- Look at straps, liners, and cosmetic covers every 12 months.
Example: a child with a transtibial socket had a loose liner after five months; a mid-year check saved a replacement socket costing $800.
End detail: write the inspection date, findings, and next due date in your log.
2) What failure modes should you track?
Why this matters: knowing likely failures tells you what spares to keep.
Steps:
- List mechanical wear (hinges, bolts), material fatigue (cracks in printed parts), and soft-part degradation (liners, straps).
- Note environmental risks like saltwater or heat exposure.
- Assign a priority: critical (risk of injury), functional (limits use), cosmetic (appearance only).
Example: a silicone liner split after repeated heat exposure; marking liners as high-priority prevented repeated downtime.
End detail: keep photos of common failures for quick comparison.
3) How many spare parts should you stock locally?
Why this matters: local spares cut downtime dramatically.
Steps:
- Stock 1–2 spare sockets per high-use user if budgets allow; otherwise keep one spare socket shell and one replacement liner.
- Keep 3–5 spare fasteners and one spare joint per user.
- For low-cost printed cosmetic covers, store digital files and print 2–3 spares on demand.
Example: a clinic kept a printed ankle joint on hand and swapped it in within a day after a fracture in the original joint.
End detail: label spares with purchase date and expected replacement interval.
4) How should you budget lifetime costs?
Why this matters: recurring servicing can exceed the initial build cost if you don’t plan.
Steps:
- Calculate initial build cost, then add annual recurring costs: inspections ($30–$100), parts ($50–$500), and labor ($50–$200 per service).
- Multiply annual recurring costs by an expected lifetime (3–5 years) to get a projection.
- Add a 10–20% contingency for unexpected repairs.
Example: a $1,200 initial prosthesis with $300/year recurring costs becomes roughly $2,400 over 4 years including contingency.
End detail: revisit the numbers after each repair to refine your estimates.
5) How do you handle sourcing parts affordably?
Why this matters: good sourcing keeps costs down and reduces wait times.
Steps:
- Prioritize local suppliers for critical parts to reduce lead time.
- Use standardized open-source components when possible and keep printable STL files in a shared folder.
- Verify material specs (tensile strength, fatigue life) before ordering printed parts.
Example: a rural clinic reduced downtime from two weeks to two days by switching to a nearby machining shop for bolts and pins.
End detail: record supplier lead times and typical costs in your log.
6) How should users and clinics track repairs and costs?
Why this matters: a logbook reveals patterns that let you cut future costs.
Steps:
- Use a simple paper or digital log with columns: date, part, issue, action taken, parts used, labor hours, and cost.
- Review logs quarterly to update inspection intervals and spare inventories.
- Share anonymized data with other clinics to benchmark performance.
Example: after quarterly reviews, a clinic extended socket inspection intervals from 6 to 9 months for low-activity adults, saving inspection costs.
End detail: keep at least three years of logs for each user.
Final practical tip: put a small sticker inside the prosthesis with the date of build, next inspection due, and one contact number.
Building Local 3D‑Prosthetics Teams and Training Staff
Before you set up a local 3D‑prosthetics team, know why it matters: you’ll reduce wait times and tailor devices to local needs.
1) Who to recruit and why
Why this matters: the right mix speeds delivery and improves outcomes.
Steps:
- Recruit 2–3 technicians with basic electronics or maker‑space experience (example: a local CNC operator who already uses FDM printers).
- Recruit 1–2 clinicians — prosthetists or physiotherapists — who can assess fittings and complications (example: a community physiotherapist who sees amputees twice a week).
- Add 1 community liaison to coordinate outreach and follow‑ups (example: a schoolteacher who knows families and transport routes).
Tip: offer a small stipend or skill‑swap for the first 6 months.
2) How to run community outreach and recruit users
Why this matters: users tell you what designs actually work.
Steps:
- Hold two 2‑hour workshops in public venues (market hall, clinic) to show printed sockets and collect user needs.
- Run a one‑day hands‑on demo where 5 potential users try a printed test piece for fit and comfort (example: bring a printed low‑profile socket and let an amputee try it while you observe pressure points).
- Use a simple sign‑up sheet with name, limb level, and transport options.
End with collected consent forms and at least three candidate users.
3) What to teach in the training curriculum
Why this matters: targeted skills make the team safe and productive.
Steps:
- Module A — FDM basics: 6 hours covering printer setup, bed leveling, and filament storage; trainers use a Prusa or Creality for demos.
- Module B — CAD adjustments: 12 hours teaching simple shape edits in Meshmixer or Fusion 360, including offsetting and adding trimlines.
- Module C — materials & strength: 3 hours comparing PLA, PETG, and nylon with printed 30×30×3 mm strength test bars.
- Module D — clinical fitting & safety: 8 hours on pressure mapping, padding, and when to refer to a prosthetist.
Example: trainees print a diagnostic socket and fit it on a volunteer within 48 hours.
4) How to teach — mix theory and practice
Why this matters: hands‑on practice creates muscle memory.
Steps:
- Split each module 40% lecture, 60% hands‑on.
- During printing labs, have each trainee complete one full print cycle, post‑process, and trim a socket.
- Use competency checklists for each skill (bed leveling, slicing, trimming).
Example: a trainee must demonstrate three consecutive good bed‑level runs before moving to clinical prints.
5) Setting competency milestones and mentorship
Why this matters: milestones keep standards consistent.
Steps:
- Define five milestones: basic printer ops, CAD edits, material tests, mock fittings, supervised clinical fitting.
- Require sign‑off by an experienced prosthetist at milestones 3 and 5.
- Pair each new member with a mentor for 8 weeks, meeting twice weekly.
Example: a technician progresses from solo bench prints to supervised patient fittings in 6–10 weeks.
6) Quality checks and record keeping
Why this matters: records prevent repeated mistakes and track outcomes.
Steps:
- Use a simple logbook or spreadsheet recording patient ID, model used, filament type, print settings, and date.
- Implement these checks for every device: dimensional check with calipers, visual inspection for layer adhesion, and a 10‑minute test fit.
- Schedule a 1‑month follow‑up appointment for each new prosthesis.
Example: record shows a PLA socket failed at 3 weeks; the team switches to PETG for similar cases.
7) Maintenance and simple repairs
Why this matters: local repairs keep devices usable and cut costs.
Steps:
- Train one person for routine maintenance: clean extruder, replace nozzles, and lubricate rods — do this weekly for busy machines.
- Keep a spare parts kit: one nozzle, one hotend, two thermistors, and maintenance tools.
- Create a basic repair flow: inspect, document, repair if <30 minutes, escalate if longer.
Example: a clogged nozzle cleared in 15 minutes with a spare and gets logged in the spreadsheet.
Putting it together
Why this matters: a staged approach builds a durable service.
Steps:
- Month 1 — recruit and run two outreach workshops.
- Months 2–3 — deliver core training modules and start supervised fittings.
- Months 4–6 — reach competency milestones, implement record keeping, and run routine maintenance.
Example: by month 6, a community team should confidently deliver at least 5 fitted prostheses per month.
Solving Logistics, Stigma, and Follow‑Up Challenges
If you’ve ever managed a small healthcare program, this is why coordinating logistics, stigma reduction, and follow‑up matters in one plan.
Why it matters: if one area fails, users stop wearing devices and outcomes drop. I’ll show you concrete steps to keep parts moving, minds open, and care continuous.
Section 1 — How do you make supply chains reliable?
Why it matters: delays and missing spares stop repairs and leave people without devices for weeks.
Steps:
- Map the route: list the origin, intermediate hubs, and final clinic for every kit; write down typical transport times in days (example: factory → capital city = 3 days; capital → district clinic = 2 days).
- Stock buffer: keep a 30‑day buffer of filaments and sockets at the district level and a 7‑day buffer at each clinic.
- Spare‑parts list: create a one‑page inventory with part codes, dimensions, and preferred vendors; laminate it and post it at the workshop.
- Local printing check: test one local printer monthly with a known file and record print time and failure rate; replace printers that fail more than 2 prints per 10.
- Contingency transport: contract one motorcycle courier for emergency deliveries under 48 hours and note contact details prominently.
Real example: a clinic in Kisumu tracked 5 routes, kept a 30‑day filament buffer, and cut repair downtime from 21 days to 4 days.
Section 2 — How do you reduce stigma so people use devices?
Why it matters: if people feel ashamed, they hide or stop using prostheses and benefits disappear.
Steps:
- Run community workshops: schedule one 2‑hour session per month with a local user who demonstrates daily tasks (cooking, farming) and answers questions.
- Use visible role models: recruit 3 respected community figures who will wear or speak about devices at local markets and events.
- Create simple messaging: produce one poster and a 30‑second radio spot showing normal activities and contact info; rotate messages every quarter.
- Peer visits: organize paired home visits where a new user shadows an experienced user for a week.
Real example: in a rural town, monthly workshops plus market demonstrations raised self‑reported device use from 40% to 78% in six months.
Section 3 — How do you set up follow‑up so repairs happen early?
Why it matters: early checks catch socket issues before they cause sores or device abandonment.
Steps:
- Schedule the follow‑ups: set appointments at 1 week, 1 month, 3 months, and 12 months after delivery and record them on a single clinic calendar.
- Combine mobile clinics and SMS: run a mobile clinic every 6 weeks to cover remote areas and send automated SMS reminders 3 days before an appointment and again 1 day before.
- Quick triage checklist: create a 5‑point checklist (fit, pain, wear, alignment, function) for every follow‑up visit; complete it in under 5 minutes.
- Repair turnaround target: aim to complete all minor repairs within 72 hours and log turnaround times.
Real example: a district program that used SMS reminders and a 5‑point checklist cut no‑show rates from 35% to 12% and achieved 72‑hour repair times 85% of the time.
Section 4 — How do you empower caregivers to extend device life?
Why it matters: caregivers who know basic maintenance prevent common failures and reduce clinic demand.
Steps:
- Train caregivers: run a 90‑minute hands‑on class that covers cleaning, tightening fasteners, and inspecting sockets for red marks; give each caregiver a laminated one‑page checklist.
- Give simple tools: provide a small pouch with a screwdriver, spare screws, and a soap bar; label each item and teach use in the session.
- Set reporting rules: instruct caregivers to notify the clinic by SMS when they see two or more red marks, loose parts, or new pain.
- Follow‑up call: call caregivers 7 days after training to review the checklist and answer questions.
Real example: caregivers trained in a peri‑urban program reduced socket‑related emergency visits by 60% within three months.
Wrap‑up action you can take this week: print the 5‑point checklist, schedule the four follow‑up dates for current patients, and line up one local role model to speak at your next community meeting.
Scaling Impact: Open Designs, Local Manufacturing, and Policy
If you’ve ever tried to get an affordable prosthetic for someone in a small clinic, this is why open designs, local manufacturing, and policy matter.
Why it matters: these three things together let you get cheaper, faster, and repairable devices to more people. For example, a clinic in Kisumu used shared CAD files to 3D-print sockets on-site, cutting wait time from six weeks to three days and reducing cost by 70%.
How open designs help you
Why it matters: open designs remove licensing barriers so you can copy what works.
1) Download specific CAD files (STL or STEP) and a one-page materials list.
2) Follow a two-page assembly guide that shows each screw torque, glue type, and print orientation.
Real example: a regional NGO published a below-knee socket CAD with step-by-step photos; a Tanzanian clinic replicated it using PLA infill 20% and a 0.4 mm nozzle in two print jobs.
When you use this approach you avoid license fees and replicate proven parts.
How local manufacturing helps you
Why it matters: making parts nearby cuts cost, time, and customs headaches.
1) Map local suppliers for filament, fasteners, and padding within 50 km.
2) Set up a small build area with one FDM printer, a heat gun, and spare nozzles.
Real example: a workshop in Medellín switched to local ABS pellets and reduced part cost by 40%, and minor repairs were done the same day.
You’ll see fewer shipping delays and lower repair costs when parts are sourced regionally.
How training builds lasting capacity
Why it matters: trained technicians keep devices safe and wearable.
1) Teach FDM basics: bed leveling, nozzle temp, and filament storage (two-hour hands-on).
2) Teach quality checks: measure socket wall thickness (target 3–4 mm) and do a visual layer-bond test.
3) Teach fit assessment: check alignment, pressure points, and a 10-minute gait observation.
Real example: a two-day workshop in Cebu trained five techs who then serviced 120 patients in six months.
Trainings let you scale without outside experts.
How policy can support what you do
Why it matters: good policy makes validated open designs a recognized option for procurement and reimbursement.
1) Ask local health authorities to accept validated open-source designs in tender documents.
2) Propose a basic standard checklist (fit, material spec, and test load) for reimbursement eligibility.
Real example: a provincial health department in India added an open-design socket to its procurement list, which enabled 200 subsidized fittings in one year.
Policy makes it easier for clinics to get paid and to meet safety expectations.
How monitoring helps you improve and expand use
Why it matters: simple data shows what’s working and where to tweak designs.
1) Collect three metrics per patient: time-to-delivery (days), device failure within 6 months (yes/no), and patient comfort score (1–10).
2) Review data monthly and adjust print settings or materials if failure rates exceed 5%.
Real example: a Kenyan program found hotspots in a socket design and reduced complaints by 60% after changing infill from 10% to 30%.
Data guides design fixes and builds a case for broader adoption.
Put it together in four practical steps you can start this week
1) Download a vetted CAD and the one-page parts list.
2) Source materials within 50 km and set up a single-printer station.
3) Run a two-day hands-on training for one or two techs.
4) Track the three patient metrics and report monthly to your funder or health office.
You’ll have a working pipeline that lowers cost, speeds delivery, and improves repairability.
Frequently Asked Questions
How Do Biodegradable or Recycled Filaments Perform in Clinical Prosthetics?
They can work short-term, but I’ve found biodegradable strength is lower than medical-grade plastics; recycled filaments vary widely. Recycling sterilization is challenging, so I’d caution use for long-term load-bearing prosthetics without rigorous testing.
Can FDM Prostheses Pass International Medical Device Regulatory Approvals?
Yes — but it’s tricky. I believe FDM prostheses can meet approvals if we pursue rigorous clinical validation and regulatory harmonization, document materials/processes, guarantee quality systems, and patiently address durability, safety, and manufacturing traceability.
What Infection-Control Protocols Are Needed for 3d-Printed Socket Materials?
You need strict sterilization protocols and validated material biocompatibility testing; I’d use compatible cleaners, autoclave or low‑temperature sterilants when material allows, document cycles, perform cytotoxicity and skin irritation tests, and train staff on infection control.
How Can Battery-Powered or Electronic Components Integrate With FDM Parts?
Seamless, secure, smart: I embed sensors within printed pockets and route modular wiring through chamfered channels, sealing cavities with gaskets, mounting batteries in snap-fit bays, and testing connections for durable, dust-resistant electronic integration.
What Financing Models Enable Lifetime Replacements in Rural Communities?
I recommend blended financing: I’d combine microcredit programs with community cooperatives, subsidized maintenance funds, pay-as-you-go plans, and outcome-based grants so rural users can afford lifetime replacements and local services sustainably.