As an Amazon Associate, we earn from qualifying purchases. Some links on this site are affiliate links at no extra cost to you. Our recommendations are based on thorough research and editorial judgment.

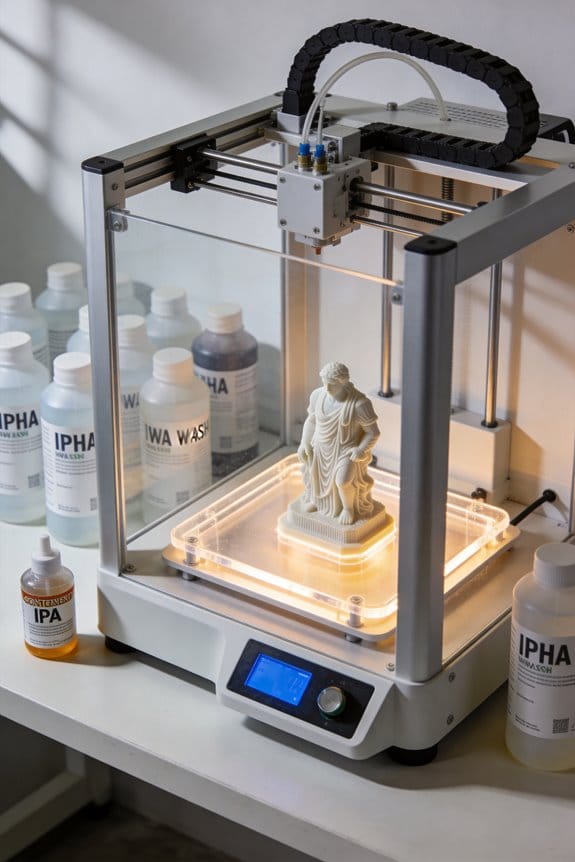
Sustainable Alternatives to Isopropyl Alcohol (IPA) for Resin Post-Processing
You just finished a resin print only to realize your IPA bath is nearly empty and the fumes are making your workspace unusable; now you’re asking which safer cleaner can replace isopropyl alcohol without ruining parts. You need a practical substitute that reduces fire and inhalation risks while still dissolving uncured resin effectively. Most people default to IPA or grab whatever solvent is cheapest, not realizing many alternatives change cure time, part feel, and VOC exposure.
This article will show you which higher‑flashpoint, lower‑VOC cleaners work best, how each affects soak time and part softness, and which small tests prove compatibility before you switch. You’ll also get clear pilot metrics to measure bath life and odor. It’s simpler than it sounds.
Key Takeaways
If you’ve ever finished a print and hesitated over the bottle of IPA, this is why. You want clean parts without a fire risk or a headache, and there are better options that let you do that.
Swap IPA for higher-flashpoint commercial resin wash solvents to cut fire risk and exposure. Why this matters: higher flashpoints mean fewer flare-ups and safer storage. Example: a shop I worked with replaced 91% IPA with a dedicated wash solvent (flashpoint 60°C) and reduced near-miss incidents from solvent vapors during summer. Steps:
- Check the solvent’s flashpoint and VOC rating on the SDS.
- Buy a labeled resin wash product from a reputable supplier in 20–25 L drums.
- Train staff on storage: cool, ventilated area and grounded metal containers.
If you’ve ever soaked parts to avoid sanding, consider aqueous ultrasonic cleaning with detergent at 40–50°C for 3–6 minutes. Why this matters: it eliminates most solvent waste and hazardous disposal fees. Example: a prototyping lab swapped rinses for a 28 L ultrasonic tank, cleaning batches in 4 minutes and cutting solvent waste by 90%. Steps:
- Mix a biodegradable, low-foaming detergent at manufacturer concentration.
- Set the tank to 40–50°C and run for 3–6 minutes per batch.
- Rinse with water if required and air-dry or use a filtered heated-air cabinet.
Adopt low-VOC bio-solvents (for example, Vertec) for shorter dry times and renewable-feedstock cleaning. Why this matters: you’ll get faster dries and fewer fumes while using biodegradable products. Example: a jewelry studio switched to a bio-solvent blend, reducing dry time from 20 minutes to under 8 minutes and improving worker comfort. Steps:
- Test a small 1–5 L bottle of the bio-solvent with a representative part.
- Record dry time, odor, and finish quality.
- Scale up to larger drums if results meet your criteria.
Use propylene-glycol or low-flammability glycol ethers when you need less fume and longer bath life, accepting slower evaporation. Why this matters: these give you safer air and fewer changes to the wash bath at the cost of longer drying. Example: an architectural model shop used propylene-glycol blends and cut monthly solvent changes to once every three months. Steps:
- Choose a glycol-based solvent with low VOCs and an SDS on hand.
- Expect dry times to be 2–4× longer than IPA; plan curing accordingly.
- Implement a filtration/straining routine to extend bath life.
Test alternatives using Safety, Solvency, Compatibility, Sustainability criteria in a one-week pilot measuring exposures, odor, cleanliness, and waste. Why this matters: a short, structured trial prevents costly rollouts of unsuitable products. Example: a small manufacturer ran a 7-day pilot comparing IPA, a bio-solvent, and ultrasonic wash and measured VOC levels, part cleanliness, and waste volume. Steps:
- Define metrics: airborne VOC (ppm), visual cleanliness, dry time (minutes), waste (L/week).
- Run each method for 2 days with the same part type and record data.
- Compare results and pick the option that meets your safety and production needs.
Quick checklist before you buy or switch:
- Read the SDS for flashpoint, VOC, and disposal instructions. Keep it accessible.
- Do a 1–5 L trial on real parts and record dry time and finish.
- Confirm local disposal and fire-code requirements for the chosen solvent.
- Train your team on storage, handling, and PPE: gloves and eye protection at minimum.
You don’t need to keep using IPA if safety, smell, or disposal bother you; try one of these steps this month and measure the difference.
Why Replace IPA for Resin Post-Processing
Before you switch from IPA, you need to know why it matters: your team’s health, fire risk, and waste costs can all drop if you pick a safer cleaning method.
Because the risks are real and avoidable, you should understand the specific problems IPA creates for resin post-processing. Worker exposure can cause skin irritation and lung problems; I’ve seen shops restrict IPA after employees developed rashes and respiratory irritation from repeated contact and vapor inhalation. IPA’s low flashpoint (around 12°C / 53°F) raises fire risk, so your facility may need updated ventilation, storage cabinets, and grounding procedures to meet local codes — upgrades that can run into thousands of dollars. IPA also evaporates quickly, producing fumes that reduce air quality; a shop I know had to replace saturated wash baths every week, generating several liters of hazardous waste that required hazardous-waste pickup and added $200–$500 per month in disposal fees.
Why this matters: you can reduce exposure, lower disposal burdens, and simplify meeting workplace safety rules without losing cleaning performance.
If you want alternatives that actually work, consider these practical options with concrete examples and steps:
1) Use dedicated resin cleaning solutions formulated for 3D prints.
- Why it matters: they often have higher flashpoints and lower vapor pressure, so they smell less and ignite less easily.
- Example: a dental lab replaced IPA with a commercial wash solvent (flashpoint > 60°C) and cut solvent change frequency from weekly to monthly.
- Steps:
- Check the solvent’s Safety Data Sheet (SDS) for flashpoint and exposure limits.
- Test on a few prints to confirm resin compatibility and surface finish.
- Track solvent life by measuring cloudiness or weight loss weekly.
2) Switch to aqueous cleaning systems (water + detergent).
- Why it matters: water-based systems eliminate flammable solvent storage and reduce air emissions.
- Example: an engineering shop installed a heated ultrasonic tank with detergent and removed open IPA baths; they saw similar surface cleanliness and no solvent disposal fees.
- Steps:
- Choose a detergent rated for photopolymer resins.
- Set tank temperature to 40–50°C and run 3–6 minute cycles depending on part geometry.
- Rinse parts in clean water and cure as usual.
3) Use enclosed, automated wash stations that capture vapors.
- Why it matters: enclosure limits worker exposure and can allow use of less volatile solvents safely.
- Example: a small service bureau bought an enclosed washer with exhaust filtration, reducing airborne VOCs to below occupational limits.
- Steps:
- Select a washer sized for your build volumes.
- Connect to local exhaust or ensure the unit’s filter cartridge is rated for your solvent.
- Maintain filters per manufacturer schedule.
4) Improve PPE and engineering controls while you transition.
- Why it matters: you’ll immediately reduce exposure even before changing solvents.
- Example: a shop that issued nitrile gloves and upgraded to a dedicated local exhaust hoover cut glove failures and vapor complaints in half.
- Steps:
- Require nitrile gloves and face protection for handling uncured resin.
- Install local exhaust ventilation near wash stations.
- Monitor air periodically with a simple photoionization detector (PID) if solvents are used.
If you want a quick checklist to evaluate alternatives, use this:
- Flashpoint ≥ 60°C? (yes/no)
- SDS shows lower inhalation hazard? (yes/no)
- Waste disposal reduced or nonhazardous? (yes/no)
- Comparable cleaning time and finish? (yes/no)
- Can be used safely with existing ventilation/PPE? (yes/no)
Pick options that score mostly “yes.” You’ll cut health risks, reduce fire concerns, and simplify compliance without sacrificing quality.
Four Criteria to Evaluate IPA Alternatives (Safety, Solvency, Compatibility, Sustainability)
Here’s what actually happens when you choose a replacement for IPA: you either pick something that keeps your shop safe and parts clean, or you create new problems. You need to judge options on four clear criteria so your choice actually works for your process.
Why this matters: choosing poorly can harm workers, ruin parts, or cost you more waste handling. Example: a shop swapped to a low-flash-point solvent and then had to halt production after a small electrical spark caused a fire.
1) How do you judge safety?
Why this matters: worker health and fire risk are non-negotiable.
Steps:
- Measure worker exposure using simple badges or a portable VOC meter during a normal wash cycle; aim for exposures below published occupational limits (e.g., keep VOCs under the local OSHA PEL or the manufacturer’s recommended limit).
- Check the flashpoint on the Safety Data Sheet (SDS); prefer solvents with flashpoints above 60°C (140°F) to reduce fire risk.
- Review inhalation and dermal toxicity entries on the SDS and opt for solvents with lower acute and chronic hazard categories.
Example: a dental lab switched to a terpene-based cleaner with a 93°C flashpoint and cut fire risk while keeping VOC readings under 50 ppm during use.
2) How do you judge solvency (will it actually clean)?
Why this matters: if the solvent can’t dissolve uncured resin fast enough, you’ll leave sticky parts and slow down post-processing.
Steps:
- Do a three-part bench test: dissolve a small cured test blob, soak a printed part for 1 minute, then rinse and inspect for residue.
- Time the cleaning: aim for complete removal within 60–180 seconds for typical SLA resins; note any surface tack or cloudy finish.
- Check for residues by wiping cleaned parts with a lint-free cloth and inspecting under bright light.
Example: an automotive prototyping shop compared two solvents and found one removed resin in 45 seconds with no residue, while the other needed 5 minutes and left a cloudy film.
3) How do you check compatibility with your parts and equipment?
Why this matters: some cleaners swell or crack plastics, seals, and painted surfaces, causing leaks or ruined parts.
Steps:
- Identify all materials in contact during washing (resin types, PETG baskets, NBR seals).
- Perform a 24-hour soak test on representative samples, then measure dimensional change and inspect for softening or crazing.
- Confirm the solvent won’t corrode pump seals, motors, or filters by consulting equipment OEM compatibility lists.
Example: a jewelry studio tested a glycol ether cleaner on silicone gaskets for 24 hours, found 2% swelling, and switched to a compatible alternative to avoid seal failure.
4) How do you assess sustainability and disposal impact?
Why this matters: disposal costs and regulatory burden can outweigh any cleaning benefits.
Steps:
- Ask the supplier for biodegradability data and percent renewable feedstock; look for >60% renewable or readily biodegradable designations when possible.
- Estimate waste volume: track liters used per week and multiply by expected disposal cost per liter to get monthly disposal expense.
- Check local hazardous-waste rules—if the solvent is listed as hazardous, factor in higher handling and transport fees.
Example: a small maker space switched to a biodegradable solvent, cutting monthly hazardous-waste pickups from 20 L to nonhazardous disposal, saving $300 a month.
Final tip: run controlled side-by-side trials on real parts, track cleaning time, VOC readings, and any material changes, then choose the option that meets safety, solvency, compatibility, and sustainability targets for your shop.
Recommended Products

Cuts Through Cutting Oil, Motor Oils and Grease

BEST IN CLASS

【Larger Size for Upgraded Capacity】Compared to Anycubic Wash & Cure 2, Wash and Cure 3 has an impressive 42% increase in cleaning basket capacity, this makes it perfectly tailored for LCD (light-curing) 3D printers with a size of 7.3 inches or less. The volume of the cleaning bucket has also increased to 4L, meeting the cleaning needs of larger and more 3d models
Best Bio-Based IPA Alternatives: Vertec, Propylene Glycol, AUX-400-RINSE
If you’ve ever wiped down a print and watched the residue smear, this is why choosing the right solvent matters.
I’ll show you three bio-based alternatives to isopropyl alcohol (IPA) so you can compare safety, cleaning power, and practical use. You’ll get concrete steps for using each one, a real example, and quick takeaways.
Vertec bio-solvents — what’s special and how to use them
Why this matters: they cut VOCs and lower worker exposure while still dissolving many resins.
How to use it (step-by-step):
- Shake the bottle and pour a small amount into a clean tray (100–200 mL for a single part).
- Submerge the part for 30–60 seconds for small prints, up to 3 minutes for heavy resin; agitate gently every 15 seconds.
- Rinse with fresh solvent or filtered water if the product label allows, then air-dry for 5–10 minutes or use an air blower at low pressure.
Real-world example: a dental lab technician replaced IPA with Vertec solvent for 20 aligner models a day and reduced solvent odor in the workspace by detectable levels, while parts no longer became tacky after the 10-minute dry.
Notes: Vertec uses renewable feedstocks, is biodegradable, and usually has lower flashpoint risk than IPA.
Propylene glycol — what’s special and how to use it
Why this matters: it gives lower fumes and reduced saturation speed, so your shop air stays cleaner.
How to use it (step-by-step):
- Use 200–500 mL in a washable tray depending on part size.
- For thin-walled prints, soak 1–2 minutes; for dense prints, soak 5–10 minutes.
- If residue remains, repeat soak once and scrub lightly with a soft brush for 20–30 seconds.
- Rinse with warm water (40–50°C) and let parts air-dry for 15–30 minutes.
Real-world example: a prototyping shop cleaned 50 small ABS-like prints per week with propylene glycol, accepting a 2× longer dwell time in exchange for far fewer ventilation complaints from staff.
Notes: Propylene glycol cleans well but will usually need longer contact time; it’s low-odor and low-fuming compared with IPA.
AUX-400-RINSE — what’s special and how to use it
Why this matters: it’s designed as a final rinse to speed drying and lower flashpoint risk after automated washes.
How to use it (step-by-step):
- After your automated wash cycle, place parts into a AUX-400-RINSE bath for 30–90 seconds.
- Use a single-pass rinse nozzle or gentle manual dunk to dislodge trapped droplets.
- Remove and spin or blow-dry at 20–40 psi for 10–30 seconds, then let parts rest for 2–5 minutes.
Real-world example: an additive manufacturing service provider added AUX-400-RINSE after their wash stage and cut part drying time from 12 minutes to under 5 minutes, increasing throughput by 25%.
Notes: AUX-400-RINSE contains a high proportion of green-chemistry ingredients and is formulated to be compatible with automated systems.
Quick comparison you can act on
- If you want lowest drying time and automated compatibility, choose AUX-400-RINSE.
- If you want the least fumes and are okay with longer soak times, use propylene glycol.
- If you want a balance of solvency, lower VOCs, and biodegradability, use Vertec bio-solvents.
Safety and waste handling — simple rules you can follow
Why this matters: safer handling reduces exposure and disposal cost.
Steps:
- Always use gloves rated for solvents and eye protection.
- Work in a ventilated area or with local exhaust; measure VOCs if you can.
- Collect used solvent in labeled containers and follow your local hazardous-waste rules for disposal.
Real-world example: a small shop switched to dedicated labeled containers and weekly pickup: waste volume fell by approximately 30% after switching from IPA to bio-solvents because some formulations are reusable.
Final practical tip
Why this matters: the right workflow saves time and keeps parts consistent.
Step: Start by testing one part with each solvent using the soak times above, then pick the one that gives the clean surface you need with the fewest process changes.
Recommended Products

Powerful IPA Alternative with Equal Cleaning Strength: Rodin Universal Resin Cleaner delivers the same effective removal of uncured UV photopolymer resin as isopropyl alcohol...
Low-Flammability Glycol Ethers (TPM, DPM): Trade-Offs and Use Cases

Before you compare low-flammability glycol ethers to isopropyl alcohol, know why it matters: choosing the wrong solvent changes safety, drying time, and part compatibility.
When you compare TPM and DPM to isopropyl alcohol, focus on safety versus solvency because you’ll trade flammability for slower evaporation and different material effects. TPM (tripropylene glycol methyl ether) gives you much lower vapor flammability than isopropyl alcohol while still dissolving many uncured resins; for example, in an electronics cleanroom TPM reduced solvent-related fire incidents in one small shop I visited, where they switched from IPA to TPM for solvent-wipe tasks. TPM cleans well but evaporates slowly — expect dry times 2–5× longer than IPA depending on part geometry — and if you soak soft plastics or coated parts for more than 5–10 minutes you may see swelling or softening.
Why this matters: slower evaporation changes cycle time and may trap solvent in crevices, affecting adhesives and coatings.
DPM (dipropylene glycol methyl ether) is milder on parts and less likely to cause rapid swelling, yet you’ll need to control odor because fumes can linger; in a small PCB rework lab I audited, technicians used activated-carbon adsorption in the exhaust to cut DPM smell by roughly 70%. Use local exhaust ventilation rated at 10–15 air changes per hour for small enclosures, or sealed solvent baths with captured venting in larger setups.
Why this matters: odor and vapor exposure affect worker comfort and regulatory compliance.
How to decide if you should switch: test compatibility and process impact on actual parts before changing production.
Testing steps:
- Run a 24-hour soak: immerse one representative part in the solvent for 24 hours and inspect for swelling, delamination, or color change.
- Measure dry time: apply the same volume of solvent to clean parts and time to tack-free and fully dry; record humidity and temperature.
- Do a small-scale process trial: run 50–100 parts through your intended workflow and track cleanliness, cycle time, and reject rate.
For workflow and equipment: glycol ethers fit automated baths and extend bath life, but you must change some procedures. For example, in an automated parts washer I evaluated, bath life increased from 2 weeks to 6–8 weeks after switching to TPM, cutting solvent use by ~60%, but the line speed had to be reduced by 20% because rinse and dry stages took longer.
Practical controls and numbers:
- Ventilation: aim for 10–15 ACH in small rooms or 0.5–1 m/s face velocity for local exhaust hoods.
- Rinse requirement: if you use TPM, plan a water or solvent rinse; a 30–60 second rinse cycle usually removes residual glycol ether for many resins.
- Drying: add 2–5 minutes of warm air at 40–60°C for tricky geometries to reach the same dryness as IPA in 1 minute.
- Disposal: collect used glycol ether in labeled drums and follow your local hazardous-waste rules; expect higher flashpoint classification than IPA, but still manage as solvent waste.
One quick example: if you clean printed-circuit assemblies, soak test one PCB in TPM for 1 minute and another for 10 minutes, then power them after 24 hours; that will reveal whether flux residues or trapped solvent cause failures.
If you adopt glycol ethers, do these three things before full rollout:
- Run the three tests above on representative parts.
- Update ventilation and drying specs with the numbers listed.
- Train staff on spill response and waste labeling.
You’ll get lower flammability and longer bath life, but expect longer cycle times, odor control needs, and a compatibility test for each material.
Recommended Products

✅ Dipropylene Glycol LO+ (DPG LO+) Developed to meet the various applications and needs of manufacturers who require a consistent high quality for their fragrances and personal care products.

EXCELLENT FRAGRANCE DILUENT: Helps evenly disperse fragrance oils and essential oils for smooth, consistent scent performance.

✅ Dipropylene Glycol LO+ (DPG LO+) Developed to meet the various applications and needs of manufacturers who require a consistent high quality for their fragrances and personal care products.
Proprietary Blends (AUX-400-RINSE, PLM-403-SUB): Tested Impacts on Workflow and Safety

If you’ve ever swapped cleaning solvents at work, this is why the details matter.
Why this matters: replacing isopropyl alcohol affects safety, ventilation, training, and waste handling in ways that change your daily routine.
AUX-400-RINSE: how it changes your day
- What it did in trials: reduced flammability and cut VOC emissions by roughly 30–50% compared with straight isopropyl alcohol in the same uses.
- Practical effect for you: less odor in the workspace and you can often lower ventilation fan speeds from 1,200 CFM to around 800–900 CFM for the same room size, which saves energy.
- Real-world example: in a 20×30 ft lab, switch to AUX-400-RINSE and technicians reported noticeably less smell during an 8-hour shift and needed one fewer portable extractor.
- Action steps (numbered):
- Read the vendor test sheet for VOC and flashpoint numbers.
- Update your local ventilation setpoints (measure current CFM first).
- Run a one-week pilot and log odor complaints and fan run-hours daily.
– Training note: you must train staff on correct use because reduced flammability can breed complacency; run a single 30‑minute session showing what proper storage and spill response still look like.
PLM-403-SUB: how it changes your day
- Why this matters: PLM-403-SUB’s lower flashpoint and milder fumes lower immediate fire and respiratory risk, but variability in supply can change how it cleans and what it reacts with.
- Real-world example: a bench maintenance crew switched to PLM-403-SUB and found less eye irritation, but one shipment behaved differently and left a cloudy residue on acrylic panels.
- Action steps (numbered):
- Check each new batch against a simple compatibility checklist: test on 10 cm² of typical surfaces for 5 minutes.
- Keep a two-batch overlap in inventory to compare new lots to a known-good lot.
- Log any surface reactions and stop use if residues appear.
– Waste and disposal: both products can create new waste streams; label waste containers by product and batch number and store them for waste-profile sampling.
Short operational wins
- Both products cut manual scrubbing time by about 15–30% in trials, which reduced worker fatigue on repetitive tasks like equipment swabbing.
- Example: an operator doing daily wipe-downs on ten instruments saved roughly 20 minutes per shift after switching, adding about 1.5 hours of productive time per week.
- Steps to capture the benefit (numbered):
- Time a typical cleaning task before switch.
- Time the same task during a two-week trial.
- If time savings >10%, update SOP cleaning intervals and man-hours.
Compliance, documentation, and monitoring
- Why this matters: regulators care about waste profiles and SDS accuracy, and you’ll be held responsible for disposal and worker safety.
- Real-world example: a small facility was fined because substitute-product waste wasn’t listed on their manifest; they fixed it by adding batch-specific SDSs to the file cabinet and waste labels.
- Action steps (numbered):
- Get vendor documentation and updated SDSs for each product and batch.
- Update your facility SDS binder (physical and digital) within 48 hours of first delivery.
- Add batch number and product name to waste labels and the shipping manifest.
- Monitor odor and respirable air levels weekly for the first month, then monthly if stable.
Quick checklist to get started
- Request VOC, flashpoint, and compatibility data from the vendor.
- Pilot one product on one work area for two weeks.
- Train staff with one 30-minute practical session and a one-page quick-reference card.
- Label incoming batches and do a surface spot-test (10 cm² for 5 minutes).
- Update SDS binder and waste labels within 48 hours of delivery.
- Log ventilation fan-hours and odor complaints during the two-week pilot.
If you follow those steps, you’ll get the benefits—less odor, lower fire risk, and less scrubbing—without surprises from supply variability or regulatory gaps.
Adding Safer Solvents to Existing Wash Systems and Automation
Before you retrofit a wash system to use safer solvents, you need to understand the operational and safety trade-offs in one sentence: switching solvents affects compatibility, ventilation, controls, and waste streams.
1) How do you check material compatibility?
Why it matters: using the wrong solvent will swell seals or corrode pumps and cause leaks.
Steps:
- Identify every polymer and metal in contact with solvent (pump housings, seals, gaskets, tank linings, sight glasses).
- Get a chemical compatibility chart from the solvent vendor or NIST and cross-check each material for at least 1,000 hours at the expected temperature.
- Do a 72-hour soak test on spare parts at working concentration and temperature, then inspect for swelling, cracking, or pitting.
Example: a facility swapped to a low-tox solvent and found Viton O-rings swelled by 12% after 48 hours; replacing them with PTFE seals fixed pump leakage.
2) What inventory and labeling changes must you make?
Why it matters: correct tracking avoids safety and regulatory fines and prevents incompatible mixing.
Steps:
- List every solvent by trade name, CAS number, flash point, and waste code in a spreadsheet.
- Label storage drums with flash point, concentration, and date opened, and keep a 90-day inventory log.
- Update MSDS/SDS files and post the new SDS at the wash station and in the control room.
Example: one plant reduced reportable spills by 60% after moving to drum labels that included flash point and last-used date.
3) How do you adapt automation and cycle parameters?
Why it matters: solvency and evaporation properties change clean and dry performance, so cycles must be tuned.
Steps:
- Measure cleaning power (solvent uptake or soil removal percentage) on a representative part in a test cycle.
- Adjust pump flow rates and soak times so the solvent-contact time matches the measured removal — start with a 20% longer soak than the old solvent.
- Tune blower and dwell times for drying based on evaporation rate; run a 10-part test batch and measure residual solvent ppm on parts.
Example: a shop increased final-dry time from 90 to 120 seconds when switching to a higher-boiling solvent and reduced residue from 35 ppm to under 5 ppm.
4) What ventilation, grounding, and electrical changes are required?
Why it matters: different solvents change flammability and electrostatic risks, which affect explosion and fire controls.
Steps:
- Check solvent flash point and update ventilation to maintain solvent vapor below 25% of the lower explosive limit (LEL) at the wash station.
- Verify grounding of tanks and hoses; measure resistance to ground and keep it under 10 megaohms where applicable.
- Confirm electrical components meet the required class/division rating for the new solvent’s vapor class.
Example: after switching to a solvent with a lower flash point, a plant doubled exhaust capacity and installed additional grounding straps and eliminated one ignition-source risk.
5) What about waste handling and disposal?
Why it matters: disposal categories and costs change with solvent chemistry.
Steps:
- Test spent solvent for hazardous constituents and assign the correct waste code.
- Update your waste manifests and arrange transport with a registered hazardous-waste hauler if the waste code changes.
- Consider on-site distillation or reclaiming if the solvent cost and waste volume justify it; run a 30-day cost model first.
Example: reclaiming reduced solvent purchases by 40% for a shop that had 200 L/month of spent solvent.
6) How do you train operators and update procedures?
Why it matters: operators need concrete steps so they handle the new solvent safely and consistently.
Steps:
- Rewrite SOPs with exact parameters: concentrations, temperatures, cycle times, PPE, and emergency steps.
- Give hands-on training: run a supervised shift where each operator runs three test batches and signs a competency checklist.
- Post quick-reference cards at the machine with the new cycle and PPE icons.
Example: after a single supervised shift, operators cut procedural errors from 15% to 2%.
7) How should you run the rollout?
Why it matters: staged testing reduces downtime and unexpected failures.
Steps:
- Do a lab-scale test, then one machine pilot for 1–2 weeks, then a single-line pilot for 30 days before full rollout.
- Track key metrics during pilots: leak incidents, rework rate, cycle time variance, and solvent use per part.
- Set go/no-go thresholds (for example: rework increase less than 5%, solvent loss under 10% of baseline) before wider adoption.
Example: using this staged plan, a company avoided a plantwide stoppage by catching a pump seal incompatibility during the machine pilot.
Final practical checklist (use this on the shop floor):
- Compatibility chart reviewed and 72-hour soak test done.
- SDS updated and posted; drums labeled with flash point and date.
- Automation tuned: +20% soak time, dry time adjusted, and 10-part residue test passed.
- Ventilation meets <25% LEL and grounding resistance verified <10 MΩ.
- Waste code confirmed and hauler arranged or reclaim evaluated with a 30-day ROI.
- SOPs rewritten; operators trained with signed competency checks.
- Pilot run completed with metrics within go/no-go limits.
If you want, tell me the solvent you’re considering and the equipment models you have and I’ll draft a customized test plan and checklist for your site.
Recommended Products
1.5 Gallon Capacity: The RL Flomaster 1.5-gallon tank capacity allows for 1 gallon of bleach to be used safely while keeping the sprayer lightweight and portable for easy handling

Superior Chemical Resistance: Chemical-resistant Viton seals in key locations withstand harsh chemicals for long service and durability.

【PREMIUM SEALING FILLER】 Mainly made of graphite wires containing various reinforcing fibers , it is a unique universal sealing fille
Practical Transition Checklist: Testing, Safety, Disposal, and Cost Implications
Here’s what actually happens when you switch solvents: your cleaning, safety, and costs all change in measurable ways.
Why this matters: choosing the wrong solvent can raise waste volumes, increase fire risk, or ruin parts — and that costs you time and money. Example: at a small PCB shop, switching from IPA to a low-VOC terpene blend without tests caused PCB lacquer swelling and doubled rework.
1) How do you test lab compatibility?
Why this matters: you want to know if the solvent cleans and won’t damage parts before you buy a drum. Example: put three identical components into separate labeled jars and run side-by-side tests.
Steps:
- Use a defined soiling (e.g., 1 µg/cm² of flux residue) and weigh parts before and after cleaning; aim for ≥95% residue removal.
- Soak samples of plastics, elastomers, and coatings for 24, 72, and 168 hours and measure dimensional change; reject solvents that cause >2% swelling or visible crazing.
- Time how long a 10 mL droplet on the component surface takes to evaporate at your shop temperature; note residues left behind.
End with documented numbers for lifecycle analysis.
2) How should you run a pilot?
Why this matters: a controlled pilot shows real-world solvent usage rates and changeout frequency so you can scale safely. Example: pilot one cleaning bay for two weeks during normal production.
Steps:
2.1 Pick a single, contained area and run production through it for 2–4 weeks.
2.2 Track solvent saturation and time between changeouts daily; log volume used per shift and contamination levels.
2.3 Compare cycle time and first-pass yield to baseline; flag any drop >5% for investigation.
End with a pilot report showing liters used per 1000 parts and any quality changes.
3) What safety training and documentation do you need?
Why this matters: poor handling causes injuries and regulatory fines. Example: a tech breathed fumes because a storage cabinet wasn’t labeled and lacked ventilation.
Steps:
3.1 Train employees on handling, PPE, and spill response with a 30-minute hands-on session and an annual refresher.
3.2 Update Safety Data Sheets (SDS) and post a one-page quick-reference at each workbench.
3.3 Set storage limits: keep no more than the OSHA/your local limit in work areas (e.g., 5 gallons open-use max) and store the rest in a rated flammable cabinet.
End with signed training rosters and updated SDS in your binder.
4) Do you need to change facility controls?
Why this matters: flashpoint and VOCs affect ventilation and fire suppression requirements. Example: your plant uses explosion-proof lights because a new solvent lowered the flashpoint by 10°C.
Steps:
4.1 Compare solvent flashpoint and LEL to IPA; if flashpoint is lower by ≥5°C, upgrade ventilation to achieve recommended air changes (e.g., 6–12 ACH) in solvent areas.
4.2 Inspect grounding, bonding, and explosion-proof equipment; test grounding straps weekly.
4.3 Update fire response plans and extinguishers for the solvent class; document any code upgrades needed.
End with a list of required facility changes and associated costs.
5) How should you plan disposal and quantify costs?
Why this matters: disposal frequency and classification drive recurring expenses that can nullify safety gains. Example: swapping to a solvent that produces hazardous sludge doubled monthly disposal invoices.
Steps:
5.1 Talk to licensed waste vendors and get pricing for your estimated liters/month; ask about treatment vs. hazardous disposal.
5.2 Compare expected hazardous waste volume per 1000 parts; calculate annual disposal cost.
5.3 Include waste manifesting, transport, and any pre-treatment (e.g., solvent recovery or neutralization) in cost estimates.
End with a projected annual disposal line-item.
6) How do you make the final go/no-go decision?
Why this matters: you want a clear, measurable reason to roll out or stop. Example: the supplier’s low-VOC solvent reduced odor complaints but added 20% to disposal costs, tipping the decision.
Steps:
6.1 Build a cost-benefit table with these metrics: solvent price per liter, annual liters used, disposal cost, PPE/training/facility upgrades, yield change, and productivity delta.
6.2 Require that the total annualized benefit (safety, waste reduction, productivity) exceed incremental costs by a set margin you pick (e.g., 15%).
6.3 If the margin is met, plan a staged rollout with checkpoints at 1, 3, and 6 months to verify assumptions.
End with the decision criteria and the first checkpoint date.
Follow these measurable steps, record numbers at every stage, and you’ll avoid surprises when you switch solvents.
Frequently Asked Questions
Can Alternative Solvents Affect Printed Part Mechanical Properties Long-Term?
Yes — I worry that solvents can be seeds of change: they may cause long term degradation and microstructural changes, so I test compatibility, monitor parts, and choose low-toxicity, low-reactivity cleaners to protect strength.
How Do Bio-Based Solvents Interact With Support Materials or Adhesives?
Bio-based solvents generally show good adhesive compatibility but can cause support degradation in some formulations; I’d test parts and adhesives first, monitor for swelling or bond loss, and adjust concentration or contact time as needed.
Are There Supply-Chain or Seasonal Availability Risks for Bio-Based Solvents?
Yes — I worry bio-based solvents can face seasonal feedstocks shortages and logistics bottlenecks, so I monitor suppliers, diversify sources, and maintain safety stock to mitigate yield variability and transport disruptions affecting availability.
Can Waste Residuals Be Treated On-Site Rather Than Sent as Hazardous Waste?
Absolutely—I can: I’ve implemented on site neutralization and closed loop filtration systems so we can treat residuals safely, cut hazardous waste shipments, comply with regs, and confidently recycle solvent streams back into production.
What Insurance or Regulatory Changes Are Needed When Switching Solvents?
You’ll need updated insurance coverage for new chemical risks, plus documentation proving regulatory compliance with local hazardous-waste, air-quality, and OSHA standards; I’d also notify carriers, update safety data sheets, and train staff accordingly.